Lovely, great pic!in a pic i see your Morgan project !
This is ours, already for many years our favorit summer car . Did a 10 days "rally" with it in Scotland ( 2016) , the Pyrenees. (2018) and even a regularity rally in the Vosges ( France) when the coupe was down with clutch . It's a '89 Plus 4 with the Rover M16 engine , and of course red
That is for sure a keeper !
View attachment 130451
You are using an out of date browser. It may not display this or other websites correctly.
You should upgrade or use an alternative browser.
You should upgrade or use an alternative browser.
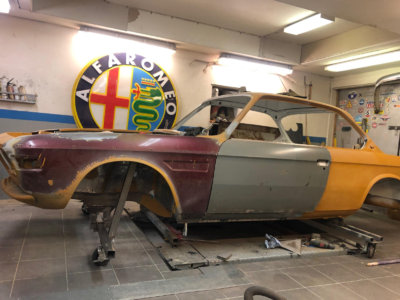
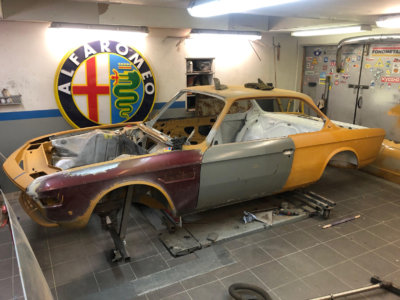
Swedish 1973 3.0 CS restoration
- Thread starter ellac
- Start date
-
- Tags
- restoration list
Hiin a pic i see your Morgan project !
This is ours, already for many years our favorit summer car . Did a 10 days "rally" with it in Scotland ( 2016) , the Pyrenees. (2018) and even a regularity rally in the Vosges ( France) when the coupe was down with clutch . It's a '89 Plus 4 with the Rover M16 engine , and of course red
That is for sure a keeper !
View attachment 130451
Lovely picture !
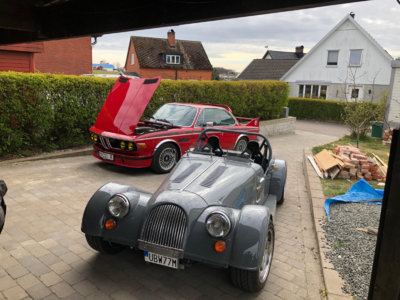
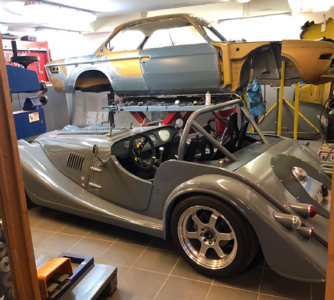
Mine is not actually a Morgan , I built it myself and named it Motus (half Morgan half Lotus)
Attachments
Belgiumbarry
Well-Known Member
scary anecdote... after that pic ( Pyrenees rally of +3000 km ) , first short drive at home the clutch release bearing broke !
Had to take out the engine as in a Morgan one cannot demount the gearbox....
But meanwhile she's running fine again !

Had to take out the engine as in a Morgan one cannot demount the gearbox....
But meanwhile she's running fine again !
Keep em coming! Amazing fabrication skills!A few more pictures.
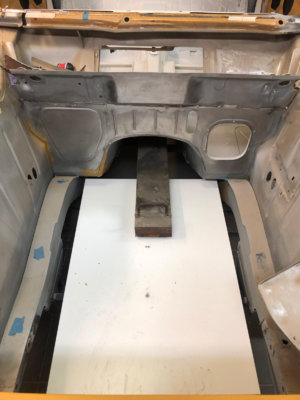
During floor repairs i removed the flimsy panel that the rear seat bench rests on . Instead of putting it back I made a more structual re-inforcement with square pipe and a removable link on the underside to be able to fit the propshaft (or more easy at least?) . Figured I could use the space to put two speakers in also.
Cylinderhead finished and I bought an ITB kit with a carbonfibre airbox . Welded a re-inforcement to the diff bushing attachement also.
Ny batterytray in place and rear wheelhouses finished and got a coat of epoxi primer.
Could you post a picture of what you use to make the ned panels? Cant wait to see this thing completed ")
Keep em coming! Amazing fabrication skills!
Thanks ! I will try to remember to take som pictures of the sheetmetal machines I use.
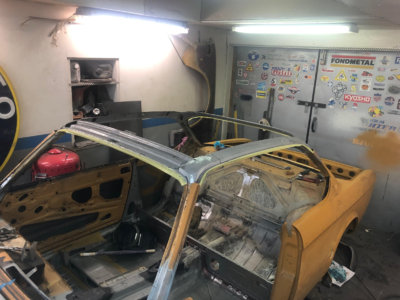
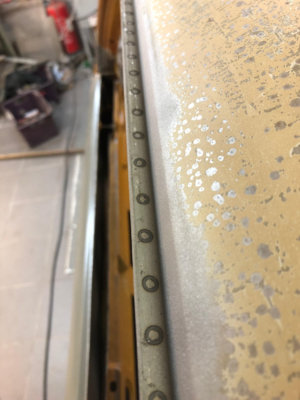
Almost done with the roof change, was able to find a complete roof in good condition. I only wanted to change the outer skin so I had to grind down at least 500 spotwelds on the "new" and the old roof . Bought myself a new spotwelder , real incredible machine and put the new roof on same way it was done at factory.
Attachments
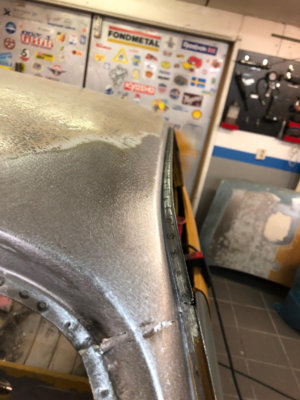
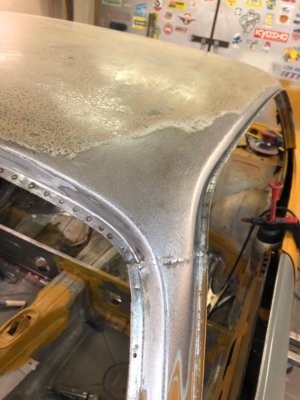

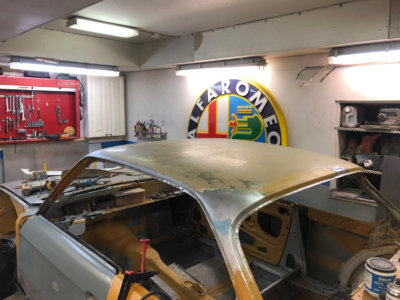
Good choice on the spotwelder. It looks really nice, and also convenient that it doesn't require any post treatment.
Did you consider some weld through primer for in between? Look up 'Europax' , really nice as it seals the spotweld around. Although not sure if available worldwide.
Did you consider some weld through primer for in between? Look up 'Europax' , really nice as it seals the spotweld around. Although not sure if available worldwide.
Oldbmwcoupes
Well-Known Member
Great work! Impressive.
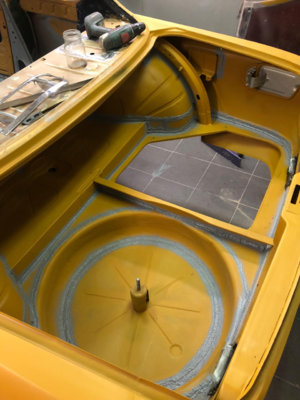
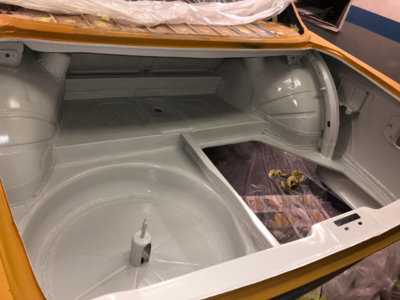
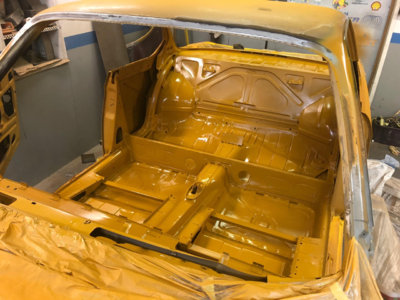
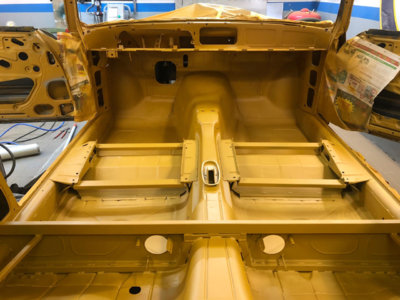
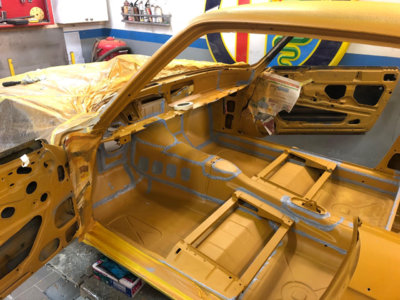
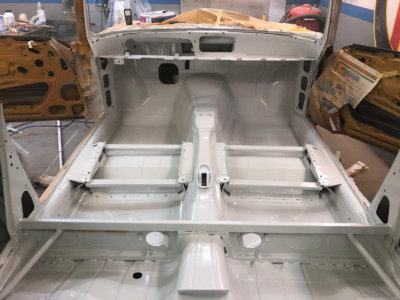
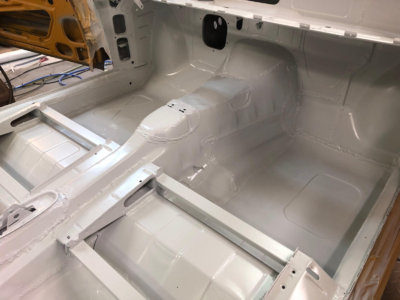
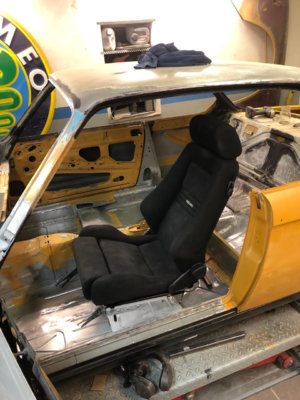
Made som progress and welded the seat brackets / re-inforcements for my "new" Recaro seat. After that I have painted and sealed inside of the boot and the inside of the car . Feels nice to have everything protected and done , small steps..
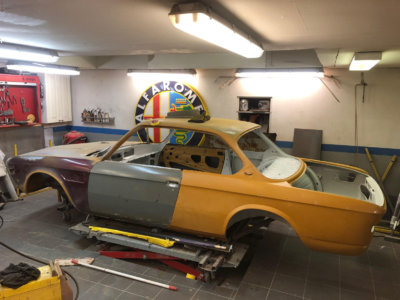
The yellow base is the Epoxy I use and the "white" (it is actually light grey but the pictures are sh*t) is an industrial polyurethan paint heavy duty. Since I still havent decided which color I am going to paint the outside this will act as base untill I make my mind up regarding colorchoices.
Sorry for bad quality pics..
Attachments
-
 IMG_0651.JPG145 KB · Views: 426
 -
 unnamed (1).jpg122.3 KB · Views: 366
 -
 unnamed (2).jpg176.7 KB · Views: 456
 -
 unnamed (3).jpg157.7 KB · Views: 410
 -
 unnamed (4).jpg188.5 KB · Views: 409
 -
 unnamed (5).jpg300.5 KB · Views: 409
 -
 unnamed (6).jpg226 KB · Views: 416
 -
 unnamed (7).jpg281.2 KB · Views: 420
 -
 unnamed.jpg166.1 KB · Views: 416
Just rediscovered your thread. Throughly impressive restoration! True craftsman at work. Good luck!
Oldbmwcoupes
Well-Known Member
Great progress. Not really a small step though. Keep up the great work!
Extreme amount of work! That's Something with bigger "S".
Playing role of @HB Chris I noticed one detail:

A-pillar from another E9 ... Maybe you can have the VIN of the donor car to be put on the list as a Donor (RIP).
I would find probably some of metal parts still for potential usage in my project. Are you scrapping them all?
Playing role of @HB Chris I noticed one detail:
A-pillar from another E9 ... Maybe you can have the VIN of the donor car to be put on the list as a Donor (RIP).
I would find probably some of metal parts still for potential usage in my project. Are you scrapping them all?
It has no rear side marker lights. I don't remember my 73' cars had the lights or not but my 74' CSi has them even it was not sold in US.a US-spec car that never sold to the US
Last edited:
No signes from rear side marker lights , the originalfront fenders might have had holes for side markers but were to rusty to determine. Traces from US spec that I found so far is only the "fasten seat belts" sign on the dash.It has no rear side marker lights. I don't remember my 73' cars had the lights or not but my 74' CSi has them even it was not sold in US.
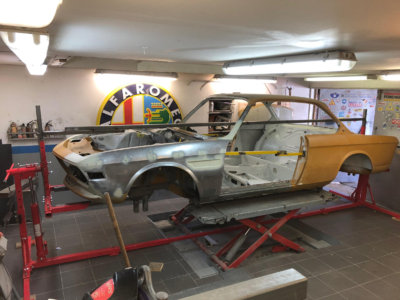
Restoration keeps on , not to many hours of welding left , my goal is to have the body ready to be sent of to paint in May / June
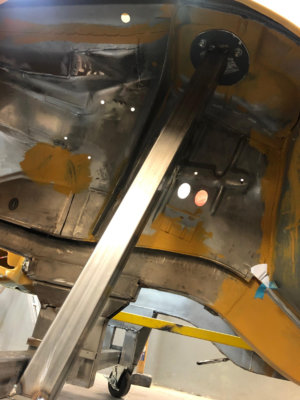
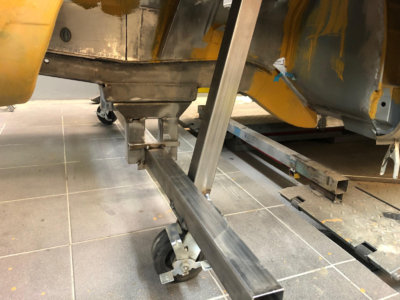
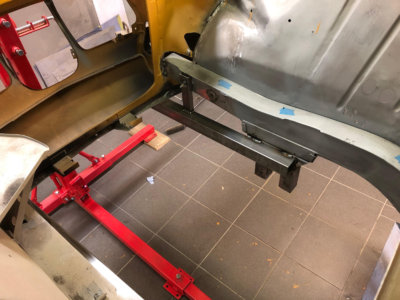
Trialfitted the right front fender , after tip from Robert Gransin I built a simple jig to get som load on the front shocktowers. I was to lazy to put an engine back in so a sturdy iron-piece had to represent gearbox weight and 7 bags of concret represented engineweght... I had the laser on to measure and see if there was any movement on , but nothing moved at all.
Trialfitted the right front fender , after tip from Robert Gransin I built a simple jig to get som load on the front shocktowers. I was to lazy to put an engine back in so a sturdy iron-piece had to represent gearbox weight and 7 bags of concret represented engineweght... I had the laser on to measure and see if there was any movement on , but nothing moved at all.
Attachments
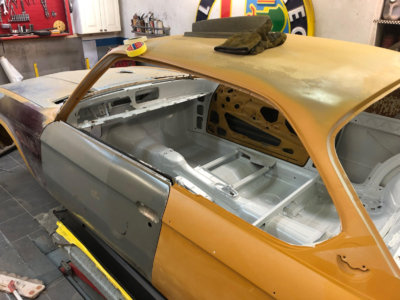
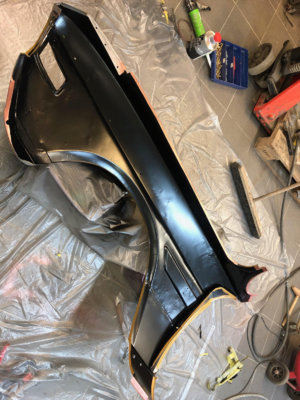
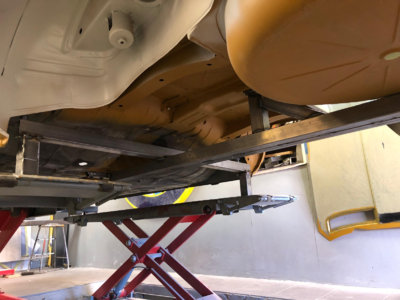
Epoxiprimed and then painted the inside of the fenders with an industrial polyurthan paint aon all surfaces except were welding were to be done primer was used instead.
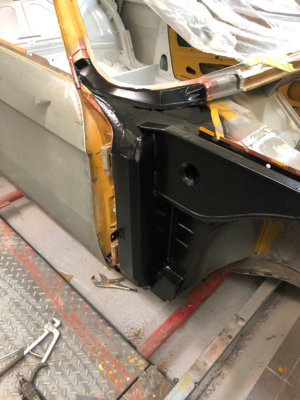
After allot of testfitting and adjusting I finally could weld the fenders in place.
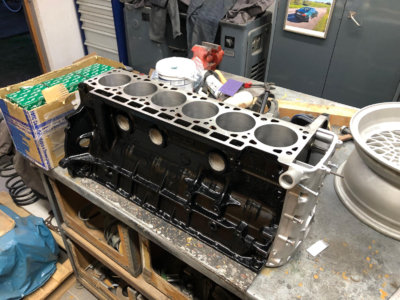
I also got the 3,5 l block back from oversize bore +0,5 mm and top deck surfacing. Engine build will start as soon as I get the body done and of to paint.
After allot of testfitting and adjusting I finally could weld the fenders in place.
I also got the 3,5 l block back from oversize bore +0,5 mm and top deck surfacing. Engine build will start as soon as I get the body done and of to paint.
Attachments
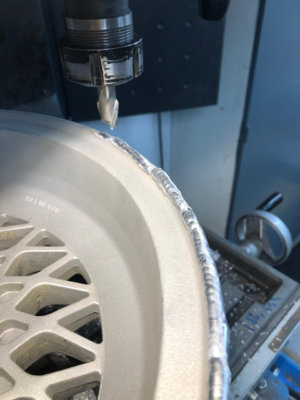
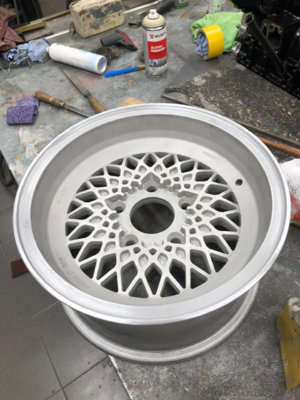
I bought a set of 14*7" BBS Mahle wheels that I like , they were all scratched by curbs so I welded the edges and was able to mill the excess away on my litte ZX45 and a turntable . After a bit of sanding they look pretty good and ready to be painted.
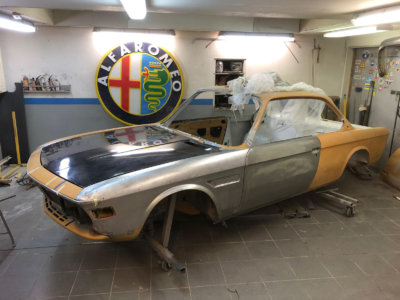
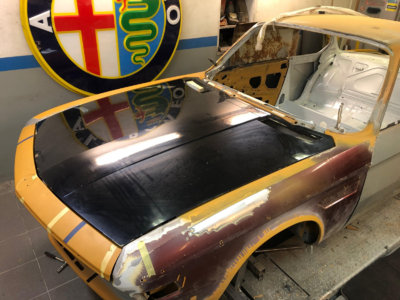
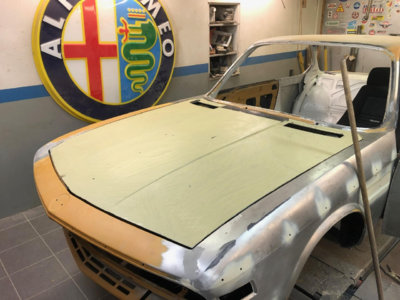
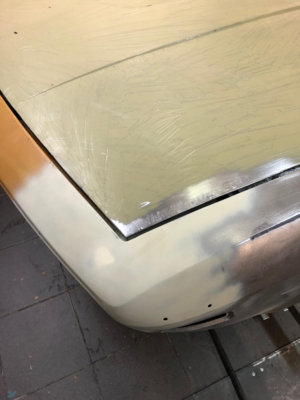
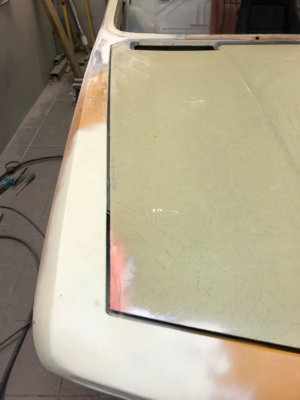
Scraped the paint of the hood (original paint 1 layer , must be rare..) . The seams were the fenders meet the front nose was sandes down and a layer of Teroson EP5010TR "filler" was put on to make it reasonably smooth for the painters to do their job later .
Scraped the paint of the hood (original paint 1 layer , must be rare..) . The seams were the fenders meet the front nose was sandes down and a layer of Teroson EP5010TR "filler" was put on to make it reasonably smooth for the painters to do their job later .
Attachments

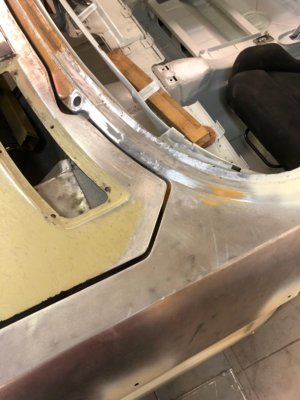
Hello, What you are doing it is not a repair work it is kind of art work god bless you with talent you haveStarted rustrepair in the boot , doing the inner and outer rear wheelhouse . Fabricating a patchpanel for the rear fender and doing repairs on the c-pillar.
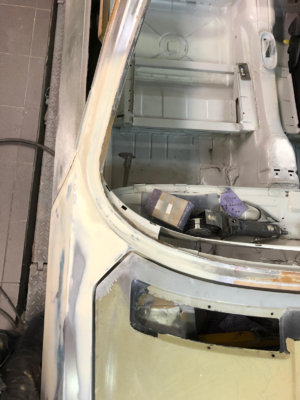
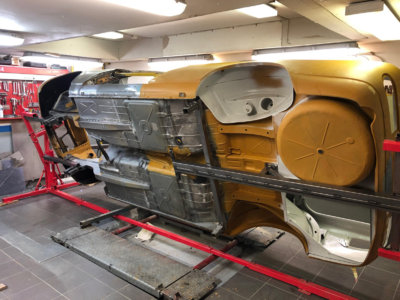
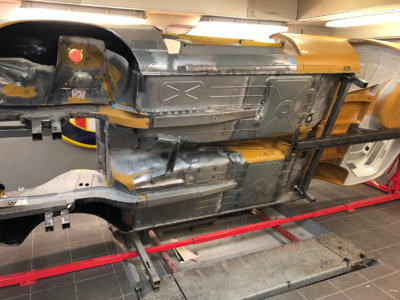
Bodywork continues but I can now see the end of this chapter , all rust-issues solved (some minor blasting / grinding left) . Finally got round to fixing the. body to my rotisserie to finish of underside and put some underproofing/paint on that.
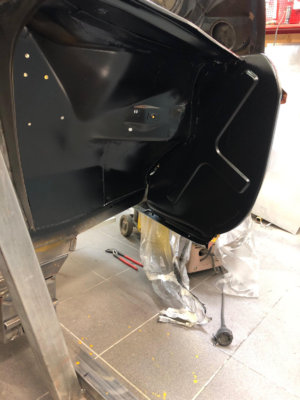
Put a few hours into panelgapping doors and hood , still have the rear lid to do.
Put a few hours into panelgapping doors and hood , still have the rear lid to do.
Attachments
-
 unnamed.jpg225.7 KB · Views: 366
 -
 unnamed (1).jpg196.5 KB · Views: 349
 -
 unnamed (2).jpg291.2 KB · Views: 366
 -
 unnamed (3).jpg307.3 KB · Views: 401
 -
 unnamed (4).jpg327.4 KB · Views: 322
 -
 unnamed (5).jpg359.3 KB · Views: 355
 -
 unnamed (6).jpg268.3 KB · Views: 397
 -
 unnamed (7).jpg370.7 KB · Views: 409
 -
 unnamed (8).jpg373.9 KB · Views: 383