A show quality paint job can cost $50k easily. Not just in the prep, but the cutting and buffing, etc.
You are using an out of date browser. It may not display this or other websites correctly.
You should upgrade or use an alternative browser.
You should upgrade or use an alternative browser.
The end is near....SCOTTeVEST's Baby
- Thread starter scottevest
- Start date
-
- Tags
- restoration list
- Status
- Not open for further replies.
wow. can you tell a $50k paint job from a $8k by looking at it? There's a ton of prep, cutting and buffing going on here.A show quality paint job can cost $50k easily. Not just in the prep, but the cutting and buffing, etc.
Regarding the interior veneer. I prefer the straight grain one that looks like Mahogany.
At Pebble Beach Concours, one can tell a $50K paint job from a $100K paint job.
At Pebble Beach Concours, one can tell a $50K paint job from a $100K paint job.
G
Well-Known Member
- Messages
- 230
- Reaction score
- 18


I can't believe how much prep work, aside from rust remediation, goes into painting, when doing it right.

that is EXACTLY the look i want. can you please take better shots of the wood, perhaps in daylight, with cleaning your phone camera lens? my email is ceo at scottevest.comMy car is in storage but I found these not so great pics. Our local furniture maker used Mahogany veneer to match the Nardi wheel.
Did this in 2006, cost was $300 to redo all the veneer .
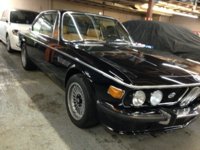
Black Rocks !
View attachment 44307 View attachment 44308
i will forward these images to my guy in the meantime. thanks so very much
Sorry. Just reread your message indicating that the cars in storage. Thank you very much. This is enough for me
Last edited:
I have never seen a Nardi that dark. Looks very nice and for a great price. It appears to be front speaker delete and the cut outs are there for the door ashtrays but the ashtrays are missing.
My worst nightmare just arrived in my inbox. Gary asked me to send a single email explaining the bumper conversion with pictures.
I have been forwarding him information piecemeal as I gather it here, but I don't think he has focused on it until now. I don't blame him.
I created a google document here https://docs.google.com/document/d/1Q0idpUiVz2iNTZ_tfnBGtzUzsGoYjiLJIkBERHvxo7o/edit?usp=sharing where I basically cut/pasted everything in some rational order. It's still information overload. I must admit I only understand enough to be dangerous.
I just talked to Gary, and he is going to look at this carefully. For some reason, he thinks that the 73 bracket can get as close as the 72 bracket. i told him i don't think so but not sure.
Per Gary, he needs to see a picture of the bracket going through the frame rail, if not in the google document already.
I am hoping Gary can walk through this information, otherwise, I am going to have to try hard to better organize it or go there together and sit down with all the parts and figure it out together.
Thanks for all your help.
Last edited:
do people delete front speaker and replace with wood instead? is there value to doing that?I have never seen a Nardi that dark. Looks very nice and for a great price. It appears to be front speaker delete and the cut outs are there for the door ashtrays but the ashtrays are missing.
That’s why I mentioned it for you to have one more thing to think about!
Some people delete both the front speaker and the door ashtrays because they think it looks cleaner. I like the looks of both and kept them when Bela fabricated my replacements but now would be the time for you to confirm your preference.
I would think the front speaker is a detailed piece and would cost less if it’s deleted. Deleting the ashtrays would also involve modifying your door cards which would add cost.
That’s why I mentioned it for you to have one more thing to think about!
Some people delete both the front speaker and the door ashtrays because they think it looks cleaner. I like the looks of both and kept them when Bela fabricated my replacements but now would be the time for you to confirm your preference.
I would think the front speaker is a detailed piece and would cost less if it’s deleted. Deleting the ashtrays would also involve modifying your door cards which would add cost.
what looks better? i sort of like leaving the ashtrays but think the speaker looks odd and would look better without. thoughts?
Left my speaker & cover because I use it.
What do you have behind there?Left my speaker & cover because I use it.
This may have been covered, but that doesn't look like a stock finish on the Nardi wheel. It's beautiful and a great match to the other wood in that car. But I think t hey tend to be lighter and more orange - at least in my experience.that is EXACTLY the look i want. can you please take better shots of the wood

its easy to fill in the speaker area and fill and patch the edges
you never see it.
you never see it.
Scott,
I can't open your google doc, but did a sketch, that may help to understand how the mods are to be done.

Left picture shows the front wheel housing of my car where you can see the 2 pockets for the bolts to mount the bumper bracket to. As you can see it's a rather simple solution, where the bracket sits at the vertical outside part of the engine support beam. The real mess here is, that the bolts are falling out all the time during bumper installation. Unfortunately I only had a picture of the passengers side, so that you can't compare it directly with the driver side picture from bfeng on the right side of my sketch. This shows the situation, after the performed modifications to a US style engine support beam, to be able to carry the Euro style bumper bracket.
Both pictures got a top view below, to describe the situation with the offset between the two versions. If I'd do the modification I would set up the threads for the bracket attachment directly inside the stringers, so that you later easily can bolt the bracket with a hex head bolt coming from the outside of the bracket. Nothing is interfering then, while sliding the brackets through the rubber grommets in the front valance.
Just read very carefully the complete and precise answer with the pictures from bfeng in here:
https://www.e9coupe.com/forum/threads/repainting-my-coupe-and-then-some.27307/page-32#post-220703
Pics 2,3 and 8 together with his explanations show the most important issues for the modifications at the stringers inside the car body and the brackets. Using slots instead of holes will be for sure a good help for the adjustment of the bumper
I can't open your google doc, but did a sketch, that may help to understand how the mods are to be done.
Left picture shows the front wheel housing of my car where you can see the 2 pockets for the bolts to mount the bumper bracket to. As you can see it's a rather simple solution, where the bracket sits at the vertical outside part of the engine support beam. The real mess here is, that the bolts are falling out all the time during bumper installation. Unfortunately I only had a picture of the passengers side, so that you can't compare it directly with the driver side picture from bfeng on the right side of my sketch. This shows the situation, after the performed modifications to a US style engine support beam, to be able to carry the Euro style bumper bracket.
Both pictures got a top view below, to describe the situation with the offset between the two versions. If I'd do the modification I would set up the threads for the bracket attachment directly inside the stringers, so that you later easily can bolt the bracket with a hex head bolt coming from the outside of the bracket. Nothing is interfering then, while sliding the brackets through the rubber grommets in the front valance.
Just read very carefully the complete and precise answer with the pictures from bfeng in here:
https://www.e9coupe.com/forum/threads/repainting-my-coupe-and-then-some.27307/page-32#post-220703
Pics 2,3 and 8 together with his explanations show the most important issues for the modifications at the stringers inside the car body and the brackets. Using slots instead of holes will be for sure a good help for the adjustment of the bumper
Last edited:
Arnie, I think "stringers" in the above message are the center members or frame rails that carry engine & subframe? .
as arnie suggests, having a threaded element in the frame rails is the easiest way to go.
You can weld something in, but you can also consider using two of these Rivkle blind rivet nut, directly inserted and pulled tought into drilled holes into the frame rails. If one of these nutserts would be too deep, I'd simply use a separate, self fabricated shim to overcome depth difference.
If you choose this option (welded like Arnie suggests, or nut inserts), you can install both types of bumper brackets, new and old. If fine tuning of the position of the bumper is needed, you also have the option to make slotted holes in the brackets. Just use a bigger washer and no-one will notice.
I owe you big time. Thank you very very very very very very much. I fix the sharing settings on the Google document but it requires a lot of cleanup. I will work on it.Scott,
I can't open your google doc, but did a sketch, that may help to understand how the mods are to be done.
View attachment 44334
Left picture shows the front wheel housing of my car where you can see the 2 pockets for the bolts to mount the bumper bracket to. As you can see it's a rather simple solution, where the bracket sits at the vertical outside part of the engine support beam. The real mess here is, that the bolts are falling out all the time during bumper installation. Unfortunately I only had a picture of the passengers side, so that you can't compare it directly with the driver side picture from bfeng on the right side of my sketch. This shows the situation, after the performed modifications to a US style engine support beam, to be able to carry the Euro style bumper bracket.
Both pictures got a top view below, to describe the situation with the offset between the two versions. If I'd do the modification I would set up the threads for the bracket attachment directly inside the stringers, so that you later easily can bolt the bracket with a hex head bolt coming from the outside of the bracket. Nothing is interfering then, while sliding the brackets through the rubber grommets in the front valance.
Just read very carefully the complete and precise answer with the pictures from bfeng in here:
https://www.e9coupe.com/forum/threads/repainting-my-coupe-and-then-some.27307/page-32#post-220703
Pics 2,3 and 8 together with his explanations show the most important issues for the modifications at the stringers inside the car body and the brackets. Using slots instead of holes will be for sure a good help for the adjustment of the bumper
Last edited:
Arnie, I think "stringers" in the above message are the center members or frame rails that carry engine & subframe? .
Yes, maybe I missed the right expression for that. frame rails, beams, whatever you'd like to call it ...
")
The mentioned inserts could also be used. You can find them in a German "Baumarkt" and probably also in an iron store in the States. I'd just weld a nut in, maybe with an M10 thread instead of the "flimsy" M8 from the BMW solution, but M8 will workout the same
He frame rail is thick enough that you could drill and tap it as long as you were careful about max torque. I very much like the idea of "threaded inserts" (rivet nuts), but wow that must be one big rivet gun. Mine riv-nut tool only goes up to M6 size and I think the bolts should be M8 or M10 size .
- Status
- Not open for further replies.