The Raven e9 project

I finally sorted out the front tow hooks. While admittedly spending too much time on these, I am happy with the results and glad they are done. Some details of the journey:

The original tow hooks on the car were a bit out of wack. Perhaps they'd found a parking wheel stop or two over the decades. I was a bit zealous in trying to persuade one of them back into shape 'without heat' and broke it. This led to my hunt for solutions including welding the original back together or replacing it/them. Given the originals were tweaked anyway I found that Coupe King sold replacements. When they arrived, I discovered two things about these replacements - they weren't the same shape as the originals and they are made from a smaller diameter rod.

Original tow hook diameter:
20211127-02-orig tow hook.jpg


Coupe King's replacement rod (I assume this is made from standard US 3/8" rod). I considered making my own from this rod but thought I could save time buying CK's. Turns out that wasn't the case given how much time I spent re-working them (see below). But it was nice to have something to start with.
20211127-03-CK tow hook.jpg


Here is a comparison of Coupe King's on the left and the original on the right: The originals had a bit more of a waist.
20210717-01-CK and orig tow hook.jpg


And here they are overlaid. It's subtle, but this discrepancy really bothered me, and the different diameter forced me to change them both out so at least they match each other.
20210717-02-hooks overlay.jpg


After some reshaping (with heat this time), I was able to replicate the original shape pretty well:
20211127-01-orig and CK tow hooks.jpg


And here they are welded onto the front subframe:
20211127-04-tow hooks welded.jpg


I went a little overboard with my welds - perhaps trying to overcompensate for the thinner diameter rods - ha ha.
20211127-05-right hook welds.jpg
20211127-06-left hook welds.jpg
 
Nice welding! I see the work in there, and also would have tried to make them indistinguishable from oem.
Looking very sturdy and up.to the job.

Erik
Thanks Erik. Unfortunately, the tell is that the welds do not match OEM. But I can live with that. I tried to match the original welds, but my welder was not matching the bead profiles. Once everything is painted black (and under the car), I think it will look good.
 
I had an interesting week. I took the week off with the express goal of spending the entire time out in the garage. While I did spend more time out there than normal, I barely made a dent in the list I'd put together for myself. I thought I was getting better at estimating my time/effort, but sometimes the Raven wants due attention.

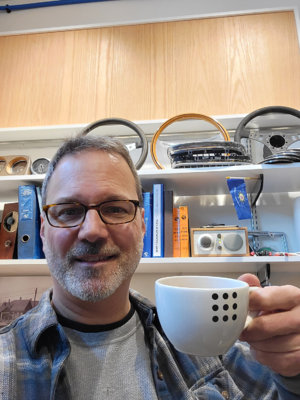
I enjoyed my first mid-day coffee in the garage. Perhaps I should have had more coffee so I would have made more progress.
20211229-week off coffee.jpg


I am trying hard to preserve not only original metal - but also the precise geometry of the car. With this in mind, I was able to salvage about 75% or 80% of the right inner sill which held the right side of the car together, while fitting up a patch on the lower section. I did get that welded up. I lamented over grinding up the welds more, but this is a concealed area and I decided to leave them a little bit beefier. Stronger is better here.
20211227-rt inner sill tacked.jpg

20220102-rt inner sill welded.jpg


I also started to fabricate a patch for one of the rear wheel arch structural pieces. Today I noticed that I also need to fab a piece of the wheel arch itself - and that somehow halted my motivation for the day.
20211231-patch piece template.jpg

20220102-patch piece folded.jpg


Baby steps.
 

Attachments

  • 20211229-week off coffee.jpg
    20211229-week off coffee.jpg
    563.4 KB · Views: 207
Last edited:
Enjoy these inspiring words of motivational wise guyerisms.

Everything takes 5 minutes, it's all the 5 minutes strung together that takes time. - Andrew Wilson

Took longer than I thought it wound, but then I thought it would - Robert Lash
 
This is far too thin an update, but I'll sneak a brief one in here. Made 30 minutes more progress on the next patch. Still have some fussing and fitting to do, but I like where it is heading.
20220104-prelim fitment.jpg


Looks great, about time to prime & paint.
Yes Andrew, I concur (checking this off the list).
20220104-painted front subframe.jpg
 
Further progress on the inner and intermediate sills as they tie into the rear wheel well/C-pillar structure. I was about to fabricate a piece for the inner wheel well but realized I needed more sheet metal. So I turned my attention back to fitting the flare structure piece. I also did a fit-up with the intermediate sill to check the coordination of these two pieces as well as some other details. I think everything is perfectly aligned and fitting beautifully. In a word, I am stoked!
20220115-int sill fit at front.jpg

20220115-int sill fit at rear.jpg


Before, templates and after shot of this flare patch.
20220115-rear WW flare patch.jpg


Ready for welding. Even though I found and re-furbished an old monster of a spot welder, I don't trust it to hold these critical sections of the car together. To that end, I plan on drilling holes in the patch in the same places that the original spot welds were located and then doing "rosette" welds to tie it all together. I feel this will be stronger, if not aesthetically accurate. This isn't an exposed part (from the inside of the sill), so the aesthetics are lower on my priority for these welds than the strength. I've also been adding some stitch welds in concealed places to tie structural elements together.
20220115-flare patch primed.jpg
 
Stephen, immediately spied the CS Register license plate frame over your right shoulder. Someday, laddie, some day!
 
man , i hope that you keep that spirit untill a finished car.
I build a 50 feet sailboat... took me 20 years. When finished , i was to old to sail it. You can't stop time. Biggest mistake in my life. Sailed it 5 years.
And here we are only talking about a simple old car as a E9.... sorry for my expression. I have learned enough by now.

6082016 052.JPG
 
I build a 50 feet sailboat... took me 20 years. When finished , i was to old to sail it.
That risk is not lost on me. I promise it will take me less than 20 years to finish The Raven. And the best part is, I'm loving every minute of the work. I am learning new skills, and honing others. If I never drove the finished car, I would be a little sad. But I'll still have the time I spent re-building/re-furbishing it. I spend a lot of time researching how the car is put together. Once I understand my next steps, the work comes a bit more quickly. I think progress will build some acceleration over time.
 
acceleration ? don't think so. I ordered custom made "normal" safety belts for my (ex) rally coupe as one of the final road legal needs ..... Took 3 months. I recived them at last , took me a day ! to install them.What to change etc... as if it were plug&play. Forget it. Always surprizes. This or that doesn't fit .

by the time you finished your restore project i have bought a E9 , drove the hell out of it for years , and sold it. It's not a damned reliqui , it's a oldschool car !

and i dare to tell more as i have the experience .... if you would drive my car , as upgraded , you wouldn't have pleasure anymore in a oem E9. I sure did not. Have had both.
 
Last edited:
And the best part is, I'm loving every minute of the work. I am learning new skills, and honing others. If I never drove the finished car, I would be a little sad. But I'll still have the time I spent re-building/re-furbishing it. I spend a lot of time researching how the car is put together.
Ditto. For me the project IS the hobby.

There are lots of ways to enjoy old cars....all of them are valid.
 
i agree fully " the project IS the hobby.".... SURE NOT driving it after finish. Just as my sailboat. A complete disaster. :(
 
Back
Top