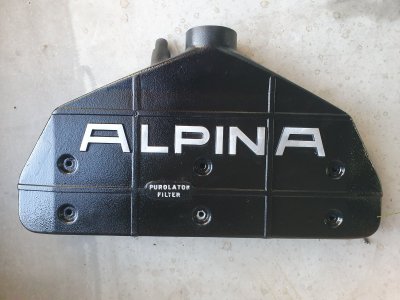
What did you do to your E9 today?

Completed a Coolant system flush as I had to replace rusting bypass pipe. (below the intake runners on L-Jet injection)
Old pipe (44 years old):
IMG_0281.jpeg

New pipe (not stainless but coated with Por-15 and high heat paint):
IMG_3586.jpeg

No way to get a good picture of it installed but I also took the opportunity to replace old hoses and new BMW clamps.

The bleeding method I used works really well for me.

There are apparently several ways to purge the cooling system of air. With no particular favorite, Here is another, courtesy of E28 board and J.Rowe at Metric Mechanic:

"There is a sure way to bleed the cooling system on 'big' six engines.
1. After repair is made (before adding coolant) remove bleeder screw and run a small piece of wire down the hole to dislodge any mineral deposits..
2. Replace the screw, but leave valve 'open'.
3. Open heater control valve and add coolant until it begins to escape from the bleeder hole.
4. Now close bleeder screw and replace the expansion tank cap and tighten.
5. Remove the small coolant line that runs from the radiator to the
expansion tank AT THE EXPANSION tank and hold it as high as you can.
6. Now attach another hose the expansion tank in place of the one you've
just removed. BLOW (gently!!) through this hose until coolant emerges from the small elevated radiator hose.
7. Now remove the 'blow' hose and reconnect the small radiator hose to the expansion tank..
8. Now top off the expansion tank to the full mark.
9. Start and warm up engine and check for leaks!!"


Test drove the car, temp gauge stayed below middle and no leaks. Ready for the summer. :)
 
Last edited:
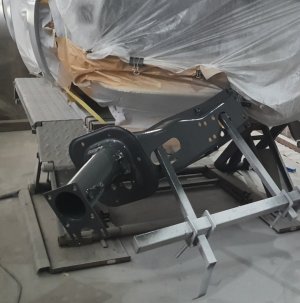
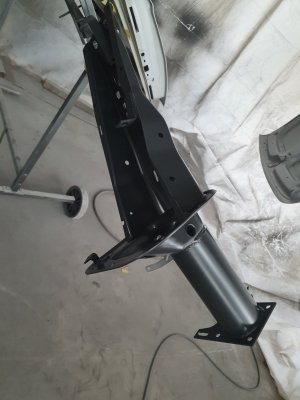
Paint the pedal / booster support in dark gray.

Breiti
 

Attachments

  • Screenshot_20240424-150419_Gallery.jpg
    Screenshot_20240424-150419_Gallery.jpg
    500.2 KB · Views: 97
  • 20240424_144910.jpg
    20240424_144910.jpg
    177.4 KB · Views: 101
Completed a Coolant system flush as I had to replace rusting bypass pipe. (below the intake runners on L-Jet injection)
Old pipe (44 years old):View attachment 181019
New pipe (not stainless but coated with Por-15 and high heat paint):
View attachment 181020
No way to get a good picture of it installed but I also took the opportunity to replace old hoses and new BMW clamps.

The bleeding method I used works really well for me.

There are apparently several ways to purge the cooling system of air. With no particular favorite, Here is another, courtesy of E28 board and J.Rowe at Metric Mechanic:

"There is a sure way to bleed the cooling system on 'big' six engines.
1. After repair is made (before adding coolant) remove bleeder screw and run a small piece of wire down the hole to dislodge any mineral deposits..
2. Replace the screw, but leave valve 'open'.
3. Open heater control valve and add coolant until it begins to escape from the bleeder hole.
4. Now close bleeder screw and replace the expansion tank cap and tighten.
5. Remove the small coolant line that runs from the radiator to the
expansion tank AT THE EXPANSION tank and hold it as high as you can.
6. Now attach another hose the expansion tank in place of the one you've
just removed. BLOW (gently!!) through this hose until coolant emerges from the small elevated radiator hose.
7. Now remove the 'blow' hose and reconnect the small radiator hose to the expansion tank..
8. Now top off the expansion tank to the full mark.
9. Start and warm up engine and check for leaks!!"


Test drove the car, temp gauge stayed below middle and no leaks. Ready for the summer. :)
I use this procedure, and have some suggestions.

You don't need to hold the expansion tank hose end as high as you can, you merely need to hold it above anywhere in the cooling system that air could be hiding. Best to hold it where you can easily see the end of the hose.

When blowing in the hose attached to the top of the radiator, your objective is to push out all of the air in the system. You know this is done when a very small amount of coolant comes out of that hose end. You want to blow hard enough that a small amount of coolant comes out, but not so hard that the coolant sprays all over the place. So, hold the hose end where you can see it and with the end square to the coolant tank. This helps you determine how hard to blow. Second, wrap a rag around the hose to catch the coolant so it doesn't get on your car or run down your arm.
 
Ever since I used @sfdon 's tip on drilling a small hole in the thermostat at 12 o'clock I haven't had to do any bleeding procedures other than a quick bleed screw opening right when the thermostat opens, including the hose in the air technique, which works great otherwise.
 
Ever since I used @sfdon 's tip on drilling a small hole in the thermostat at 12 o'clock I haven't had to do any bleeding procedures other than a quick bleed screw opening right when the thermostat opens, including the hose in the air technique, which works great otherwise.
Yep. Drilling the hole in the t-stat works great. I did that 12 years ago. I still like the expansion tank hose trick for piece of mind. ;)
 
Yep. Drilling the hole in the t-stat works great. I did that 12 years ago. I still like the expansion tank hose trick for piece of mind. ;)
Maybe it's coincidence, but also since doing this my temp gauge never wavers from 185, winter or heat of summer with or without a/c on.
 
Completed a Coolant system flush as I had to replace rusting bypass pipe. (below the intake runners on L-Jet injection)
Old pipe (44 years old):View attachment 181019
New pipe (not stainless but coated with Por-15 and high heat paint):
View attachment 181020
No way to get a good picture of it installed but I also took the opportunity to replace old hoses and new BMW clamps.

The bleeding method I used works really well for me.

There are apparently several ways to purge the cooling system of air. With no particular favorite, Here is another, courtesy of E28 board and J.Rowe at Metric Mechanic:

"There is a sure way to bleed the cooling system on 'big' six engines.
1. After repair is made (before adding coolant) remove bleeder screw and run a small piece of wire down the hole to dislodge any mineral deposits..
2. Replace the screw, but leave valve 'open'.
3. Open heater control valve and add coolant until it begins to escape from the bleeder hole.
4. Now close bleeder screw and replace the expansion tank cap and tighten.
5. Remove the small coolant line that runs from the radiator to the
expansion tank AT THE EXPANSION tank and hold it as high as you can.
6. Now attach another hose the expansion tank in place of the one you've
just removed. BLOW (gently!!) through this hose until coolant emerges from the small elevated radiator hose.
7. Now remove the 'blow' hose and reconnect the small radiator hose to the expansion tank..
8. Now top off the expansion tank to the full mark.
9. Start and warm up engine and check for leaks!!"


Test drove the car, temp gauge stayed below middle and no leaks. Ready for the summer. :)

Diggin that work mat of yours John!
 
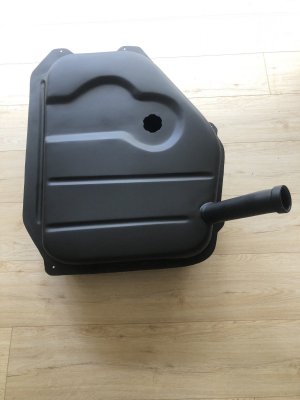
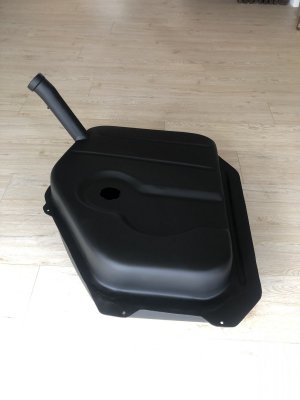
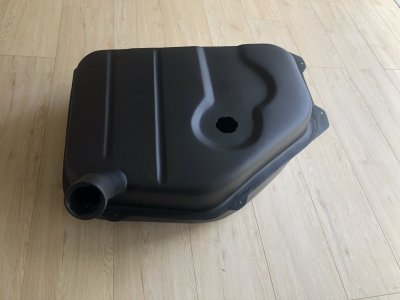
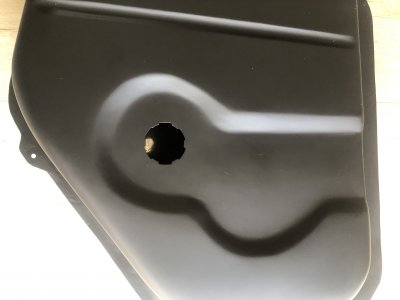
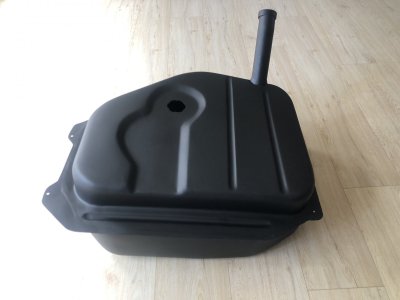
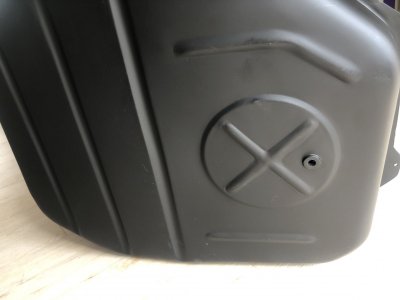
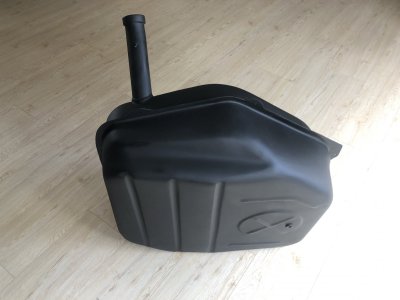
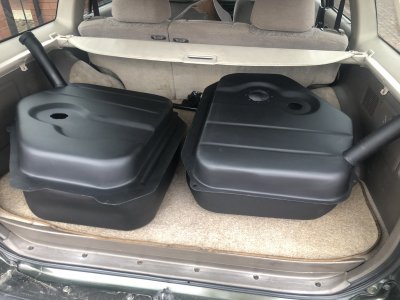
Stainless Steel Fuel Tank. Late style
 

Attachments

  • F1C931EF-29D1-4607-9E16-5229C9EC1D39.jpeg
    F1C931EF-29D1-4607-9E16-5229C9EC1D39.jpeg
    174.3 KB · Views: 84
  • 8249296E-5A2D-4D75-9198-5C80E84D6F5D.jpeg
    8249296E-5A2D-4D75-9198-5C80E84D6F5D.jpeg
    148.6 KB · Views: 82
  • 427FEC9F-7C63-43F7-A77A-7CC97730F903.jpeg
    427FEC9F-7C63-43F7-A77A-7CC97730F903.jpeg
    202.2 KB · Views: 77
  • A168BE05-B45A-45C4-B2E1-9D735DD44A97.jpeg
    A168BE05-B45A-45C4-B2E1-9D735DD44A97.jpeg
    131.8 KB · Views: 80
  • D64DCB73-8B4F-4C2C-A44A-EDC81162DD5B.jpeg
    D64DCB73-8B4F-4C2C-A44A-EDC81162DD5B.jpeg
    145.3 KB · Views: 84
  • 344297D9-7ABD-4C9F-B86A-558F0A3FAD0C.jpeg
    344297D9-7ABD-4C9F-B86A-558F0A3FAD0C.jpeg
    125.4 KB · Views: 87
  • A6C3DD57-8AB0-43F5-BF05-4FCEBB8293F5.jpeg
    A6C3DD57-8AB0-43F5-BF05-4FCEBB8293F5.jpeg
    178.2 KB · Views: 108
I finally repaired the emergency brake switch so the light goes on when the brake is one. It's only been 5 years!
 
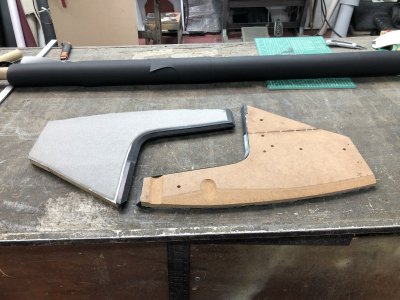
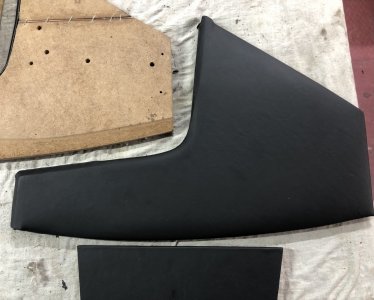
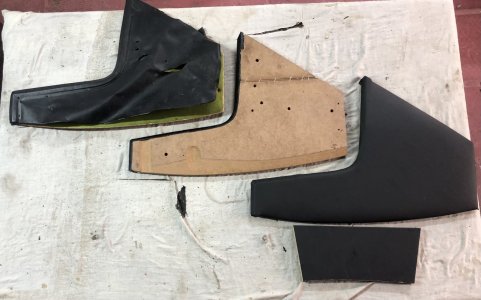
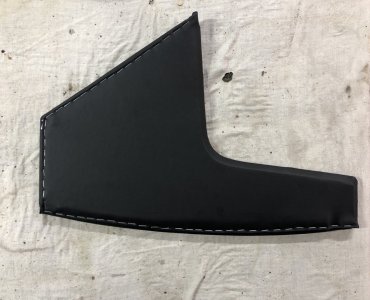
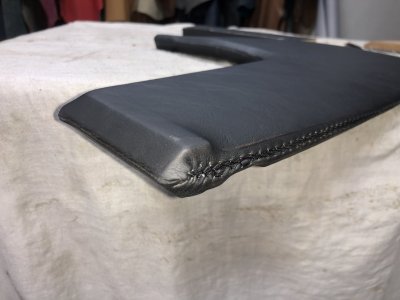
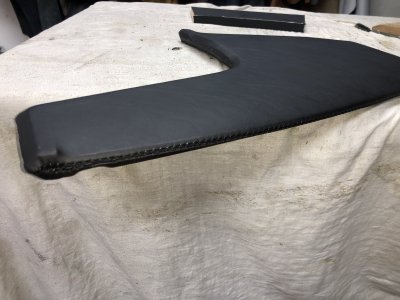
Working on a reproduction console, and looking for the best solution to upholster it. The console is heat sealed on the visible sides and the first option was with staples, and although you won't be able to see them, I didn't like it very much... the second option is to sew it as if it were a steering wheel
 

Attachments

  • 744D356A-A431-49E7-9EC3-8C14A0C955B2.jpeg
    744D356A-A431-49E7-9EC3-8C14A0C955B2.jpeg
    371.8 KB · Views: 77
  • 7DC2C5C6-C13C-4902-88AA-AB99103D2C91.jpeg
    7DC2C5C6-C13C-4902-88AA-AB99103D2C91.jpeg
    295.3 KB · Views: 77
  • 4B5AFCAD-50B0-41B6-88E5-33F2FED86E18.jpeg
    4B5AFCAD-50B0-41B6-88E5-33F2FED86E18.jpeg
    226.6 KB · Views: 83
  • 9976DE14-635E-41F7-8239-D6F6E2C971DC.jpeg
    9976DE14-635E-41F7-8239-D6F6E2C971DC.jpeg
    281.6 KB · Views: 77
  • 519D2512-D1B8-4CB9-B085-9AAE3884C2B5.jpeg
    519D2512-D1B8-4CB9-B085-9AAE3884C2B5.jpeg
    156.5 KB · Views: 80
  • A7337BE2-B11A-498A-A79B-E44D436EA878.jpeg
    A7337BE2-B11A-498A-A79B-E44D436EA878.jpeg
    290.3 KB · Views: 107
That is not a haet Isolation, that is only for a cushion appearance from the upholstery.

Breiti
 
Petri Hub reproduction
 

Attachments

  • 8D6B26D1-DEE4-41B5-A526-498D021C98A7.jpeg
    8D6B26D1-DEE4-41B5-A526-498D021C98A7.jpeg
    375.2 KB · Views: 69
  • 6503F729-1C8B-47D2-B685-5ABAE6FDC408.jpeg
    6503F729-1C8B-47D2-B685-5ABAE6FDC408.jpeg
    232.8 KB · Views: 69
  • 765A934B-61BA-491F-B8A8-5807E425527E.jpeg
    765A934B-61BA-491F-B8A8-5807E425527E.jpeg
    240.7 KB · Views: 63
  • 18191B7E-4CC2-4760-A436-CDED96822FBE.jpeg
    18191B7E-4CC2-4760-A436-CDED96822FBE.jpeg
    272.4 KB · Views: 60
  • 20CA0C5A-8AB0-40ED-B63A-3BA1E0701CE4.jpeg
    20CA0C5A-8AB0-40ED-B63A-3BA1E0701CE4.jpeg
    505.2 KB · Views: 75
  • 72687917-F1F2-4FA7-9207-5C12F43A10D2.jpeg
    72687917-F1F2-4FA7-9207-5C12F43A10D2.jpeg
    405.8 KB · Views: 67
Back
Top