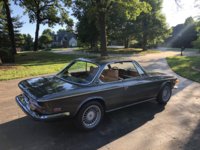
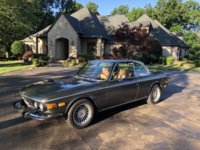
What did you do to your E9 today?

Markos, I bet it's difficult to steer at best with either no belt or fluid.

Well I wouldn’t recommend it but it is not difficult to steer. I’m slowly dismantling my car and don’t plan on driving it more than 10 miles or so before I begin my restoration.

I drove around for two miles making turns before putting my car away. It is difficult to move when you are stopped but as long as you are rolling it is just stuff. I also have 235 front tires. The skinnier your tires the easier it is to handle unassisted steering.
 
What did I do with my CS today?..... well, finally up and running so with great sunny morning I took it for a drive , with all the windows down and sunroof open!!! Fantastik!!!

Since I bought it July 2017 - barely running condition -
1) rebuilt and tuned dual Weber’s
2) removed US Spec shock tower spacers and installed lowered springs to correct ride height
3) installed Alpina wheels with staggered figment and Continental DWS Sport contact tires
4) Installed Magnaflow custom exhaust
5) rebuilt shifter
6) fixed , repaired or replaced much wiring throughout to ensure reliable electrical operation including sensors and relays
7) changed all fluids / oils
8) adjusted valves and new head and various gaskets to prevent leaking
9) coolant flush and new hoses
10) new brake fluid, fresh low dust pads and stainless steel brake lines
11) found complete tool kit for trunk, new tool case in box, and trunk trim on eBay as well as OEM refurbished jack and OEM lug wrench.

Drives and handles Fantastik !!!
Looking forward to many many smiles with this baby !!!
 

Attachments

  • 998A2105-DFC5-4BA5-B03F-D6BF9A305629.jpeg
    998A2105-DFC5-4BA5-B03F-D6BF9A305629.jpeg
    455.9 KB · Views: 315
  • 342B937D-F6C5-4284-ABF6-98D62F85DE14.jpeg
    342B937D-F6C5-4284-ABF6-98D62F85DE14.jpeg
    546.6 KB · Views: 317
  • 1699FD92-1E1A-4552-8494-01E442707E97.jpeg
    1699FD92-1E1A-4552-8494-01E442707E97.jpeg
    492.1 KB · Views: 341
  • 824F931F-49B0-4EF6-B8DB-078C2BC901EB.jpeg
    824F931F-49B0-4EF6-B8DB-078C2BC901EB.jpeg
    403.7 KB · Views: 337
Well, it's begun. I needed to move my 2800cs into the garage to clear the driveway for the upcoming carport install and it's time to start the restoration.

The front carb had a sticking float due to an improperly sized gasket I put in when I rebuilt it, so I removed the carb and corrected the issue. I also lubed up the L bracket in the throttle linkage since it had become stiff during the year long sit in the driveway. I charged the battery and cleared out the garage. All set.

I knew there was no gas in the lines and so used starter fluid to keep from having to crank for so long to get fuel pulled up to the engine. What I didn't realize until I looked at the video was the connection for the ground strap at the head was dirty and there was quite a bit of resistance resulting in a slow crank and some smoke. I also didn't see that once the fuel started flowing, the pump itself started to leak. Eeek. Fortunately, the smoke and fuel didn't coincide in time and space so there were no flames.

I was going to disconnect the pump and just use the fuel in the carbs to get the car into the garage, but testing it the next day, there was no fuel leak. I suspect that the membrane had shrunk during the long sit with no fuel and it resumed its normal thickness after absorbing some fuel. Either way, I'll be looking into a new pump. I've read that replacement pumps are not satisfactory. Any suggestions on the best option? I didn't find a conclusive answer in the forum's posts.
* Now that I've thought about it, a more likely source of the leak is the hose on the pressure side of the pump. I looked but didn't see any leak there when I first shut off the engine, but I will be replacing the hoses as a matter of course so I'll test for leaks and pump pressure when I begin work on the engine.

Here's a youtube video of the startup. All's well that ends well. I got it moved into the garage with no issues other than a squealing power steering belt.

I'll be updating my build thread now that I've actually begun.


IMG_9892-Hedwig-in-her-new-home.jpg
 
Last edited:
Today I put some new Michelin XWX tires on the CSL. This gave me an opportunity to poke around underneath the car while it was on the lift, which as we all know is a dangerous past time with an E9 :eek: Fortunately, everything looks fantastic beneath the floor boards, so today was a good day :D

53018dm1.jpg


53018dm2.jpg


53018dm3.jpg


53018dm7.jpg


53018dm8.jpg


53018dm4.jpg


53018dm6.jpg


53018dm9.jpg
 
I see a slight discoloration near the passenger fender box. Looks like you better do a fenders off restoration! :D

The car looks amazing. After seeing some intimate photos of this car I have a new found appreciation. I was never that fond of golf e9’s. However, after seeing Peter’s in the flesh I learned how much fidelity is lost with photos of this color. It is very jaw-dropping in person.
Thanks Mr Markos :)
 
well bought Dan ... that's a very impressive 40 something. i have to admit, i've never been that fond of golf ... but that is primarily based on 2002 and 320i ... its a fitting color for a CSL
 
Wow, the condition of your car seems to be insane, I’ve driven about 150miles with mine since the restoration and I swear this one’s cleanero_O
As Scott said, well bought!
 
Today we installed a missing rear edge bonnet seal and adjusted the bonnet fit on the CSL. This work presented an opportunity for some gratuitous engine bay photographs :D

6218dm1.jpg

The engine bay is already extremely clean and we have spent zero time on it as of yet.


6218dm2.jpg


6218dm7.jpg


6218dm5.jpg

If only we COULD buy 99 octane fuel at the pumps :cool:


6218dm4.jpg

Note missing rear edge rubber seal


6218dm3.jpg


6218dm6.jpg


6218dm10.jpg

New rear seal glued into place

52618dm15.jpg

Bonnet fit prior to adjustment (was high in both rear corners)


53118dm2.jpg

After adjustment the bonnet fit is excellent
 
Dan - could you describe your bonnet adjustment procedure please.
I will ask Oscar (my technician) to explain precisely how he made the adjustments and report back on Monday. I know it was fairly involved because the bonnet was a little low at the front corners and high at the rear. It was important to me not only that it should fit well, but also be easy to latch.

Cheers!
Dan
 
originality question - while i think the black headlight access panel screws look great on the golf ... weren't they all white originally?
 
I'd put new braided hose on those brake & clutch lines, those are looking a little long in the tooth.
 
Back
Top