72 CSi rotisserie restoration

paul

Well-Known Member
Site Donor
Messages
321
Reaction score
305
Location
Australia, Queensland, Gold Coast
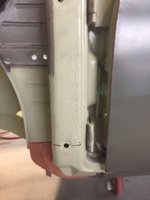
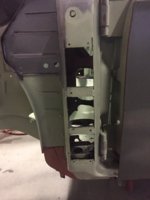
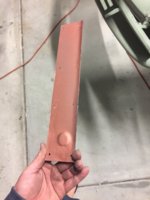
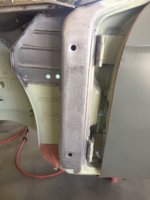
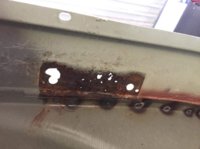
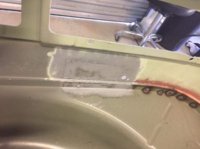
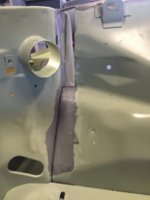
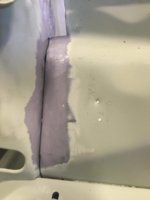
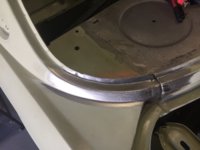
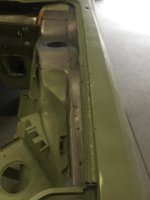
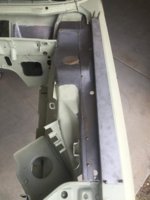
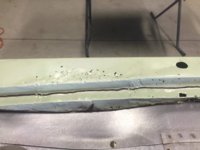
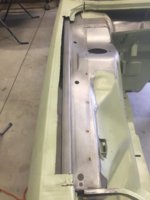
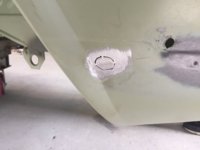
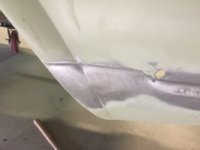
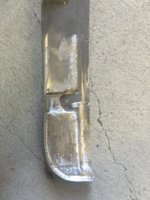
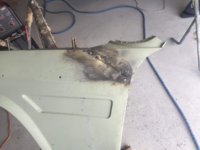
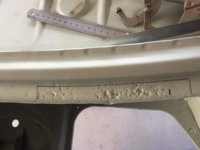
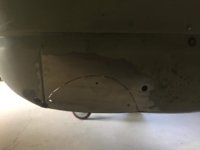
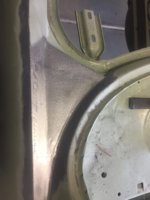
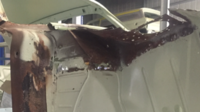
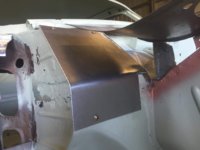
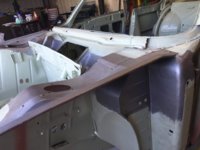
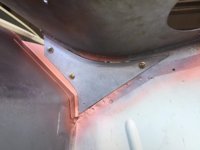
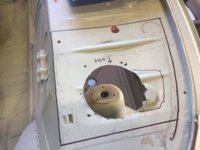
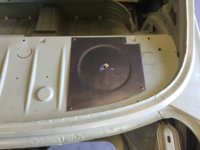
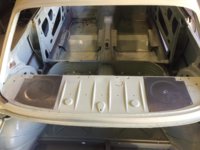
Thanks guys..........little over 1 mm sheet metal in that area same as the surrounding metal. Likewise any other areas worked on identical thickness material to suit. No skimping ;)
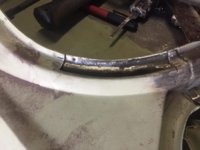
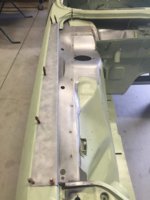
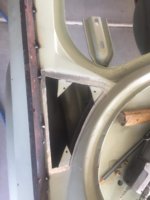
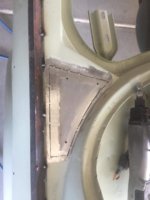
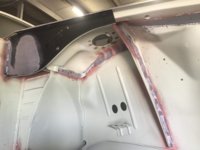
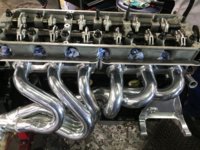
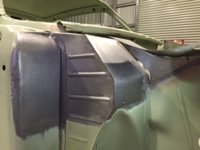
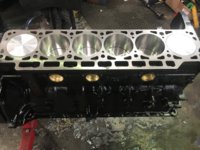
MIG welded in that particular area.....too hard to get TIG welder in there. TIG welded everywhere else especially panels as you can panel beat TIG welding. Hope to have engine photos next week as engine being assembled as we speak.:D
 

paul

Well-Known Member
Site Donor
Messages
321
Reaction score
305
Location
Australia, Queensland, Gold Coast
Week 18 Fabricators upper inner front fender area .............cut out rust effected areas.......cut and fit new metal. .......... I hope not too many weeks to go ( why do we do this :rolleyes: )
Engine.......pistons fitted....more engine pics tomorrow I hope, as visiting engine builder tomorrow.
 

Attachments

  • RHS Inner Front Fender Area BEFORE.PNG
    RHS Inner Front Fender Area BEFORE.PNG
    91.9 KB · Views: 643
  • RHS Inner Front Fender Area AFTER.JPG
    RHS Inner Front Fender Area AFTER.JPG
    32.8 KB · Views: 622
  • IMG_8458.JPG
    IMG_8458.JPG
    241.8 KB · Views: 631
  • IMG_8459.JPG
    IMG_8459.JPG
    229.1 KB · Views: 635
  • IMG_8460.JPG
    IMG_8460.JPG
    207.6 KB · Views: 638
  • Block & Pistons.jpg
    Block & Pistons.jpg
    105.2 KB · Views: 631

paul

Well-Known Member
Site Donor
Messages
321
Reaction score
305
Location
Australia, Queensland, Gold Coast
Gentlemen...I am back week 20 (19 was a bit pathetic sickness in the camp) So much work on this car.........are they all this rusty? (I thought mine wasn't really bad) or am I being too thorough?
Anyway almost out of the inner front guard and shock tower area. About to start the front fenders in the next day. Indicator light holes filled in (not required in Australia) and I like the Euro look better. (LHD car) Speaker holes filled and cutouts for new speakers.
The engine rebuild has halted awaiting Schrick 282 cam arrival. I think 3 weeks and will be out of fabricators and then to spray painters.
 

Attachments

  • LHand RH shock tower areas.JPG
    LHand RH shock tower areas.JPG
    226.9 KB · Views: 614
  • IMG_8880.JPG
    IMG_8880.JPG
    223.5 KB · Views: 626
  • IMG_8860.JPG
    IMG_8860.JPG
    148.5 KB · Views: 592
  • Indicator light hole.JPG
    Indicator light hole.JPG
    114.1 KB · Views: 579
  • IMG_8864.JPG
    IMG_8864.JPG
    164.7 KB · Views: 587
  • speaker hole lhs.JPG
    speaker hole lhs.JPG
    246.2 KB · Views: 606
  • IMG_8868.JPG
    IMG_8868.JPG
    184.3 KB · Views: 561
  • New speaker hole infills.JPG
    New speaker hole infills.JPG
    223.5 KB · Views: 579

paul

Well-Known Member
Site Donor
Messages
321
Reaction score
305
Location
Australia, Queensland, Gold Coast
Gentlemen...I am back week 20 (19 was a bit pathetic sickness in the camp) So much work on this car.........are they all this rusty? (I thought mine wasn't really bad) or am I being too thorough?
Anyway almost out of the inner front guard and shock tower area. About to start the front fenders in the next day. Indicator light holes filled in (not required in Australia) and I like the Euro look better. (LHD car) Speaker holes filled and cutouts for new speakers.
The engine rebuild has halted awaiting Schrick 282 cam arrival. I think 3 weeks and will be out of fabricators and then to spray painters.
thanks Wladek
 

Attachments

  • 1408154388_b34a66bdcf.jpg
    1408154388_b34a66bdcf.jpg
    25.3 KB · Views: 571

autokunst

Well-Known Member
Site Donor $$
Messages
3,610
Reaction score
2,623
Location
Milwaukee, WI
"Are they all this rusty?"
- I believe yes. Some are even worse.

"Am I being too thorough?"
- Absolutely not. The work looks great! I envy the pace.

Can't wait to see it in paint (as I am sure you are as well).
 

Wladek

Well-Known Member
Messages
1,316
Reaction score
799
Location
Gdansk, POLAND
I'm kind of admire you Paul, in short period of time you made such a big progress in addition with good quality.
I think, if all of us (mainly me) had such tempo like you, instead of just thinking a lot - no e9's where in renovation any more;)
 

Gazz

Well-Known Member
Site Donor
Messages
945
Reaction score
620
Location
Gold Coast Australia
You are coming up behind me real fast. At our relative rates of progress I can see yours finished before mine, even though you are at 40% and I'm at 90%. I do suspect however that the very last bits may be the slowest.
 
Last edited:

Gazz

Well-Known Member
Site Donor
Messages
945
Reaction score
620
Location
Gold Coast Australia
Gazz. I am out cracking the whip tomorrow. Must be your shout for coffee.:D

Your recollection is slipping in your dotage Paul, it's your shout..........I think. Madhouse here at present with house renovations under way so it would be good to get out for an hour or so.
 

paul

Well-Known Member
Site Donor
Messages
321
Reaction score
305
Location
Australia, Queensland, Gold Coast
Week 21 ........and the wallets getting thinner:( So.......little holes revealed from Sand blasting cut out and filled. Some bad pitting cut out and new metal at front of doors. Speaker holes all finished. Exhaust cutout in Valance will be filled in (twin pipes each side behind rear wheels will be the final look :D ) lower part of front fenders replaced. Top of front fenders will be cut and shaped next week along with top gutter of engine bay. Then we fit the front spoiler and panel beat any dents around the body and perhaps ring the spraypainter in 3 weeks :):):)
 

Attachments

  • IMG_8977.JPG
    IMG_8977.JPG
    214 KB · Views: 551
  • IMG_8978.JPG
    IMG_8978.JPG
    228.2 KB · Views: 567
  • IMG_8979.JPG
    IMG_8979.JPG
    184.7 KB · Views: 549
  • IMG_8981.JPG
    IMG_8981.JPG
    253.8 KB · Views: 558
  • IMG_8986.JPG
    IMG_8986.JPG
    125.6 KB · Views: 575
  • IMG_8988.JPG
    IMG_8988.JPG
    177.2 KB · Views: 556
  • IMG_8991.JPG
    IMG_8991.JPG
    163.8 KB · Views: 574
  • IMG_8995.JPG
    IMG_8995.JPG
    235.9 KB · Views: 540
  • IMG_8996.JPG
    IMG_8996.JPG
    264.2 KB · Views: 558
  • IMG_9026.JPG
    IMG_9026.JPG
    172 KB · Views: 553
  • IMG_9027.JPG
    IMG_9027.JPG
    175.9 KB · Views: 547
  • IMG_9054.JPG
    IMG_9054.JPG
    263.1 KB · Views: 555
  • IMG_9055.JPG
    IMG_9055.JPG
    258.6 KB · Views: 560
  • IMG_E8949.JPG
    IMG_E8949.JPG
    189.9 KB · Views: 587

Wladek

Well-Known Member
Messages
1,316
Reaction score
799
Location
Gdansk, POLAND
Love to watch at your work Paul (you already know that;)).
One dumb question, because you guys are definitely much bigger experts in that, than me (really want to understand this) - why you always bolt new repair panels first (as it is on a fender)? Is it just to take a measure for cutting? Or do you weld on the tab? Or it is kind of fixing for welding?
 
Last edited:

autokunst

Well-Known Member
Site Donor $$
Messages
3,610
Reaction score
2,623
Location
Milwaukee, WI
I love seeing each little nibble you take at the damaged areas. The before, during, and after shots are awesome. Looking great, as always.
 

paul

Well-Known Member
Site Donor
Messages
321
Reaction score
305
Location
Australia, Queensland, Gold Coast
Thanks guys........ the reason screw only first is when you fit say the front fender back onto car there may be minor misalignment and with screws you have that bit of adjustment before welding the lot.....also to hold while welding. Hey Wladek are you collecting air boxes??????:)
Gazz I rang you for a coffee you did not answer...............so you missed out :D
 

paul

Well-Known Member
Site Donor
Messages
321
Reaction score
305
Location
Australia, Queensland, Gold Coast
Week 22 the old girl is starting to look like something now. A lot of work in the top of front fenders rain gutter. Also all the little fiddly things........and filling in little holes.
 

Attachments

  • IMG_9176.JPG
    IMG_9176.JPG
    159.6 KB · Views: 524
  • IMG_9187.JPG
    IMG_9187.JPG
    222.2 KB · Views: 543
  • IMG_9181.JPG
    IMG_9181.JPG
    209.2 KB · Views: 508
  • IMG_9183.JPG
    IMG_9183.JPG
    200.2 KB · Views: 516
  • IMG_9184.JPG
    IMG_9184.JPG
    205.2 KB · Views: 543
  • IMG_9168.JPG
    IMG_9168.JPG
    189.4 KB · Views: 531
  • IMG_9170.JPG
    IMG_9170.JPG
    196.7 KB · Views: 508
  • IMG_9171.JPG
    IMG_9171.JPG
    211.5 KB · Views: 520
  • IMG_9162.JPG
    IMG_9162.JPG
    116.5 KB · Views: 483
  • IMG_9163.JPG
    IMG_9163.JPG
    151.1 KB · Views: 482
  • IMG_9164.JPG
    IMG_9164.JPG
    184.8 KB · Views: 492
  • IMG_9190.JPG
    IMG_9190.JPG
    163.7 KB · Views: 493
  • IMG_9208.JPG
    IMG_9208.JPG
    231.9 KB · Views: 494

paul

Well-Known Member
Site Donor
Messages
321
Reaction score
305
Location
Australia, Queensland, Gold Coast
Week 24 .........trunk lid had some pin holes at rear end (where badges attach) cut away revealing rust on inside so new outer and inner pieces cut and welded in. LH front fender had some lead repairs (dodgy work) so cut out and new piece fabricated. Unpick inner panels front guards.......cut and repair....refit. Has been a lot of work in these front fenders. Pity you can't buy them new.:( In 2 weeks time all welding /cutting /patching should be finished. then on to hammering ready to go to Spray shop. (2 months there probably) I looked into the tunnel today and saw a very dim light at the end :rolleyes: Engine is coming along ok....Cam in and timed....( all good Don) had to get extra parts ceramic coated. I don't think I will get this machine on the road until Feb next year...............oh well.
 

Attachments

  • IMG_9606.JPG
    IMG_9606.JPG
    161.7 KB · Views: 441
  • IMG_9610.JPG
    IMG_9610.JPG
    231.3 KB · Views: 424
  • IMG_9611.JPG
    IMG_9611.JPG
    237.8 KB · Views: 445
  • IMG_9604.JPG
    IMG_9604.JPG
    151.2 KB · Views: 420
  • Inner Guard Supports.JPG
    Inner Guard Supports.JPG
    337.6 KB · Views: 440
  • Repaired Support.JPG
    Repaired Support.JPG
    452.2 KB · Views: 430
  • Dodgy Lead Repairs.JPG
    Dodgy Lead Repairs.JPG
    243.4 KB · Views: 418
  • IMG_9599.JPG
    IMG_9599.JPG
    252 KB · Views: 439
  • New Piece Fitted.JPG
    New Piece Fitted.JPG
    243.8 KB · Views: 443
  • IMG_9618.JPG
    IMG_9618.JPG
    211.9 KB · Views: 455
  • IMG_9619.JPG
    IMG_9619.JPG
    196.9 KB · Views: 447

paul

Well-Known Member
Site Donor
Messages
321
Reaction score
305
Location
Australia, Queensland, Gold Coast
More Pics
 

Attachments

  • IMG_9627.JPG
    IMG_9627.JPG
    97.6 KB · Views: 420
  • IMG_9628.JPG
    IMG_9628.JPG
    107.9 KB · Views: 433
  • IMG_9631.JPG
    IMG_9631.JPG
    208.4 KB · Views: 430
  • IMG_9632.JPG
    IMG_9632.JPG
    218 KB · Views: 450
  • IMG_9633.JPG
    IMG_9633.JPG
    244.9 KB · Views: 449
  • Inner Struts.JPG
    Inner Struts.JPG
    191.9 KB · Views: 463
  • Schrick 282 Camshaft 2.jpg
    Schrick 282 Camshaft 2.jpg
    93.4 KB · Views: 451
  • Schrick 282 Camshaft.jpg
    Schrick 282 Camshaft.jpg
    393.5 KB · Views: 466

Wladek

Well-Known Member
Messages
1,316
Reaction score
799
Location
Gdansk, POLAND
Wladek...............3" Roll Lock sanding pads 36 grit with right angle Roll Lock sander. :)
Yesterday received my new 3" wireless grinder, didn't tested it yet, but hope to make it as soon as possible.
Thank's for advice of grinder diameter Paul;)

p.s. NICE WORK SIR!!!
The question is - what type of bolts on cylinder head & what kind of engine mount bracket you used & why (because of headers)?
 

Attachments

  • 20181003_150510.jpg
    20181003_150510.jpg
    194.8 KB · Views: 424
Last edited:
Top