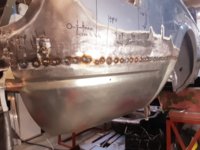
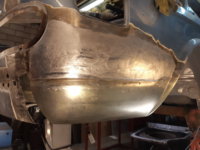
I snapped that photo before working the hem with a hammer and dolly to clean it up, and also before I removed the floor mat button. I collect these odd and end parts even though I'll likely never use them. By the way, I did seem to lose one of the captured nuts that hold the seat rail down. It is a loose square nut - not sure the size - that is "captured" within a little metal pocket. If anyone has one available...
Regarding spot weld drills, happy to share. When it comes to tools, I believe in getting the best quality you can afford (and cost doesn't always determine quality). But your problem is with the $5 HF drills. You need to spend, like, three times that. The ones I have are from Amazon for a whopping $16.90:

I have to say, once I developed a system, the spot welds are no match. I start by locating the welds to the bet of my ability/visibility. I'll either mark centers with a marker if I am doing a bunch all at once, or I'll go straight for the drill if only doing a few. I then drill pilot dimples with a 5/64" drill bit. I say dimples, because I try not to go all the way through the top layer of metal. Of course, if there is some rot in there, sometimes the bit punches right through. Once the pilot holes are done, I use the spot weld drill. It has a spring loaded pin that rides in the pilot dimple. If you tilt the drill, it will walk. But I start a little slower, and then once a grove is started I go full speed. Each one only takes a few seconds. In critical areas, I start and stop often to make sure I am not going too far. But you can usually tell the moment you go through the top layer - either by a little puff of rust dust, or a flash of heat coloration, or I can often actually feel the layers delaminate.
")