1974 BMW CSE

Markos

Well-Known Member
Site Donor
Messages
13,369
Reaction score
7,502
Location
Seattle, WA
Wouldn't hurt to open up the case just to confirm it's non-LSD. Sometimes there's just a painted "S" rather than a stamp. Paint can wear off of course.

I think you have it backwards. There is always a stamp and sometimes there is a painted S.
 

JetDexter

Well-Known Member
Site Donor
Messages
321
Reaction score
529
Location
Newport Beach, CA
Interesting. I can't find either.

I did have one guru tell me that if I spin the input shaft that generally speaking the output shafts will both spin the same direction for an LSD. These do pass that test, but otherwise, no S stamp or paint indication that I can find. (Though there is a considerable amount of grease to be cleared if I were to search the entire body- I haven't yet had the time to do that).

Here is the top stamping BTW: diff-top.jpg
 

Bmachine

Well-Known Member
Site Donor $
Site Donor $$
Messages
3,525
Reaction score
1,778
Location
Northern California coast
So.... hate to bring this up but, am I seeing what I think I am seeing here? Because if these are actually gaping rust holes in the frame rail, whether the diff is limited or not is going to be of fairly minor importance.


Rust-1.jpg
 

Markos

Well-Known Member
Site Donor
Messages
13,369
Reaction score
7,502
Location
Seattle, WA
So.... hate to bring this up but, am I seeing what I think I am seeing here? Because if these are actually gaping rust holes in the frame rail, whether the diff is limited or not is going to be of fairly minor importance.

Spending $250 (at most) on frame rails shouldn’t diminish one’s desire to nail down drivetrain specifics. I have holes in my drivers frame rail and I’m not the least bit concerned.

https://www.alfaparts.net/bmwcs.htm
 

JetDexter

Well-Known Member
Site Donor
Messages
321
Reaction score
529
Location
Newport Beach, CA
Haha, yes, I think one topic doesn't affect the other:) True, the passenger rail is about shot and will be replaced. Probably the other side as well just to be wholistic about things.

I am just wanting that diff to go to a good home, and if it's limited, then there are a lot of homes out there that would want it.

That photo sure does look scary though! There's some work to be done to say the least.
 

JayWltrs

Well-Known Member
Site Donor $
Messages
954
Reaction score
534
Location
Oklahoma City
Haha, yes, I think one topic doesn't affect the other:) True, the passenger rail is about shot and will be replaced. Probably the other side as well just to be wholistic about things.

I am just wanting that diff to go to a good home, and if it's limited, then there are a lot of homes out there that would want it.

That photo sure does look scary though! There's some work to be done to say the least.

I think the worse condition your car is in, the greater likelihood it would never have survived to a full rebuild. So the pics of this much rust, cancer, and bad old repairs probably make the purists more comfortable. Not bagging on the purists--90% of the people involved with E9s likely have a big % of purist in them--but these types of projects are perfect to save a car that might otherwise have been a donor or abandoned project with someone else.
 

JetDexter

Well-Known Member
Site Donor
Messages
321
Reaction score
529
Location
Newport Beach, CA
Hi guys,
Thanks again for all the banter. Great thoughts all around.

I should have a full update next week, but after some time at work, we have made good progress tearing her down. Next week she goes off to be glass blasted and if I am lucky there will return with some factory metal to work with:)

I am posting a few things in the classifieds. The Engine and tranny is taken (or at least a lowball offer has been made and tentatively accepted). I still have a nice fuel tank/sender and red cooling fan. Also my euro rear fog light and trim if someone might be interested in it. It is cool and euro, but I am opting for the cleaner look without it.

Later for now-

Rear-empty.gifFog-Light.gif
 

JetDexter

Well-Known Member
Site Donor
Messages
321
Reaction score
529
Location
Newport Beach, CA
Spending $250 (at most) on frame rails shouldn’t diminish one’s desire to nail down drivetrain specifics. I have holes in my drivers frame rail and I’m not the least bit concerned.

https://www.alfaparts.net/bmwcs.htm

Thanks Markos, I have my new frame rails arriving next week, along with new floors of course from my local guy. Now I gotta go watch that YouTube video on how to weld.
 

JetDexter

Well-Known Member
Site Donor
Messages
321
Reaction score
529
Location
Newport Beach, CA
Here's another full update from the blog. Once again, it's written for the general public. You guys know these cars better than I or those that read the blog, so don't be too offended:)

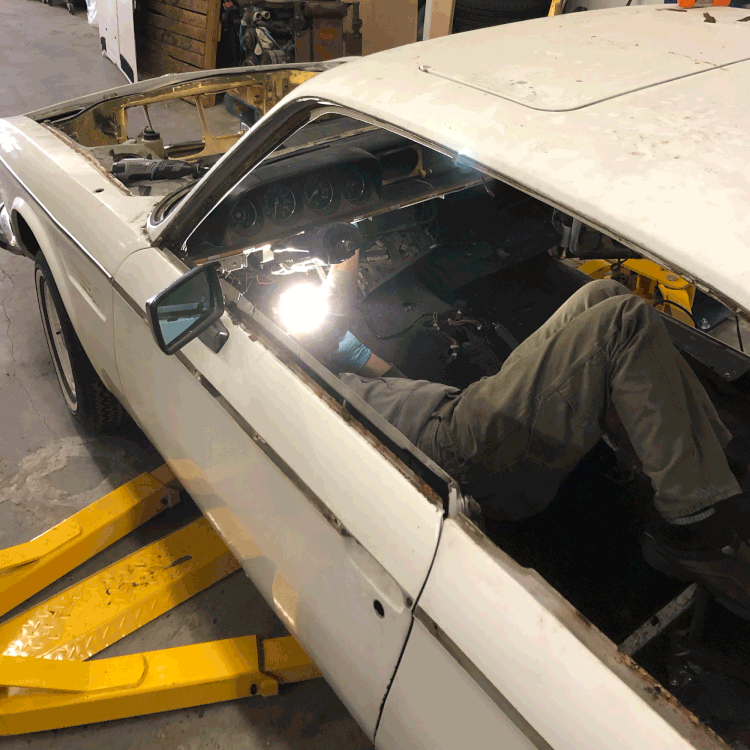
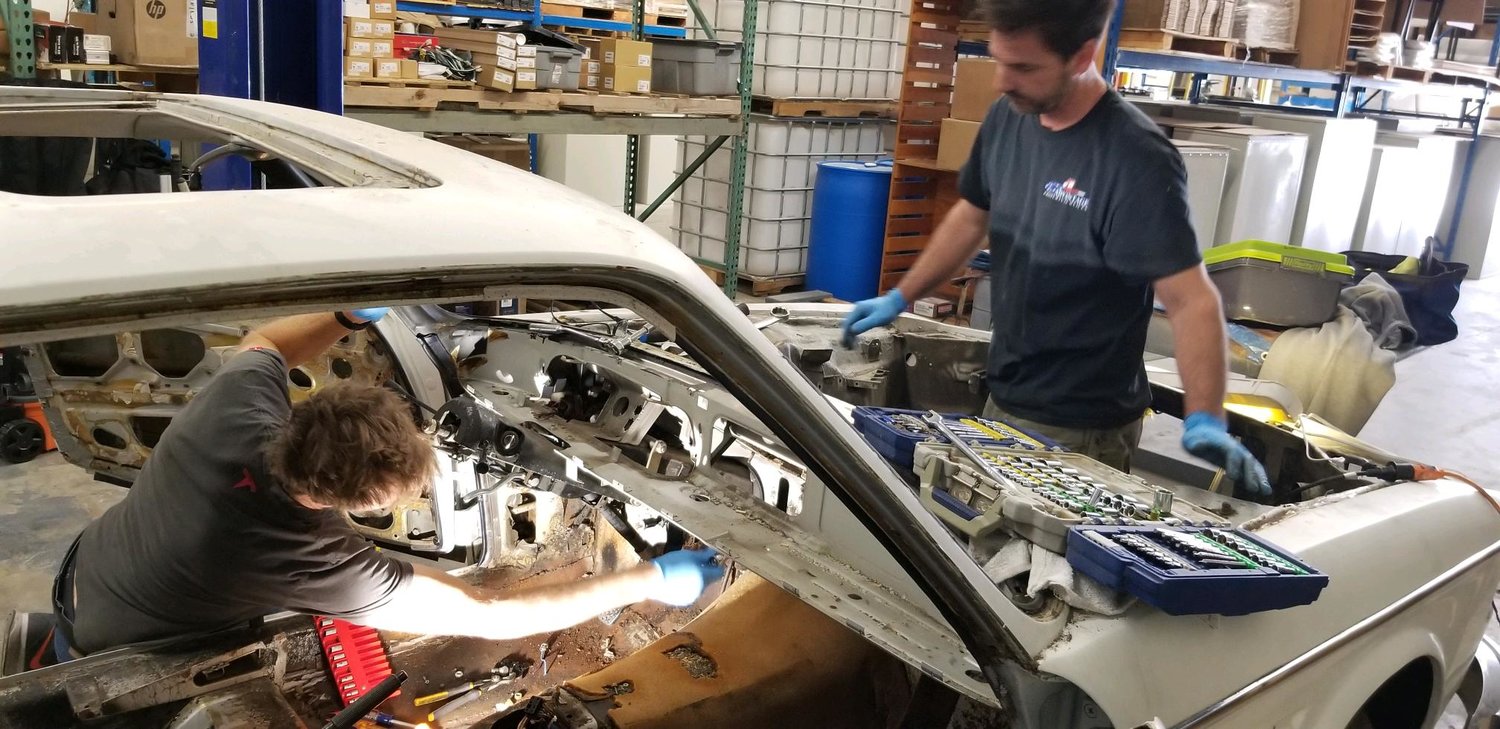
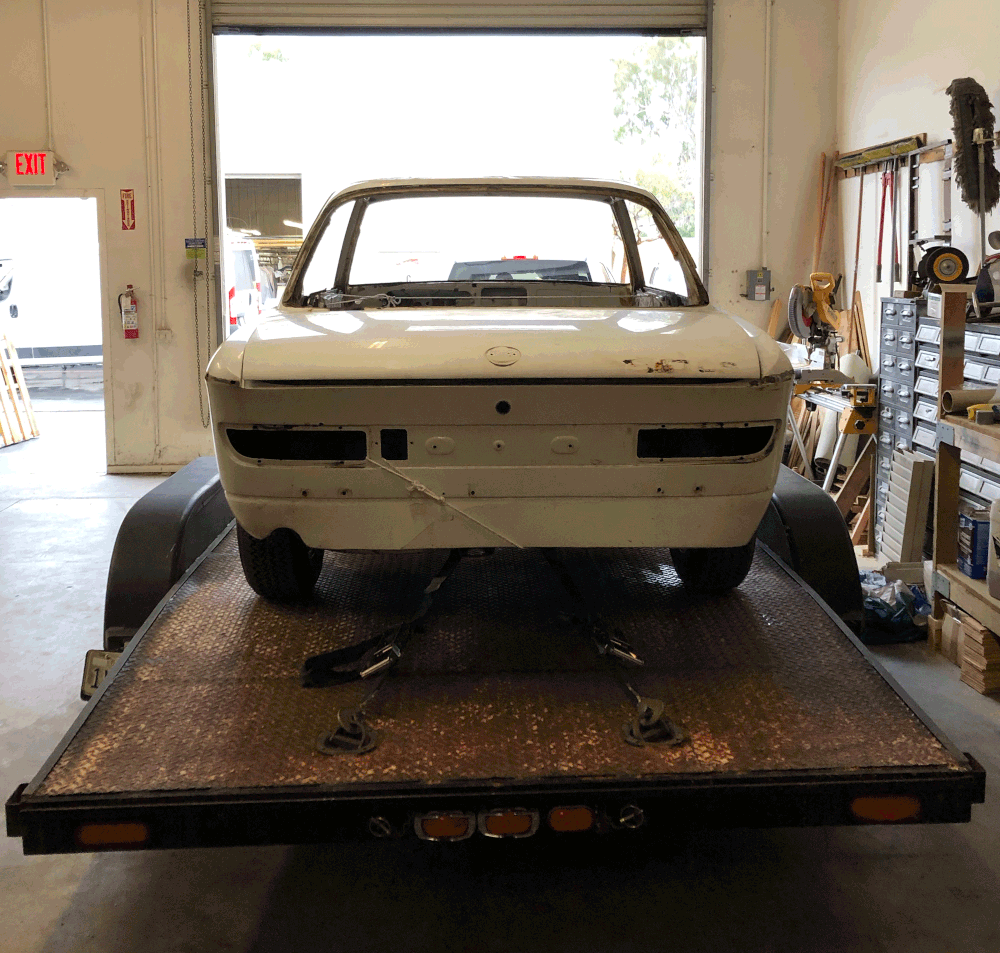
November was an extremely busy month outside of this project. We only were able to fit in a few half-day sessions on the car, but that was enough time to get her stripped down and sent off to be blasted.

The Hanz and Franz Effect

Man-Under-Dash.gif

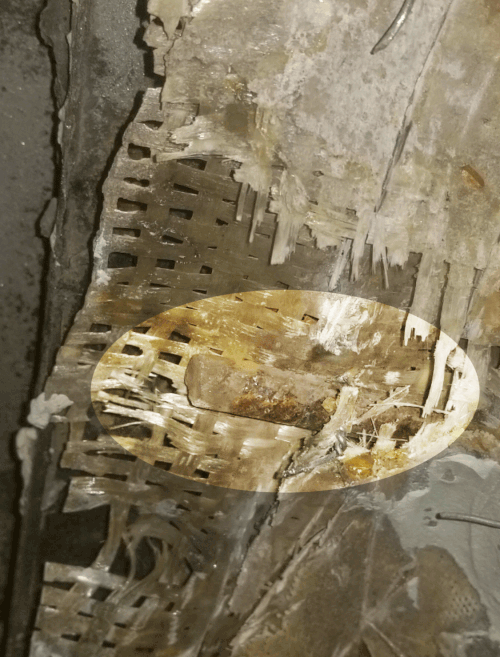
Since Karmann had coach-built these cars for BMW, we discovered some very interesting peculiarities as we were disassembling. At the risk of sounding insensitive (but with a tribute to Saturday Night Live) we dubbed this the “Hanz and Frans” approach to building cars.

The best we can tell, Hanz was responsible for the driver’s side, while Frans assembled the passenger side. Where Hanz would use a 5mm phillips screw to attach a bracket, Frans would use a 6mm hex bolt to attach the same bracket on his side. One might argue that this was not the case - instead attributing it to 44 years of repair work done by various people. Probably so. We prefer to imagine Hanz and Frans starting the day with a good strength workout, putting down plenty of sausage, then getting to work assembling the car each using whatever bin of fasteners they had handy.

inside.jpg

The Quality and Design

On the other hand, it was equally fascinating to discover some wonderful engineering and design. The dash for example. While it appears to be robust component, it is instead a series of small layered assemblies. The steel of the dash frame forms the entirety of the shape. Wonderfully high grade plywood forms the dash trim pieces themselves, and 44 years later, they are still in terrific condition.

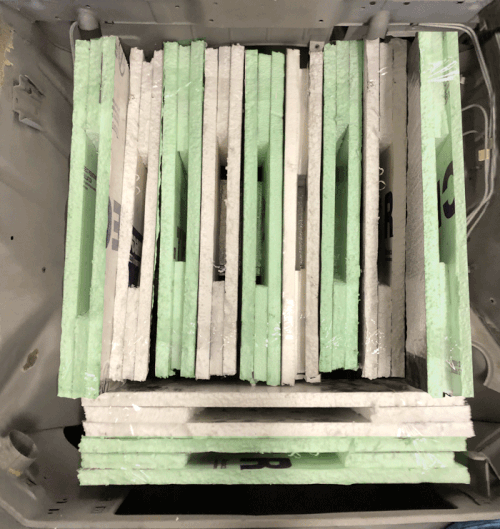
We bagged, tagged, binned, and categorized every part on the car. So many trim pieces are in terrific shape and can go right back on, while so many more will be cleaned, straightened, polished, painted, wrapped, powdered, or chromed.

Stripped+from+Front.gif

We had great fun cutting away every bit of wiring in the car. One buddy that dropped by left in horror wondering how we were planning to recreate the wiring harness. We could hear him yelling as he drove off “So long suckas- have fun putting that back together!”

We wanted to start fresh with the wiring for a few reasons: First, none of the wiring that had to do with the gas motor will apply. Second, we want to modernize how the lights and windows are powered. No longer does every light, motor and switch require several wires running to it. We will be running LEDS for nearly every light, so fewer, smaller gauge wires can be ran to just about everything. Finally, we need to account for the 12v side of the EV systems. For the combination of these reasons, we want to design an entirely new wiring schematic. The goal is that it will look like we bought and installed a modern factory wiring harness.

Off to the Blaster

Leaving-the-Shop.gif


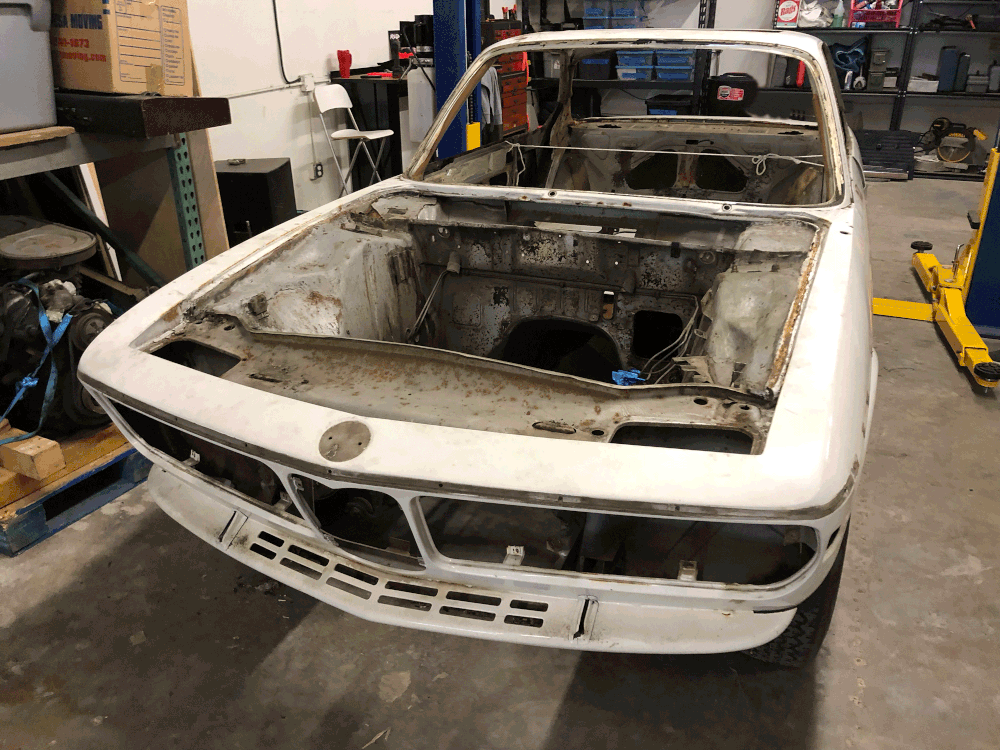
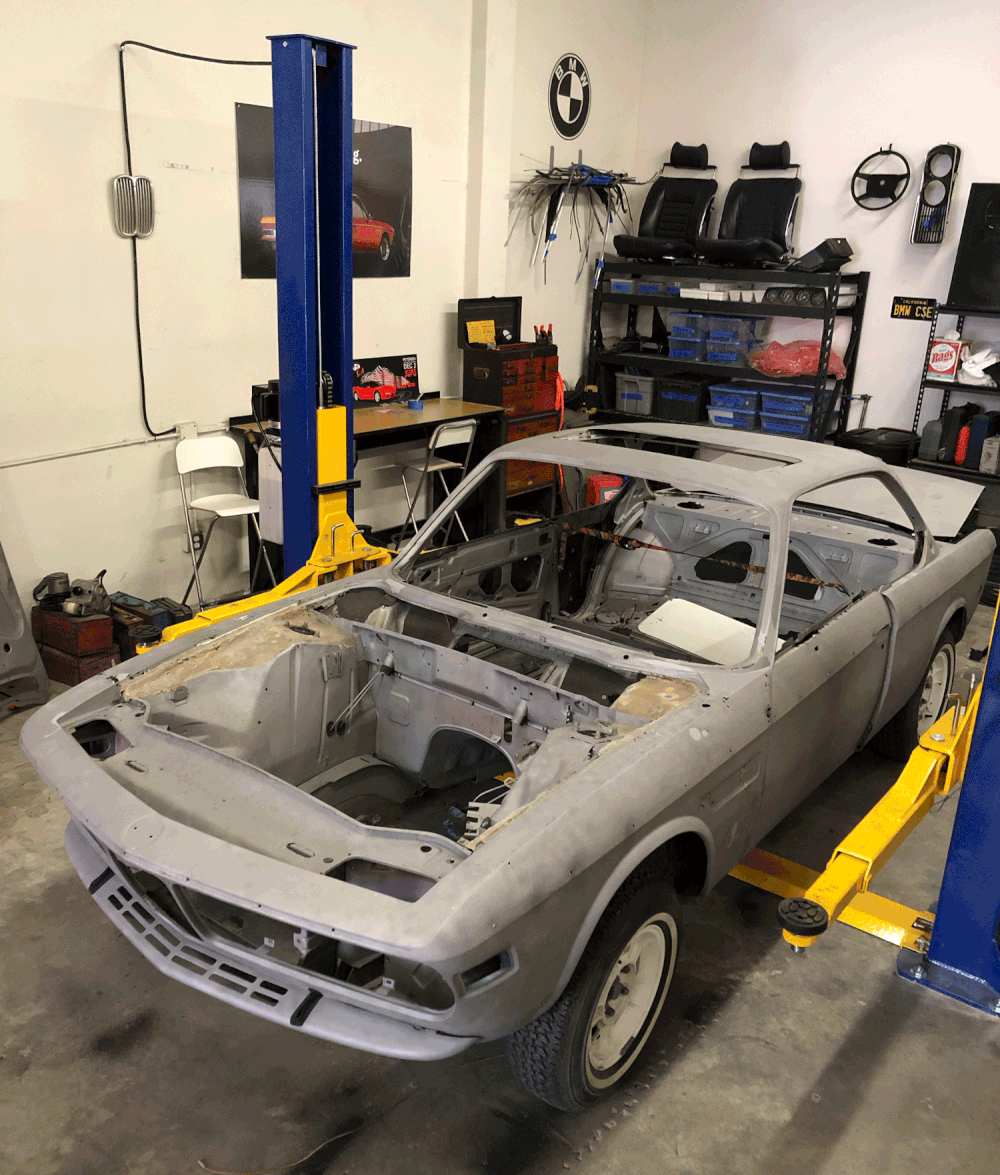
Finally, she was ready to head to the blasting shop. We agonized about removing the suspension and fabricating a dolly for her, but in the end we opted to send her off on her own tires. We will remove the suspension when she returns and finish grinding and sanding those last sections ourselves before we begin the metalwork.

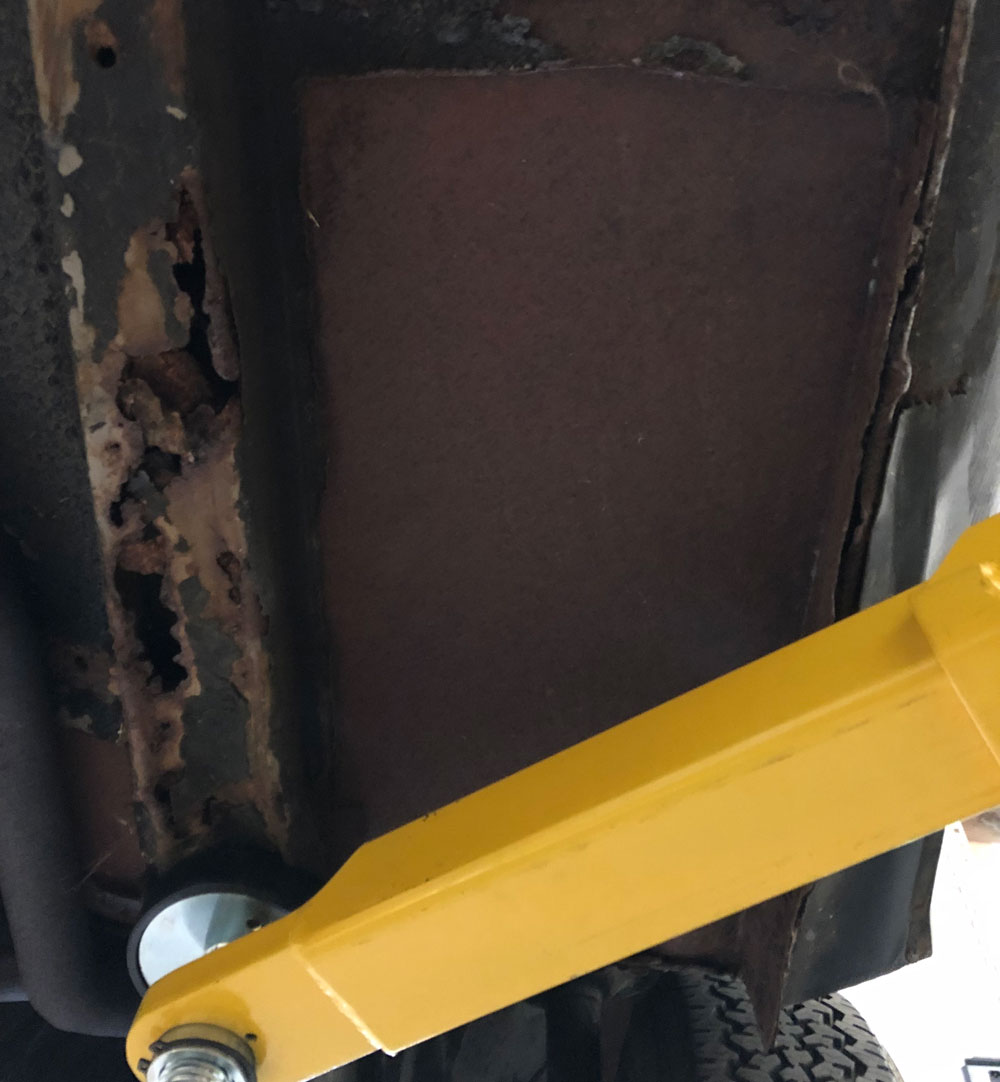
We can’t wait to see her return as bare metal. We have new floors and frame rails ready to weld in along with a number of other areas which we will better evaluate when the paint is off.

Until next time!

Paul
 

JetDexter

Well-Known Member
Site Donor
Messages
321
Reaction score
529
Location
Newport Beach, CA
Happy New Year folks! Here's another blog post update from bmwcse.com:

Swiss Cheese and the Rebar Method

Blasted-Car.gif

Last week the coupe arrived back from the glass blaster. We knew that we were going to discover hidden issues, so we weren’t surprised to find quite a few areas with poor metal work and plenty of filler covering things up. The car had been repainted 10 or so years ago, and one can hide a lot of sins under a fresh coat of paint.

Now that all is exposed, we have plenty of Swiss Cheese holes. Behind the sunroof (where the water drains had clogged decades ago). On fenders, behind rear wheels, doors and more.
Front-Blasted.gif


1546286022454


------------------------------------------------------------------------------------------------
The Rebar Method


What we were not prepared to see was rebar. Inside the driver’s front wheel well was plenty of fiberglass, reinforced with rebar and more fiberglass. Scott, our faithful blaster said that in his years of blasting restorations he has never discovered rebar as a structural component. I never thought that Home Depot would have many parts for auto restoration.
Rebar-Method.gif


As bad as this is, we already knew of a lot of repairs in the strut supports, so we won’t let this beat us down too much. We will source new metal and get it cleaned up properly. It’s too early to get beat down yet.
------------------------------------------------------------------------------------------------
Battery Module Placement

Batteries-Mock.gif


Now that things are finally clean and free of grease, we took an opportunity to dry-fit some foam models of our Tesla battery modules. Through our research we know that we can run these units vertically with very little gap between them - as little as 3/16” if we configure mounting rails just so and our wiring setup doesn’t push the bolts to the next module. In this photo, we have 9 units across the engine bay (but we may need to reduce this to 8 to allow a bit more room for reality). The far left and right unit are sitting on frame rails, but the center units are extremely low in the bay.

We then add 2 more where the radiator sat, and finally up to 4 more can stack flat on top of the main cluster of modules. This gets us 14+ all in the engine bay, and the bulk of the weight will be much lower than the engine weight which sat much higher in the compartment.

To keep the center of gravity the lowest, we would prefer not to stack that last 3-4 modules on top of the base cluster. One module does fit under the rear seats with some modification to the tunnel. We would have to perform a lot of modification to get one or two where the transmission sat. Finally we could easily get 2 or more in the trunk, but we prefer to not add the weight back there, as the drive unit is as much weight as we like back there.

------------------------------------------------------------------------------------------------

Raspberry Pi for dessert
Raspberry_Pi.png


We picked up a Raspberry Pi with dual isolated CAN Buses and a 7” touchscreen to begin programming our control system. This system will control most of the basic functions of the car from blinking the turn signals, setting the interior to 70 degrees and more. It won’t perform critical motor and braking control, but it will push to the Tesla control unit what preset we are running (i.e. Standard, Sport or Valet modes) I will describe more of these details in a future post.

Well, that’s all there is to report this time around. Happy New Year!

Paul
 

Attachments

  • image.png
    image.png
    180.6 KB · Views: 223
Top