You are using an out of date browser. It may not display this or other websites correctly.
You should upgrade or use an alternative browser.
You should upgrade or use an alternative browser.
tdgray
Well-Known Member
Hey Scott
Not a lot to them. As far as process... When it comes to shapes like that I always use scotchbrite pads. Red to get the surface rust off. Then grey to smooth things out. Wax and grease remover to get all the nooks and crannys clean.
As far as the trim rings and surround trim I use very fine steel wool and then polish them with my bench buffer using the appropriate paste for the material. Have to be really really careful with the surround trim. One misstep and you will wind up with spaghetti.
Oh and pay attention to the lights and their order with the buckets... The buckets are indeed different. On one of them I got them backwards. The plastic adjusters can be installed by hand or in my case I used a drill and a bit to make the process faster. They have a drive on the inside of the "handle". Go slow... very slow.
tdgray
Well-Known Member
Well the 2800 body is coming home tomorrow.... one way or the other.
As I have made progress on many things. A few more I will add after this rant... I have been dying to get the body back here so I can start work on it.... yes I said start.
If we go back in this thread a ways... quite a ways. You may remember that I trailered the car off to blasting in DECEMBER. I was assured that no problem they would get on it and they did... sort of. They hand stripped the top of the hood, trunk and top. A great start. I saw it in person. Then after collecting some additional funds. NOTHING.
It was winter, so I was like no biggie I've got things to work on. I then called in January, February and starting in March I called every two weeks. Each time an excuse, working on it... weather too cold... raining... shop is full of other projects (WTF) etc. In April I started calling every week. Same thing... right on it... yep... working on it....will get in primer this week. May came and I continued my calls. Same.
Fed up and fuming after they didn't even take my call Friday I called today to inform them I would be picking it up tomorrow. PERIOD. Oh the litany of excuses started flying. Just give us until the end of the week. Me- NO. Well we have to finish stripping the hood. ME- Don't care I'm picking it up tomorrow afternoon. Well it won't be in primer... ME - tough shit I can shoot primer too.
Sorry for the rant gents but I am fed up! Again... this is just STRIPPING the car... no body work... nothing more than taking all the paint and garbage off.
i know the feeling all too well ... don't care to count how many years my coupe was at the painter ... with zero body work to be done. but i was lucky, i got an amazing paint job for a song.
tdgray
Well-Known Member
This is exactly why I do all my own work… last time I farm anything out like this. I have people I trust… he was not one of them.
I’ve been taught a long lesson.
I’ve been taught a long lesson.
tdgray
Well-Known Member
Been busy last couple of days but I got it home last evening.
Literally shoved it off the trailer and into the shop.
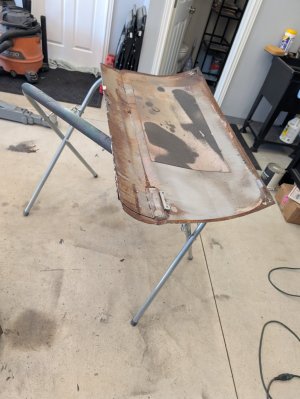
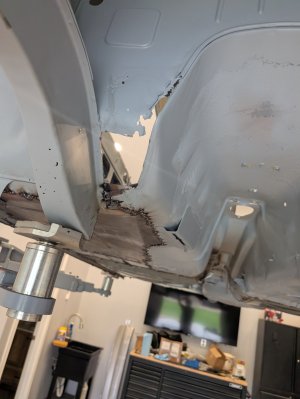
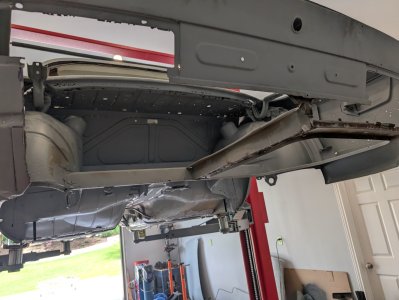
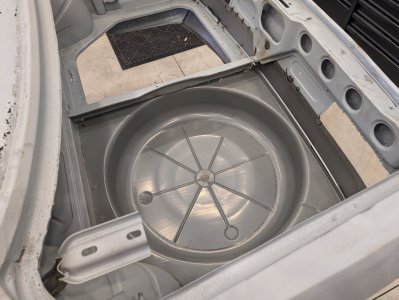
Some of the bad... Post more later. Almost all of this was known. The only part I thought was okay was the spare tire well... Nope... It's swiss cheese.
All the known bad parts are already purchased and in the shop. Have to get the trunk part.
As said .. more to come
Literally shoved it off the trailer and into the shop.
Some of the bad... Post more later. Almost all of this was known. The only part I thought was okay was the spare tire well... Nope... It's swiss cheese.
All the known bad parts are already purchased and in the shop. Have to get the trunk part.
As said .. more to come
Attachments
tdgray
Well-Known Member
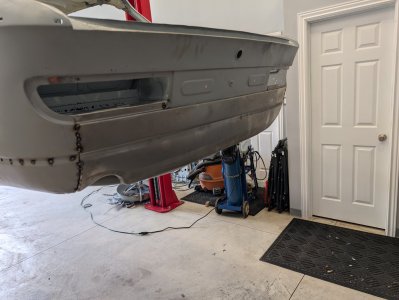
Now for some of the good.
Appears that someone replaced the front clip already. I wondered why the usual places were in such good shape.
Some work to do but nothing major.
Appears that someone replaced the front clip already. I wondered why the usual places were in such good shape.
Some work to do but nothing major.
Attachments
When you look at the “Swiss cheese” it is sometimes good to look back on the project and realise the parts that are already finished. Ready for reassembly and go for the next part.
Last edited:
tdgray
Well-Known Member
Yep. Nothing I have not encountered in previous restorations. I do love that I got a super head start on a lot of the parts that get bolted on after the paint is done. That will make it a very pleasant experience after the long slog of bodywork.
tdgray
Well-Known Member
Good lord I feel terrible for not updating this for a such a long time.
I was going to post something and I looked to see where I was... I'm an idiot. Not even sure where to pickup.
Well I will go back to the last project that was "finished"
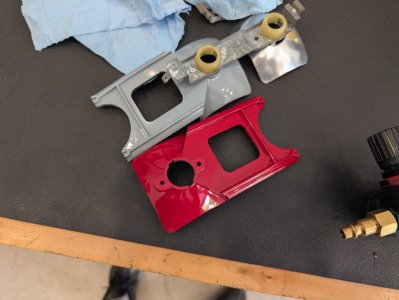
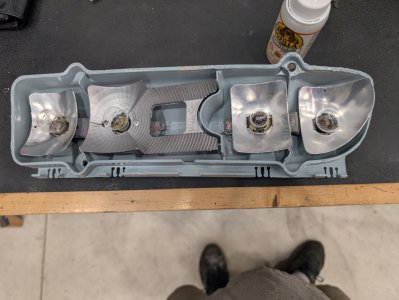
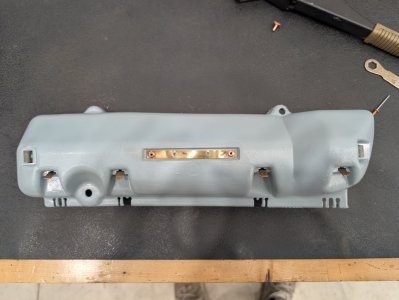
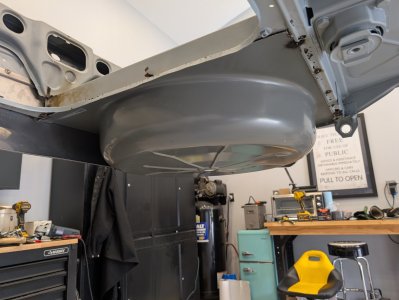
I tore down the taillights for a refresh. They were pretty nasty and I didn't really have an option but to paint the plastic housings. I have also been messing around with powder coating as a little side project. I thought what a good place to practice on the reflectors. I am definitely learning as I go (like no matter how much you clean you will never get all the rust out of pitted metal). But since we are not going for show quality anything here I thought well good enough.
I was going to post something and I looked to see where I was... I'm an idiot. Not even sure where to pickup.
Well I will go back to the last project that was "finished"
I tore down the taillights for a refresh. They were pretty nasty and I didn't really have an option but to paint the plastic housings. I have also been messing around with powder coating as a little side project. I thought what a good place to practice on the reflectors. I am definitely learning as I go (like no matter how much you clean you will never get all the rust out of pitted metal). But since we are not going for show quality anything here I thought well good enough.
Attachments
tdgray
Well-Known Member


tdgray
Well-Known Member
Re skinned that drivers door as well as fixed the upper structure
For those of you that have not skinned a door... It's easiest to just grind the metal around the edges until it seperates. Go slow... Small amounts at a time.
I glued mine... Simpler
For those of you that have not skinned a door... It's easiest to just grind the metal around the edges until it seperates. Go slow... Small amounts at a time.
I glued mine... Simpler
Attachments
tdgray
Well-Known Member
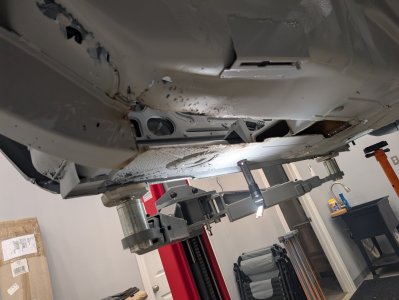
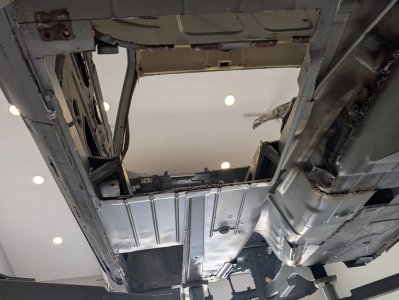
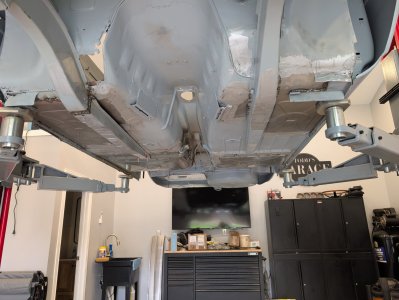
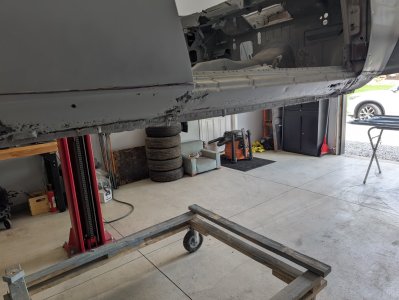
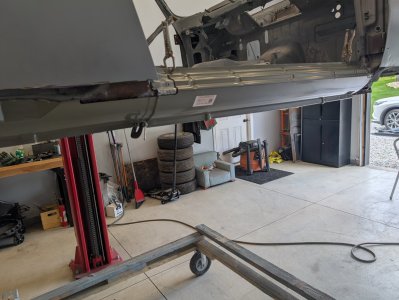
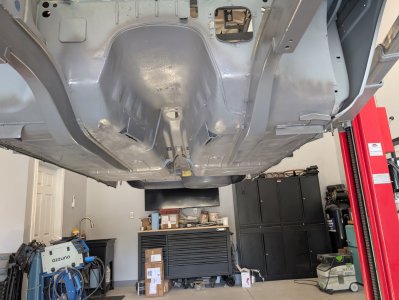
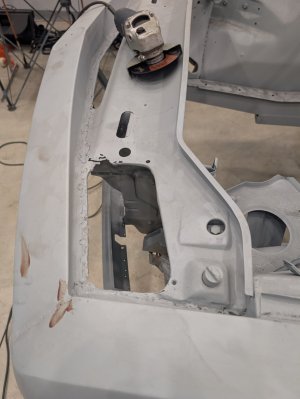
Most of what I have been spending my time on is the underside and the engine bay.
So this involved multiple things.
Replacing the floor pans. The rears I got from WN. Really nice. The fronts I got from Wolf. Those were garbage. I used as much as I could of them but it was a lot of patching in.
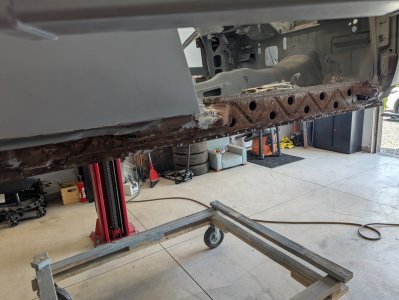
Outer rockers...there were holes but overall the structure was okay. When I got them off the insides were rusty but solid sans for one patch I had to make. Treated them with Ospho and primered.
Various patches... All made by hand. Mostly in the firewall and some places.
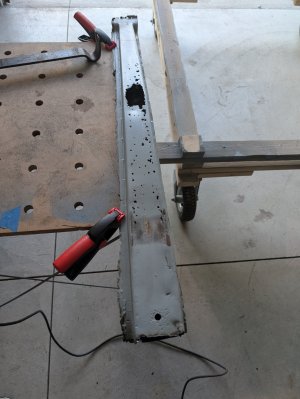
Engine support... Yah... The left one was very swiss cheese... Cut it out. Welded in new structure. Filled it and welded it back on.
So this involved multiple things.
Replacing the floor pans. The rears I got from WN. Really nice. The fronts I got from Wolf. Those were garbage. I used as much as I could of them but it was a lot of patching in.
Outer rockers...there were holes but overall the structure was okay. When I got them off the insides were rusty but solid sans for one patch I had to make. Treated them with Ospho and primered.
Various patches... All made by hand. Mostly in the firewall and some places.
Engine support... Yah... The left one was very swiss cheese... Cut it out. Welded in new structure. Filled it and welded it back on.
Attachments
tdgray
Well-Known Member

tdgray
Well-Known Member
tdgray
Well-Known Member
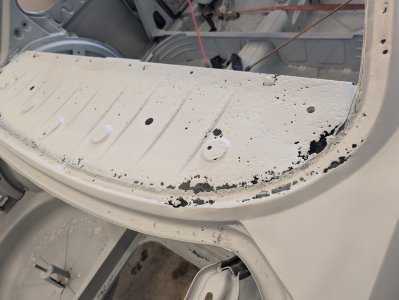
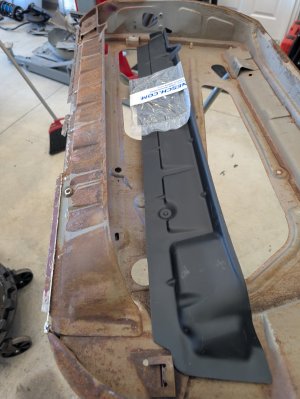
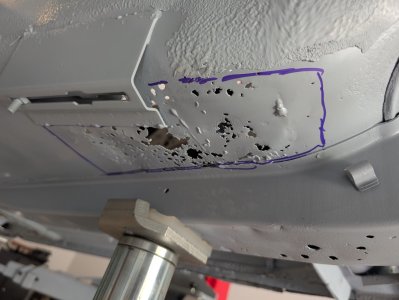
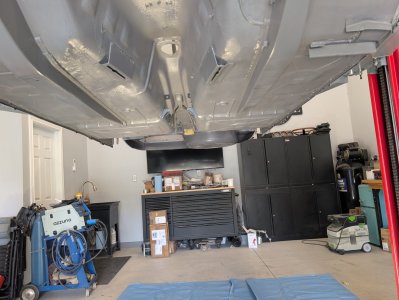
Also did the spare tire area as well. Now that was one pricey panel...again WN. Very high quality. Same with the rear finishing panel very nice quality.
Attachments
tdgray
Well-Known Member
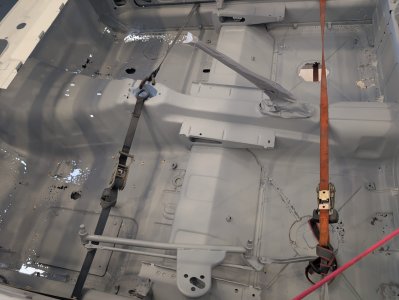
Lots of small holes back there to weld up... Took a long time.
Anyway got the floors and firewall and rockers done before I took off on a business trip.
Textured with schutz and painted when I got back. I did a grey color underneath... I'm taking a few liberties with the paint but I kinda like it.
Anyway got the floors and firewall and rockers done before I took off on a business trip.
Textured with schutz and painted when I got back. I did a grey color underneath... I'm taking a few liberties with the paint but I kinda like it.
Attachments
tdgray
Well-Known Member
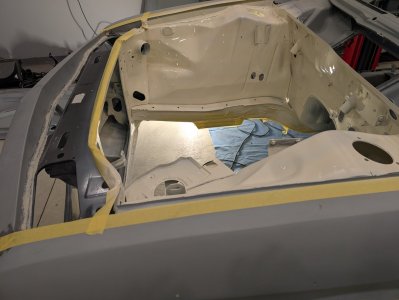
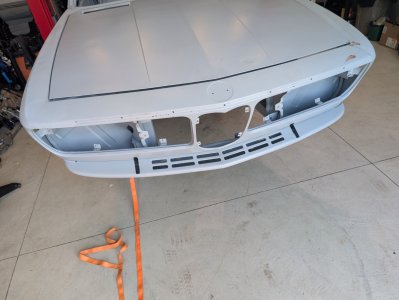
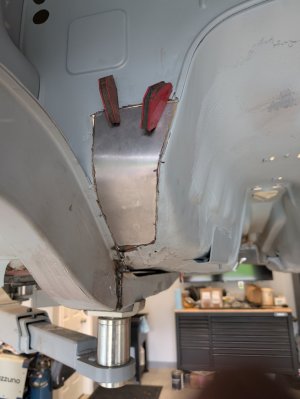
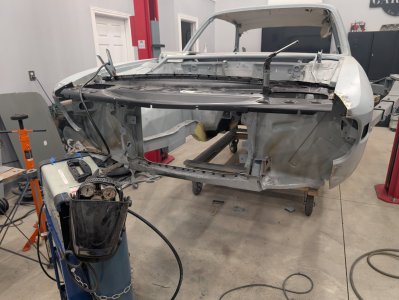
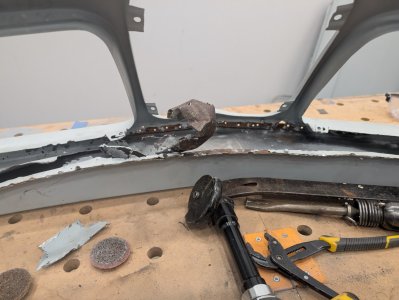
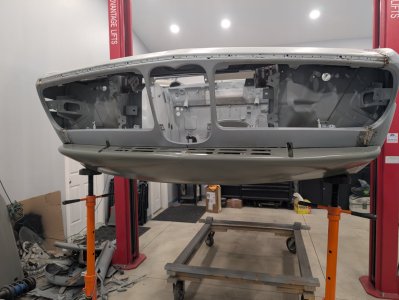
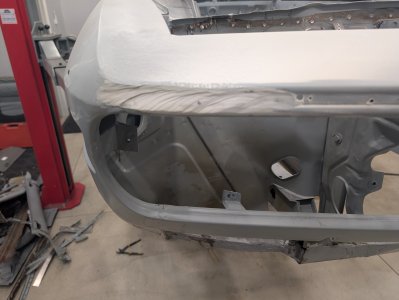
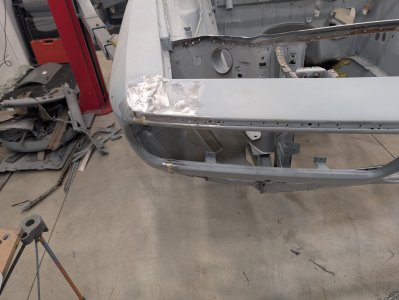
When I was on my trip I started thinking about the front end and what a crappy job the PO did by not replacing the inner nose structure. So I ordered the panel.. and a new chin spoiler which was a mess in itself... Maybe salvageable but screw it
It was there when I returned.
What a shitty job... Which is why they probably didn't do it. They just glob welded the shit out of the old rusty piece
It was there when I returned.
What a shitty job... Which is why they probably didn't do it. They just glob welded the shit out of the old rusty piece
Attachments
Last edited:
tdgray
Well-Known Member
tdgray
Well-Known Member
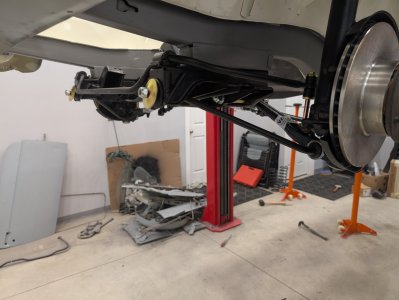
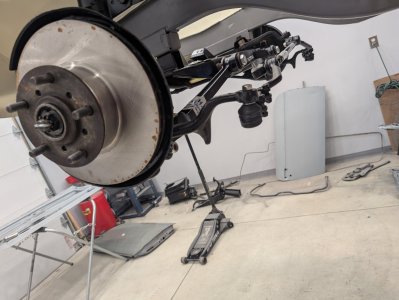
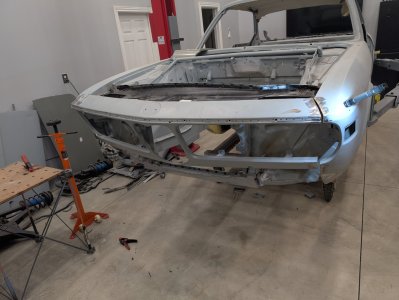
I've got a couple of other projects that need some attention... Primarily my brother in laws Jag and my sons car.
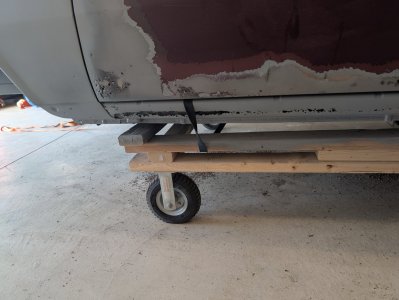
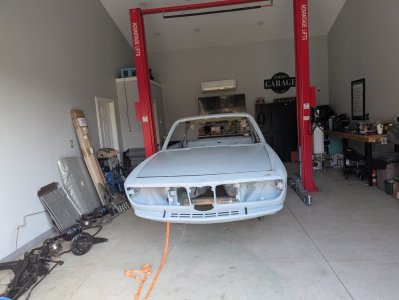
I need to get this thing a little mobile so I can get it around the shop to put other stuff in there for a minute.
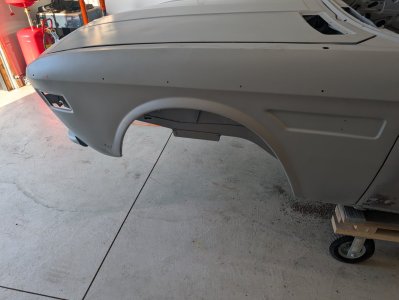
So I cut in the engine bay, inner fenders etc. yes.. this makes the rest of the body work a bit harder but masking plastic and tape are on hand.
Started assembling the suspension so we can roll it in and out.
I have the proper washers... But I went with nylocs... Sorry... They are silver.
I need to get this thing a little mobile so I can get it around the shop to put other stuff in there for a minute.
So I cut in the engine bay, inner fenders etc. yes.. this makes the rest of the body work a bit harder but masking plastic and tape are on hand.
Started assembling the suspension so we can roll it in and out.
I have the proper washers... But I went with nylocs... Sorry... They are silver.