You are using an out of date browser. It may not display this or other websites correctly.
You should upgrade or use an alternative browser.
You should upgrade or use an alternative browser.
Those came out really well!
Fantastic work on the wood!
tdgray
Well-Known Member
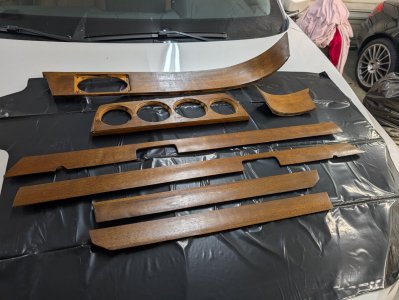
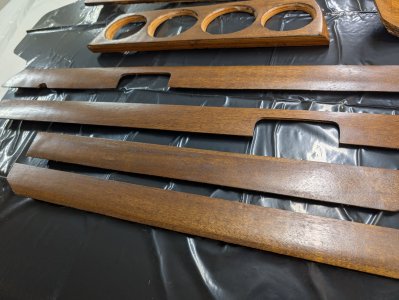
Sorry guys should have added before… someone asked the question… it is mahogany veneer with medium brown dye.
Mahogany is much more readily available in the US with very similar grain structure to European walnut.
Mahogany is much more readily available in the US with very similar grain structure to European walnut.
hmmm ... not so sure i agree with you about a similar grain structure. mahogany is a much more 'open' grain (larger pores). european + american walnut both have a very fine grain which can sand very smooth. the only way to get mahogany that smooth is to fill it. colorwise, mahogany is more orange but a similar color value to european walnut ... american walnut is generally a darker brown. european walnut generally doesn't have much 'figure' in the veneer whereas american walnut often does.
tdgray
Well-Known Member
Yes, Mahogany has a more orange color naturally. That's why I use dyes instead of stains. Dyes tend to actually color while stains mimic along with coloring. This particular piece of veneer was a very nice "plain" bit of mahogany. Very few character marks.
They had American walnut but I always feel it has just a bit too much of a black tone for my taste.
They had American walnut but I always feel it has just a bit too much of a black tone for my taste.
tdgray
Well-Known Member
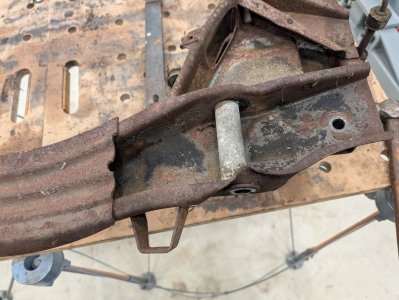
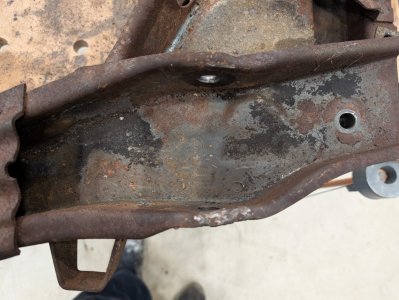
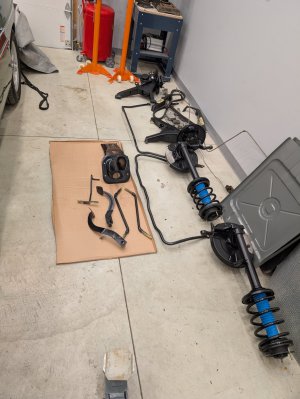
So just to prove I haven't been a slug... Okay.. slightly sluggy as it is winter in Ohio... I did rip down the front suspension which was mainly intact as I dropped the engine and trans from below.
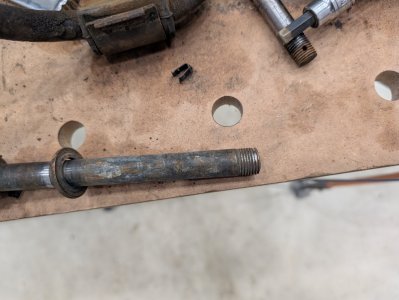
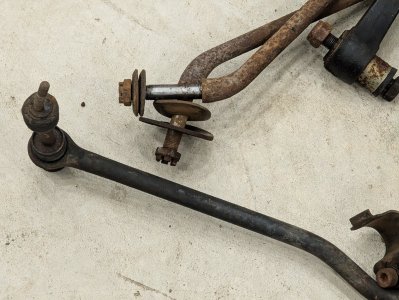
Couple things of note. There was another bent sway bar link. This is the second one. The other in the rear. Also, finally had to cut a bolt off... And it was a big one. The one that attaches the wishbone to the suspension cradle. Someone cross threaded it and it would not come back out.
And just for good fun...the bushings were so toasted, particularly the front frame bushing that it actually bent the suspension frame. I was able to straighten it out a bit. Guess I will need some of those fancy washers you all like so much.
Attachments
tdgray
Well-Known Member
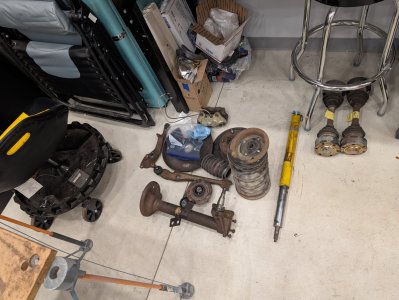
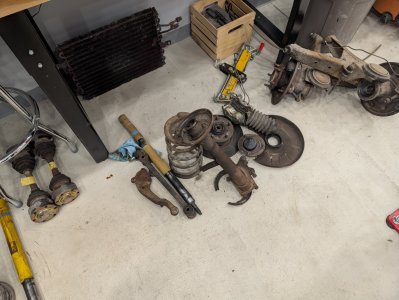
Everything else came apart just fine. Shocks slid right out of the tubes... Plenty of oil in there as they both had blown so they slipped out very easily.
All in nothing major. I am going to switch to 3.0 rotors as the 2800's are just impossible to find.
Now everything needs a bath and some por15. I have all new wishbones, steering links etc. One thing I did not get is new strut bearings. Have to get those before some reassemble.
Parts piles...
All in nothing major. I am going to switch to 3.0 rotors as the 2800's are just impossible to find.
Now everything needs a bath and some por15. I have all new wishbones, steering links etc. One thing I did not get is new strut bearings. Have to get those before some reassemble.
Parts piles...
Attachments
tdgray
Well-Known Member
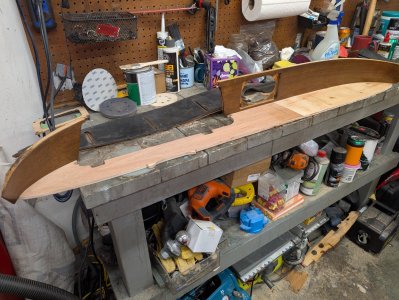
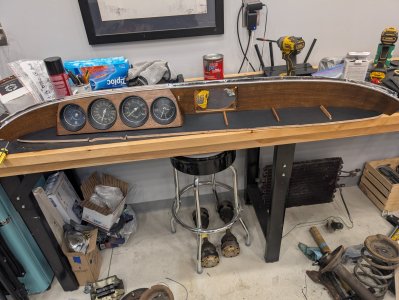
Yesterday I spent some time assembling the dash after making a new bottom.
Came out well. Only thing I need to do is redo the little wood pieces in the bottom. I just had them in there to assess fit.
Big thanks to TomHom for the new / nice used dash. Large improvement over my old stuff obviously... No craters in it.
Came out well. Only thing I need to do is redo the little wood pieces in the bottom. I just had them in there to assess fit.
Big thanks to TomHom for the new / nice used dash. Large improvement over my old stuff obviously... No craters in it.
Attachments

tdgray
Well-Known Member
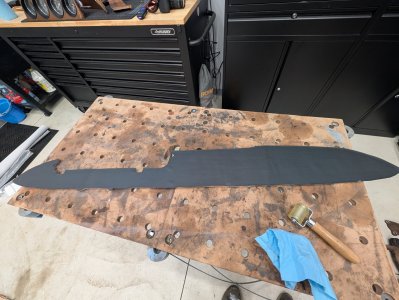
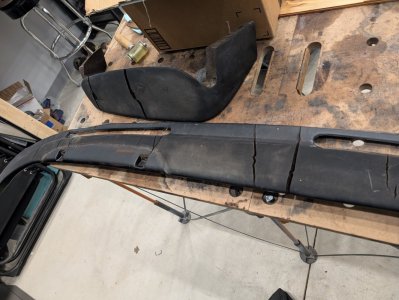
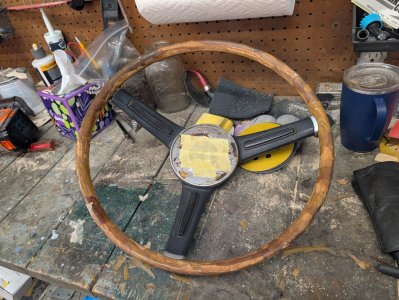
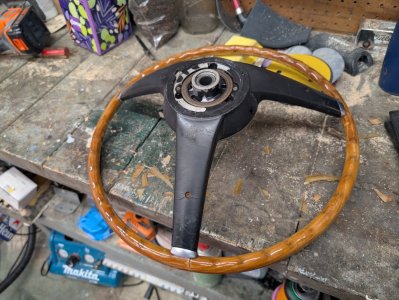
The next victim.
Pretty tough shape but not horrible.
Will sand the plastic spider cracks and fill what can be filled. Couple of larger stress cracks.
Wood is okay... Couple of chunks of veneer missing. No biggie. Can fill those with some tintable filler.
Big job was to get all that clear off... Thick stuff as it should be.
Attachments
tdgray
Well-Known Member
tdgray
Well-Known Member
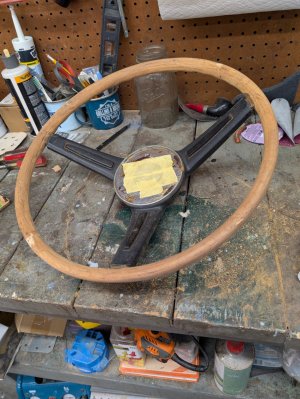
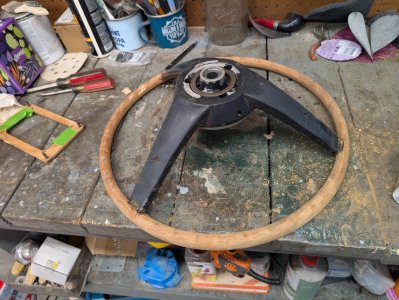
Got the wheel mostly done. Need to final sand and polish the poly.... And find the center... It's in a box somewhere.
It's a good driver quality... Was pretty rough.
Thanks a ton to Kris (Krzysztof) for the reproduction trim... Nice stuff.
I only needed one piece so I have 5 pieces if anyone needs some…. The old ones not the new shiny stuff.
It's a good driver quality... Was pretty rough.
Thanks a ton to Kris (Krzysztof) for the reproduction trim... Nice stuff.
I only needed one piece so I have 5 pieces if anyone needs some…. The old ones not the new shiny stuff.
Attachments

Last edited:
tdgray
Well-Known Member
Also have the rear trailing arms torn down.
I really gotta start painting stuff. Just been so cold… like unbelievably cold.
question for the group… what color are the trailing arms supposed to be? I see black paint and they don’t look like they’ve been redone but who knows.
Also, is the rear sub frame the same color then? EDIT - found what Scott calls the subframe in his color list… says gray…. Same one I am referencing?
Last edited:
I think it depends on build year. Some came in an grey, slightly olive color.
My car came with black on all chassis parts. Even has the original yellow paint streaks on the rear half shafts.
My car came with black on all chassis parts. Even has the original yellow paint streaks on the rear half shafts.
tdgray
Well-Known Member
Interesting. Well my half shafts are black and yes, there was some yellow paint streaks on them. Hubs in the rear trailing arms still have the brown paint mark inside on the nut and retaining ring.
tdgray
Well-Known Member
It's been a bit since posting... Haven't been super busy but still poking at things as I can.
Finally painted some parts and put the front struts back together. New bushings in the trailing arms and bushings in the front suspension cradle.
Finally painted some parts and put the front struts back together. New bushings in the trailing arms and bushings in the front suspension cradle.
Attachments
Last edited:
tdgray
Well-Known Member
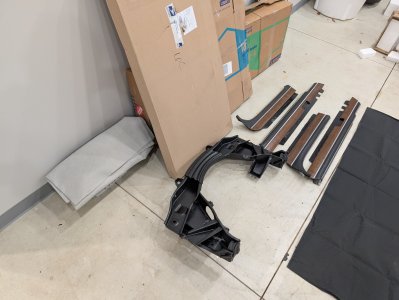
Mostly have been collecting parts until I get the body back.
Have new floor both front and back. Was going to work with the back ones as is but decided just to go new. Also have new skin for the drivers door and a new rear valence as the one on the car is bent to shit.
Also a new rocker cover panel as was missing one.
Have new floor both front and back. Was going to work with the back ones as is but decided just to go new. Also have new skin for the drivers door and a new rear valence as the one on the car is bent to shit.
Also a new rocker cover panel as was missing one.
Attachments
tdgray
Well-Known Member
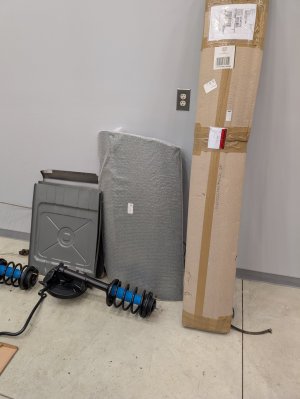
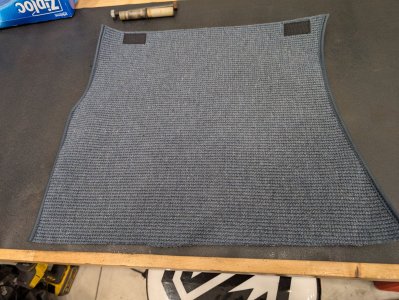
New carpets from Germany.... New seat covers and all the associated trim acquired as well.
Time to get started on the upholstery since we still have no body.
Maybe with the weather breaking a bit this week the guy stripping the car can get moving. It has been a bit of a brutal winter here in NE Ohio.
Time to get started on the upholstery since we still have no body.
Maybe with the weather breaking a bit this week the guy stripping the car can get moving. It has been a bit of a brutal winter here in NE Ohio.
Attachments

tdgray
Well-Known Member
Oh and I decided to switch to vented 3.0 rotors.
A little confused as to which calipers to switch to and for that part… which pads.
Advise needed.
A little confused as to which calipers to switch to and for that part… which pads.
Advise needed.
One option is to add spacers to your existing calipers during the rebuilding process so they can accommodate vented rotors.Oh and I decided to switch to vented 3.0 rotors.
A little confused as to which calipers to switch to and for that part… which pads.
Advise needed.
@halboyles sells them.
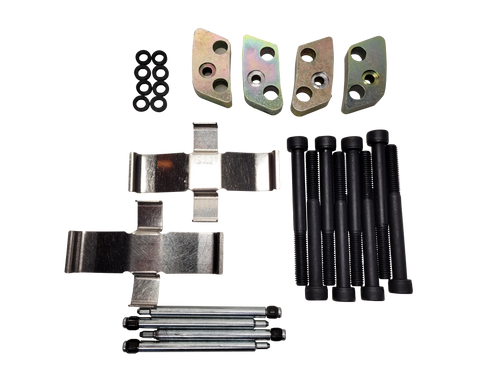
Tii/6 Cylinder Vented Caliper Spacers | 2002s Only
Includes spacers, bolts, nuts, O-rings, pin and spring kit.There are two versions of the large calipers used on the 60s and 70s BMWs. Please see attached graphic to determine which ones you have. Our spacer kit will fit both the early and late. Because the pad opening is narrower on the early...
 www.2002sonly.com