72 3.0 CS 2240344 Restoration

I'll be spending the weekend assembling work benches and organizing the space. Planning to build some frames to hold big items like the hood, and the doors, so I can work on them without having them either on the car, or getting banged up on the floor leaning against the wall.

I am also planning to remake the entire wire harness (the current one is a hot mess, and is 53 years old...). to do that I am going to create a vehicle "buck" that allows me to position the wires in 3D to create the new harness. I am working on this idea with a fellow fortnite, so we'll see how this progresses.
 
Moved my son's old Bronco over to the shop today. Had to drill out the ignition key tumbler since the key seems to have disappeared. My that's a terrible vehicle to drive! Steering wanders all over, very stiff suspension, etc.. Planning to drop an EFI crate motor in it since the carbureted 302 is pretty balky.. A project for a time after the E9 is done...

IMG_5082.jpg
 
I know this is step 4001 in the restoration, but I am wondering what techniques the forumites have used to renovate the original aluminum roundels. Mine are the aluminum ones with raised lettering. I am pretty sure I can polish the aluminum to a high shine. So what is best to fill the colored areas?

On my Bronco I renovated the FORD letters in front using carefully matched and carefully applied nail polish. Several layers of polish did a good job of creating a shiny fill. I was thinking of doing the same on the roundels. I am hoping that I can get the layers of polish thick enough that they at least partially fill the places that are not raised, although I'm a bit concerned about the curve of the roundel causing the polish to be thicker around the outer edges of each recessed area.

Thoughts or suggestions?
 
Last edited:
go to Home Depot, Lowes or Costco and buy a bunch of the black plastic boxes with yellow lids and organize the parts into boxes as you take them off. take tons of pictures. i would also write a list of things you put into the boxes. you can organize the boxes how ever you see fit, but i suggest organization like exterior trim, interior trim, doors + windows, trunk, hood, brakes, lights, etc. then, when you buy new stuff, you put the new parts into the same organization.

i also recommend that you create bags that work with the orange book / real oem pages for all new bolts, nuts, washers + screws - keep the old ones and match the new ones as you replace them.
I was thinking of doing a bolt inventory using realoem, and then just buying a pile of bolts, nuts and washers from Belmetric, and putting them in one of those plastic drawer organizers, so I have a stock ready when i need it
 
Start by looking in the FAQ There is a list by location and another by size in the thread I started with technical drawings etc. it’s not 100% accurate but a good start
 
And again!

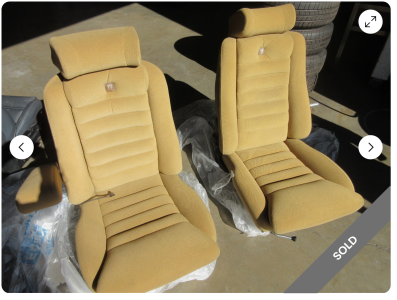
We will probably be re-covering these in a white/grey leather...
 

Attachments

  • Screenshot 2025-10-31 at 8.58.53 PM.png
    Screenshot 2025-10-31 at 8.58.53 PM.png
    2.9 MB · Views: 21
  • Like
Reactions: LEO
Back
Top