CSL Restoration

Marc-M

Well-Known Member
Messages
377
Reaction score
311
Location
Preston - Lancashire-UK
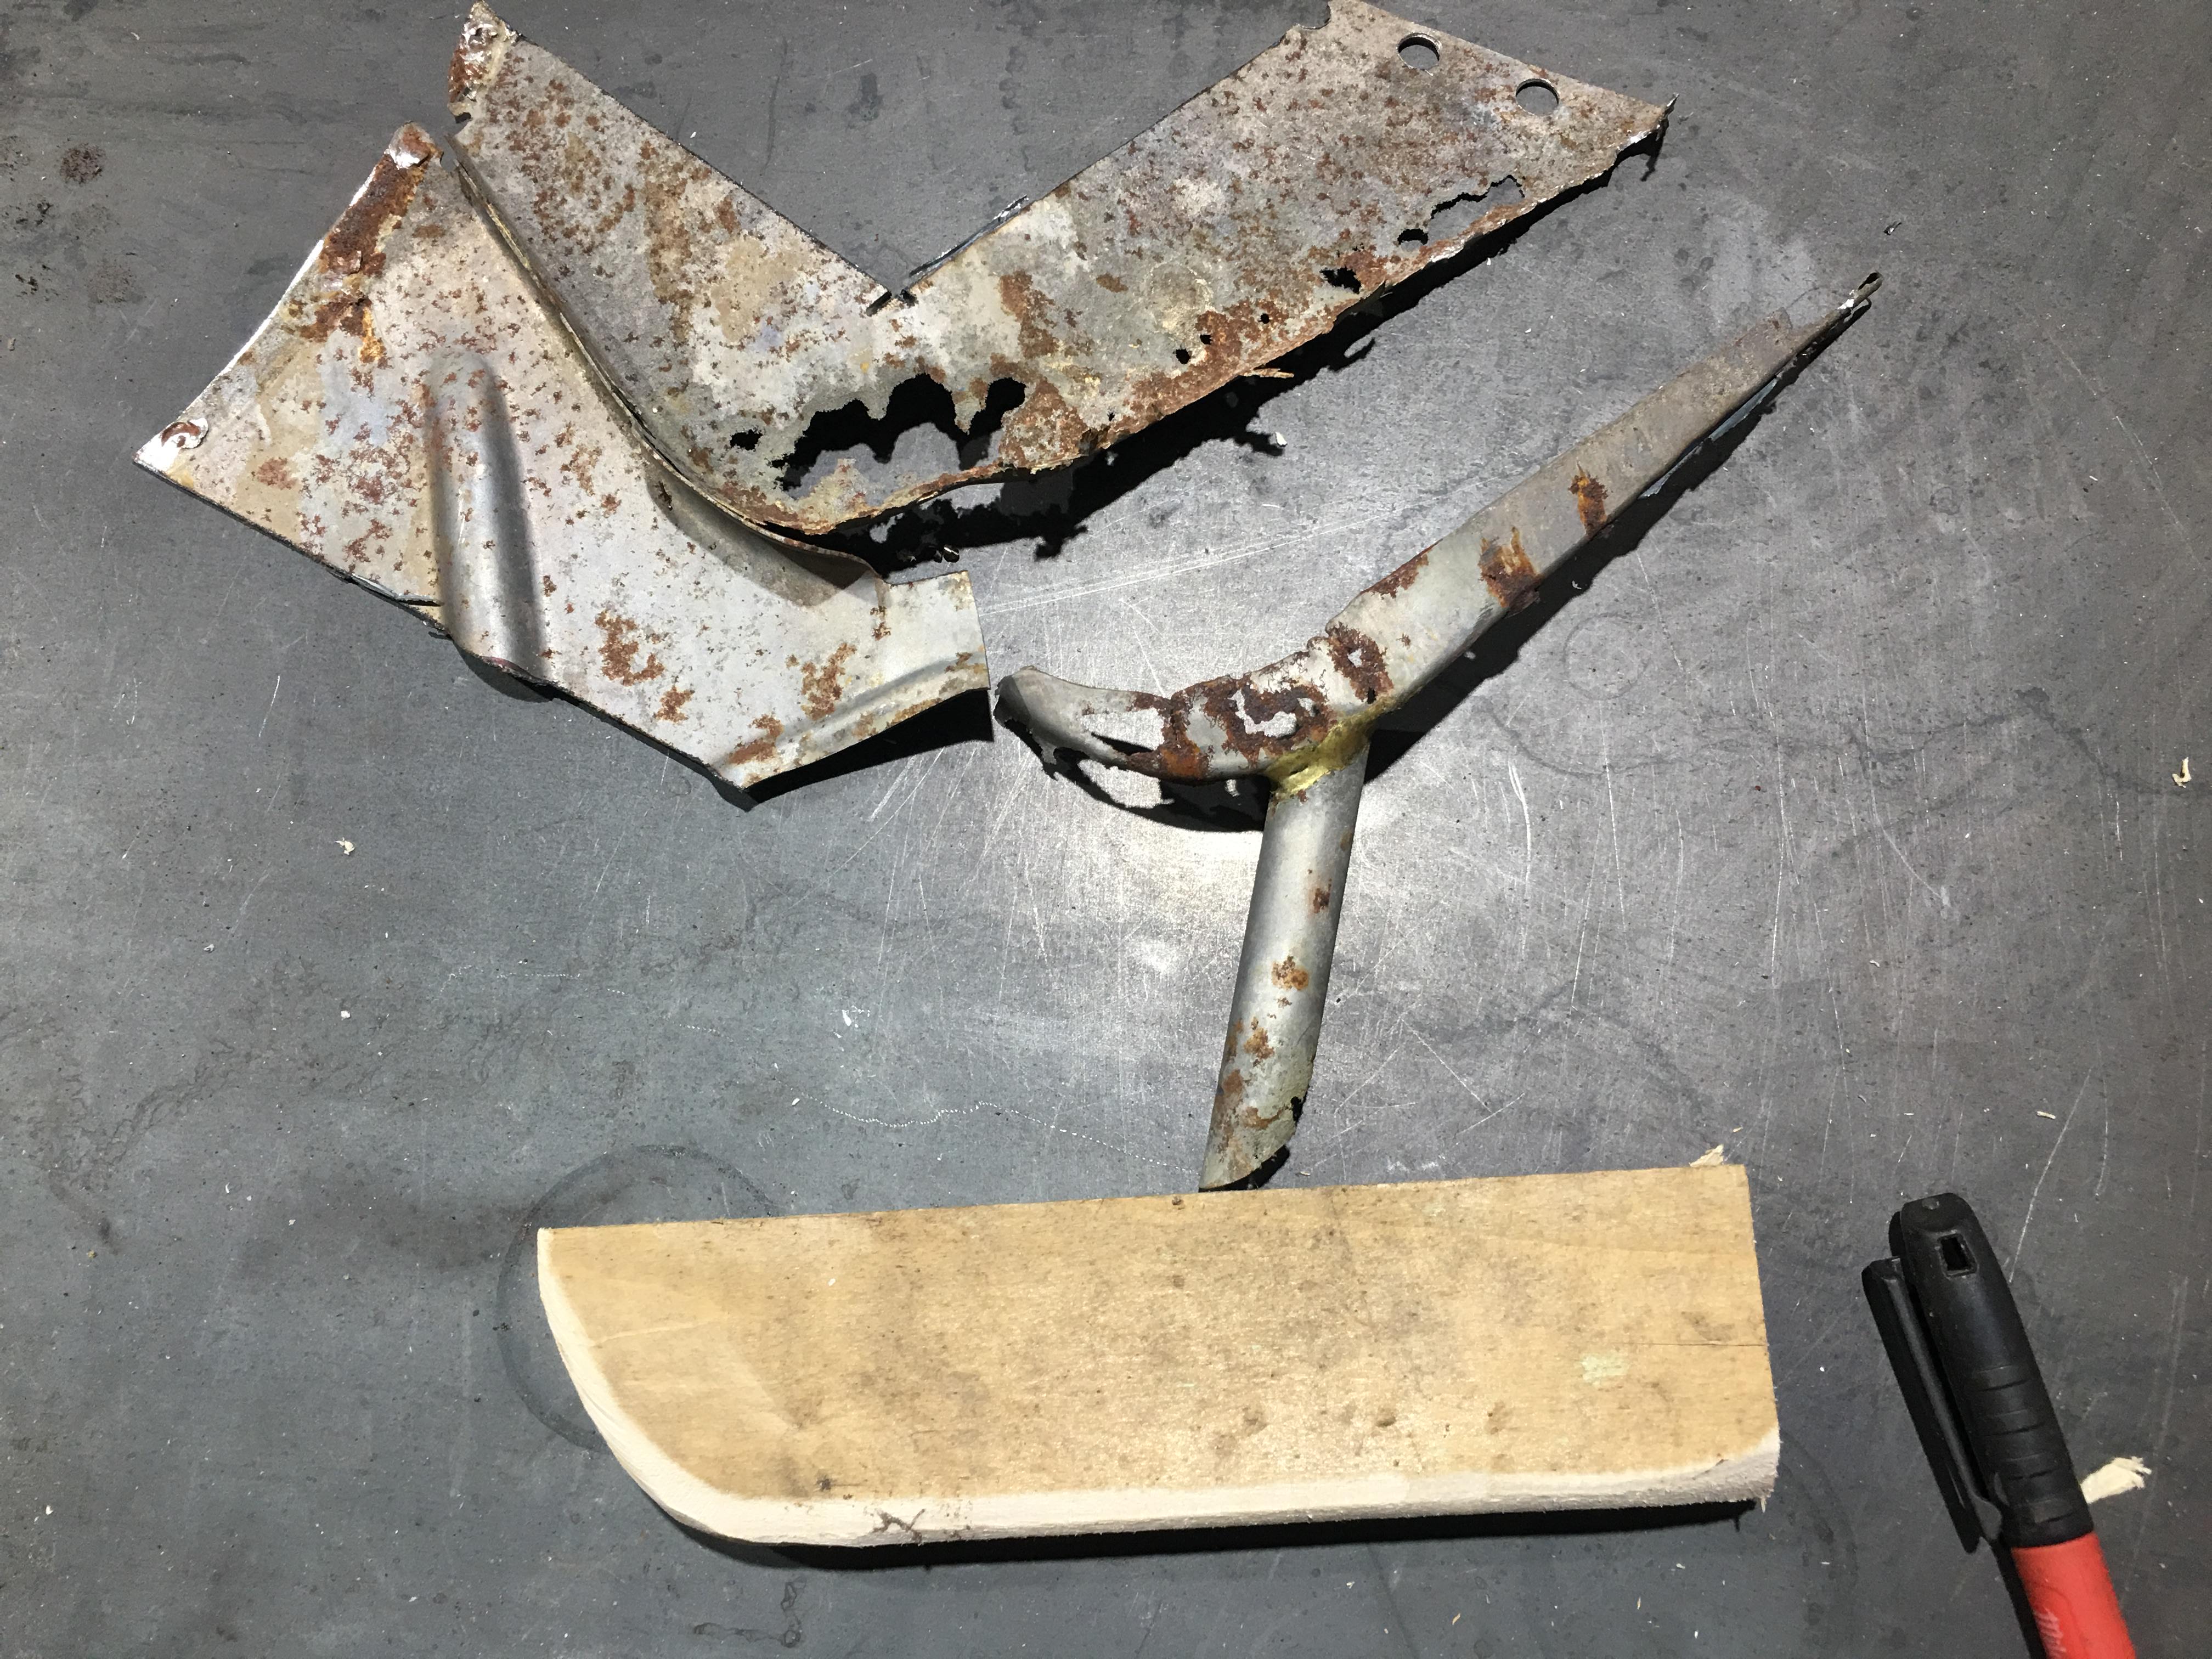
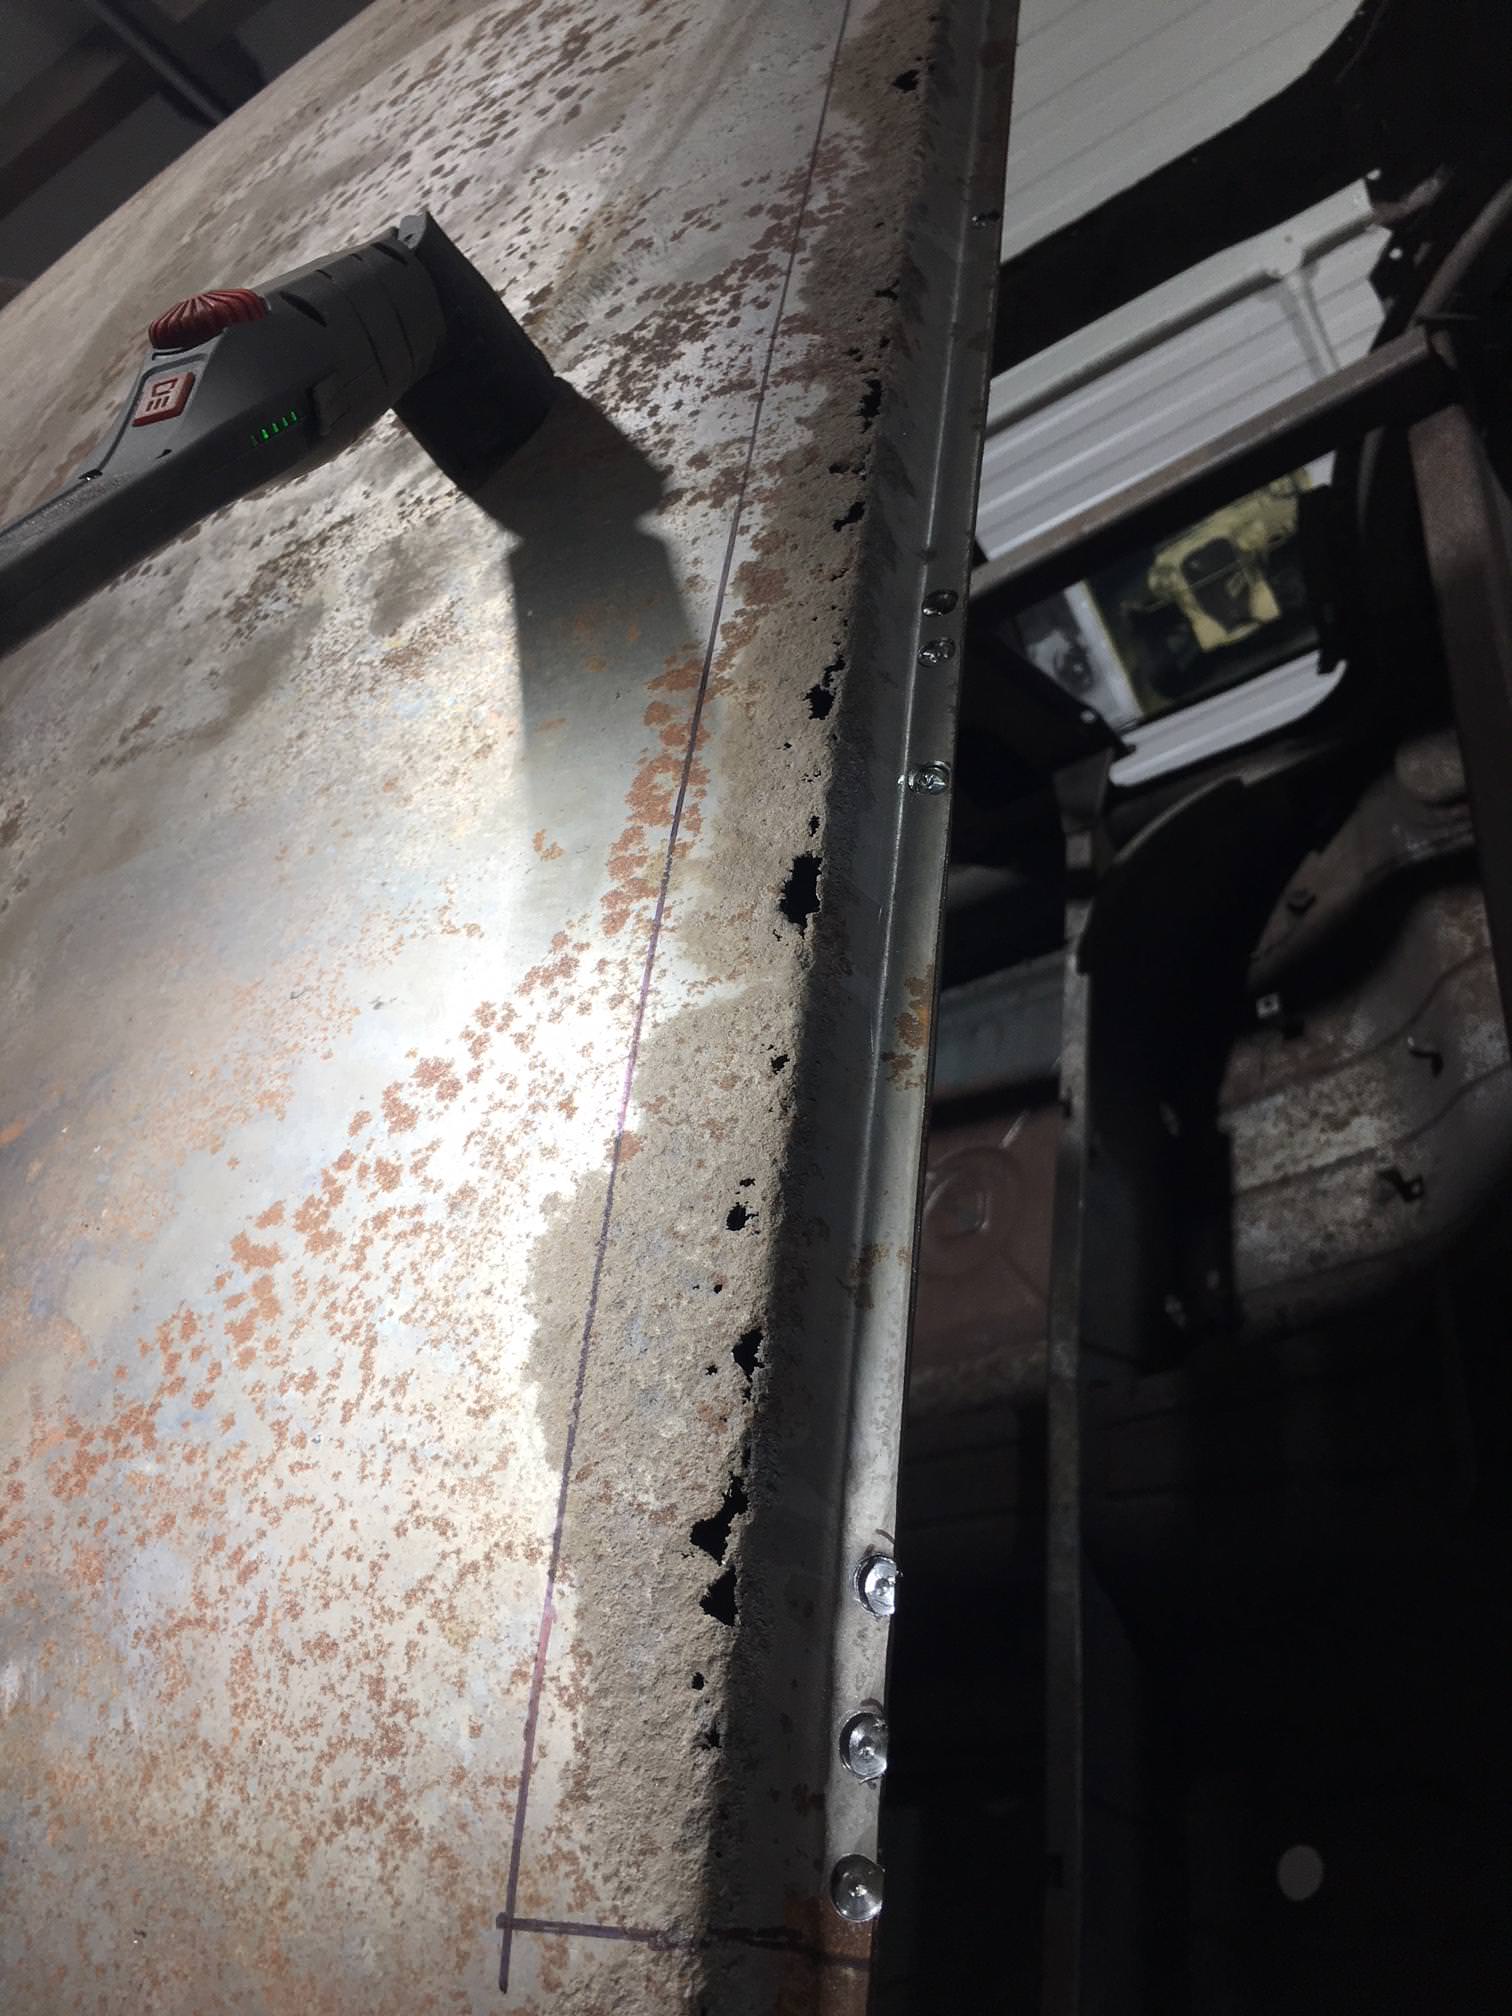
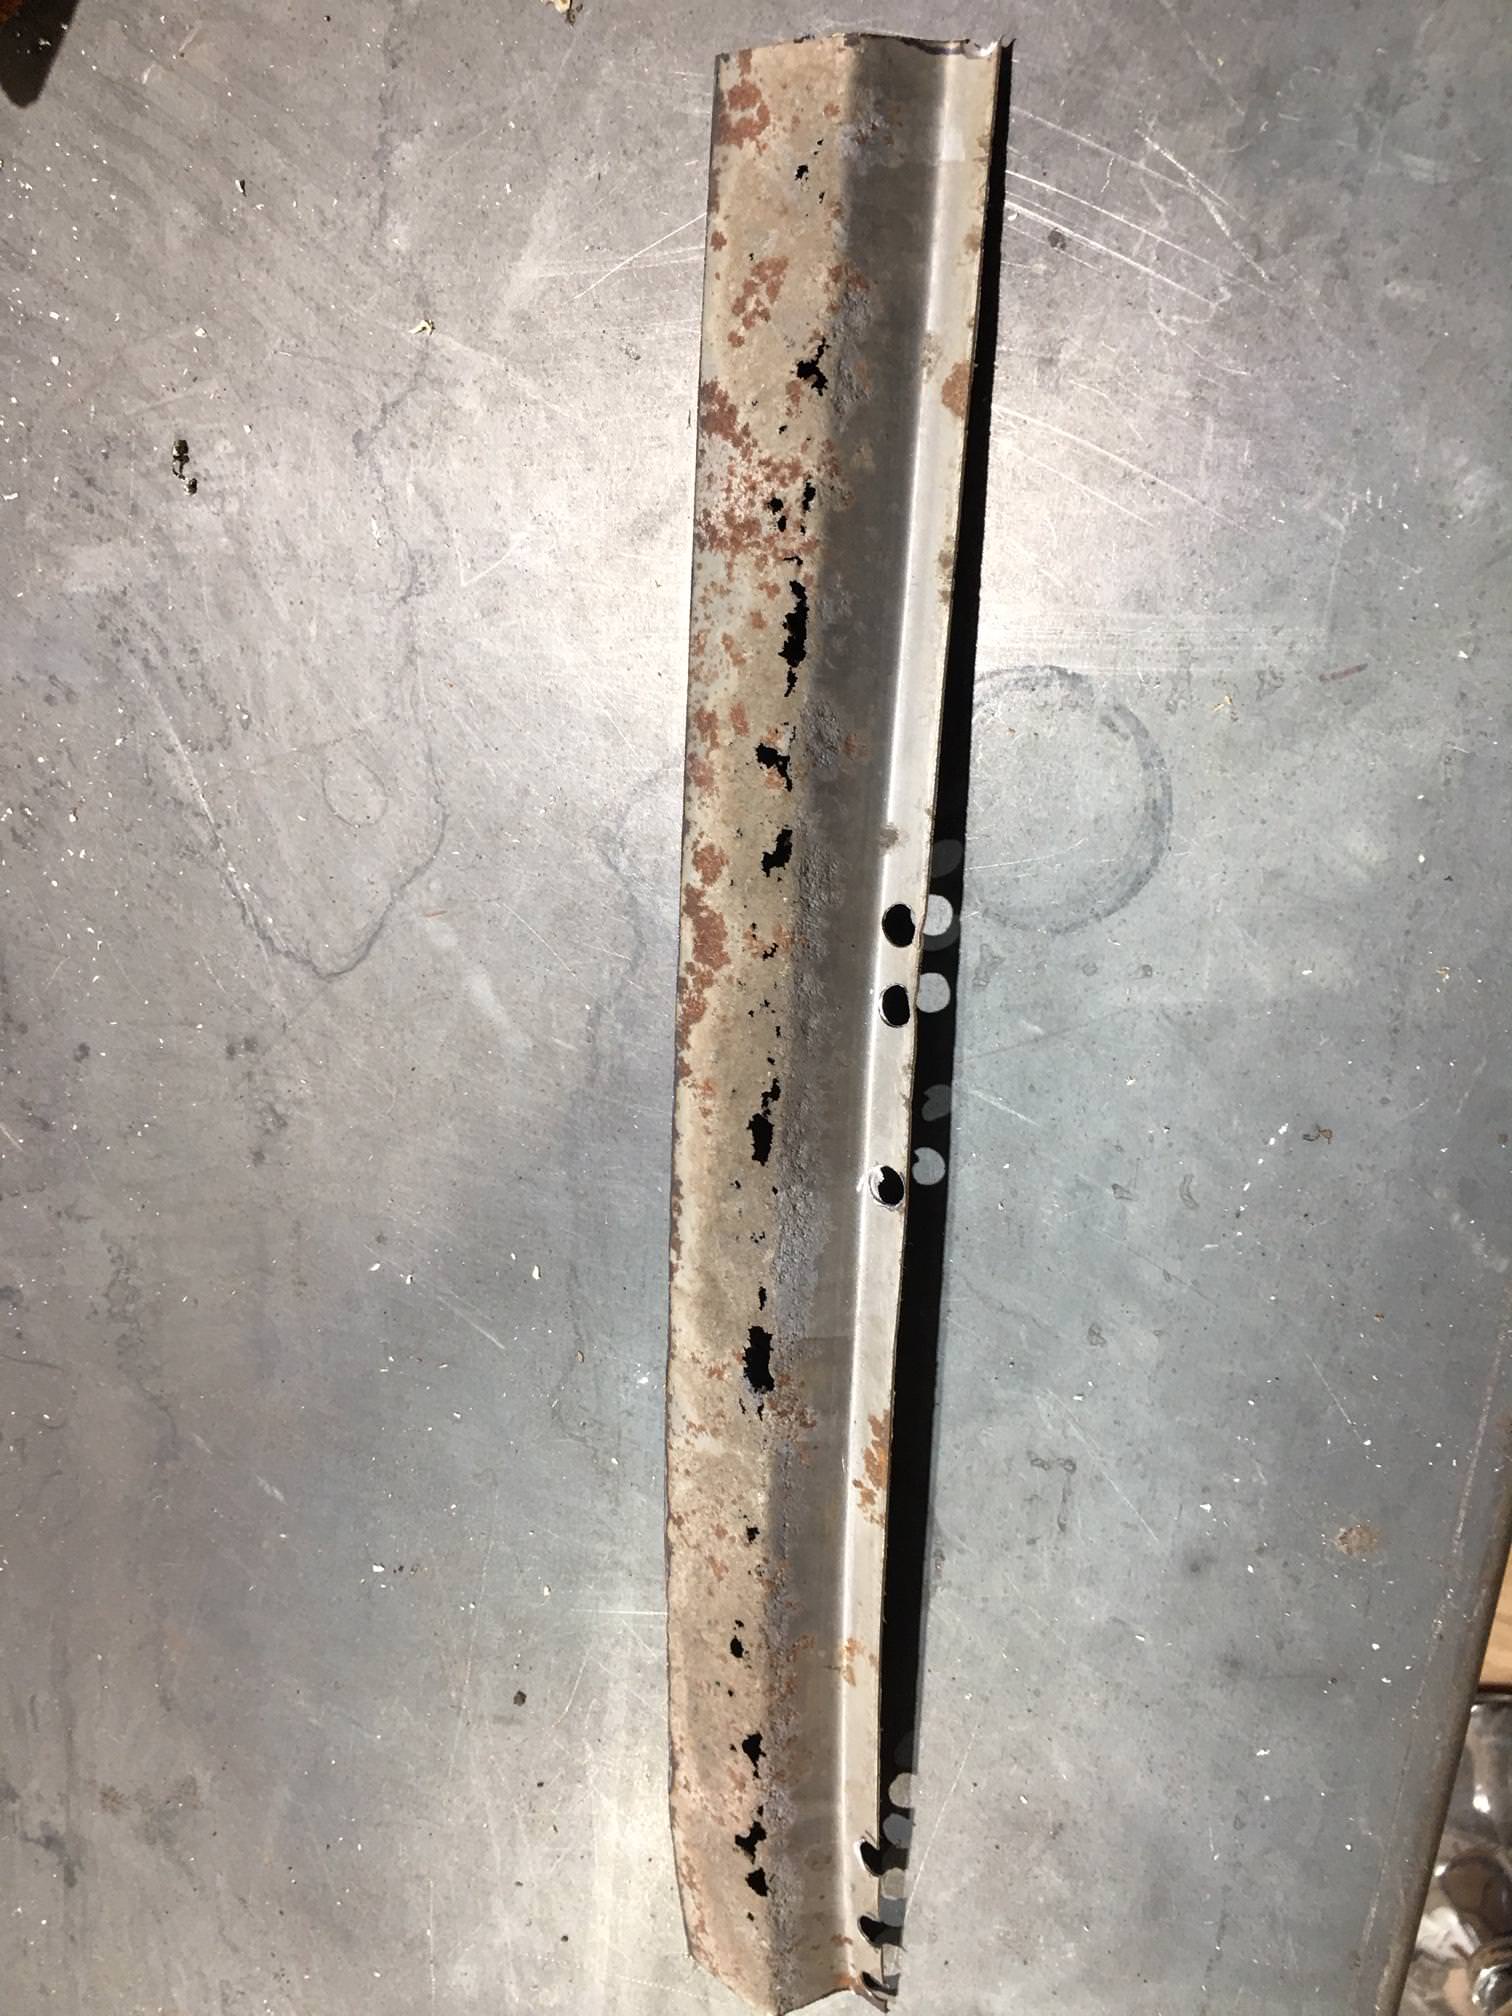
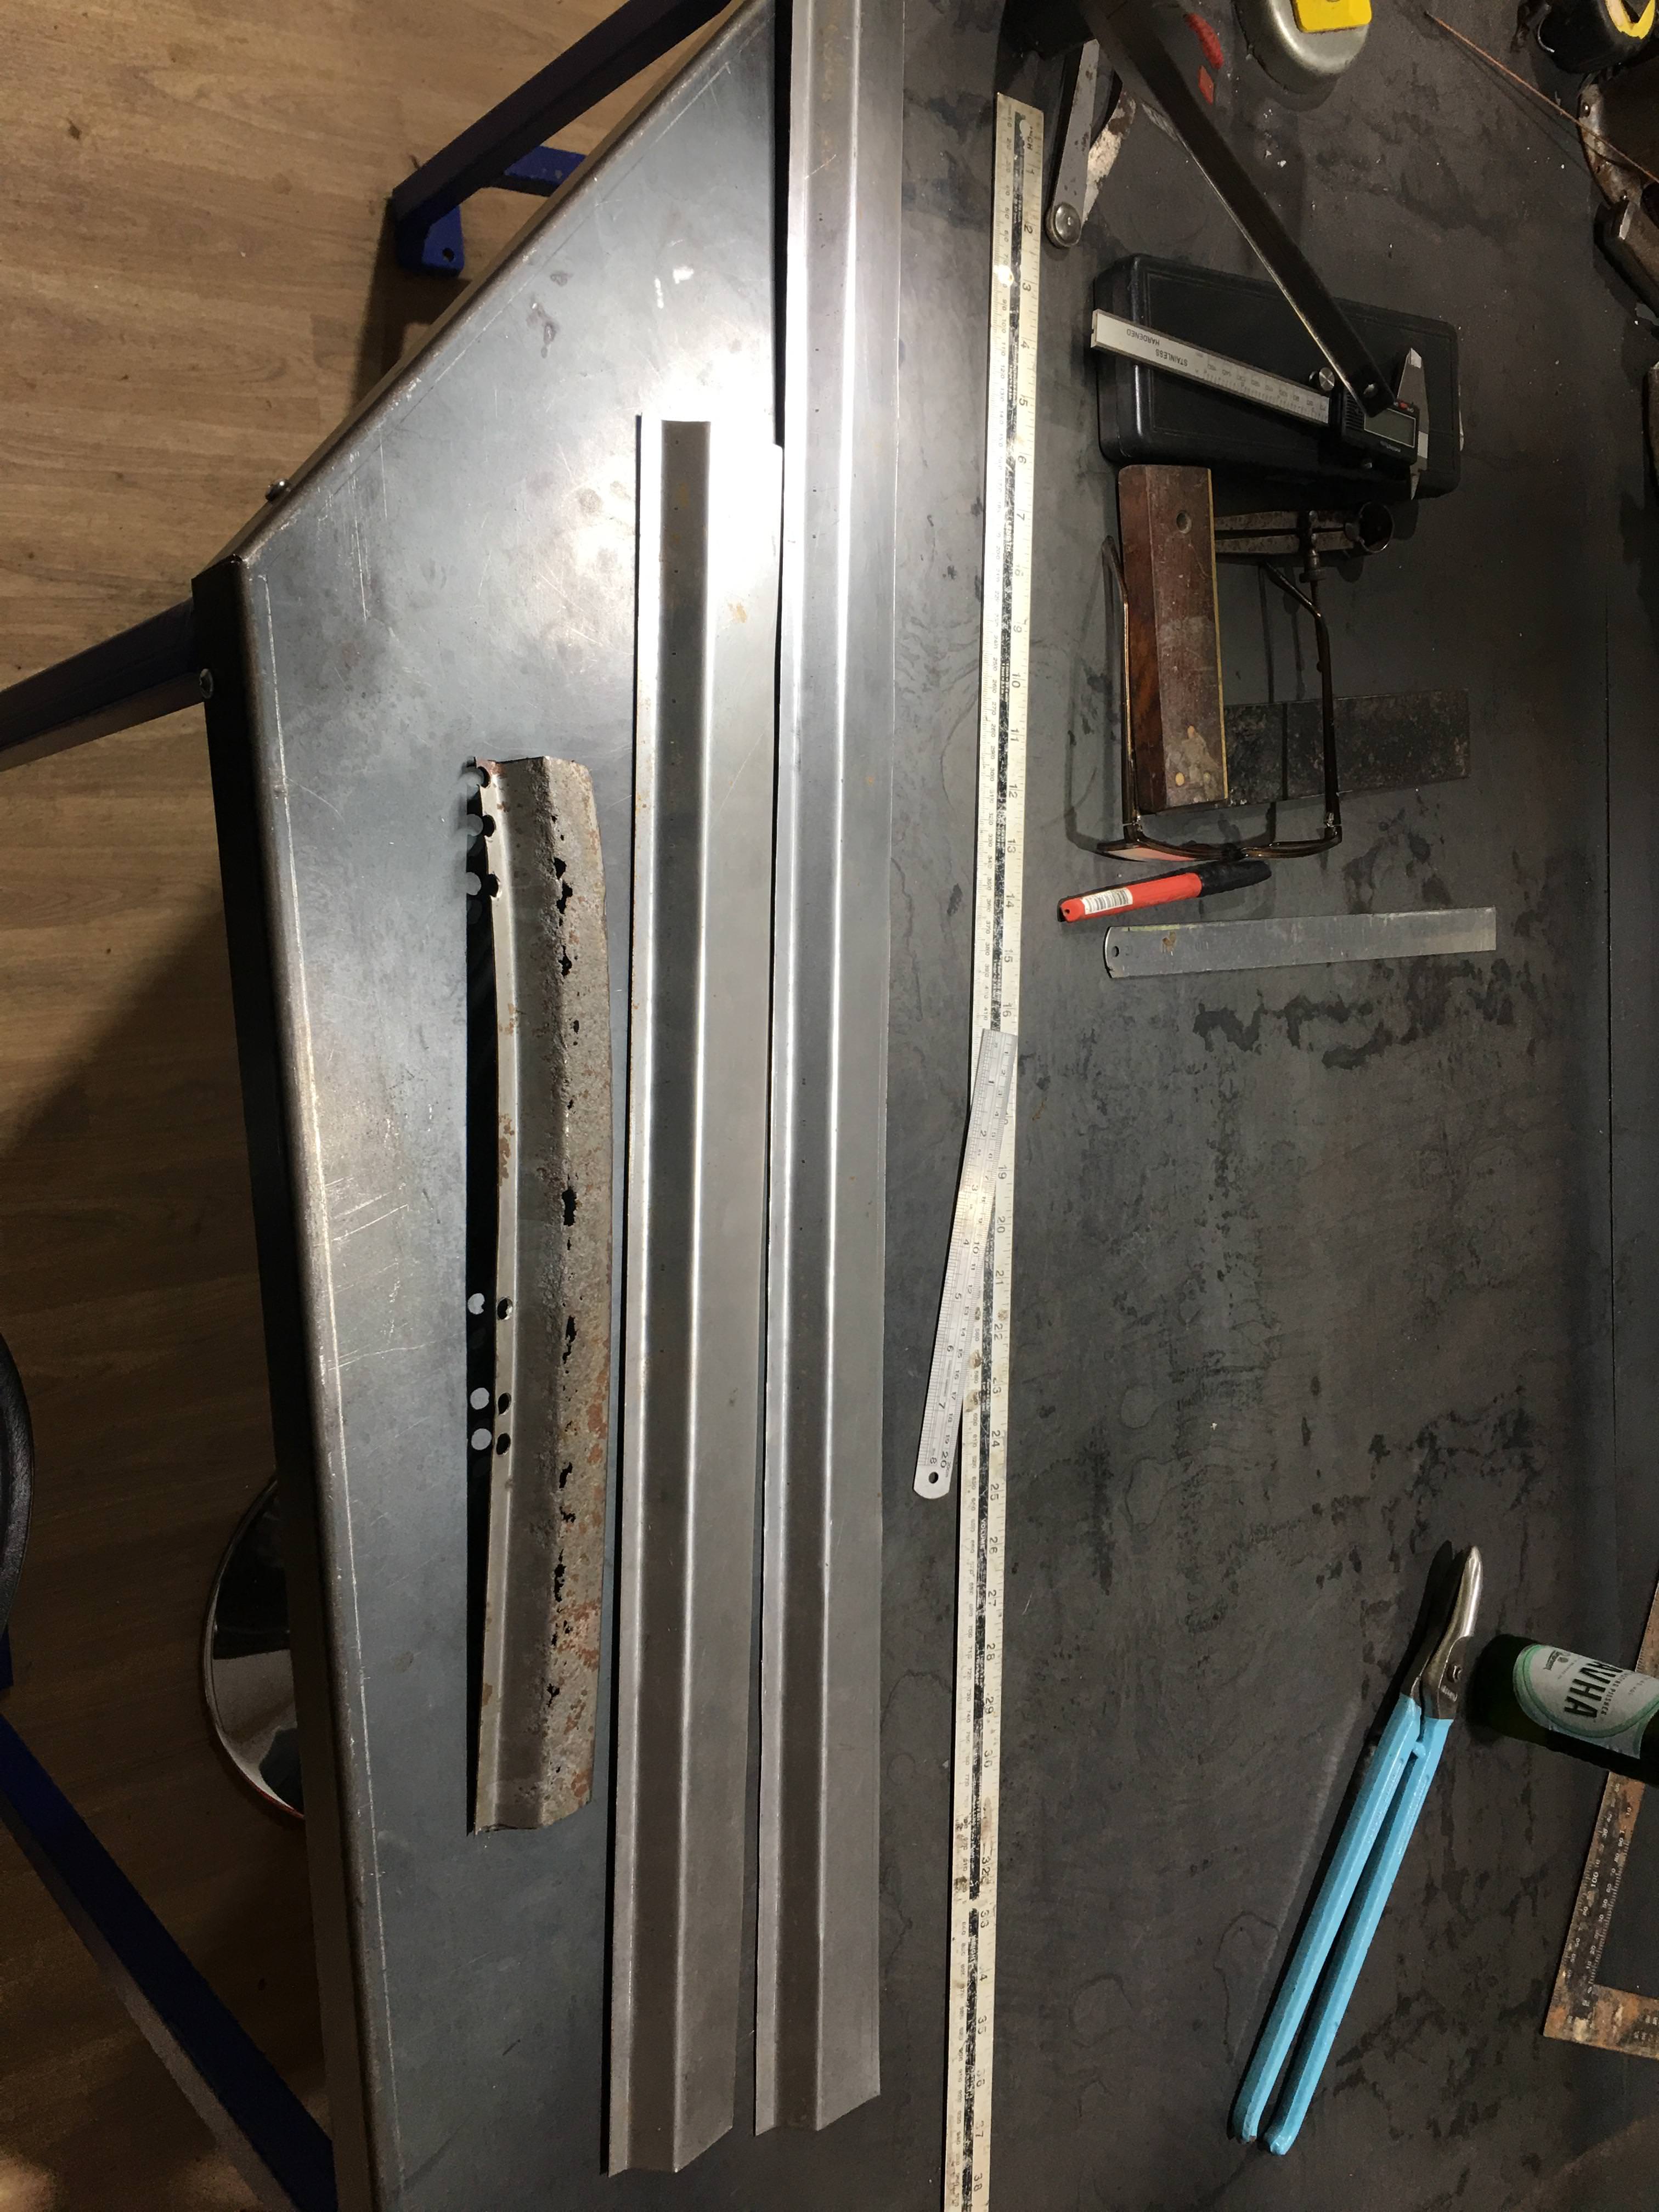
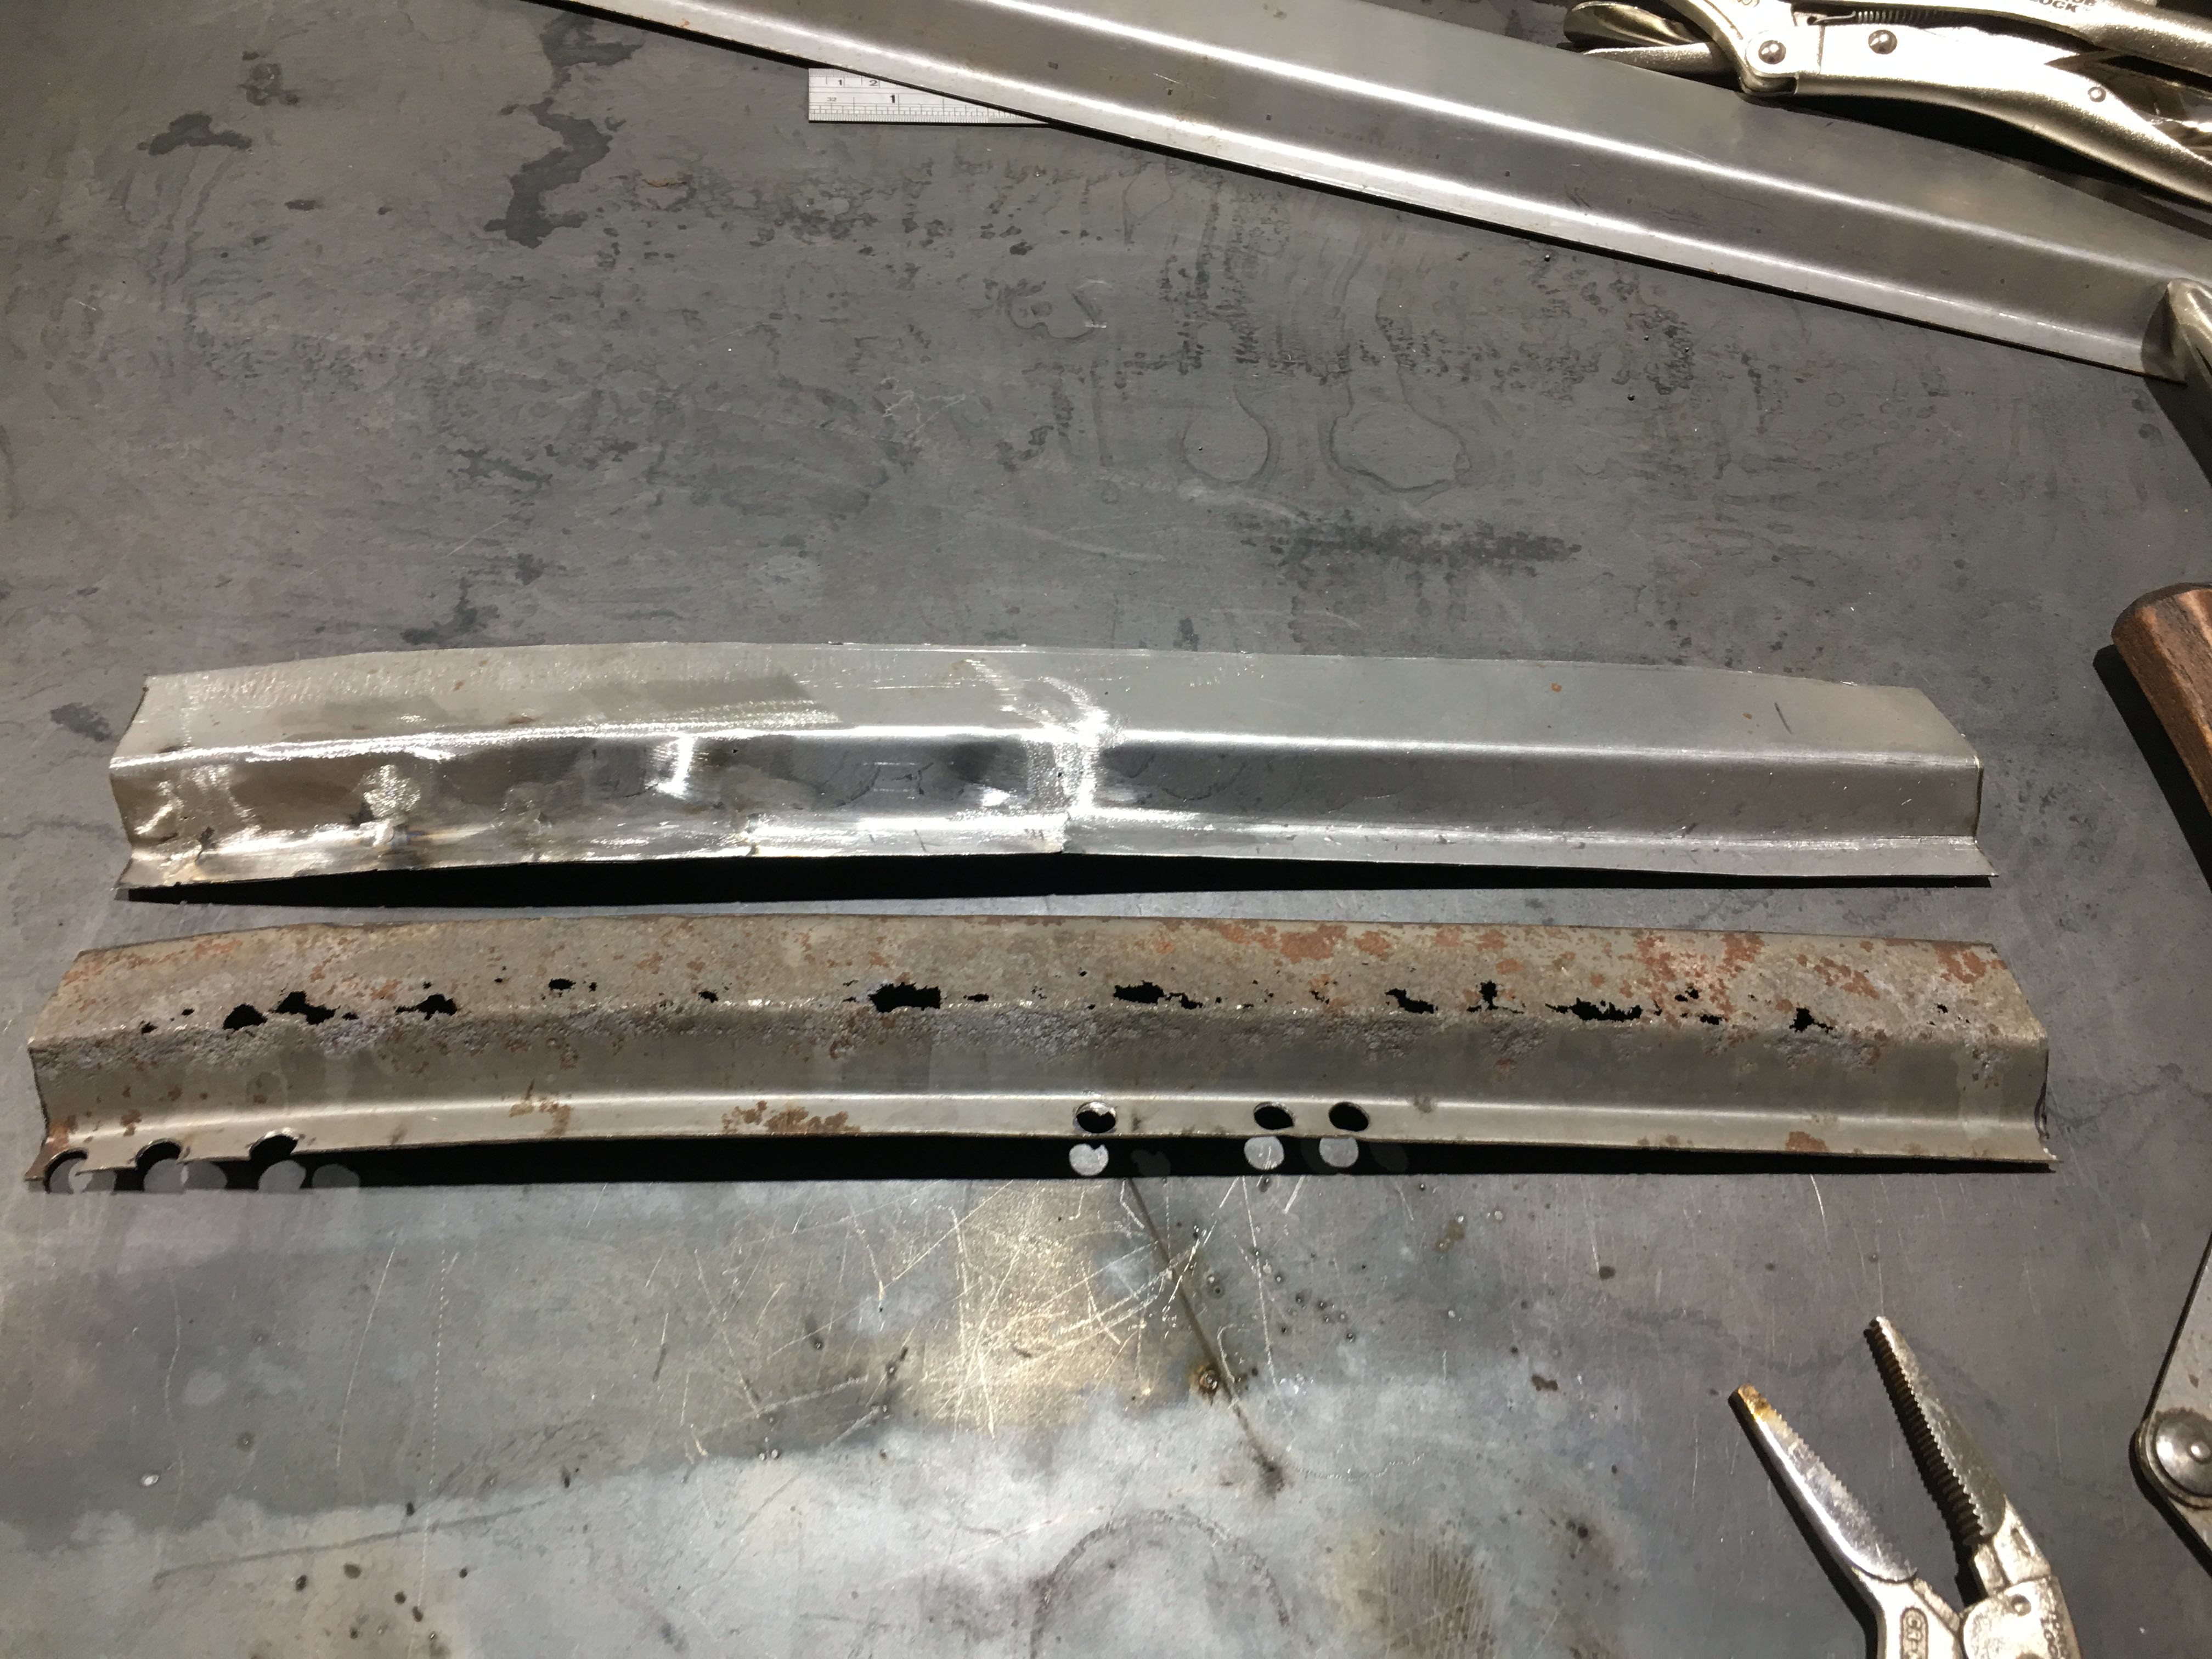
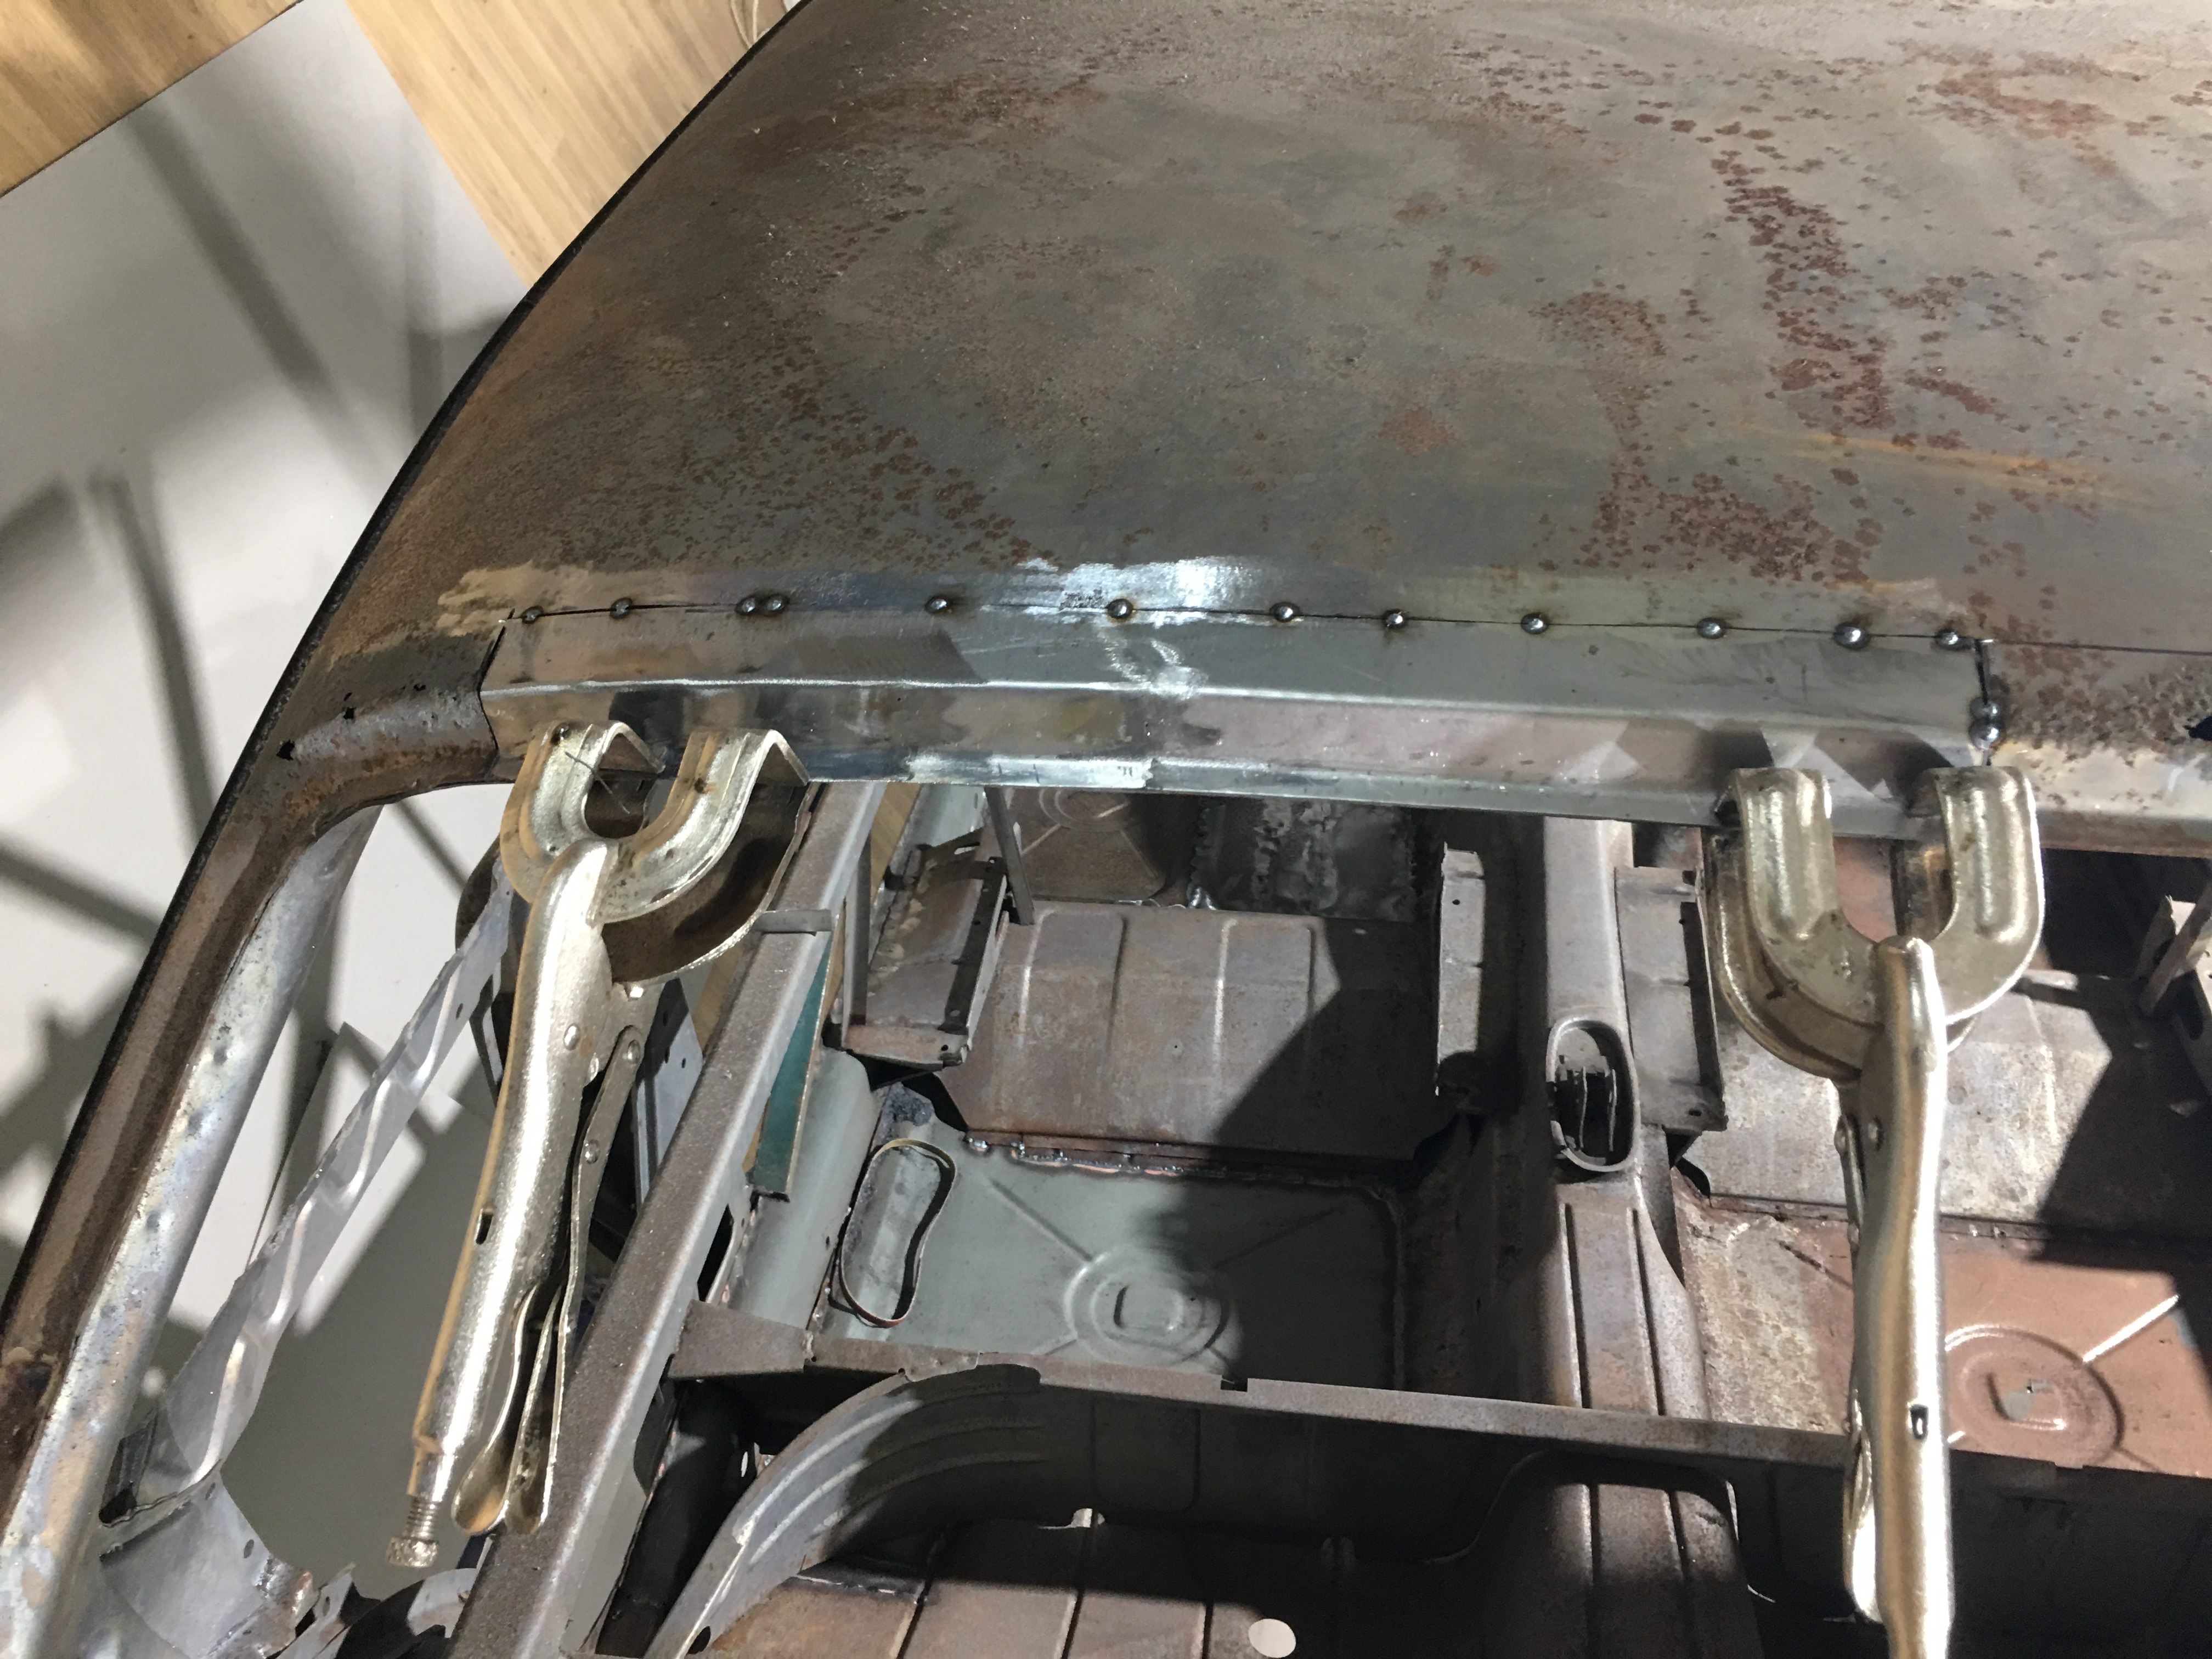
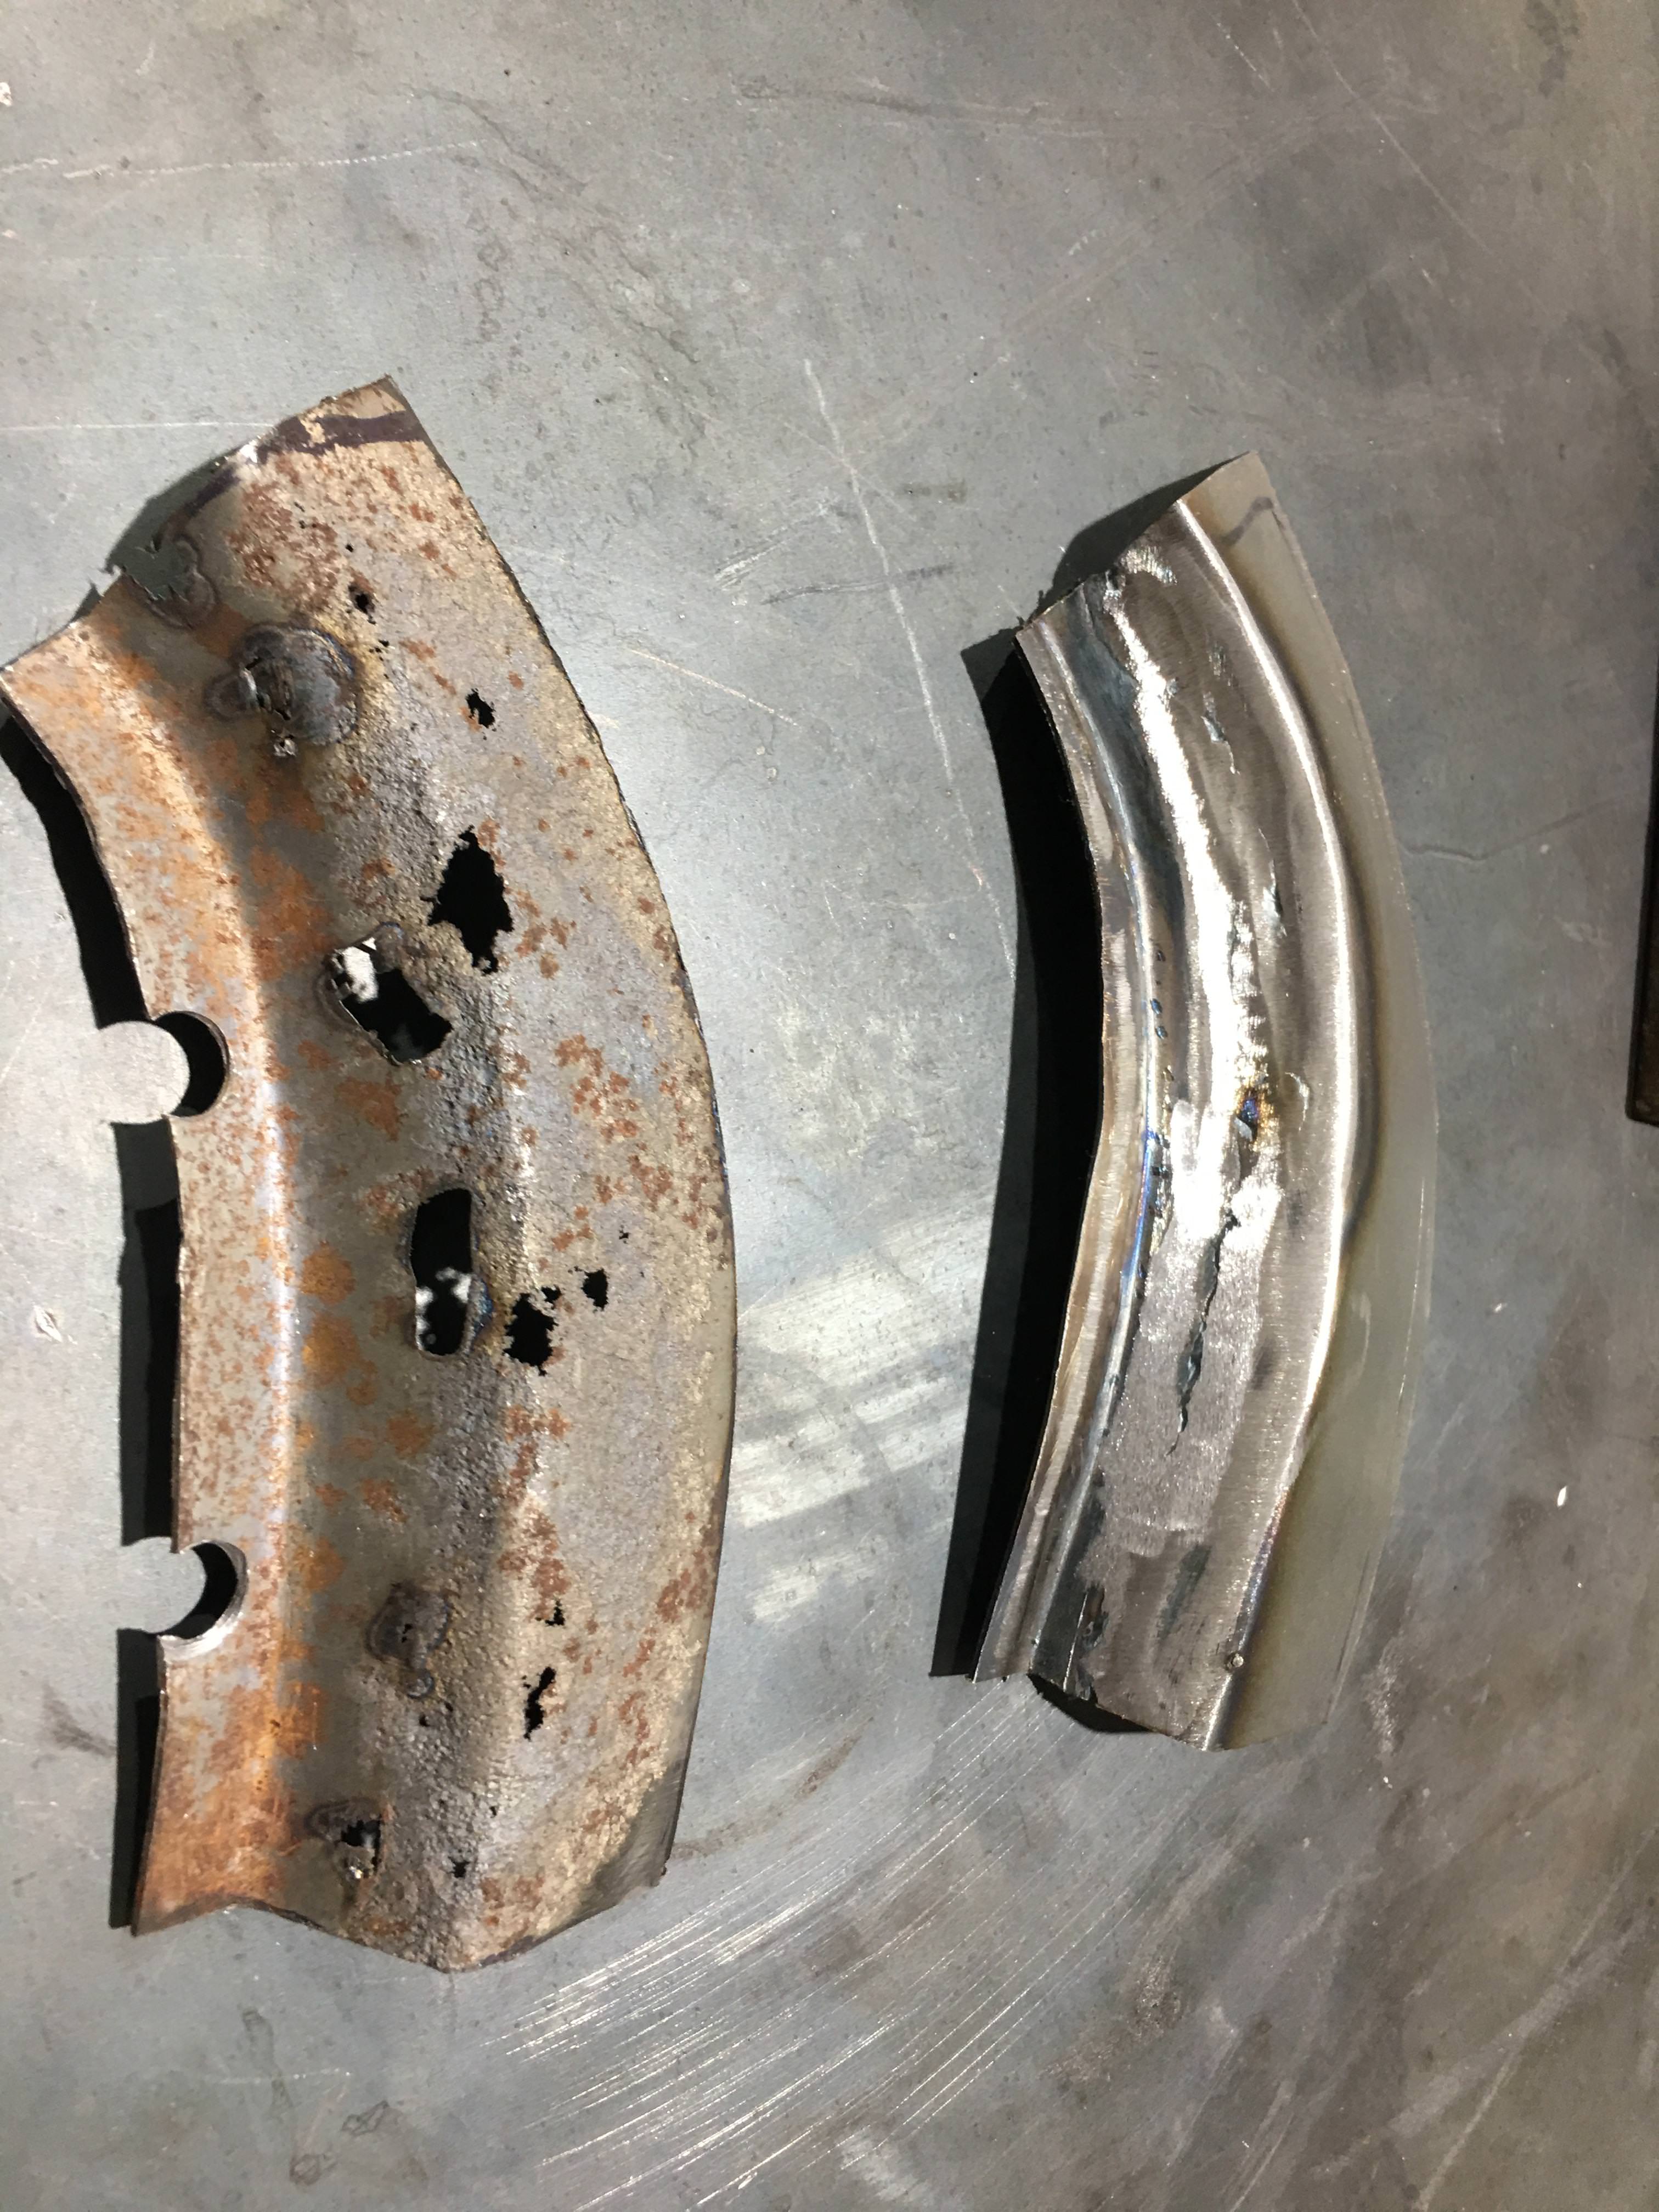
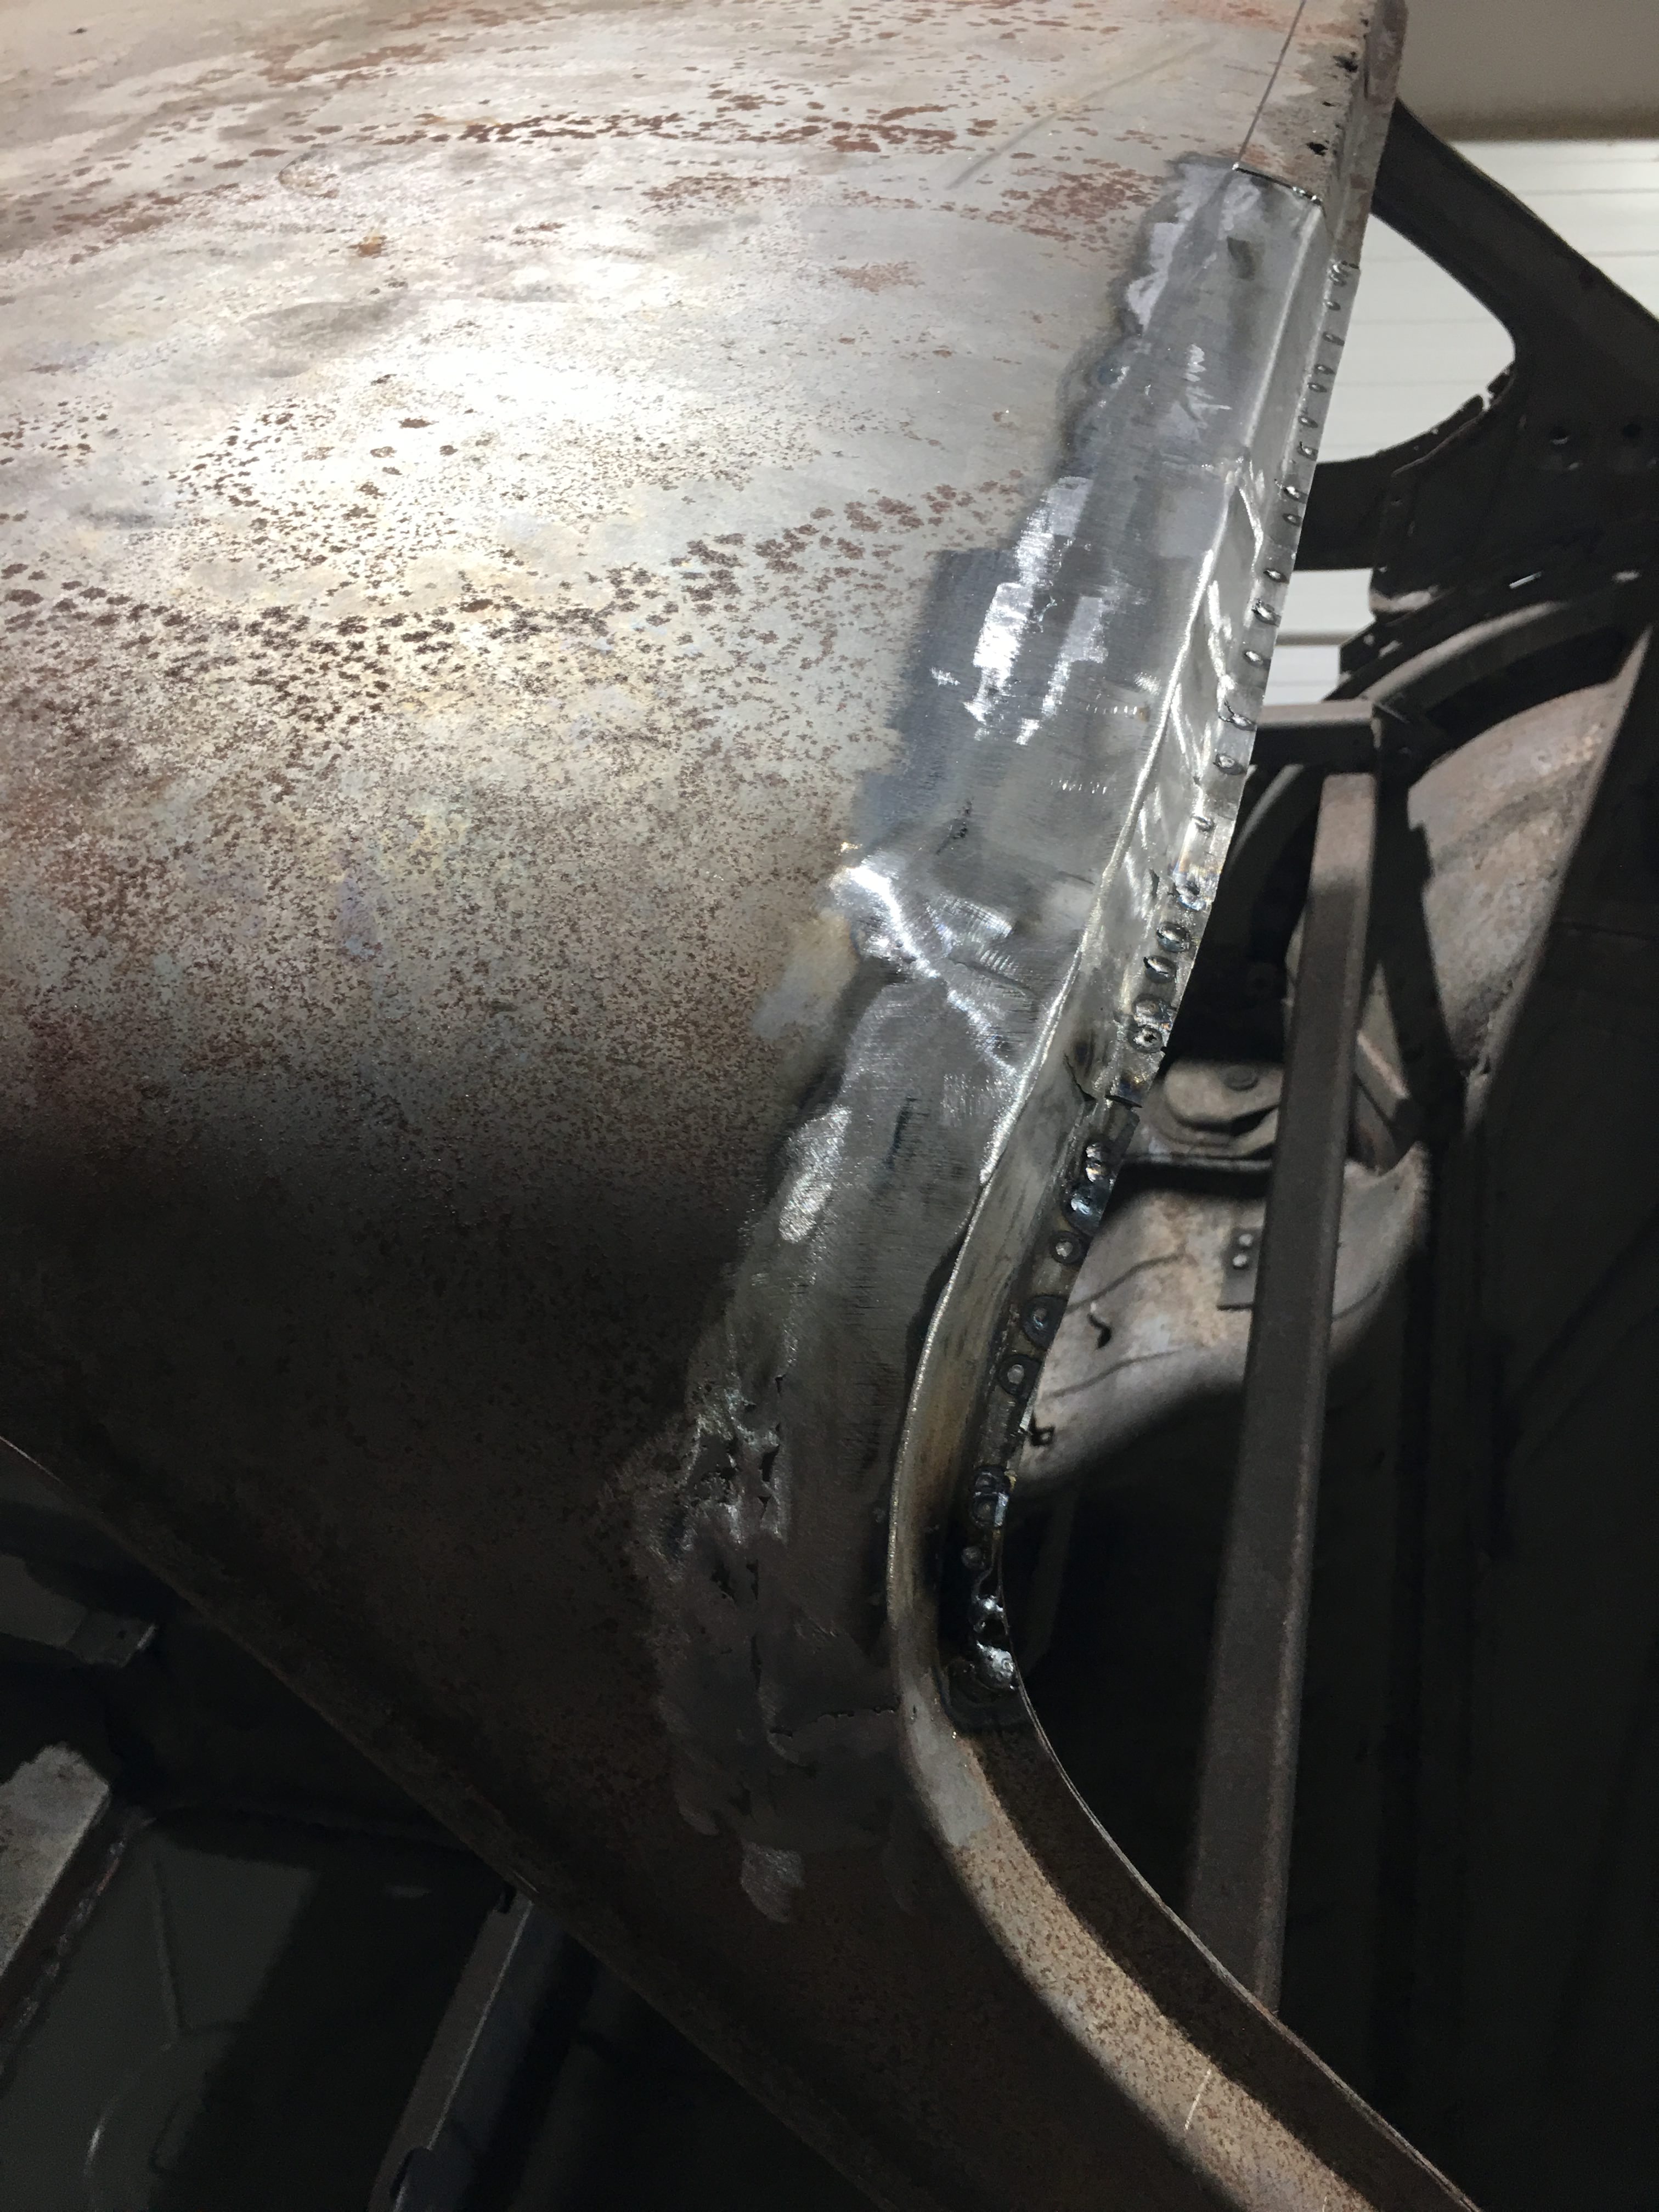
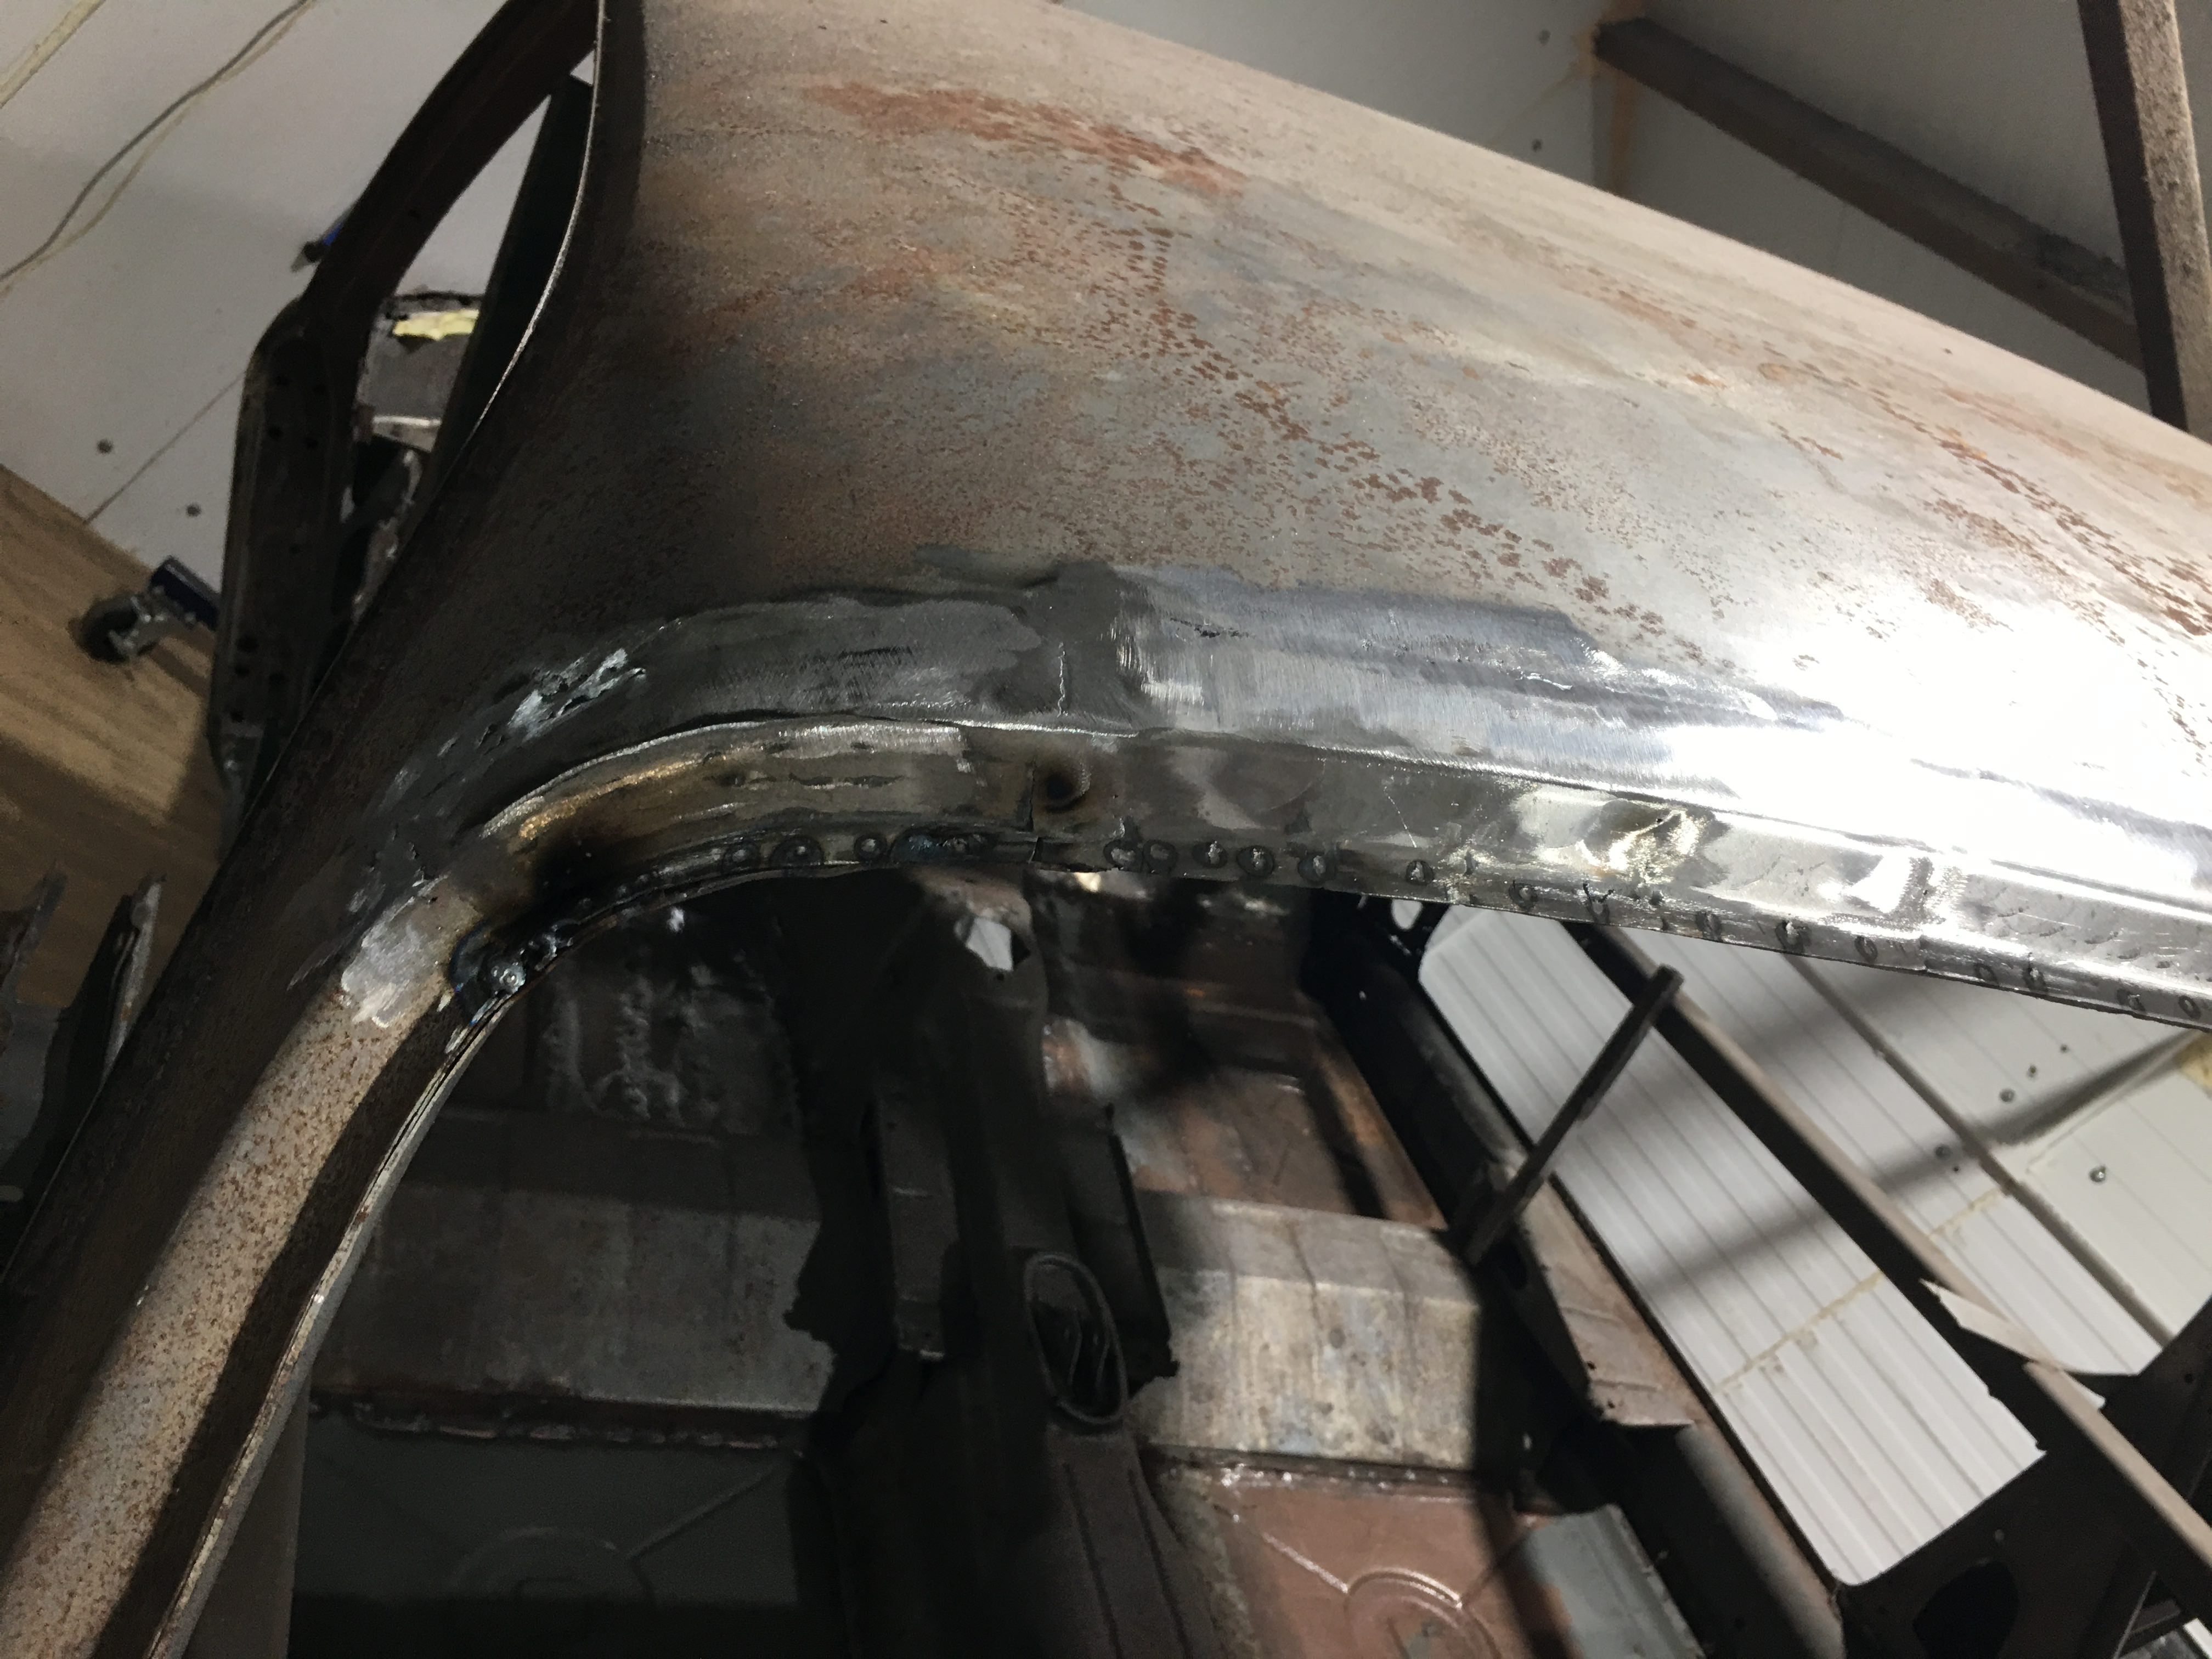
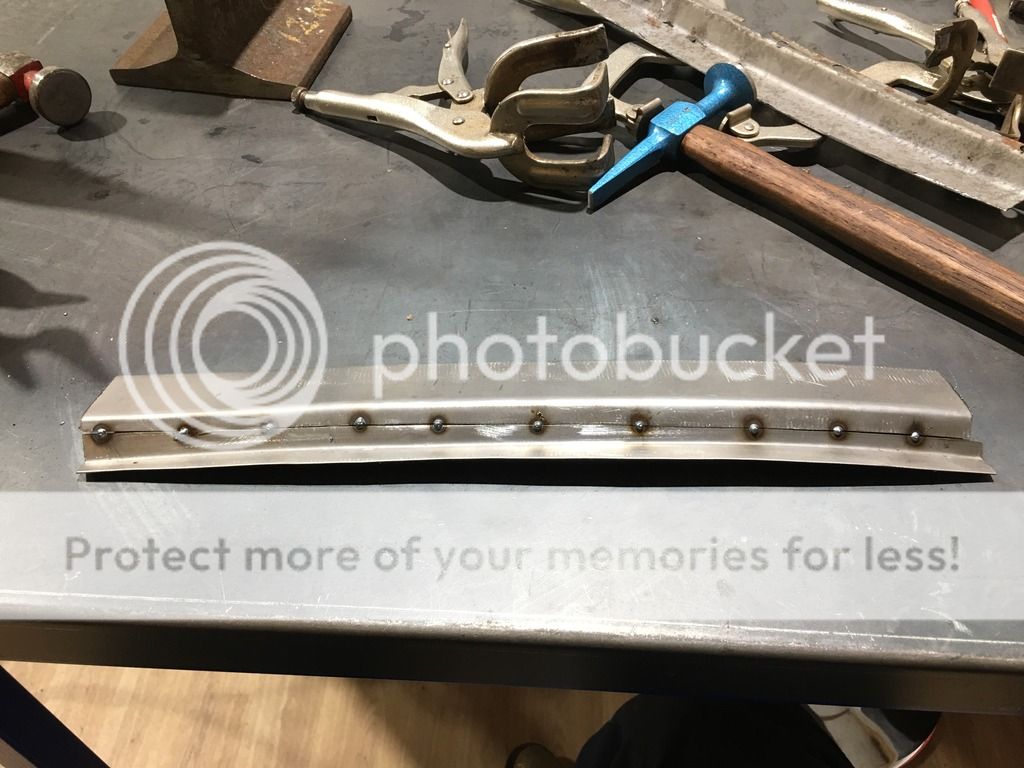
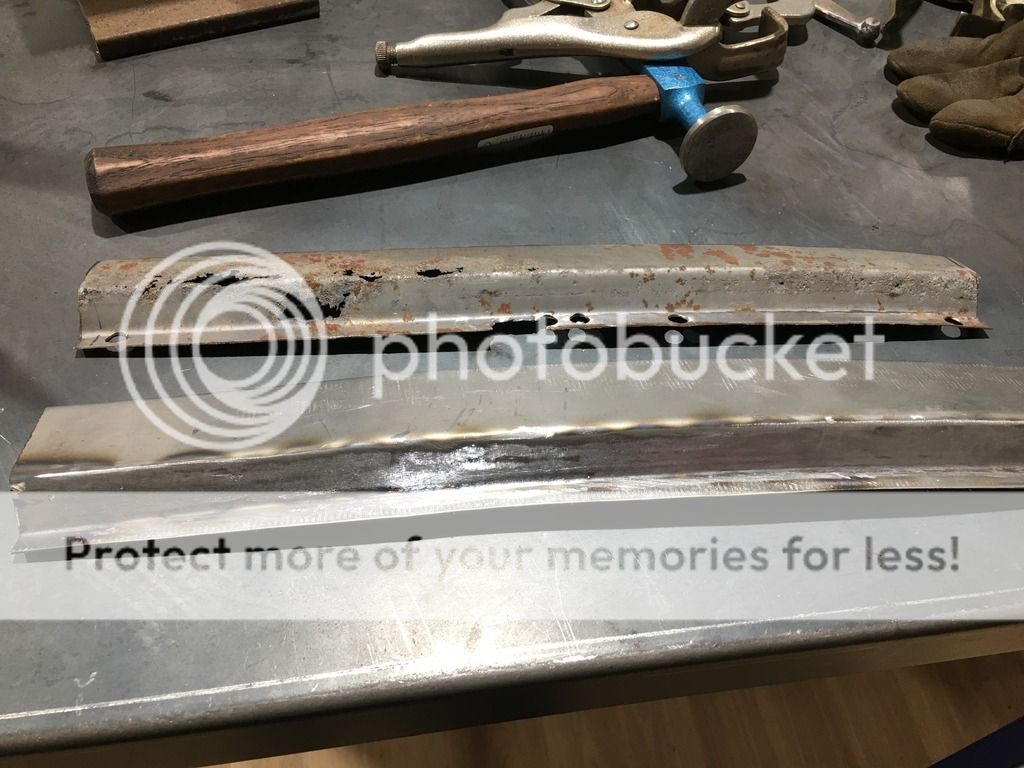
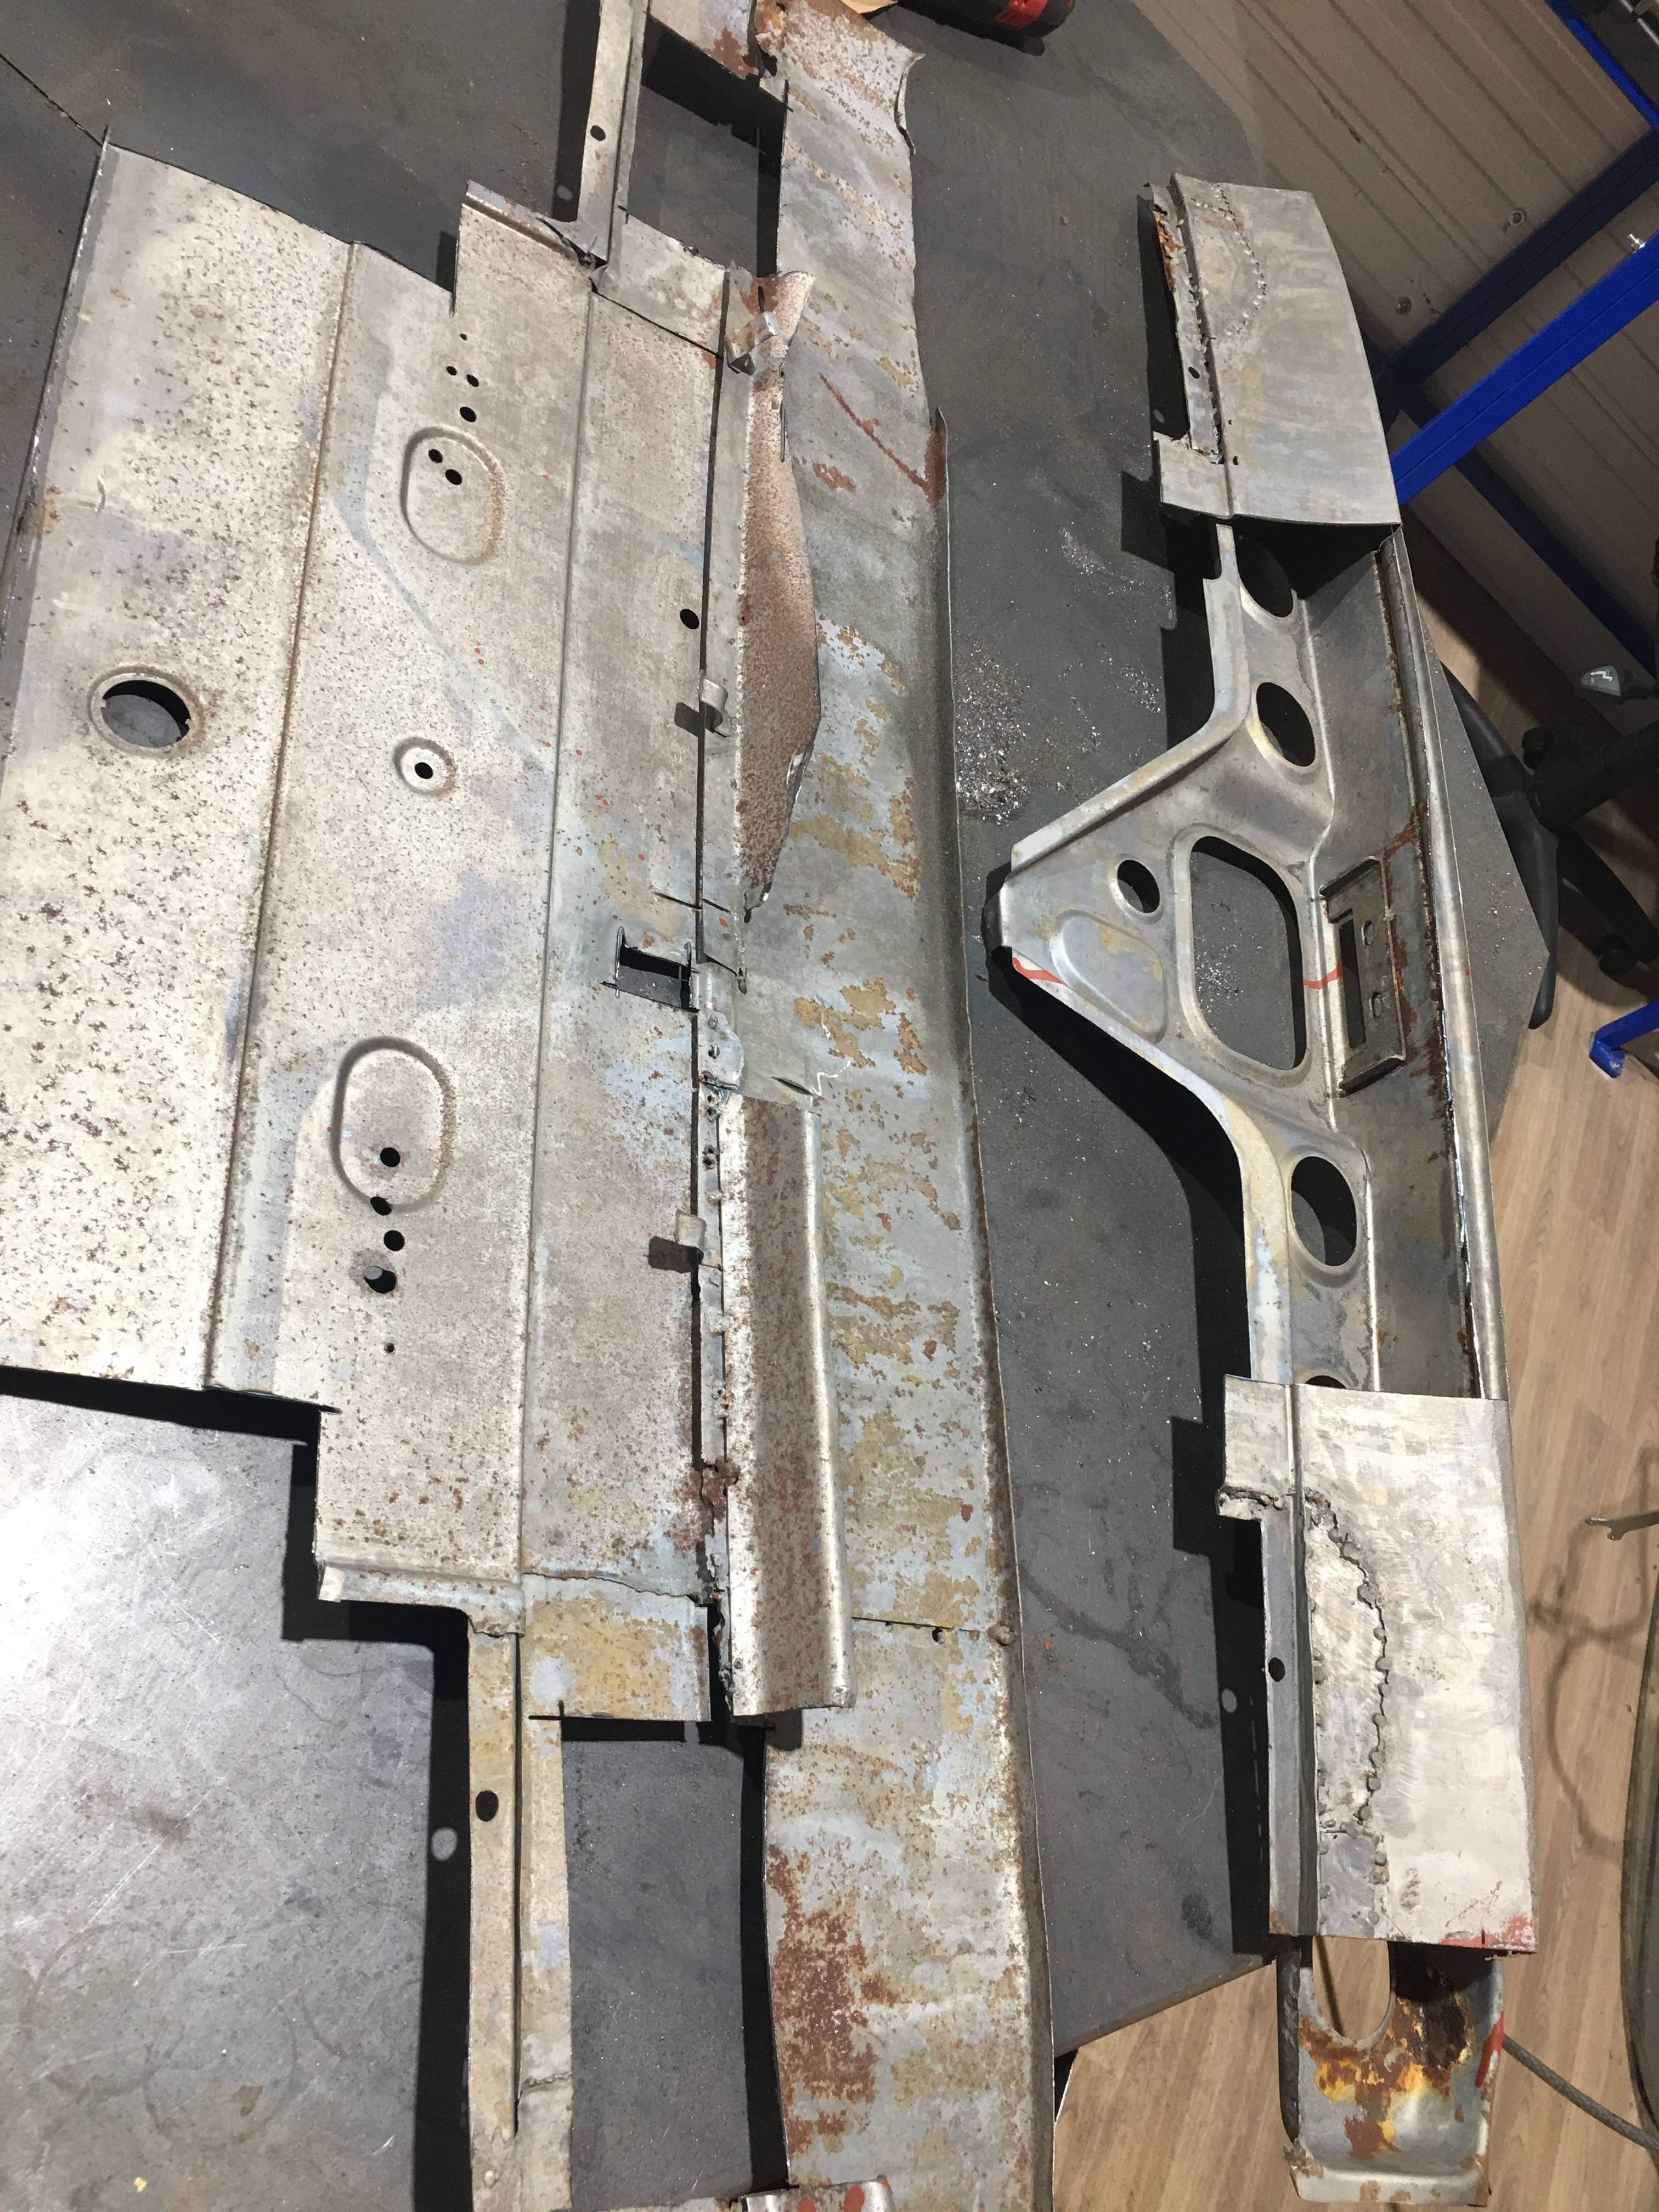
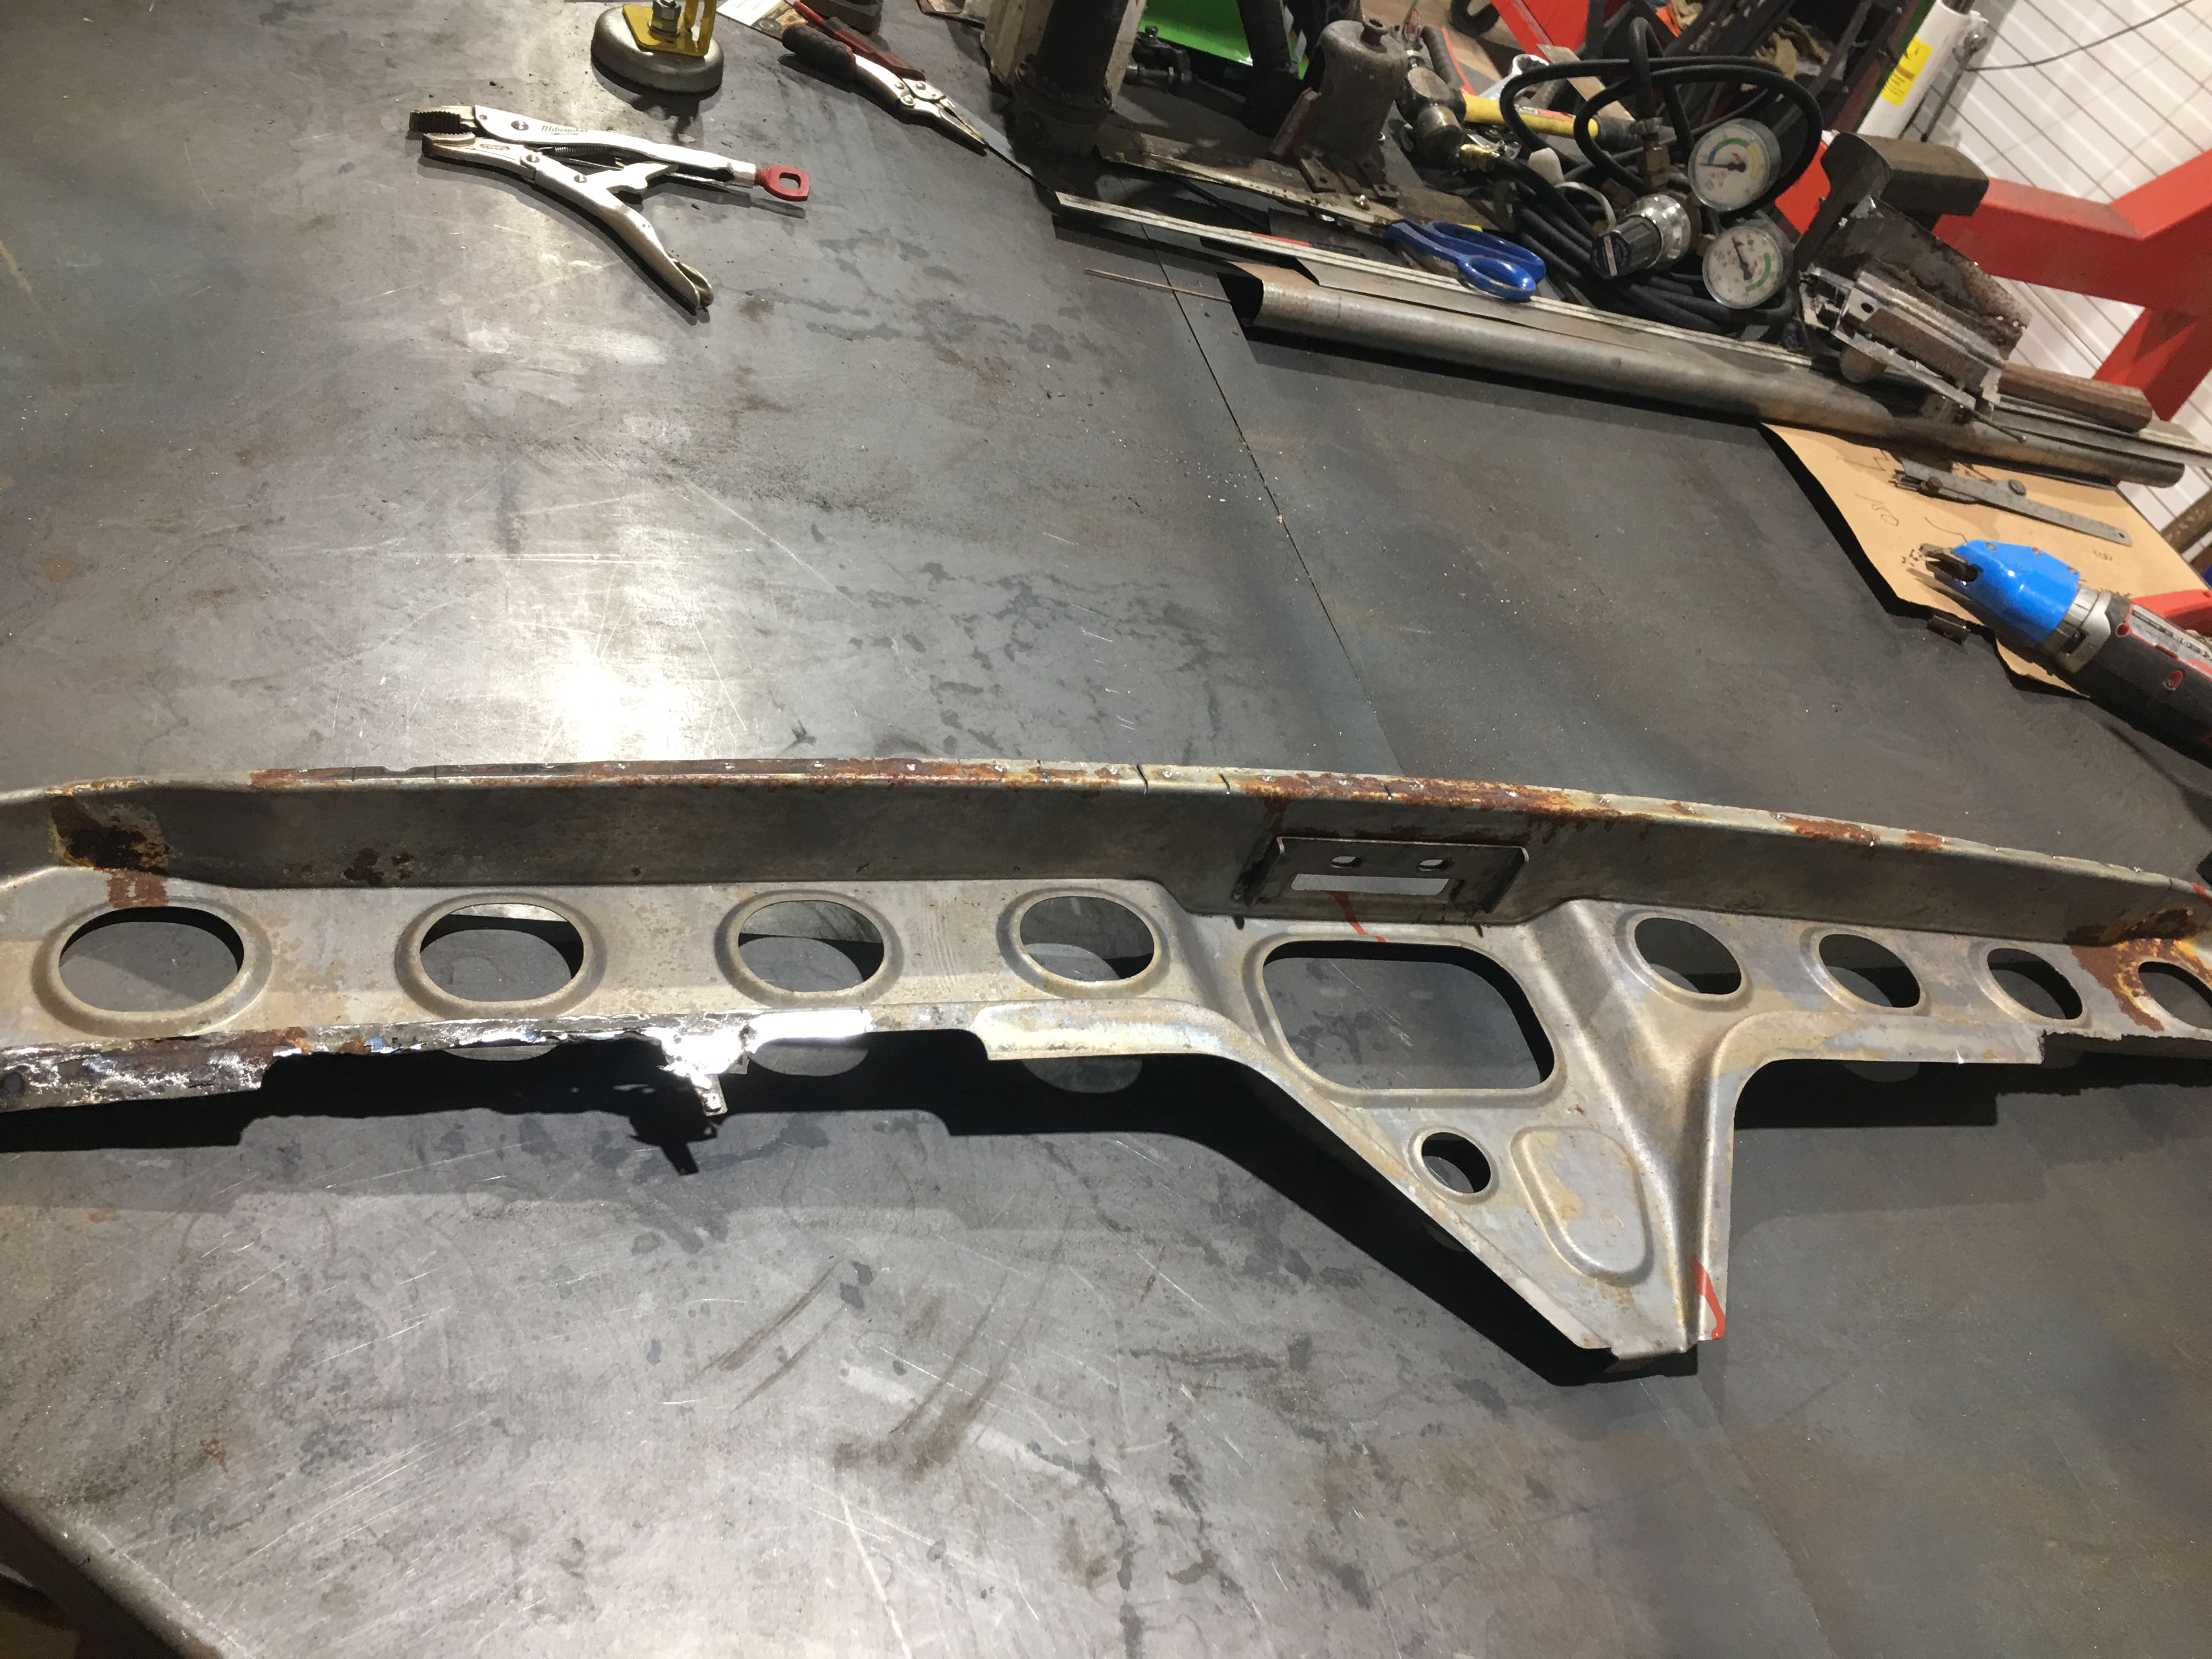
The water channel that is hidden inside the top of the rear wing was totally rotted out on the LHS, as you can see from the pictures a new section had to be made.
3v6Lkd1.jpg

gjNR9KQ.jpg


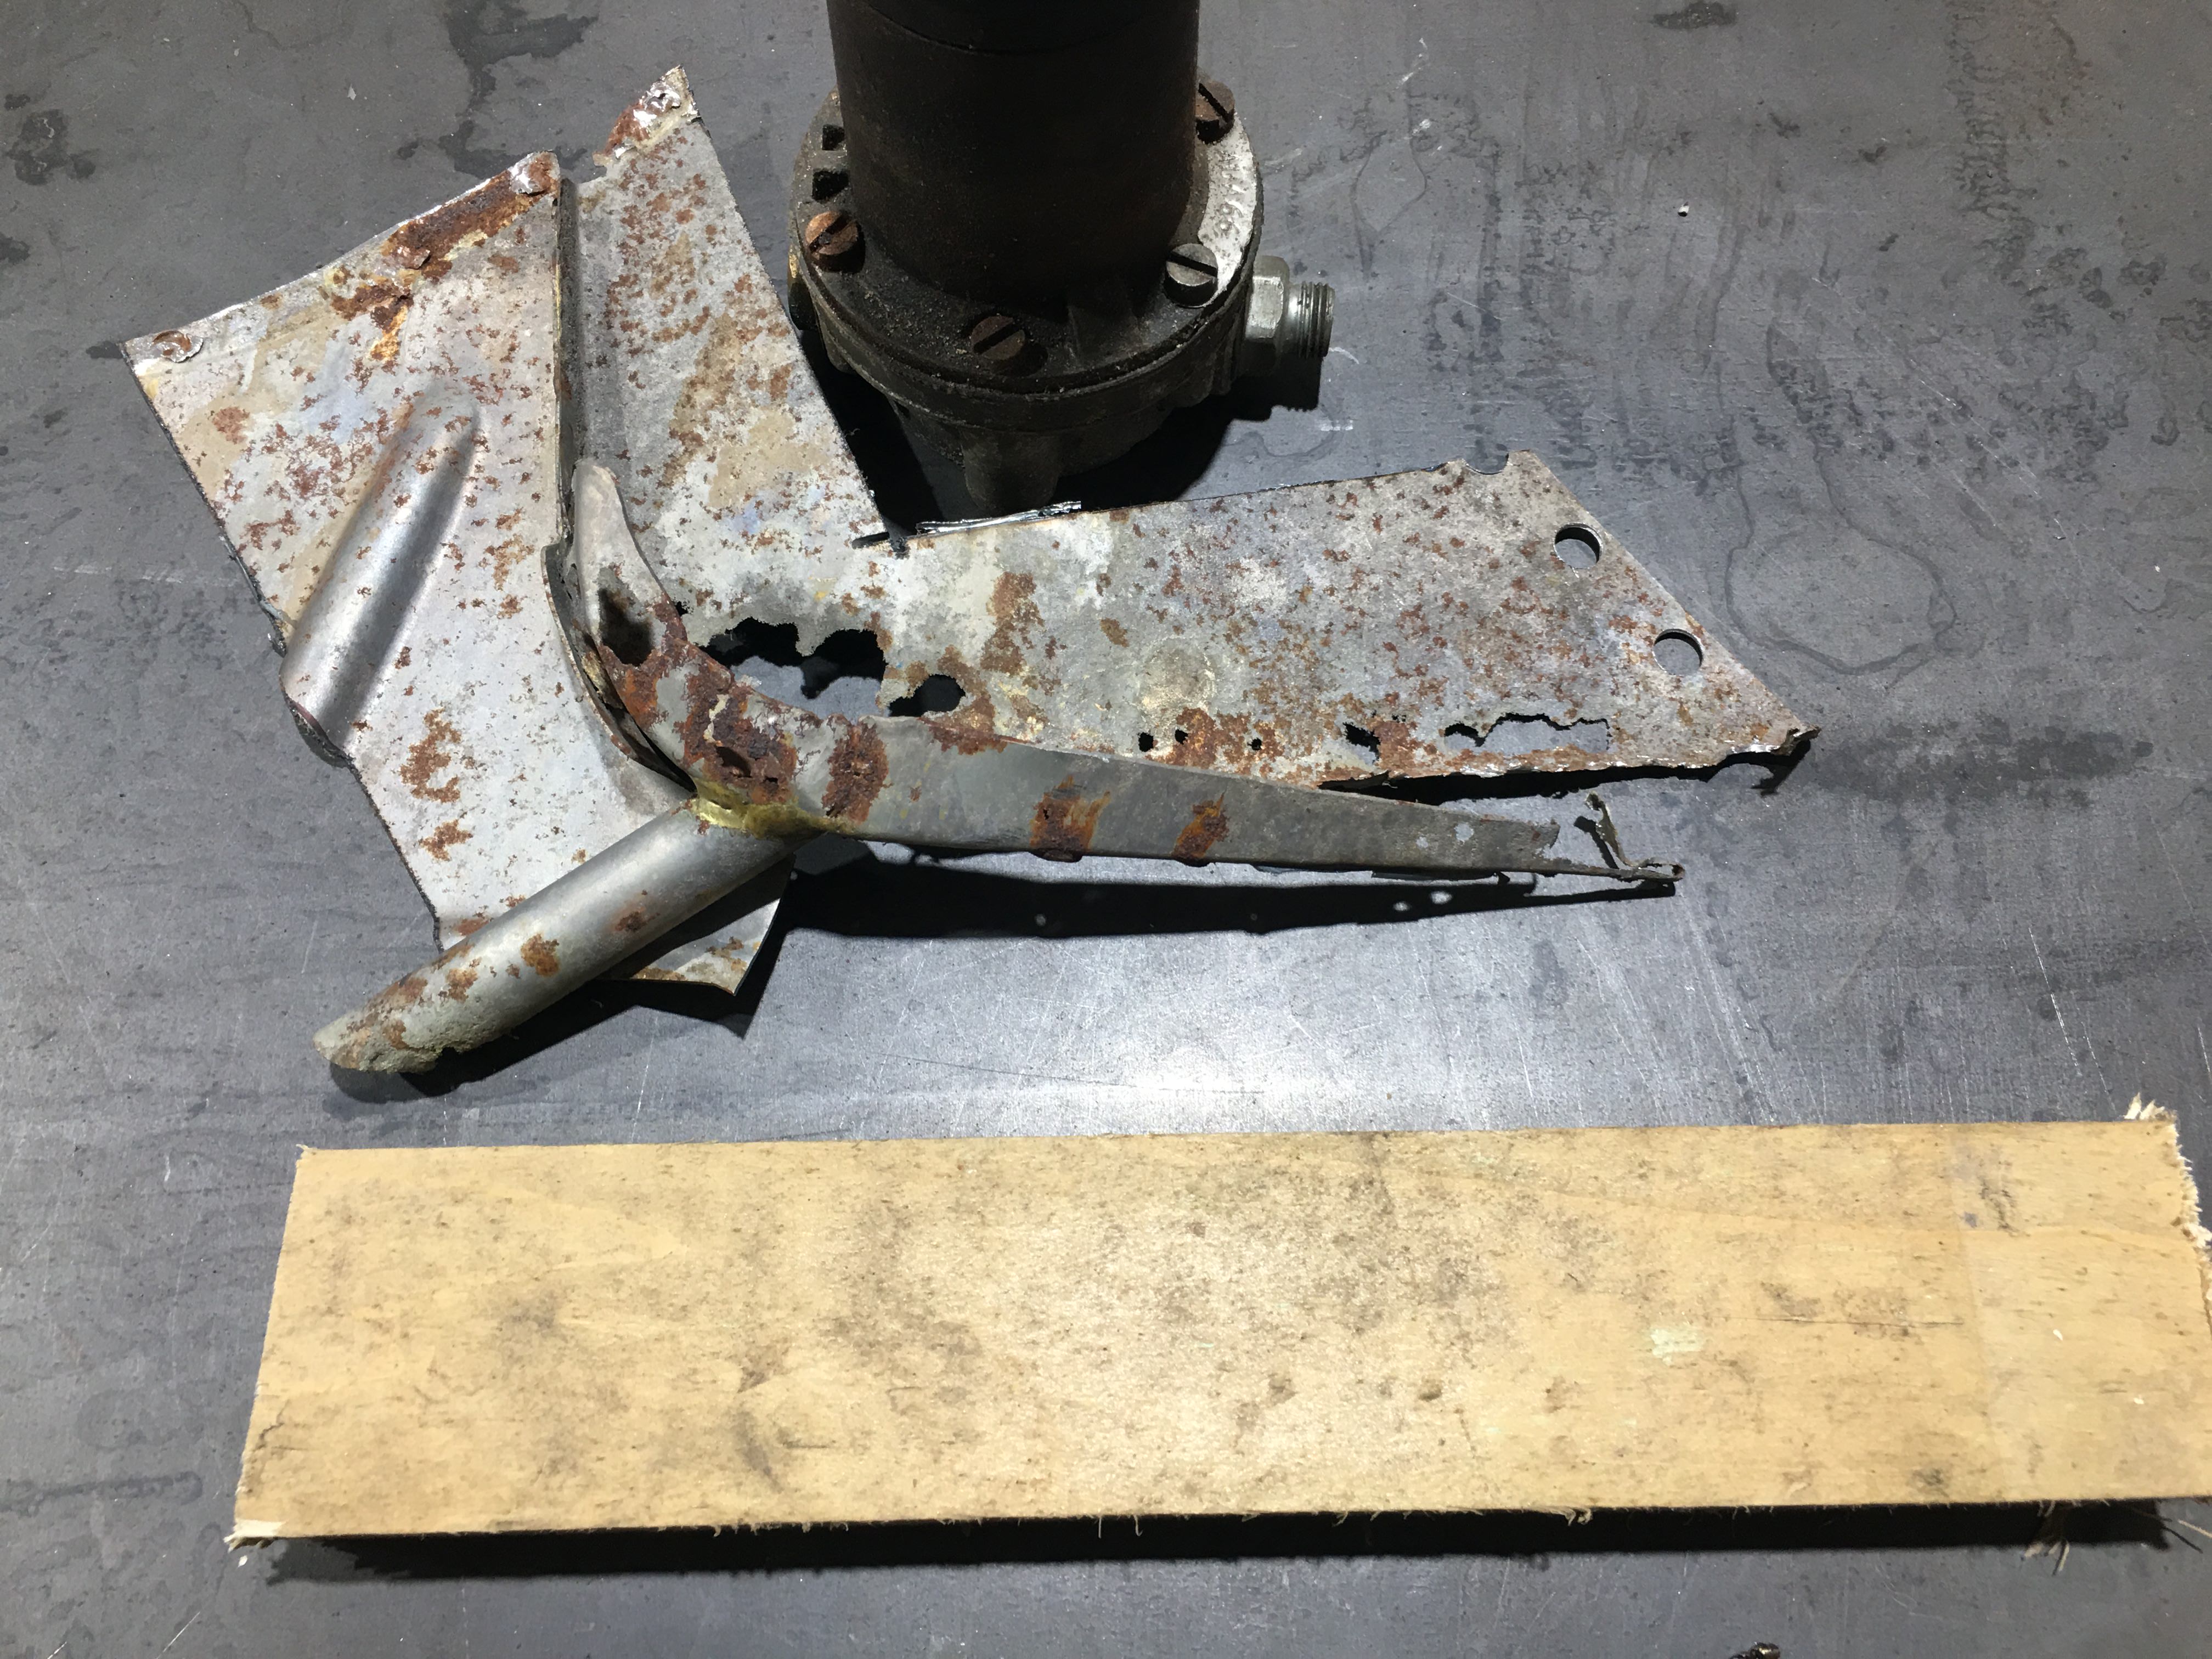
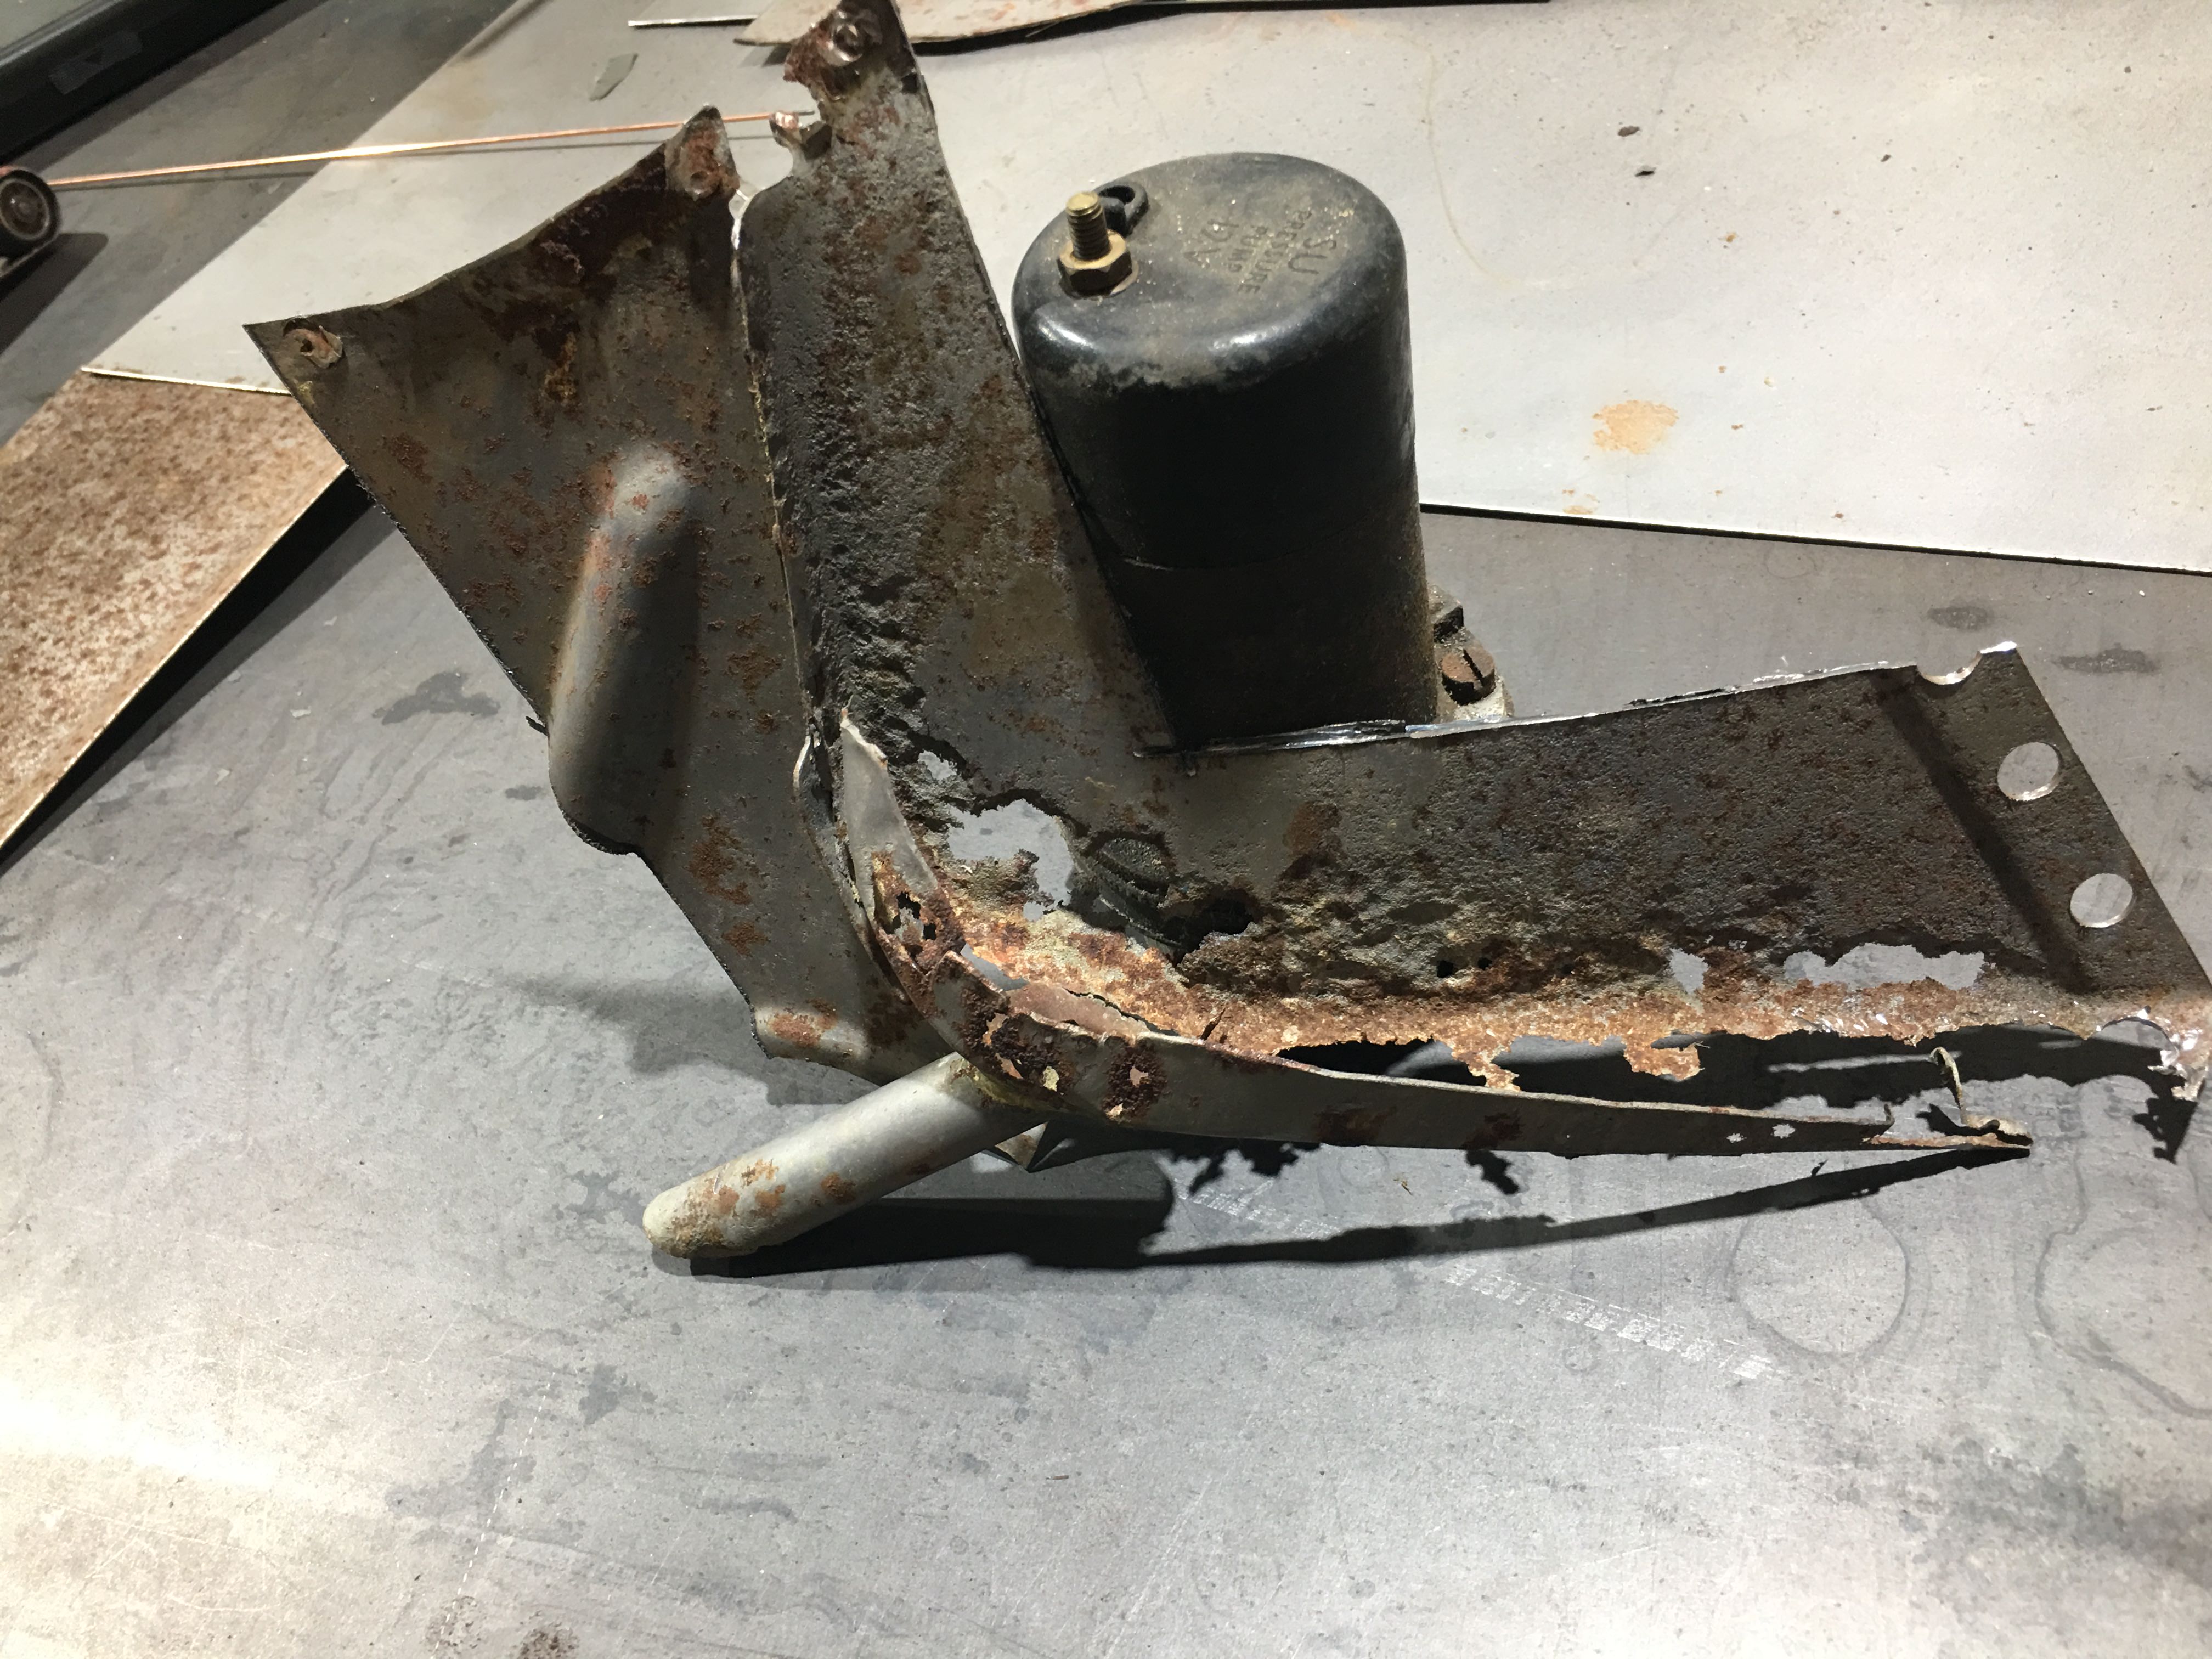
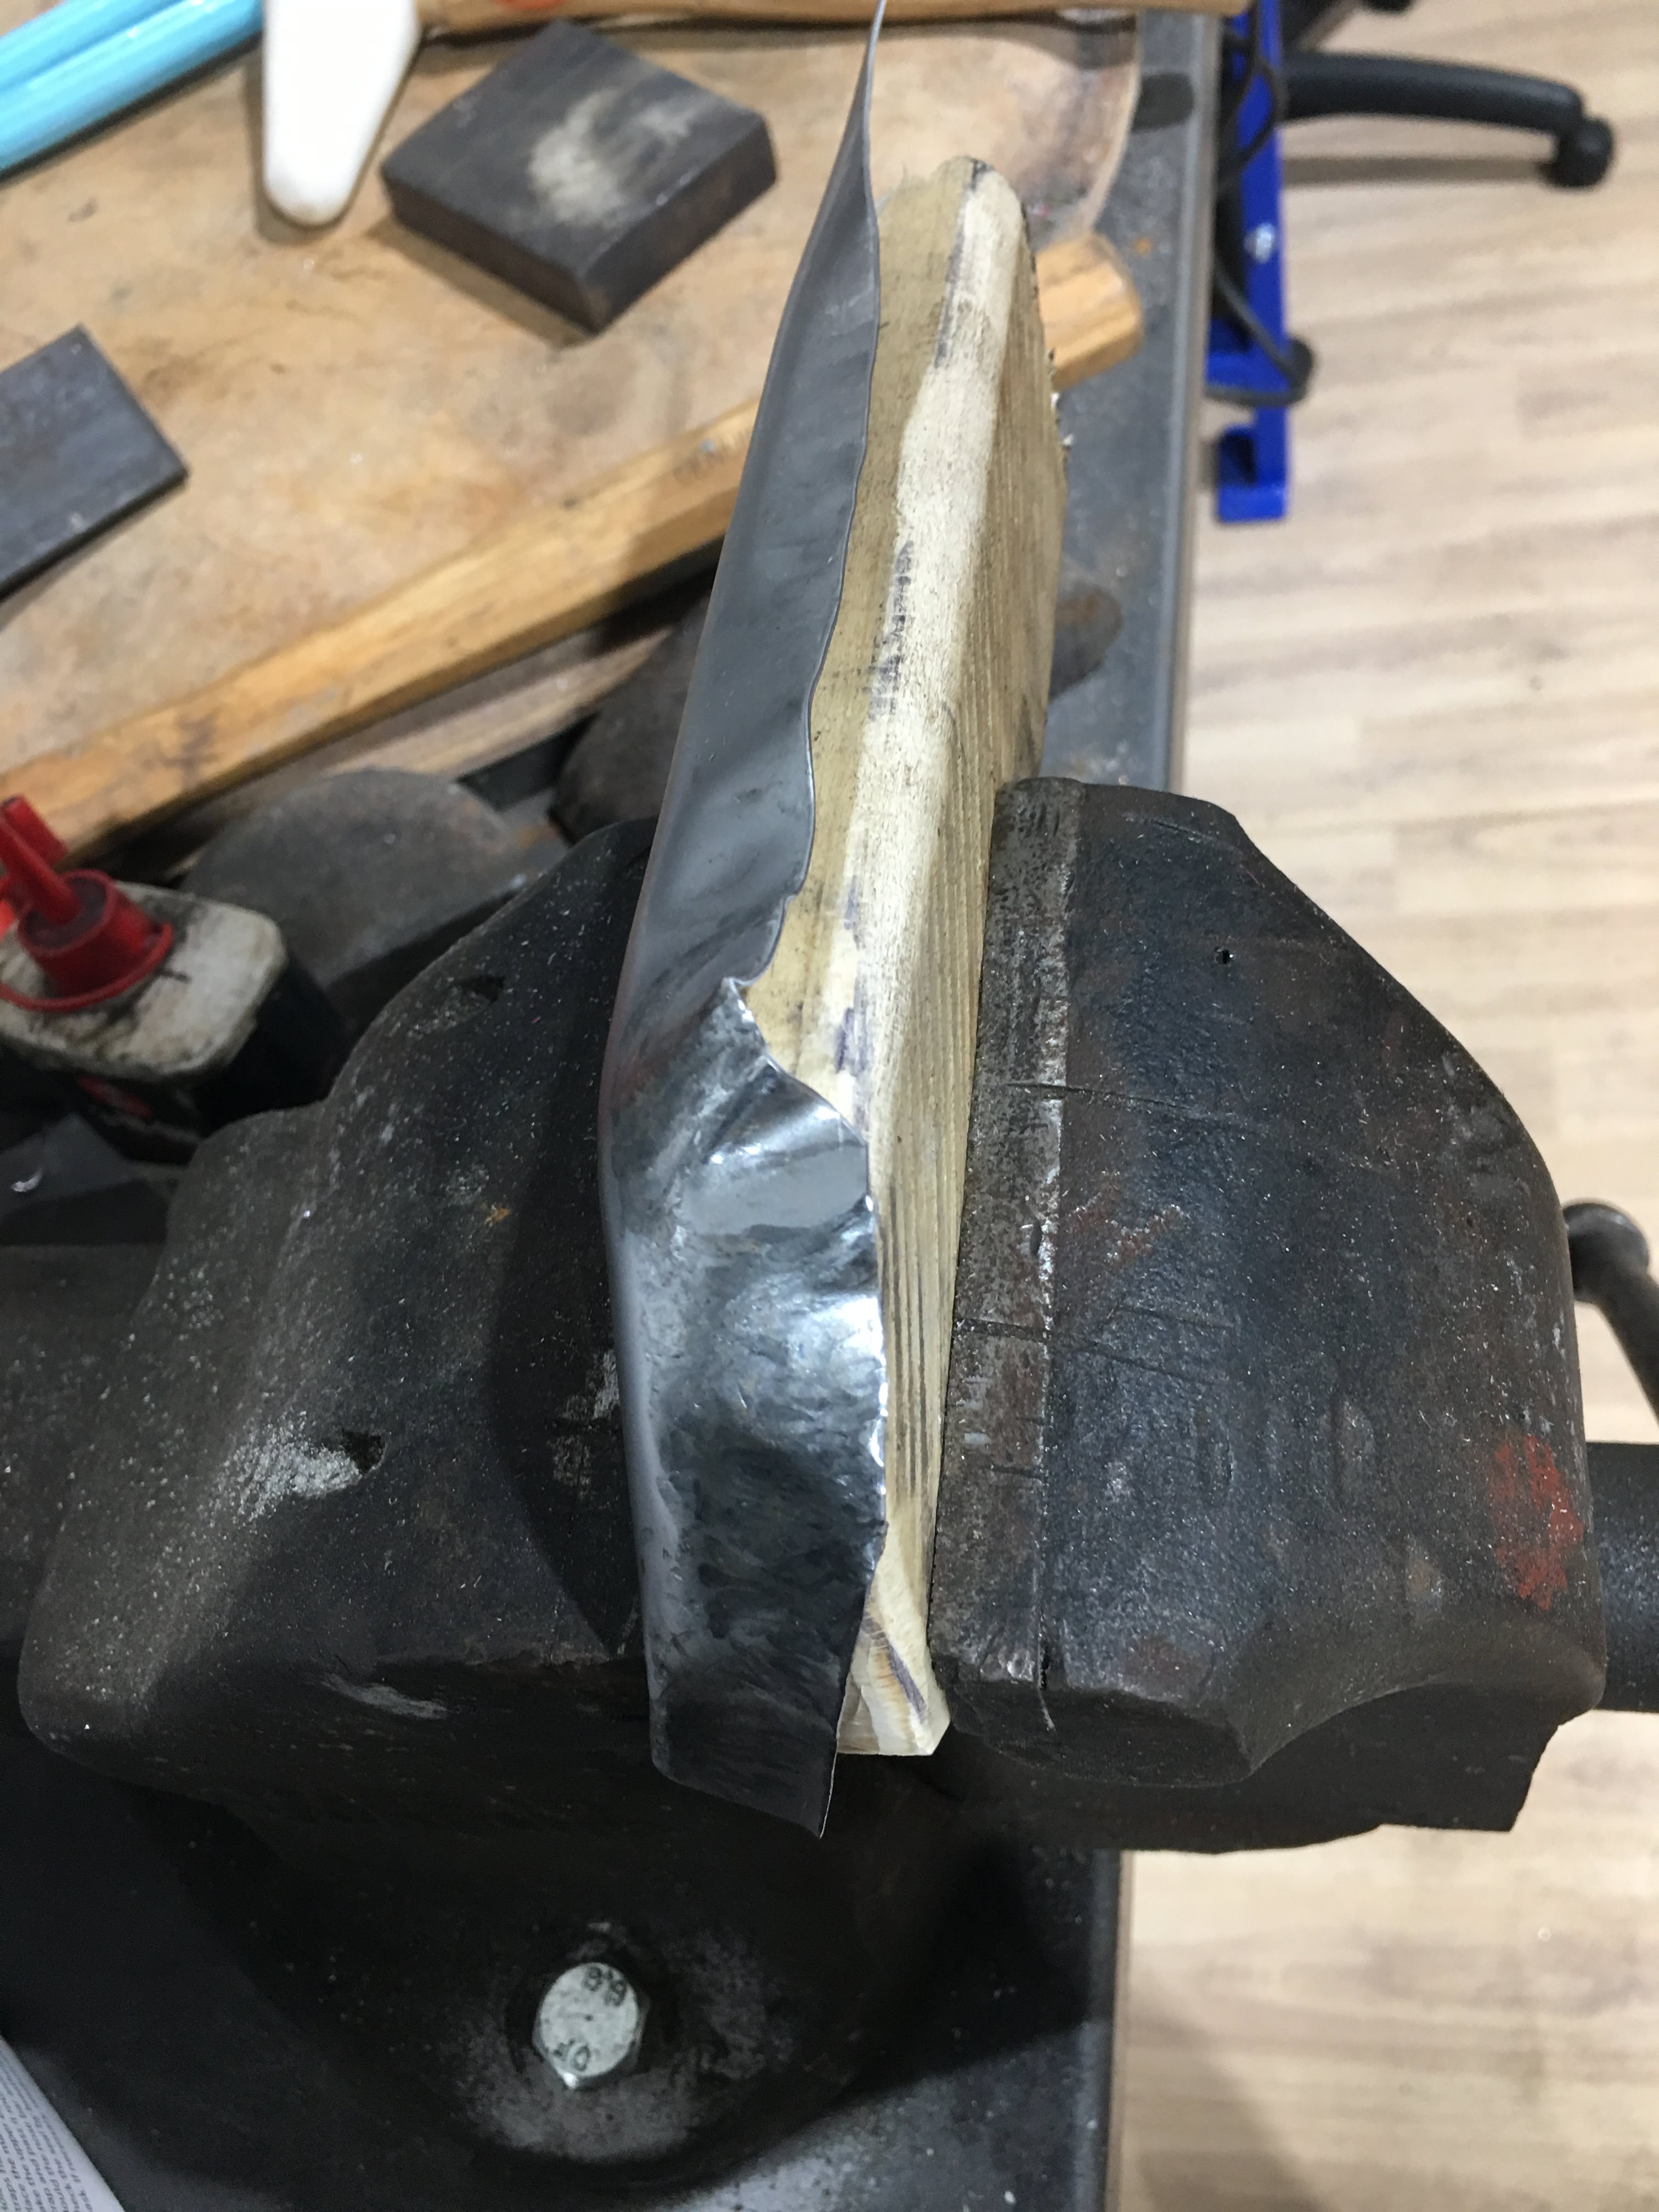
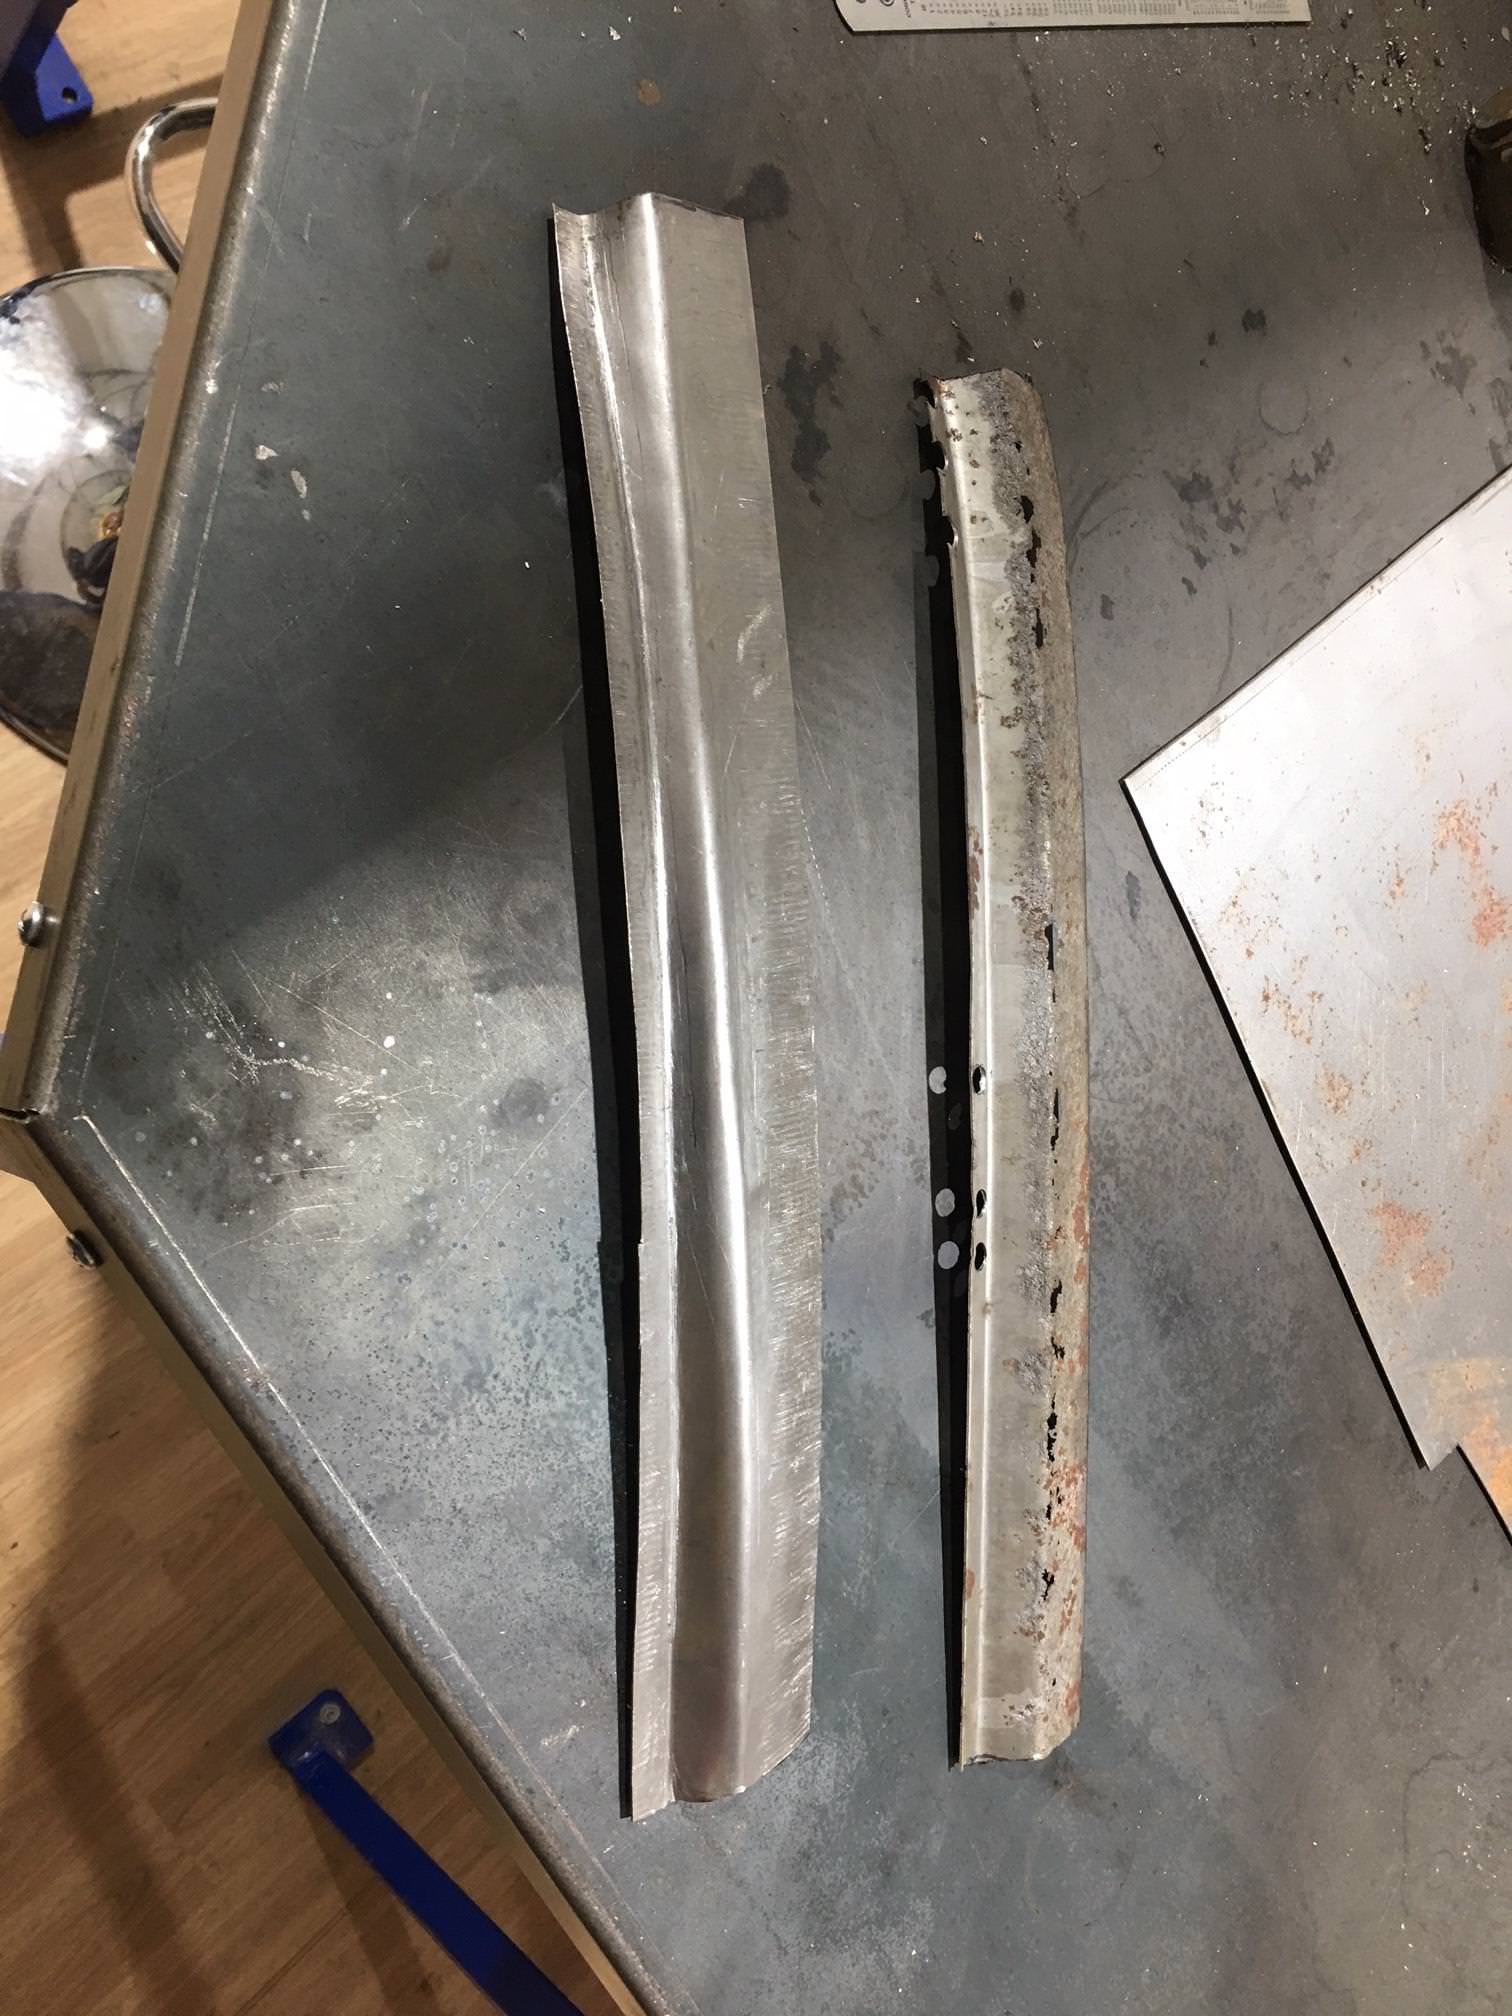
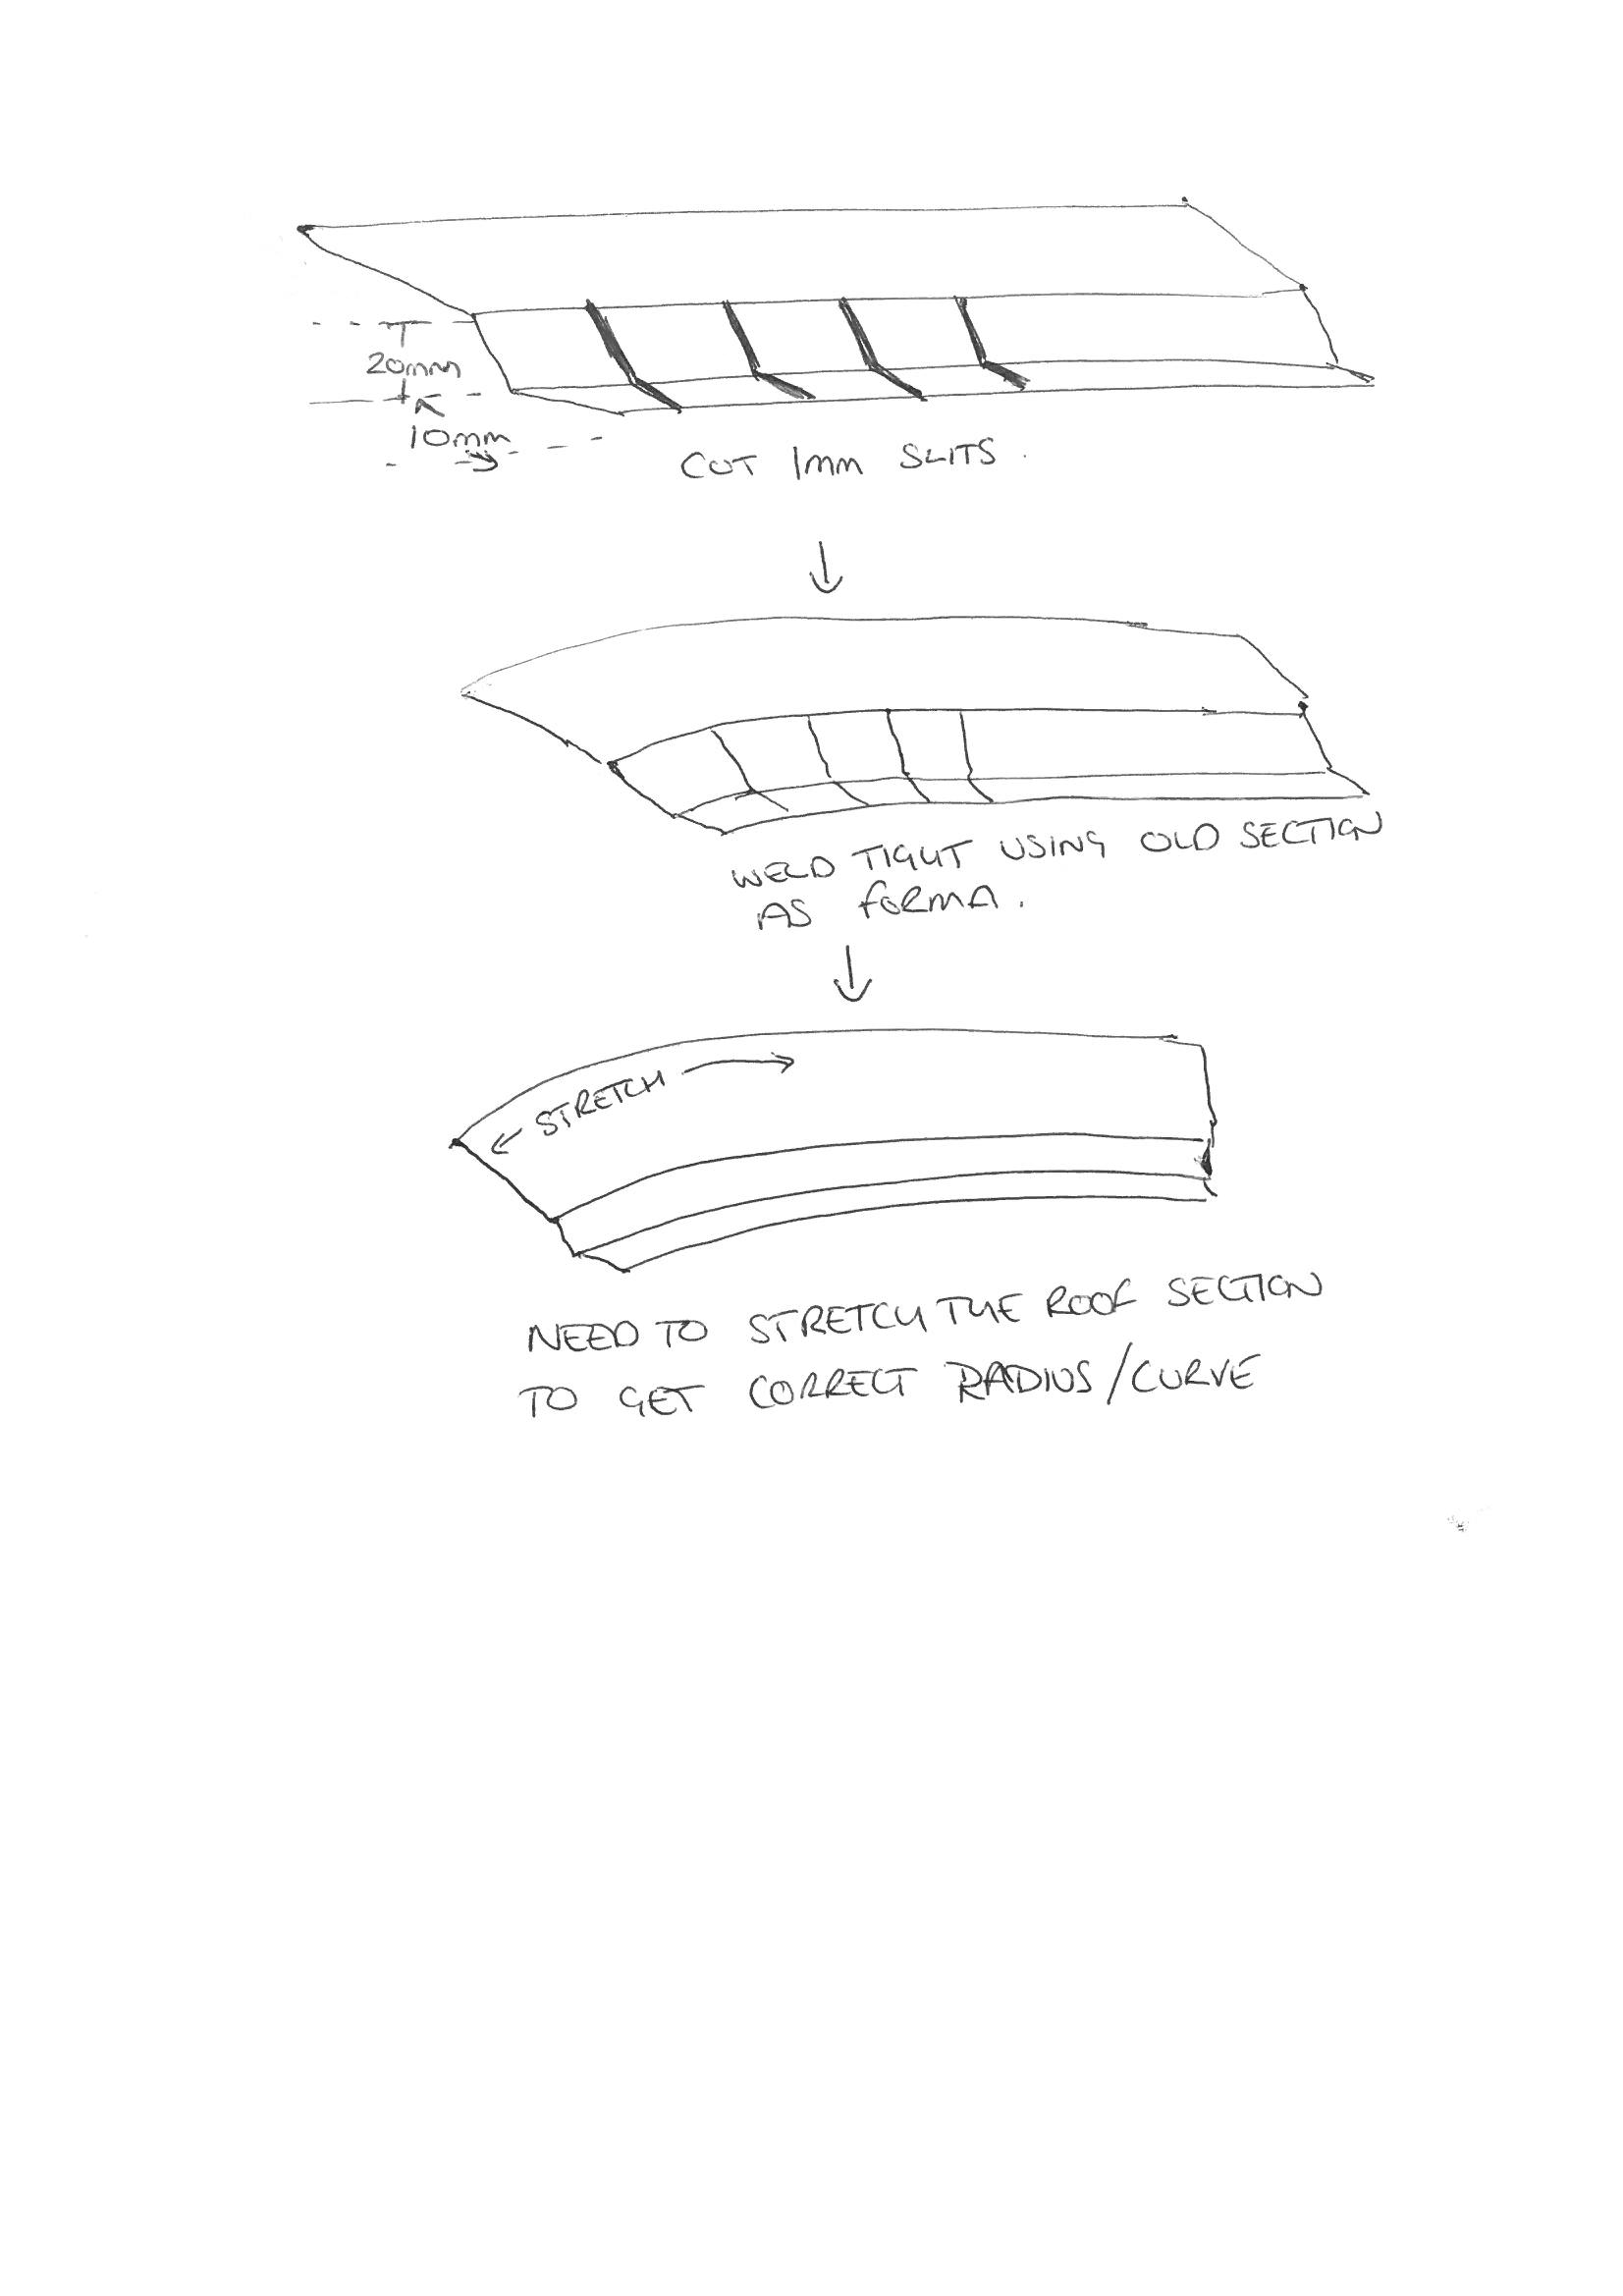
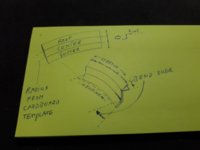
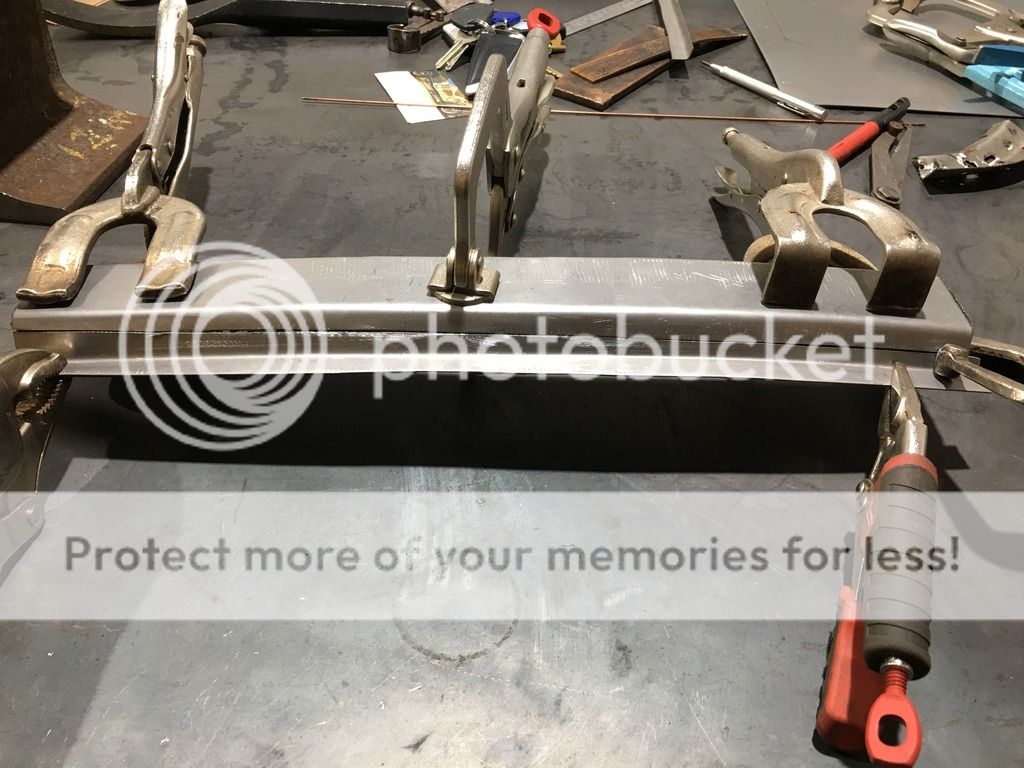
The curvature of the channel was going to be a problem to make as it was quite extreme so I made up a wooden buck and used that to form both halves of the channels.
fc9IXjM.jpg


These took a while as the was a large amount of shrinking required.

WQeTSZ2.jpg

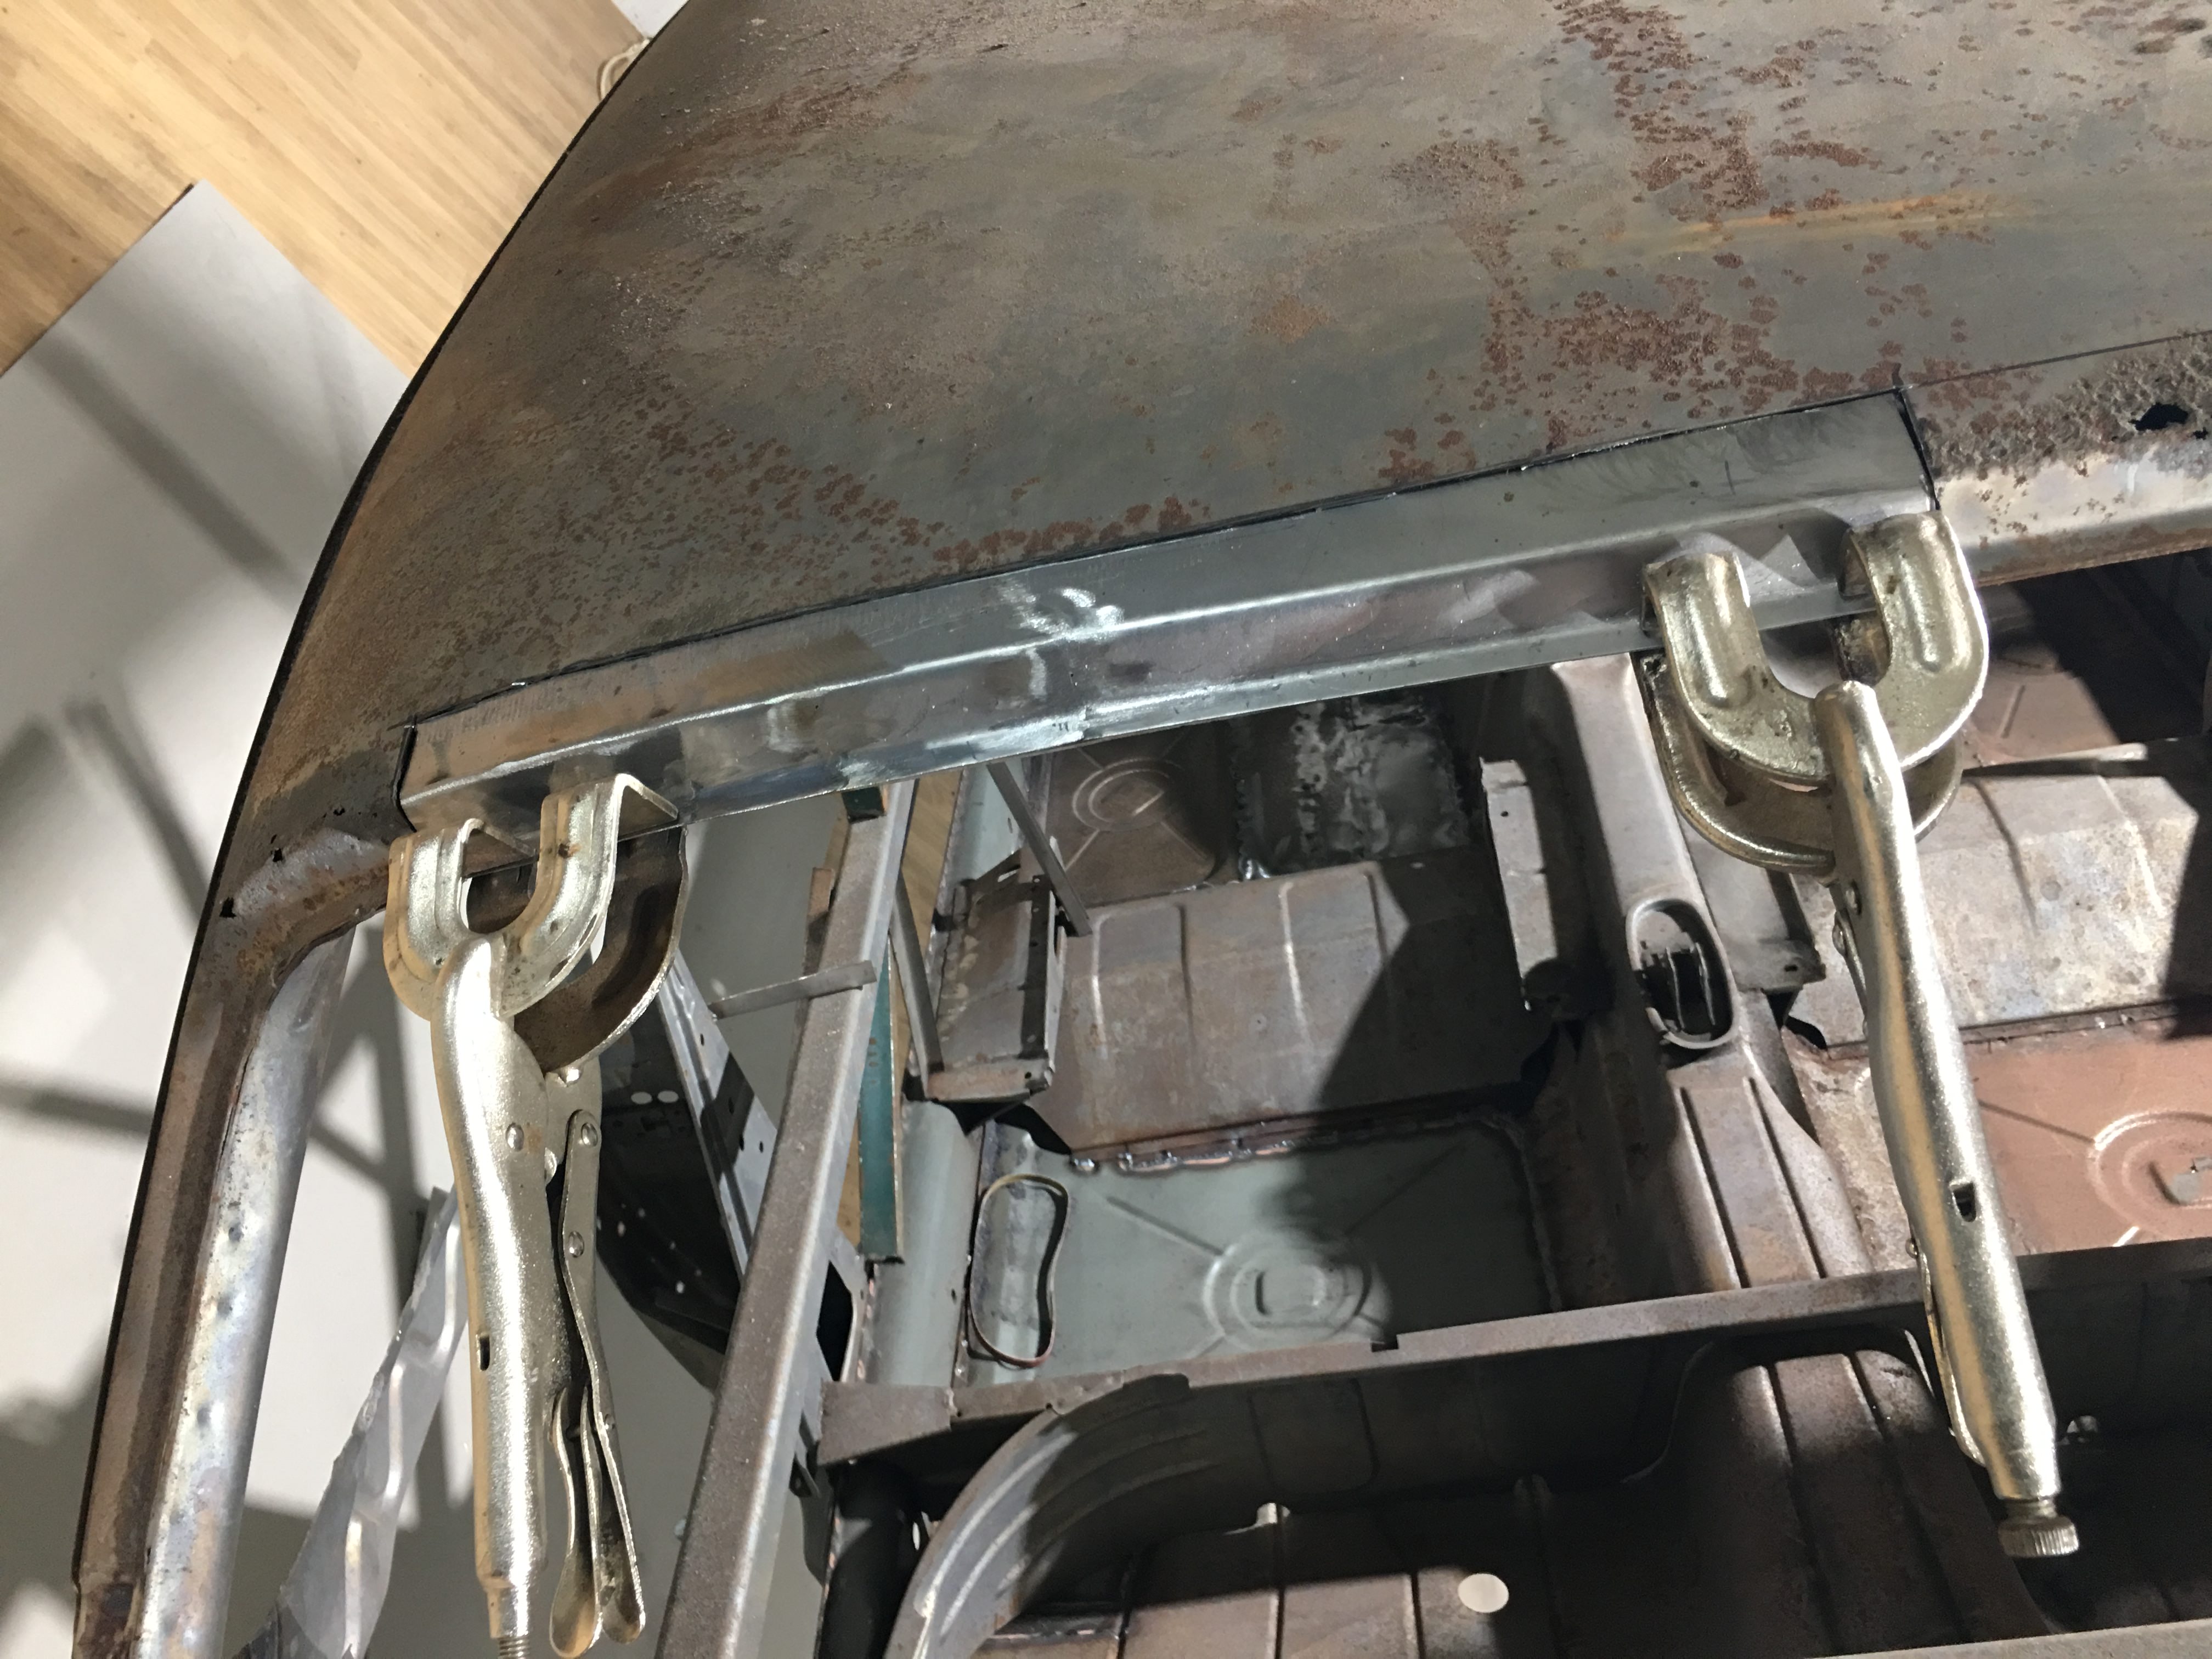
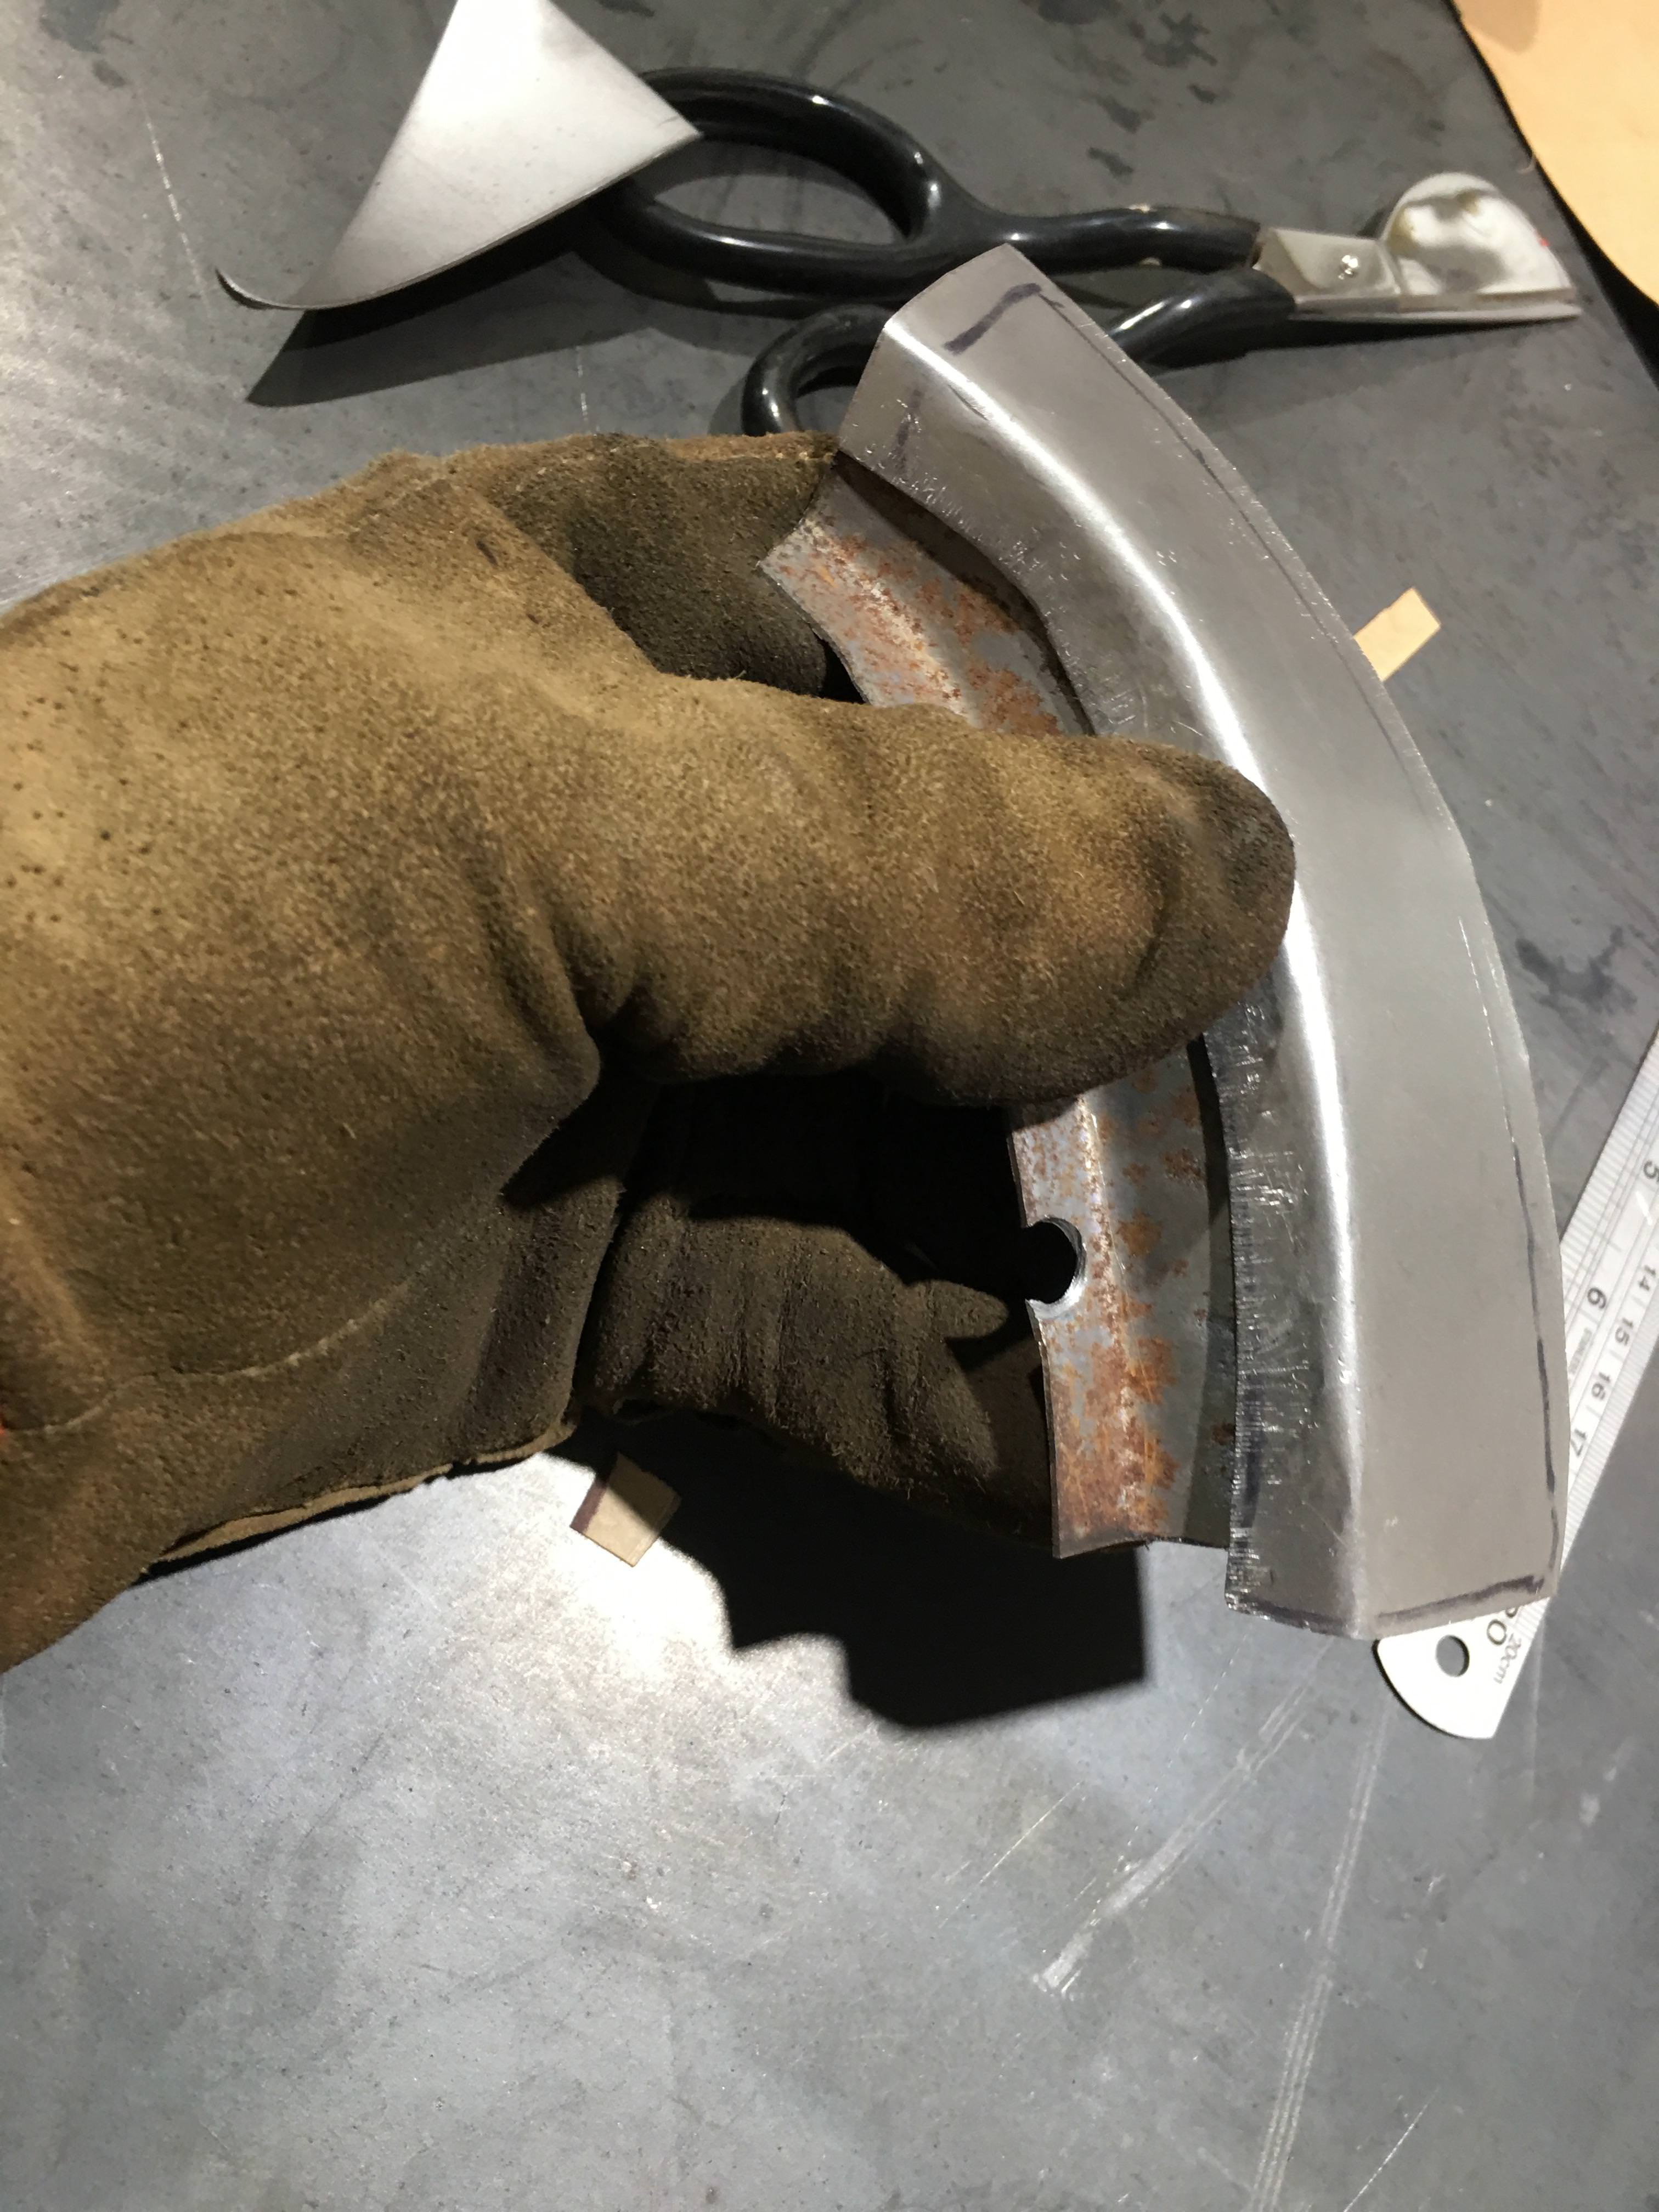
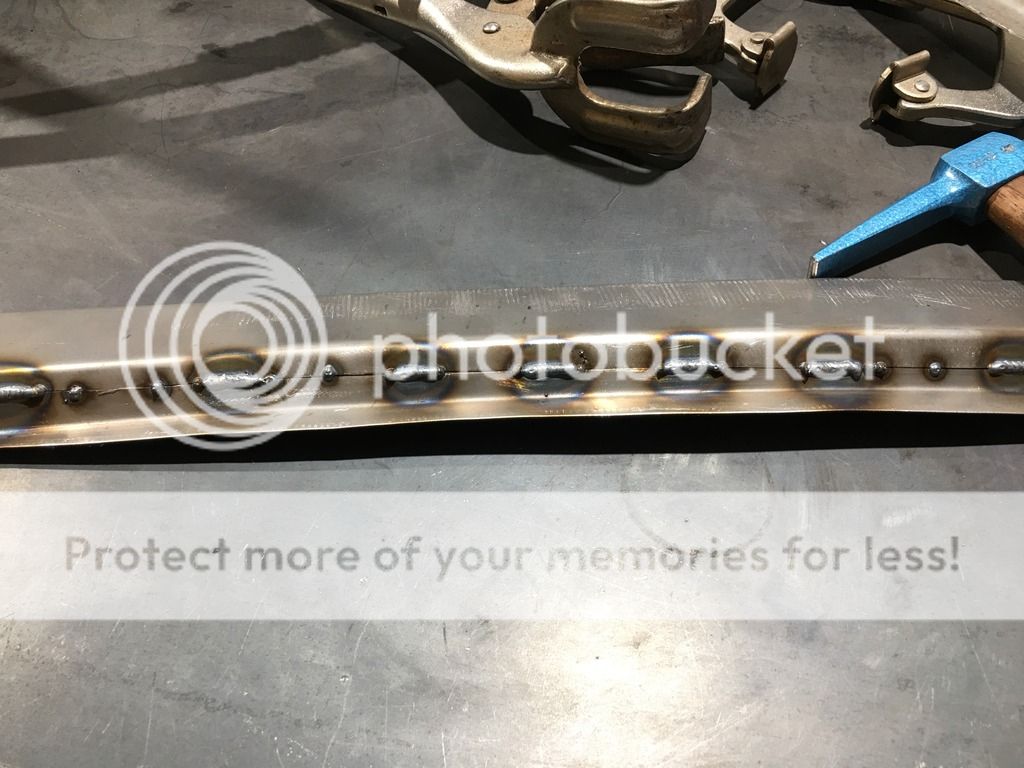
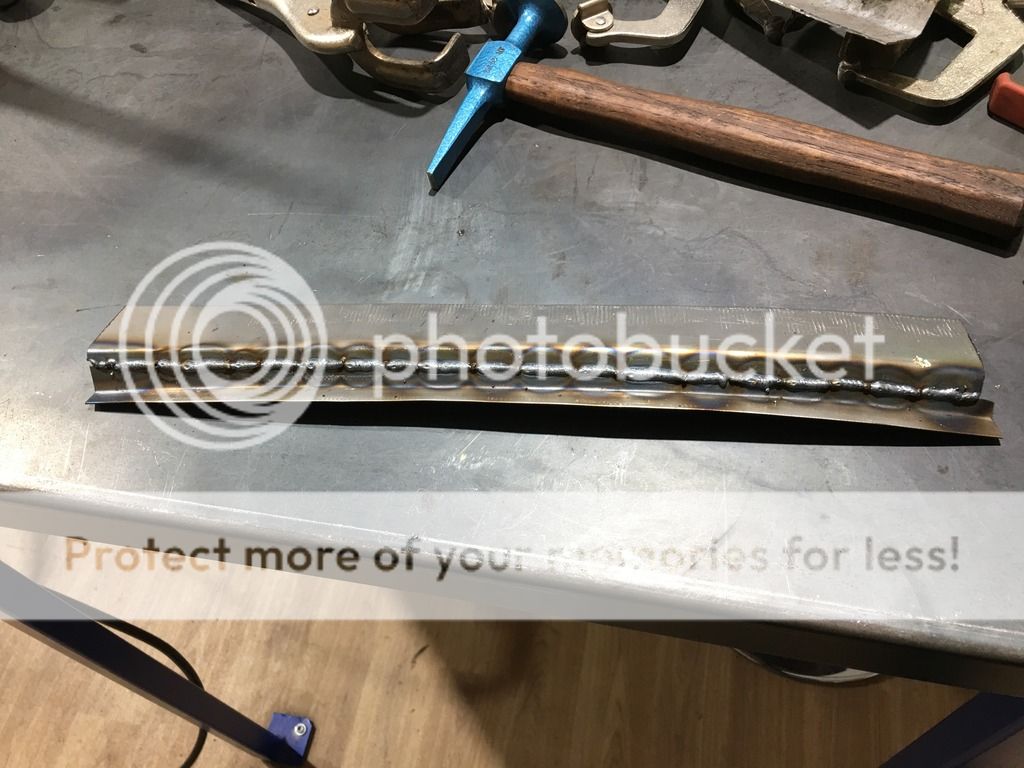
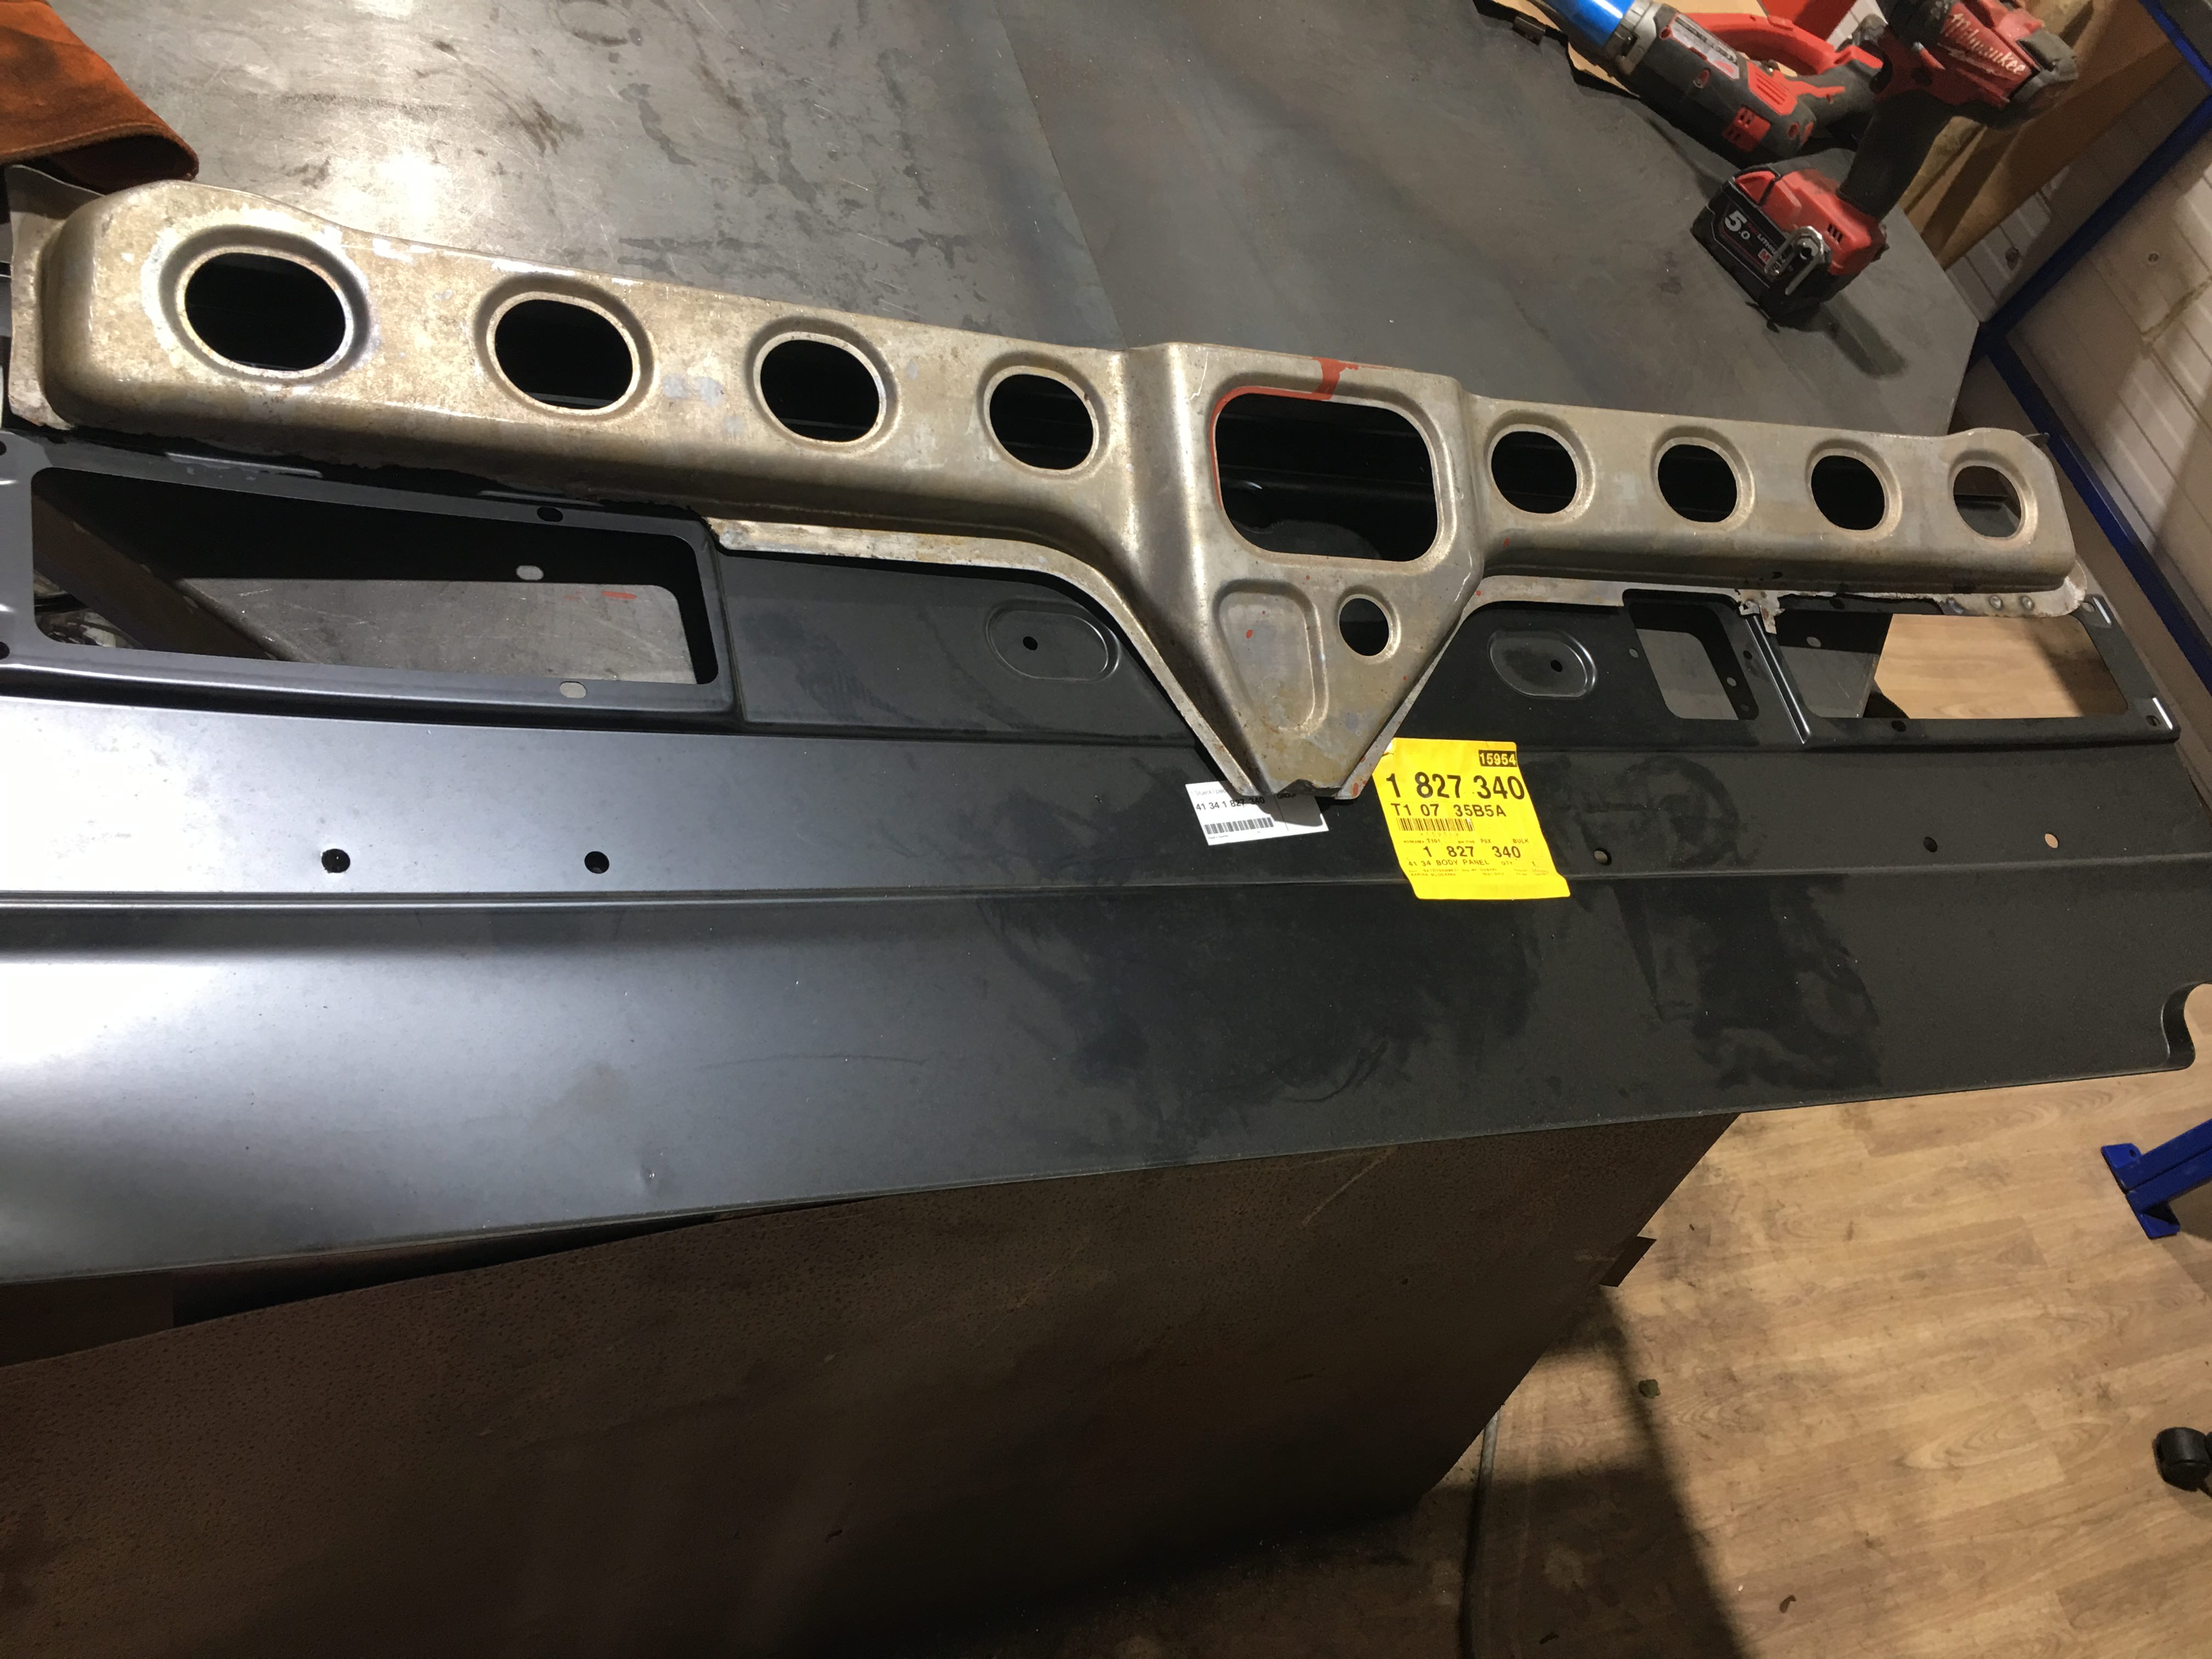
The 2 halves were mated up and tig welded together – all I need to do now is braze in the waste tube.
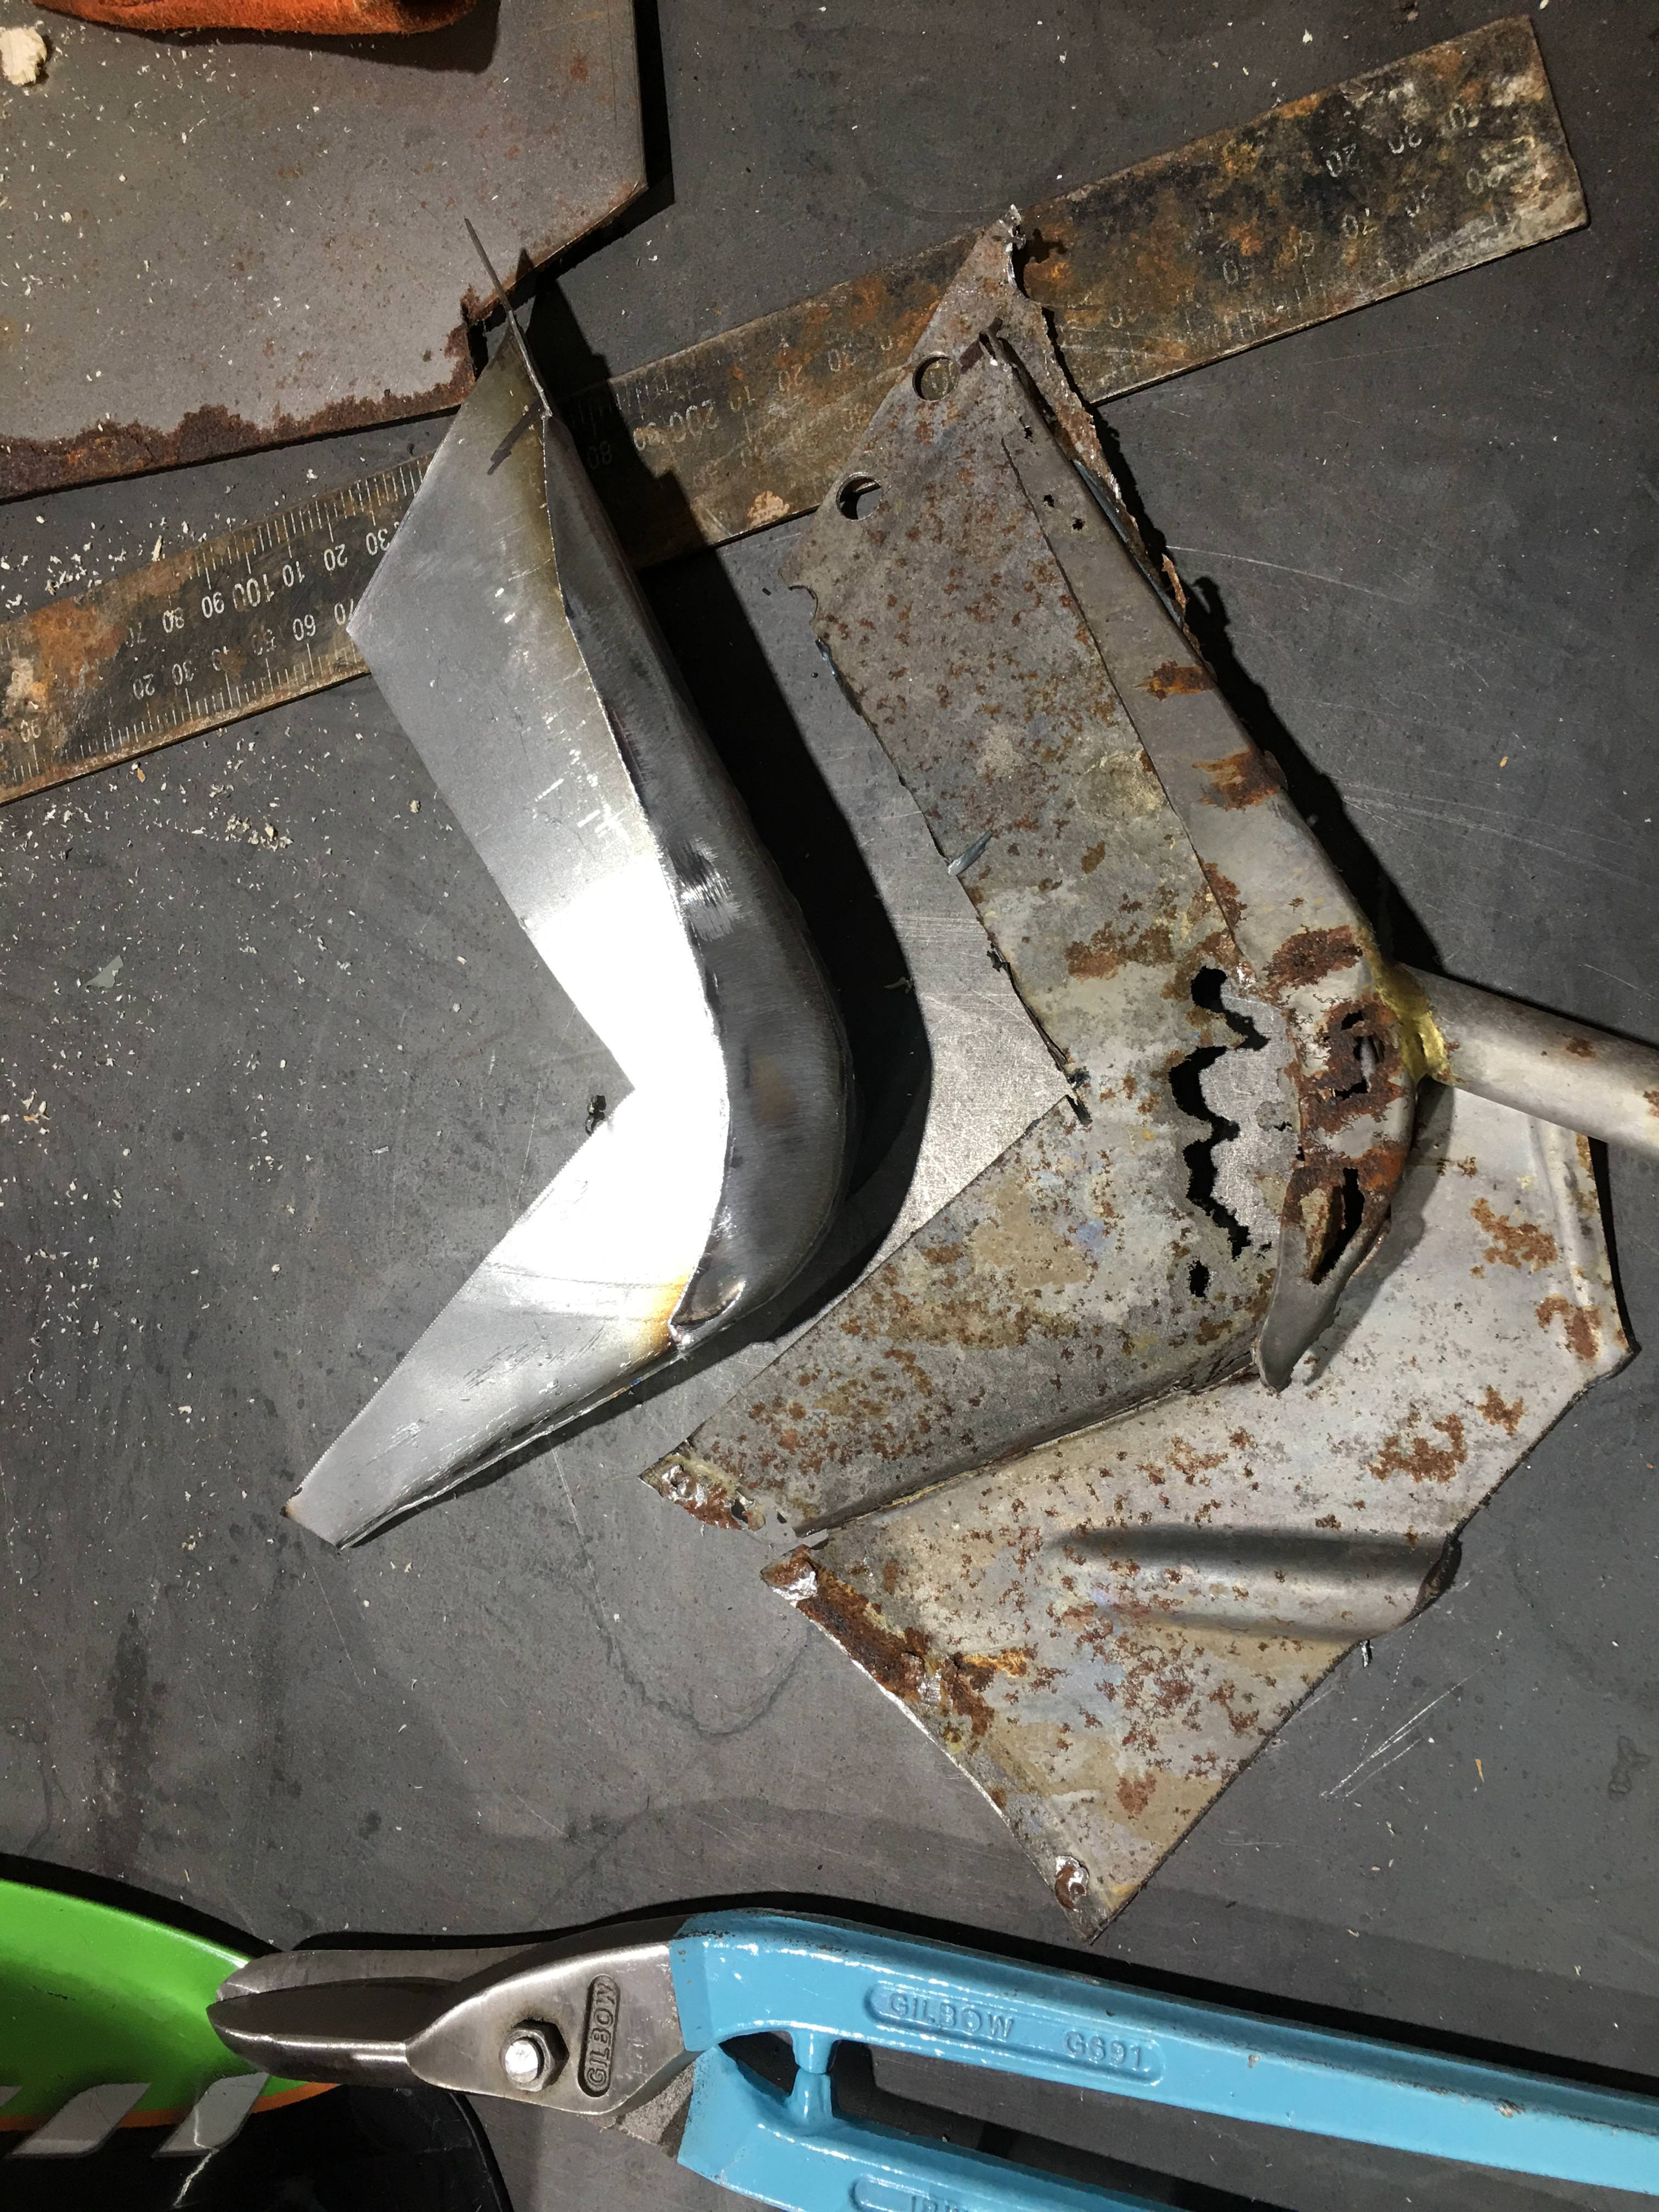
TqOc5Yt.jpg
 

autokunst

Well-Known Member
Site Donor $$
Messages
3,605
Reaction score
2,618
Location
Milwaukee, WI
Whew, that was a lot of shrinking. You worked that like an artist with clay. It always fascinates me when metal is manipulated in such as a way as to demonstrate just how plastic steel really is. Looks great!
 

Marc-M

Well-Known Member
Messages
377
Reaction score
311
Location
Preston - Lancashire-UK
The rear section of the roof along the back window is all rotted out, and last night I decided its time to cut out and make new sections.

As its rotted out the whole length I decided its best to make it in 5 sections.
l4a5QSo.jpg


The corner sections have quite a lot of curve so 2 sections to be made – one for either side

The middle is quite flat – so 1 section

And the LHS and RHS middle – 2 sections

I cut out the RHS middle section and set about making new… thinking I will do that first and then work along doing one section at a time to keep as much integrity in the roof.
283VDJq.jpg


The new section was made after an hour – but I messed it up with the shrinking… as you can see I distorted it and you can see its all turned to shit… it was getting late so I went to bed in a bad mood!
fhbiBLy.jpg


Hopefully I now know what I need to do, so the next section should be better…

I guess the old saying is – if first you don’t succeed. try try again!
 

Marc-M

Well-Known Member
Messages
377
Reaction score
311
Location
Preston - Lancashire-UK
Made up some more sections for the roof/ rear window after the first rubbish attempt…

Made up more than I needed just in case I messed up again, but after a think and study of how the steel needed to be stretched and shrunk, I realised that doing it without cutting into the section was going to impossible, because I needed to shrink the middle section of the profile ,and that cant be got at by the shrinker – however if anyone knows a better way of doing it I would be happy to find out.

Onc3Vi8.jpg


So, for anyone out there who needs to make one of these here is how I made it…
KeEADzm.jpg


Section made up and cut a few 1mm slits into the up stand and the edge/ not the roof steel where the curve is required.

Bent the new section over the old section and griped it in place to get the correct radius and welded up the slits.

Ground off all welds

Offered it up and it was apparent that it also has curves on 2 planes!

To get the correct curve / radius, the steel that was to be welded to the existing roof needed stretching – so after couple of deep, and edge stretches, the section was an exact replica of the old section.

hYcwBrX.jpg

Kzg29xF.jpg

YLH8Wn2.jpg


For the eagle eyes – you will see the welds I did there are a few pin holes – will weld these up when I weld the section in….
 

eriknetherlands

Moderator
Site Donor
Messages
2,696
Reaction score
1,927
Location
Netherlands, Eindhoven area
Hi Mark,

I would shape the piece in a different way. Your dilemma is that after folding the two edges, you have a straight profile: the middle section between the two folds needs to be reshaped from straight into a bit of a "rainbow" shape. And shrinking devices usually don't offer such throat depths/space.

I would start by making a cardboard template of the middle section as it's 2 edges are sections of a very large circle. copy that middle section on steel, and add the top (roof) and bottom (gutter) flange. Cut it out. you now have a 'three-lined' rainbow. Making the folds is now more difficult (vs your approach) as you can't use a press brake and must do it by hand. Use a soft (wood or aluminium) mallet to bend the edges over a steel form. I usually take a thick bit of construction steel and give it a curve a bit smaller as the large 'rainbow ' radius, and a nice round edge (matching the car's radius) to use at a dolly. The roof flange needs to stretch a little; hammer it out or use your stretcher. The bottom gutter flange needs to crimps a little. Usually it needs a bit of both hammering and stretcher / hammer and shrinking.

Big advantage is that you don't need to shape the center section. There are also no slits to weld shut and grind flat. The radius of the inside corners remains nice as you bend it over your self made dolly. Should you cut and weld, then it's really difficult to flatten any weld blobs from the an inside radius due to restricted access for an angle grinder with flap disc.

mind you, there are probably other ways to do it, and perhaps i'm overlooking some aspects. So anyone with tips/ corrections: I'm happy to learn .
 

Attachments

  • 20180824_134541.jpg
    20180824_134541.jpg
    141.8 KB · Views: 466
Last edited:

Marc-M

Well-Known Member
Messages
377
Reaction score
311
Location
Preston - Lancashire-UK
Hi Mark,

I would shape the piece in a different way. Your dilemma is that after folding the two edges, you have a straight profile: the middle section between the two folds needs to be reshaped from straight into a bit of a "rainbow" shape. And shrinking devices usually don't offer such throat depths/space. .


Thanks for that – its great to see how we all do things. I will give it a go!


also


I spoke to my metal shaper guru who has made body’s for Bugatti’s etc etc and he told me I was a DICK HEAD…..

And the way he would do it was as follows…..

Make a card template of the roof section to just to the edge.

When cutting out the steel out allow 10mm extra overlap where the section drops dover.

Bend over the 10mm with hammer and dolly as it on a curve

This 10mm section can then stretched and shrunk to get the desired profile.

Make another L section and because it’s a L section this can be easily stretched and shrunk to suit.

Scribe in the two sections and weld the two sections, and as its on a flat, there is less distortion- easy to grind and planish.

He says that doing it my way (slits) does not give a perfect curve on the edge of the roof- more like a 50 pence piece (English currency) it’s a coin shaped with 7 sides!


Good job I have only tacked it on!! - looks like some more work - both ways!
SARBqqo.png
 

autokunst

Well-Known Member
Site Donor $$
Messages
3,605
Reaction score
2,618
Location
Milwaukee, WI
I spoke to my metal shaper guru who has made body’s for Bugatti’s etc etc and he told me I was a DICK HEAD…..
Yikes - that seems a bit harsh. :eek:
Just for comparison sake, this third method would result in a two-layer "sandwich" at the drop of the profile. That would need to be seam sealed, and is not how the original roof panel is, correct? Not that it wouldn't provide the smooth curves - just trying to understand the pros and cons of the various methods.
 

Marc-M

Well-Known Member
Messages
377
Reaction score
311
Location
Preston - Lancashire-UK
Yikes - that seems a bit harsh. :eek:
Just for comparison sake, this third method would result in a two-layer "sandwich" at the drop of the profile. That would need to be seam sealed, and is not how the original roof panel is, correct? Not that it wouldn't provide the smooth curves - just trying to understand the pros and cons of the various methods.

Hi


The joints would be butted up and seam welded - then ground flat - so there would be no seam to see, in effect it would be one section.


The big problem is that the curves/ aperture for the back window are not on one plane - but 2 - so i guess its 3d??


Not easy to explain, but imagine you held a banana in front of you and the ends are pointing down, and each end was in your hands like you would hold a steering wheel.


Then with your left hand pull toward you the left had corner of the banana - that would give you the shape of the rear window at the sides…… don’t try this at home as you wold split the banana and the you may have to eat it! –

I guess the best way to understand how metal needs to shrink and stretch is to make a paper template and put cuts in it to allow it to form the shape (keeping the main template in one piece) – then open out on a flat table, and then you can see all the gaps and overlaps that would be required to make the section from steel…


Regards

Marc
 

autokunst

Well-Known Member
Site Donor $$
Messages
3,605
Reaction score
2,618
Location
Milwaukee, WI
Love the banana reference. Yes, most of the metal on our cars are compound shapes with curves in multiple directions. That's what makes them beautiful. :D and more challenging to fabricate...
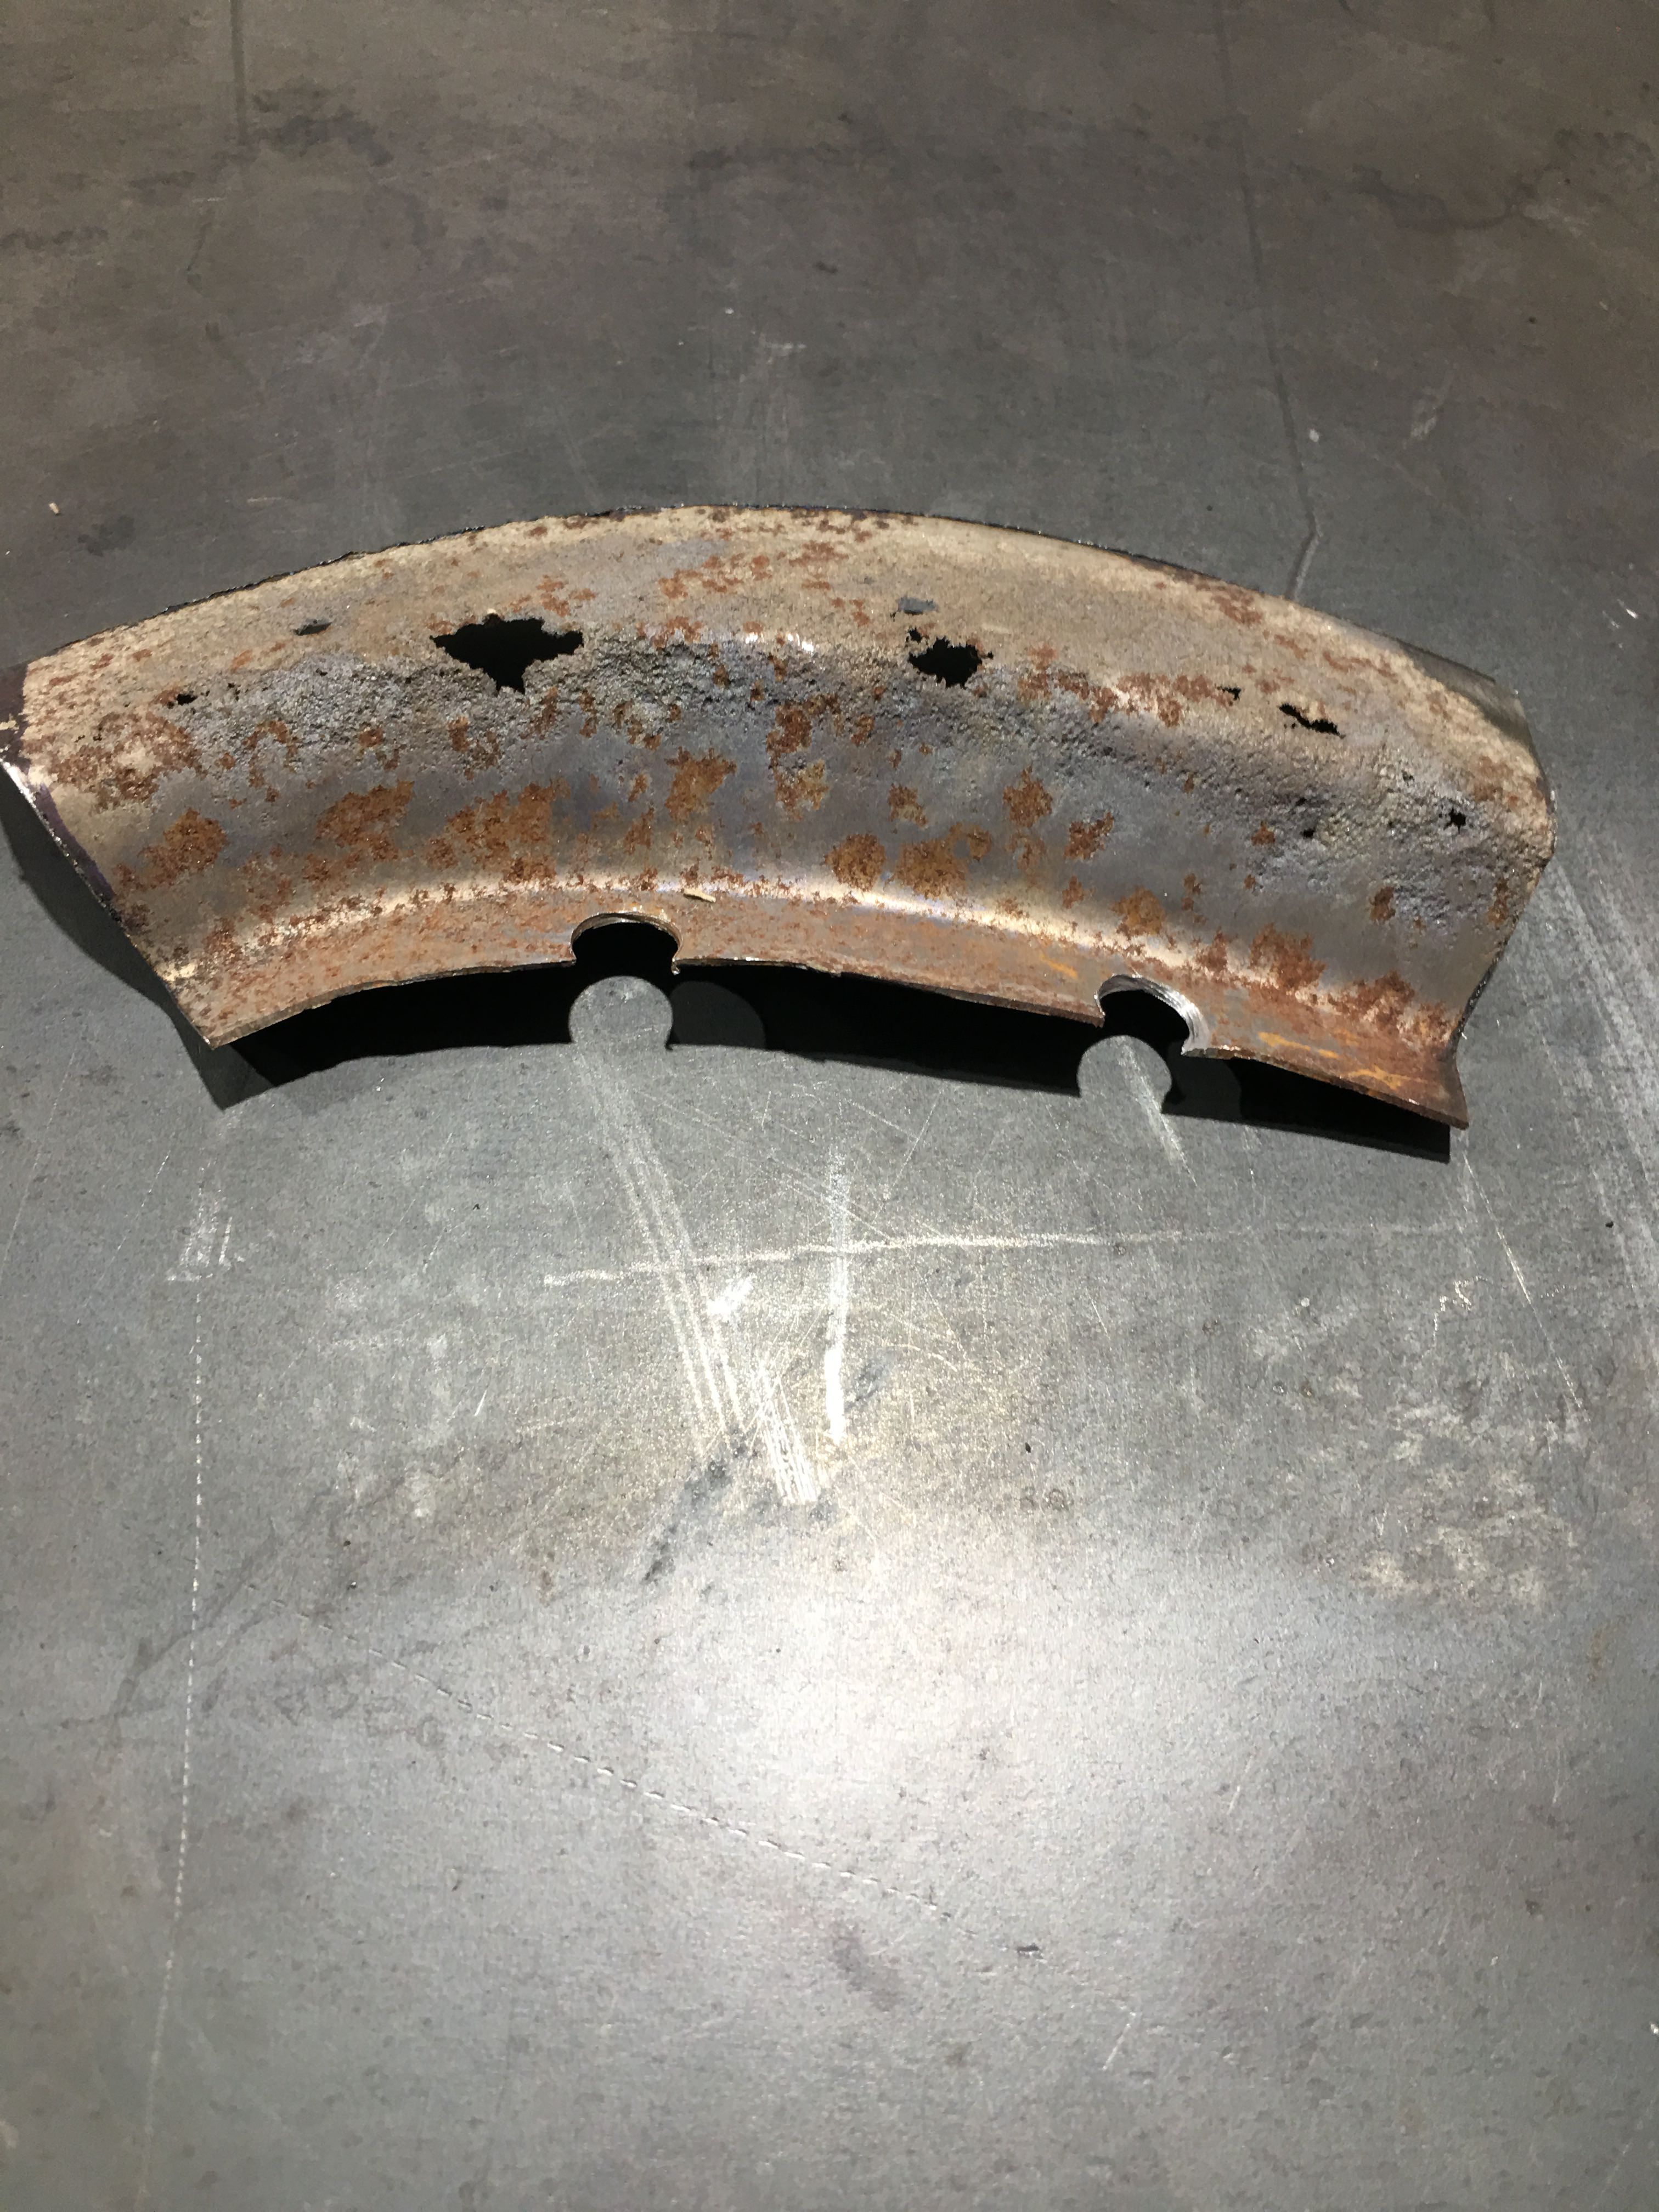
 

eriknetherlands

Moderator
Site Donor
Messages
2,696
Reaction score
1,927
Location
Netherlands, Eindhoven area
I spoke to my metal shaper guru who has made body’s for Bugatti’s etc etc and he told me I was a DICK HEAD…..

And the way he would do it was as follows…..


[/QUOTE]
Interesting approach. I think I have to improve my welding skills, as I didn't consider to do it like that due to the welding involved.
So if we manage these shapes successfully we can progress and move on to Bugatti's ?
 

Marc-M

Well-Known Member
Messages
377
Reaction score
311
Location
Preston - Lancashire-UK
I spoke to my metal shaper guru who has made body’s for Bugatti’s etc etc and he told me I was a DICK HEAD…..

And the way he would do it was as follows…..
Interesting approach. I think I have to improve my welding skills, as I didn't consider to do it like that due to the welding involved.
So if we manage these shapes successfully we can progress and move on to Bugatti's ?[/QUOTE]

I would have a go! just need to save up and find one - plus they are made of Aluminium and you can anneal it so it easy to bend!
 

Marc-M

Well-Known Member
Messages
377
Reaction score
311
Location
Preston - Lancashire-UK
This weekend I made the top LHS corner section of the rear window.

I adopted the way of making it in 2 sections, and it turned out quite well.

The section is welded in place and the lines are correct however on the weld to the roof it has shrunk a little and will need to be built up will a little lead – I can’t get the dolly under it to planish it up as there is a support stopping me getting to it.

But its always better to have a low spot than a high spot.


40dH2Le.jpg

AZaK4qW.jpg

rijKHDj.jpg


SV5kR5t.jpg

bPd7wBD.jpg


fB2Wedm.jpg

Qn1USlq.jpg
 

Marc-M

Well-Known Member
Messages
377
Reaction score
311
Location
Preston - Lancashire-UK
Last night made a bigger section of the rear window, I’m now getting it off to near perfection!
Only 2 more sections to make --

IMG_2069_zps7oibopgt.jpg


The 2 sections made and clamped onto the old section to ensure I have the correct profiles and ready to weld.
IMG_2070_zpslutuaac2.jpg

Sections made and spot welded..
IMG_2071_zpsuqjsfrft.jpg

Small 1 inch welds to keep distortion down - I also use my airline to blow cold air onto the weld to keep the whole sections cool
IMG_2072_zpskdaopllf.jpg


All welded up
IMG_2073_zpsxfx7vdhz.jpg

Weld ground off and planished - offered up and it was slightly out but a little bit of work with the stretcher and all came back to how it should be...
 

autokunst

Well-Known Member
Site Donor $$
Messages
3,605
Reaction score
2,618
Location
Milwaukee, WI
Ah, I see. So you rather than a lap joint you are welding the two pieces with a butt joint. That makes more sense (to my original misunderstanding). Looks great!
 

Marc-M

Well-Known Member
Messages
377
Reaction score
311
Location
Preston - Lancashire-UK
With the main inner shell now being solid – it was now down to tackle the rear of the car.

I have got replacement panels from W&N - and these are – spare wheel – fuel tank floor – and I got from BMW Uk a new rear Vallance (it’s in black).

The rear valance, as always is not a complete panel… why do they do that???? and I had to take off the inner supporting panel off the rotted out one.

I must say – drilling spot welds out with a blunt bit is a pain in the ass – and as it was 7 pm I had no option.. will get some new ones today…

Has anyone tried to sharpen up the old bits??? – I need to look on utube if there is a way?

There are quite a few tabs that hold the wiring loom in that need to be put back on the parts that have been taken off.

Back to the rear panel – so all ready and apart from dressing up and taking the paint off where it all needs spot welding together.

I will have to prop/ weld the boot (trunk) floor off my supports to keep the floor from dangling down – and is now going to be a juggling act with the whole body.

kr4fCD1.jpg

Looking solid but sad

All a big patchwork - you can see all the tabs that need to be put on the new repro panels..
VsCoNwC.jpg

Still bits to finish off round the wheel arches - but I will pull them in when I put the floors in
wFpE27y.jpg

All to be put in the skip ( apart from the inner support) and the spare wheel holder
Wd3Y83u.jpg

I cut the panel off - so it was simpler for me to drill out the spot welds
Y21Sezj.jpg

Still some new sections to weld in to make the section right - these things rot everywhere... how did it rot above the rear lights ?? nuts
p0v9Fk4.jpg

Trial fit - it fits snug...
 

autokunst

Well-Known Member
Site Donor $$
Messages
3,605
Reaction score
2,618
Location
Milwaukee, WI
Marc, I love how you are going at it. It is great to see - and also a telling forecast for what lies ahead in my future. I have the same rear panel sitting in a box, awaiting this assemblage one day...
 

Peter Coomaraswamy

Well-Known Member
Site Donor $$
Messages
3,787
Reaction score
896
Location
Austin, TX
I'm thinking you might could weld a whole new roof on or steal a section from a wreck somewhere? I know it's not as much fun but might take less time :)
 
Top