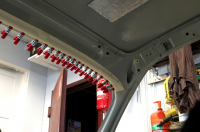
Getting this 3.0CSi back on the road

Today we took some small steps with the headliner installation, this is something that I've never done before, but they say you'll never learn if you never try.

Still waiting on the A + C pillar foam and vinyl pieces, but started with the small patch at the rear window.

Screen Shot 2017-09-02 at 23.41.12.png


Screen Shot 2017-09-02 at 23.41.23.png


Screen Shot 2017-09-02 at 23.41.31.png


Glued in place and ventilation holes cut open:

Screen Shot 2017-09-02 at 23.41.44.png


After that we played around with the headliner trying to find the right position for the rear wooden ceiling board, not so straight forward but we think we got it. Here the headliner is glued to the board:

Screen Shot 2017-09-02 at 23.41.52.png


Now I have to install the A and C pillar vinyl pieces before continuing with the headliner, will hopefully get them from the upholsterer this week.
We also started to glue the rear engine compartment gasket, patience.. patience..

Screen Shot 2017-09-02 at 23.41.59.png
 

Attachments

  • Screen Shot 2017-09-02 at 23.41.38.png
    Screen Shot 2017-09-02 at 23.41.38.png
    862 KB · Views: 226
Last edited:
This weekend we continued with the headliner install, and prepared us for dash installation later on.

Started with the dash prep, glued new vinyl onto the dash base.

Screen Shot 2017-09-02 at 23.44.38.png


Screen Shot 2017-09-02 at 23.44.49.png


Testfitted the three small wood pieces

Screen Shot 2017-09-02 at 23.44.58.png


More testing

Screen Shot 2017-09-02 at 23.45.05.png


Going back together

Screen Shot 2017-09-02 at 23.45.12.png


Screen Shot 2017-09-02 at 23.45.19.png


Gauges installed

Screen Shot 2017-09-02 at 23.45.27.png


Ready for installation in the car, when that time comes

Screen Shot 2017-09-02 at 23.45.35.png


But had to testfit it in the car just to check how it looks!

Screen Shot 2017-09-02 at 23.45.42.png


Back to the headliner installation, glued in the small vinyl patch under the rear window.

Screen Shot 2017-09-02 at 23.45.51.png


Screen Shot 2017-09-02 at 23.45.59.png


Foam backing

Screen Shot 2017-09-02 at 23.46.06.png


Screen Shot 2017-09-02 at 23.46.13.png


Glue time

Screen Shot 2017-09-02 at 23.46.19.png


Screen Shot 2017-09-02 at 23.46.28.png


With the C-pillar vinyl in place we could continued with the actual headliner and sunvisor panel, here is the panel with new vinyl:

Screen Shot 2017-09-02 at 23.46.36.png


And the fun begins

Screen Shot 2017-09-02 at 23.46.43.png


Finally glued along the sides

Screen Shot 2017-09-02 at 23.46.50.png


Then started to cover the A pillars, foam glued in:

Screen Shot 2017-09-02 at 23.47.01.png


And vinyl:

Screen Shot 2017-09-02 at 23.47.08.png
 
Last edited:
Repeat

Screen Shot 2017-09-02 at 23.52.01.png


All glued in place, the line where the headliner meets the A pillar vinyl is not as they came from the factory, but there were some issues and this was simply the best way to solve it.

Screen Shot 2017-09-02 at 23.52.09.png


And the other side

Screen Shot 2017-09-02 at 23.52.16.png


C-pillars

Screen Shot 2017-09-02 at 23.52.23.png


Screen Shot 2017-09-02 at 23.52.30.png


It came out allright, there are some wrinkles but overall I think it looks pretty good for a first time DIY.

Screen Shot 2017-09-02 at 23.52.37.png


It was nice to get that out of the way, been worrying myself over the headliner install for a long period of time, and it wasn't fun, not at all, but it is totally doable with some thinking and patience.

Cheers,
 
Last edited:
Thanks Alan!

Today we installed the dash and some chrome trim, wasn't the easiest and also managed to break a little piece of the passanger end of my very expensive, close to pristine dash top I've bought from DeQuincy :(, I'll glue the little piece back in later when the windscreen is installed, looked like it will go back in pretty seamlessly. Not optimal, as many other things on this car.

Another thing, every part of this dash is from bought from different places/cars, so not one thing fitted together without adjusting and some serious head scratching, big PITA. Not that it's news to me, but it's still unbelieveable how much different cars/parts differ from each other.

On to the pictures:

Screen Shot 2017-09-02 at 23.54.57.png


Screen Shot 2017-09-02 at 23.55.08.png


Gauges installed:

Screen Shot 2017-09-02 at 23.55.17.png


Screen Shot 2017-09-02 at 23.55.25.png


Then came the horrific moment when the dash top end broke and it kinda ruined the day, so I forgot to take more pictures of the install, but here the dash top and grabrail are finally installed:

Screen Shot 2017-09-02 at 23.55.32.png


And the chrome trim that goes over the headliner at the door openings, lower door opening chrome trim and glove comparment button:

Screen Shot 2017-09-02 at 23.55.42.png


Steering wheel needs refinishing too, will do that later. Overall I'm very happy with the result, looks so nice IMO :)

Screen Shot 2017-09-02 at 23.55.49.png


Screen Shot 2017-09-02 at 23.55.56.png
 
Last edited:
Thanks Rick,

I bought the clamps from a local store called Biltema, they sell 10-packs for a couple of euros, I don't have any idea where you could get them the easiest and cheapest way in USA. Maybe somebody else can chime in on this?
 
The dash wood looks fantastic, great job. If there is one thing I learned putting it all back together.... go slowly

Cheers. John
 
never seen such a beautiful piece of wood for the dash base mine is rather beat up and old lookin
really nice work
know what you mean about the dash
mine did the same thing went to put in my perfect original dash and the right tip broke off
luckily just dashes saved the day in a matter of days it was back stronger than before
cant say enuff about those guys
also i burned a blemish in the dash cover from a light
and saved again
 
Last edited:
Thanks guys! Appreciate your words, Bela really did a great job on the wood and I couldn't be more happy with the result, he nailed the vision I had in my mind when I explained how I wanted it.

Alan, yes, just dashes could probably save or repair my dash top, but sending it across the globe back and forth is both time consuming and very expensive for a big fragile piece like this, and before I bought this top I asked around locally if anyone want/could recover my old cracked top and guarantee a perfect result - without luck.
So I'm going to live with this small blemish for a while, replacing it later is of course a big job, but I have to draw a line somewhere, this is after all a driver, not intended to show - ever.
I know I wont notice it when I blast down the road:)

Cheers,
 
Last edited:
[QUOTE="Gransin, post: 184629]
So I'm going to live with this small blemish for a while, replacing it later is of course a big job, but I have to draw a line somewhere, this is after all a driver, not intended to show - ever.
I know I wont notice it when I blast down the road:)
[/QUOTE]

This definitely one of those things which, right now, seems like a total disaster but once the whole thing is done, 1) no one will notice and 2) even you will realize that, compared to the mountain of work you did everywhere else, it really is no big deal.
 
Small update, installed more chrome trim in the door openings last weekend:

Screen Shot 2017-09-02 at 23.59.19.png


Screen Shot 2017-09-02 at 23.59.28.png


And yesterday we moved the car to the rust protection shop, both rockers, every box and crevice will get filled with cavity wax or whatever rust protection product the shop think is best.
If the weather allows, it will be moved to the car glass shop next week to get new front and rear glass installed.

Screen Shot 2017-09-02 at 23.59.37.png


Screen Shot 2017-09-02 at 23.59.44.png
 
Last edited:
NIIIIICE!!!!!! In the old days when it was very hard to get any waxoyl or anything like that we would use diff oil, it has a rust preventive additive in it. we would lay it on about 6-8 inches from he bottom and let it drain down thru to drain holes. Not the best but it did work
 
Thanks! That brings up some memories, I've been doing some sketchy rust protection attempts myself back when I was younger, heated up oil to over 90+ degree celsius in a big saucepan to make it fluid enough to spray it in and under the car, can't remember what car it was thou.. maybe a Volvo 240.
 
The car has been rustproofed, and after that I got the windscreens installed, luckily both windows went straight in without any problems, phew!
But now it's time to let the car sleep in a storage garage until September or October. I'll now continue building my garage instead, so don't expect much to happen in this thread until then.

Here is a couple of pictures after the glass installation:

Screen Shot 2017-09-03 at 00.00.58.png


Screen Shot 2017-09-03 at 00.01.06.png
 
Last edited:
But now it's time to let the car sleep in a storage garage until September or October. I'll now continue building my garage instead, so don't expect much to happen in this thread until then.

Just keep posting pics of the garage build. 1) It's part of the coupe restoration process 2) It adds variety to the thread 3) I don't think anyone could get tired of pics of the garage with that stunning lake behind it.
 
Back
Top