My 1974 Inka S38B35 project

Comments…

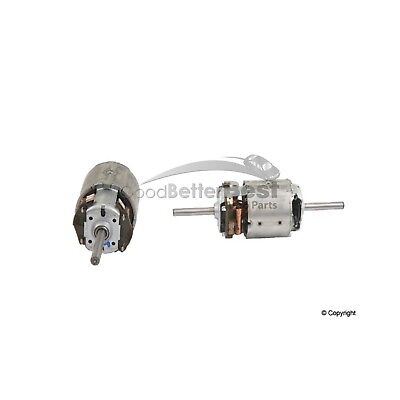
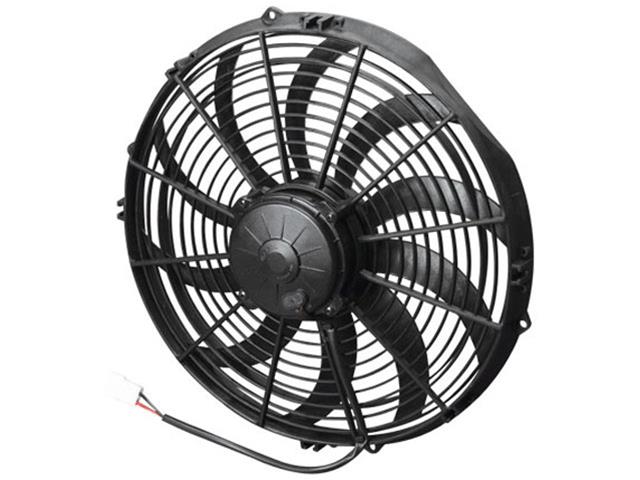
maybe change AC condenser fan now? Easy and cheap or is it not needed in Estonian weather?


where are you buying your euro lowbeams?

what/who is Tloznia Blach?
Replacing the fan sounds like a good idea definitely, the original one looks a bit.. well... weak.
Bought the headlight set from a guy in Germany together with the AC kit.
Tloznia Blach is a Polish company that makes some E9 parts: https://tlocznia-blach.pl/kategoria-produktu/e9/
 
OK, summer months were a bit slow, but we are moving on. Slowly but surely.

We scanned now my car, the bare body with already changed sill and one wheelwell. As somewhat suspected, when comparing the 2 scans, we found out some of the measurements from the "good" car were off on mine and by as much as 15mm (~1/2 inch). That is nowhere in acceptable range, but luckily we have modern 3D tech and computer programs to mend that. We drew up a sturdy rig that would attach to my car at specific points and would enable to reinstall the wheelwell etc bits later on in exact locations. Better than using a Celette bodybench, for which E9 attachments are really hard if not impossible to find and which do not really satisfy fully anyway...

My car's body skeleton scanned as-is:
3dscan1.jpg


My car scanned as-is, another angle:
3dscan2.jpg


Here is the "good car", with measurment points
3dscan3.jpg

And mine measured at the same points. You can also see the previous owner repaired the floor on one side - we will cut it out and restore with original panels ofcourse.
3dscan4.jpg


So overlaying the 3D models on top of each other and comparing measurements, we did find mine was no good. Here is an example of the 2 models on top of each other showing the difference with rear wheelwell and shock mounts:
3dscan5.jpg


And this is how we will correct it. The rig we drew up is seen on the following images and is currently being lasercut and bent at a speciality shop.
rig1.jpg


rig2.jpg


For the front of the car, we will construct a similar rig to make sure everything is later as it should be.

PS! just an idea about which I will have to talk to my constructor about, but if there would be interest, we could also offer the rigs later to others restorers :). As 3D models or ready made.
 
Last edited:
I would be interested in a model as I need to pull apart my front strut mounting points. As the fenders have been removed before,I'd like to check if all is the right position before welding her up again.

Also a model will help others to do rough checks, as the most difficult question is not "what do I have?" but more the " How should it really be?".

A 3d model of a original e9 would help a lot in that aspect.
 
Is there a chance that you could share those point to point dimensions so that others could use them as a reference? Please and thanks. I love the scientific approach to properly repair an aged chassis. Excellent work! I’m looking forward to seeing the final results especially with this quality approach to restoration.
 
If you could give those 3D scans to the community back, it would awesome and help so much people with there restaurations.

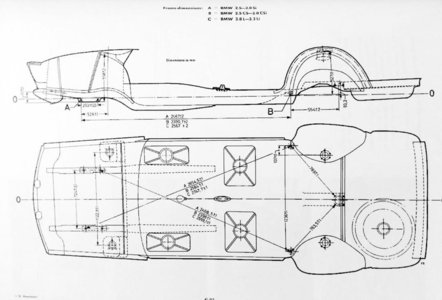
I would also love(!!!) to get these 3d floor scans from the good car. Because I’m currently building a e9 that I bought as a shell and really want to check some point to point dimensions. There are not so much references beside some front to rear subframe points measurement as in the attached picture.

i’m currently building a coupe as a restomod with a V8 heart and need to strengthen the chassis with some bracing. Preferably mounted on original points from underneath.
 

Attachments

  • Chassis Dimensions from Blue Book.jpg
    Chassis Dimensions from Blue Book.jpg
    89 KB · Views: 222
The rear rig was assembled and welded up to make it really sturdy.

IMG_20211019_150848.jpg


IMG_20211019_150902.jpg


After which it was time to see how it fits to the car's shell. For this, we cut out the misaligned wheel well

IMG_20211020_151317.jpg


IMG_20211020_151323.jpg


First tests and further measurments done, the body shell is a bit crooked still, so we need to mend this

IMG_20211020_161658.jpg


IMG_20211020_163855.jpg


IMG_20211020_164144.jpg


And for this we had to dig a bit deeper, cutting out the rest of the trunk floor too and the partition wall below the rear seat.

IMG_20211021_170229.jpg


IMG_20211021_170218.jpg
 
Last edited:
Cleaning of new parts for installation, more cutting and sanding down the shell to bare metal continues. Also made progress with first parts - patching the rust areas.

IMG_20211026_121943.jpg


IMG_20211029_154849.jpg


IMG_20211101_112749.jpg


IMG_20211101_113617.jpg


IMG_20211101_141325.jpg


My metal fabricator got a new tool also as a bonus :). He told me, he always finds something in the shell when opening these up. In this case, a scredriver underneath the seat console.

IMG_20211029_085604.jpg


We have also been playing with the 3D model some more, sketching up the attachments for shock towers in the rear and a complete front body rig. These screenshots are taken from a videoconf. call with the 3D guy from a session where we went through the ideas so far, so not best quality but you get the idea. Once finalized the parts will be sent to laser cutting and 3D printing. High-tech resto continues, I am hoping it will all be worth it later on :)

rear_rig_p1.jpg


rear_rig_p2.jpg


front_rig_01.jpg


front_rig_02.jpg
 
It is a long shot, but I do not know where else to start. I am looking for the previous owner of my E9 BMW 3.0cs. He was an American stationed in Germany at the Hahn Airbase in Hunsrück until it was closed in ca 1990s and he lived on in Germany until 2002-2003 before moving back to US. Name is Dany Fenall or something similar. He sold the car to Mario Golembusch from whom I got it. The car is a inka orange E9, converted to l-jetronic and painted dark blue at some point. Maybe someone here knows someone who knows someone or could share this in some FB groups? Or are there by any chance some records of people stationed there or anything I could research? Any hint greatly appreciated! Let me find him please :)
 
Parts for the front rig and additional rear rig parts arrived from laser cutting and 3D printing.

x02.jpg


x01.jpg


This is what will look like completed, a bit better view of front and rear rig complete:

x03.jpg


x04.jpg


x05.jpg


x07.jpg


x06.jpg


x08.jpg


x09.jpg
 
amazing work , i must admit.... but in the end , wouldn't you be better of buying a less rusted shell ??? after all , it's only a E9, not a 250 GTO..... ???
 
MYGOSH THIS IS THE mosT amazingest THING IVE ever seen
its truly remarkable the work you have done Its beautiful
and the amount of work involved to get this so accurate.!!
its a fantastic tool everyone here in the future can refer too
to get there cars together.
i mean you have started with almost nothing and building the complete coupe from
almost nothing,
and these cars are super complicated, they have more parts than three regular cars
i mean the rear window tops for example.
im really impressed as an architect and mechanic and coupe owner
thank you so much for your work
also there is no other car that people put so much effort into -at least not that i know of
surely there is no site as wonderful and involving as here!!!
 
Last edited:
Back
Top