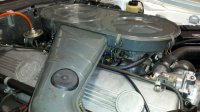
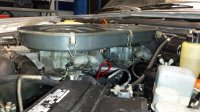
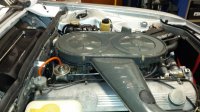
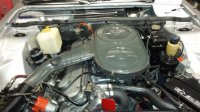
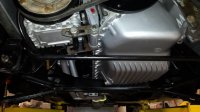
Will have to start somewhere

Peter,

No comments on electrical - can't see electrons, so I don't know where they should go either!! - ha.

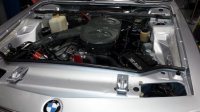
My comment is: Your engine compartment sure looks 'purdy'.
 
She's just about ready

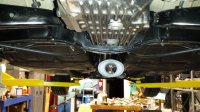
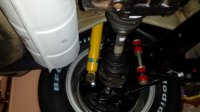
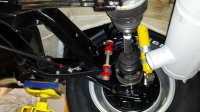
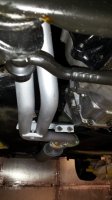
This is my attempt at "old-school" maintenance, gonna give her a try as soon as the battery is charged :)
 

Attachments

  • oldschool-1.jpg
    oldschool-1.jpg
    66.9 KB · Views: 275
  • oldschool-2.jpg
    oldschool-2.jpg
    78.3 KB · Views: 253
  • oldschool-3.jpg
    oldschool-3.jpg
    79.3 KB · Views: 272
  • oldschool-4.jpg
    oldschool-4.jpg
    79.4 KB · Views: 261
  • oldschool-5.jpg
    oldschool-5.jpg
    83.7 KB · Views: 255
  • oldschool-6.jpg
    oldschool-6.jpg
    86.9 KB · Views: 260
  • oldschool-8.jpg
    oldschool-8.jpg
    48.9 KB · Views: 276
  • oldschool-9.jpg
    oldschool-9.jpg
    67.8 KB · Views: 264
  • oldschool-10.jpg
    oldschool-10.jpg
    62.5 KB · Views: 239
  • oldschool-11.jpg
    oldschool-11.jpg
    64.5 KB · Views: 265
You're close, I have the valve cover to hood light bracket too :smile:

I believe that was installed by the dealer when the Becker went in, along with the hood bracket to wall strap, ignition coil suppressor, and regulator supressor, the latter 2 which I have yanked.

I also have the tranny to firewall strap, I guess I am well grounded so to speak!

I've relocated the battery to my trunk, with a ground under the rear seat. I have a tranny to firewall ground, a ground from my alternator housing to the oil filter housing and then across the motor mount to the front subframe. I also have a ground on the opposite side of the engine block across the motor mount to the subframe.

Total voltage drop from the alternator housing to the front fender (through the battery, subframe, etc.) is .02 volts. I plan to chase down this drop as well, in due time.
 
OK, I have 2 well-respected members with a different opinion than mine on this one, DeQ, to answer your question, blasting and powder coating would run about 200-250 US. I was thinking that the engine compartment might look more "believable" if I super-cleaned everything, I tried to follow the idea of a full maintenance rather than a restoration. I guess I did a little half & half as I did repaint allot of stuff. What I will do after I finish everything up is take a few shots and then put it up for opinion again- I have the interior to work on now, it no longer smells like mold, but does smell like something you would not want to drive in, so there is a thorough scrubbing to be done and then the exterior clean up. Almost there! It will be interesting to see which coupe drives better, the blue or polaris. They will definitely be 2 very different rides.

Thanks for the comments!

hi peter, thank you for the price estimation, i have recently bought a couple of preowned air filter boxes in germany, my intention is to use them to try to recover the original color, because when i did my engine i painted the air filter box in black and lost track of the original color, i have found a guy that is able to do the job but he is reluctant to offer a quotation yet, and i do not know if he is doing so to ask for more money,...

additionally let me ask about powder coating again, if you powdercoat the air filter cover, would you miss the BMW and PUROLATOR letters ?

BTW i fully respect your idea of having a nice engine but keeping some of the parts in a natural condition, it is really part of the joy of an original but well preserved car

looking forward to see the next bunch of photographs
 
I read somewhere that the dark green color of the subframes is RAL 6015 Black Olive which if I were a betting man is the same as the dark green air cleaner, both of which I have on my car. Perhaps worth looking into.


hi peter, thank you for the price estimation, i have recently bought a couple of preowned air filter boxes in germany, my intention is to use them to try to recover the original color, because when i did my engine i painted the air filter box in black and lost track of the original color, i have found a guy that is able to do the job but he is reluctant to offer a quotation yet, and i do not know if he is doing so to ask for more money,...

additionally let me ask about powder coating again, if you powdercoat the air filter cover, would you miss the BMW and PUROLATOR letters ?

BTW i fully respect your idea of having a nice engine but keeping some of the parts in a natural condition, it is really part of the joy of an original but well preserved car

looking forward to see the next bunch of photographs
 
Peter,

The guy Mike and I use here would charge about $80 to do the air cleaner. I think RAL 7022 is also a close match. We have also discussed 7043 verkeshrgrau, traffic gray.
 
Last edited:
Peter,

The guy Mike and I use here would charge about $80 to do the air cleaner. I think RAL 7022 is also a close match. We have also discussed 7043 verkeshrgrau, traffic gray.

yes, i was considering 7022

but what about : if you powdercoat the air filter cover, would you miss the BMW and PUROLATOR letters ? or the other way, how many coats ? preparation and final, two coats, only one ?
 
Ok, I have said before that I am "electrically challenged", so I provided some shots and would like to know if anyone can help tell me which wires go where on the starter. I have the manuals but the colors don't seem to match up. When I got the car it was "running" but there was more than 1 melted connection so I want to get it right before melting something else. Also, which is the best place to ground the engine? I have a lead coming off the battery to the body via a braided strap and then I assume the thick tan ground goes somewhere around the oil filter base?

I know you guys are shaking your heads, but I have a mental block against electric stuff.

Also included a shot of the header pipe I cleaned up. I have stainless pipes but I don't think they are going to fit that well so I may use the stock ones since I have a new original complete exhaust system and I'll be assured to get that ancient BMW sound.

Hi Peter -- I don't think we got back to you on this question; I pulled my wiring diagram and can tell you a couple of things. Not sure I can get you connected with all the wires in your picture, however.

The large black cable from the battery to the alternator obviously goes to the large terminal at the 12 O'clock position in your picture (since the other large terminal block is grounded to the starter motor and thus to the block).

The black/red wire pictured at the highest position in your second picture is the starter to coil wire. It connects to the terminal located at 9 O'clock in your first picture.

The wire at the lowest position in your second picture is covered with a heat shield, but it appears this contains two all black wires. That is the connection to the ignition switch (and to the starter relay in cars with automatic transmissions). It is connected to the terminal located at 3 O'clock in your first picture.

The green/white wires in your picture are I believe electric choke wires. There should be a connector for them in the engine bay to a green white wire that goes through the firewall to the fuse block.

Not sure about that green/red wire, but it appears that this is part of the circuit for the speed relays. It is not part of the starter circuit.
 
How do I find 7022 in your link?

Found it, go to very bottom, click on the third blue box, RAL color charts.
 
Last edited:
Chris O, thanks for the help- you the electric guy!

Chris & DeQ, when I get everything done we'll have to make an artistic decision, I put the 200.00 estimate because that included the media blasting. Not sure if that is included in your guys' price in CA Chris, ah, just had a thought, since I have to have it blasted, I could use the air cleaner from the blue coupe, I think they are the same and I can't use that on the Weber carbs with the LJI strut bar. Even without the strut bar I found it rather ill-fitting with the Webers, so I'll inspect them to be sure they are the same and then do the coating on one of them-

Chris, can you tell me if your 80.00 estimate includes blasting-I can send it to you from work with a PPd. box for its return if that's the case.

Thanks
 
Next question

what's the best way to test the operation of the Hirschmann (sp?) antenna now that it's out of the car? The car seems to have an original cassette player, I think it says Becker/Mexico? something like that, I hope it works, would love to test out some old Dead & Little Feat tapes from about the time this car was made. I also have a guy down here who fixes all these old stereos, I have yet to stump him; "Telstar" audio repair, he runs his operation out of a bunch of ad-hoc connected U-Haul storage spaces here in Austin.
 
Peter,

I have to take ours in, I can definitely beat your price including blasting, we'll have a two for one! Check for a PM.
 
what's the best way to test the operation of the Hirschmann (sp?) antenna now that it's out of the car? The car seems to have an original cassette player, I think it says Becker/Mexico? something like that, I hope it works, would love to test out some old Dead & Little Feat tapes from about the time this car was made. I also have a guy down here who fixes all these old stereos, I have yet to stump him; "Telstar" audio repair, he runs his operation out of a bunch of ad-hoc connected U-Haul storage spaces here in Austin.

if i understand well and the hirschmann antenna is an automatic one, you will normally have three cables plus the antenna signal coaxial cable: black for ground (battery minus), and another two for operation, colours may vary, but usually one is red (poistive battery) that is power, and another green or white that triggers the power, this is essentially a positive but it comes usually through a switch included in some radio models, or an external switch (my setup)

test operation is simple, use you battery, you connect black to batt neg, red to batt poistive, and then you touch batt positive with the other (green/white) cable, as soon as you touch the antenna deploys out of the tube, if you remove the contact of this cable from batt, the antenna goes into the tube again and closes

some other models have a more complex setup including a relay, i may have schematic drawings, let me know

a tip, a friend prepared his setup including a switch that cuts both positive cables at the same time, this allows him to have the antenna stop in intermediate positions between close and open

hope this helps
 
Back
Top