Will have to start somewhere

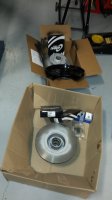
Agreed BD, some just more so than others:) And to prove my point I'll tell you what went on with the Polaris coupe; I scraped the rust and guck off the front rotors and painted the hubs with high temp header paint. I did this to the blue coupe and when you look through the wheels it just looks nice and clean. Granted only 1200 miles on the blue one but the alternative was just to leave them rusty, or paint black, but I did not have any high temp black; I think the engine paint is only supposed to go up to 400d. where the header paint is 1200, so that's my excuse. Finished up the front struts and then finished the welding on the front floors. I hope to have some pictures of that tomorrow if I get done wrapping presents (that shouldn't take long) :)

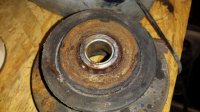
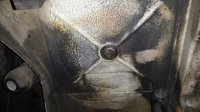
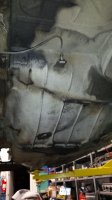
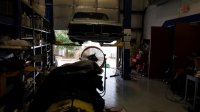
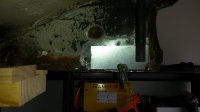
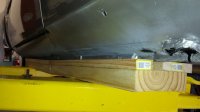
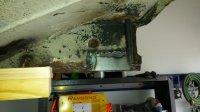
Since I have to clean the rear underside before I put up the rear sub frame I experimented a little; after seeing HB Chris' grey undercoating I wanted to see what the original stuff on mine looked like so I sprayed some "greased lightening" on it, let it set for a bit then used a nylon bristle brush to scrub at it (exciting, I know). I then used a little hand sprayer to clean off the muck and these are the pictures-along with a shot of the old strut bearing for morbid reference. I think a power washer might be in order but that would mean draping off allot of stuff.
 

Attachments

  • nasty bearing.jpg
    nasty bearing.jpg
    83.3 KB · Views: 248
  • under the muck1.jpg
    under the muck1.jpg
    98.8 KB · Views: 250
  • under the muck.jpg
    under the muck.jpg
    43.9 KB · Views: 245
  • pimp my rotors.jpg
    pimp my rotors.jpg
    77.1 KB · Views: 244
Yep, the original primer is a khaki/grey with grey undercoating over that which turns black over the years from oil and dirt. And you can see near the rockers where the body color overspray got on the underside.
 
Peter, not sure if you purchased new strut bearings yet but I believe there are 2 choices:

Bearing 31 33 1 101 663 around $175
Bearing 31 33 1 106 060 around $70

060 has longer studs but these are easily cut or replaced with shorter ones.

I installed the 060 on the Bav and I believe Luis did as well (because he provided the part numbers). It is difficult to tell the difference between these two parts except for price and stud length. Perhaps somebody else knows why these would NOT be interchangeable for an E9.
 
Peter - if you go for the strut bearings with the longer studs, I have a set of the stock studs I removed when installing my camber plates I could send to you.

Keep up the good work.
 
Thanks Guys! Merry Christmas, Chris, I'll take those longer studs whenever you have time to send them, I'm thinking of just putting the spacers on top of the towers of the Polaris, that way I won't lose them :)

Question, does anyone use the spacer plates with the CN springs and camber plates and 16 in. wheels to gain a little more clearance? Mine don't hit but I see the potential.
 
Hi Peter, very much enjoying your progress reports, complete with pics. I am (still!) just about completing my garage build and am always looking in the backgrounds to see how people configure their storage.
Anyways, interesting thread. thanks for sharing.
Regards
 
OK, OK, spacers will be dumped, got it :)

Restart, some tricks to space, put as many things as possible on wheels that way you can move things around as you need them. I have my compressor mounted in a far corner, and I have to keep the lift in one place (I hope) :). One of my favorite tools is an old metal bench that I found half buried in a neighbors yard It has super castors on it and can easily support the full weight of the motor and trans. I also did a double coat of resin floor paint. It's not cheap but it makes finding things much easier and rolling things easier as well. The space in the actual shop is only 18 X 30, so just over 500 sq ft, but the ceiling is 21 ' high. When necessary I do have to move things into the warehouse but that's usually just temporary. There are some folks here with super shops, maybe I'll include some shop pics for those in your boat.

Off to the shop to try to get my son interested in restoring (anything), or for that matter trying to get him interested in anything besides that demonic "smartphone".

Please pray :)
 
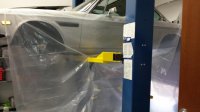
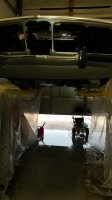
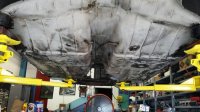
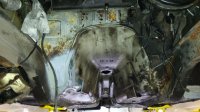
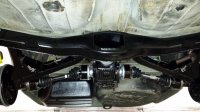
Did some more stuff today, for some reason hard to get really motivated- maybe it was all the pasta and apple pie coupled with a lack of exercise.. Anyhow, the job I like least (so far) is cleaning the underbelly. I made a little tent and broke out the power washer and went to town. I know the water is anathema but I have big fans. stripped a little more of the engine compartment and worked on the brake booster, so here are some "power shots". I can get in there and do the finishing touches as well as some patching of the undercoating when it's dry. Found another very minor spot I think I'll make a patch for. I thought about just Por-15-ing it and seam sealer but since I'm in this far I might as well do it right, or as right as I can. I keep telling myself that this is just a minor restoration, hmmm.

Thanks for watching and any suggestions are very welcome!
 

Attachments

  • wet tent 2.jpg
    wet tent 2.jpg
    47.5 KB · Views: 267
  • wet tent.jpg
    wet tent.jpg
    84.3 KB · Views: 283
  • underbelly1.jpg
    underbelly1.jpg
    92.1 KB · Views: 265
  • underbelly2.jpg
    underbelly2.jpg
    86 KB · Views: 262
  • blow dry.jpg
    blow dry.jpg
    59.3 KB · Views: 268
I tried quite a few chemicals while trying to remove my undercoating. The one that worked best was a gel used to remove flooring adhesive. Still not sure I should remove all the factory stuff and get right down to the bare metal if it is doing it's job.
 
no no

I am not removing any of that original undercoating unless it's cracked or such and then I'll just re-apply in that area. I did that on the blue coupe and it was a total waste of time since 85% if the undercoating was in great shape. there are a few areas like around the parking brake cable holders that need to be cleaned up and re-applied but other than that it's just a major clean up and I can put that rear sub frame up. I was shooting for yesterday but I left my "Life-alert" on the nightstand :)
 
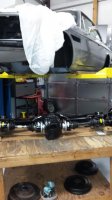
I was reading the "Mild Restoration" thread and was thinking that the Polaris coupe is not being restored at all, just bringing the "maintenance" book current. Well, early this morning I ran off to the fun house (AKA the warehouse) and contemplated how to get the 3rd member in; the clearance issues are well known so I improvised. I noticed a spot that needed "mig-attention" so that always slows the process down but by the end of the day the mission was accomplished.

Most of the other parts should be in this week so with any luck the engine sealing will be next and things should start looking normal around the shop. Some pictures below.
 

Attachments

  • one more patch.jpg
    one more patch.jpg
    46.6 KB · Views: 272
  • making room.jpg
    making room.jpg
    48.1 KB · Views: 273
  • patch welded.jpg
    patch welded.jpg
    66.7 KB · Views: 283
  • rolling in the patient.jpg
    rolling in the patient.jpg
    42.7 KB · Views: 285
  • up and in.jpg
    up and in.jpg
    89.3 KB · Views: 268
Every time I think about posting an update, I seem to use up my spare time actually working on the car. Pics and updates coming very soon...
 
Looking great Peter.

I noticed the rocker repair and then later on a pic of it on the lift. With the new paint it gives a finished look. I've been considering some custom steel rocker cover replacements ... would have them painted the same color as the body. That pick of the driver side on the lift just makes it look so much cleaner than the standard black rocker cover.
 
Back
Top