1974 BMW CSE

I feel your pain, Paul. When I installed my e92 seats I ran into the same issue of course. After doing some research I found that there may be a simple solution:
" If you want the controls to work always, you will need to supply a 5v or TTL signal the the data bus input wires for rx. This will keep it alive."

Thanks Bo! Yes, I actually tried that back when I first installed the seats, but it didn't work for me. I think they really do need to see the true CAN messages or the computer shuts down. This is working great now. The CAN just keeps the computer alive so that the buttons will work. But yes, the Heat is controlled 100% by can and I have a batch of messages from the 5 series that I am hoping will be the same. It will be fun to see if I can get it working. I have no windows yet, so the only heat I will have will come from the seats!
 
Thanks Bo! Yes, I actually tried that back when I first installed the seats, but it didn't work for me. I think they really do need to see the true CAN messages or the computer shuts down. This is working great now. The CAN just keeps the computer alive so that the buttons will work. But yes, the Heat is controlled 100% by can and I have a batch of messages from the 5 series that I am hoping will be the same. It will be fun to see if I can get it working. I have no windows yet, so the only heat I will have will come from the seats!

That’s awesome Paul. Congrats once again!
 
Finally got around to getting the Garagistic kit to adjust my rear camber and toe. My rear tires are already shot from the funny wear (and a fair number of burn-outs of course). You can't really see the wear in this photo.

It's been a long time since the coupe has been up on the lift. We dropped the suspension and welded on the plates. We got the new bushings in the arms as well and today we put her all back together and get a proper alignment.

I'm just about ready to take it all down over the course of a week to make it all pretty under there. There's still a lot of things uncoated. But as you can see, for good reason, as we keep welding on this thing...

Cheers!

Paul

29306F90-549E-4593-9A8D-DB81974F6179.jpg
E2E1ECCC-E74E-42AC-B164-002C9EDB37E3.jpg
 
Yes, i was going to post here as well. I’ve got a bit of perfect storm happening between family, business and being an adult that all require me to move on with the car.

Its super sad, and my plan is to find another and in a couple of years start this project all over again.

The only silver lining is that it is like my Mount Everest. I dreamed of doing this, and accomplished it- and build an in reboot rod coupe, and enjoyed it for an amazing year on the road- including down to La Jolla last weekend for the meet.

I’ve got over $150k into the car as you can imagine. I don’t expect to get that all back. But I’d like to avoid BAT and find a home with a true fan of the car. Since about 4500 people follow the car on Instagram I’ve got a lot of people there who know the car and the history. Ive got offers up to $95k. I feel I should hold for more than that, and BAT would likely bring more- even without the paint and AC done, etc. So I will see what happens over the next week.

I’ll post more about the sale here too as well in case someone here is crazy enough to want a Tesla Shark.
 
I would love an E9 Tesla if it had Tesla's Autopilot.
Does it?
No, but I’ve been asked that many times. Also, when I first started building it, the most common thing I heard was “is it going to have that huge screen?”

Its interesting to me that Tesla used many diverse features to build it’s brand. They could have only made the best drive train possible, but they also invented so many other interesting features. It’s probably the auto pilot or the huge display or the pop out handles that brought in a whole other batch of people who may have disregarded the car as a toy.

anyway, Just my thoughts. But no auto pilot.
 
I feel it would be tragic to "drive" a beautiful, classic car but not actually be driving it. :cool:
Oh, not having to drive Highway 17 herself would be reason enough for my wife to want this car.
Today she uses a human Autopilot (me), she supervises from the passenger side, which for me is beyond tragic :).
 
No, but I’ve been asked that many times. Also, when I first started building it, the most common thing I heard was “is it going to have that huge screen?”
...

anyway, Just my thoughts. But no auto pilot.
Well you could follow the 1950s Italian car builders tradition of making cars "Su Mesura", ie one-off custom variants for each customer! BMW 3.0 CSM, Coupe Su Mesura, a car with Italian shapes.
Heritage is knowing that Pininfarina is not a Pizza joint in the Mission :).
 
I ABSOLUTELY LOVE THIS POSTING
WELL WELL DONE. GREAT RESTORATION - SEEMS LIKE YOU COULD HAVE STARTED WITH A LESS RUST UNIT
THAT'S WILD ,ALL THE WORK YOU HAVE DONE JUST TO REMOVE ALL THE BAD PARTS
CAR WAS JUST A HUGE RUST BUCKET I'M AMAZED .
GREAT JOB AGAIN -LOVE THE POST
 
Last edited:
Well, the car no longer belongs to me! It's sad, but it's the right thing for my business and my family. However, the new owner has commissioned me to finish all the pretty stuff. So that means you are stuck with me for a few months more at least! We will be finishing it at daily driver standards. Meaning, no $30k paint job here. We will get nice, respectable paintwork by my buddy Jake. I will be wrapping up things like battery cooling, air conditioning, headliner, upholstery, etc.

The car will be driven every day around LA, and that's a fantastic thing! And since the buyer had originally wanted us to build him a Tesla Volvo "Swedish Shooting Brake", he may still do that build and sell me back this car when that's done (if I become wealthy by that time:).

So let's get to wrapping up this car!

Paul

BMW-SOLD.jpg
 
It sounds like this is the best outcome for everyone. Sometimes it is easy to forget that this is just a hobby and that many things are ahead of it in the priority list. No matter how you look at it, cars are money and time black holes and it is much harder to get out of them than to fall into them. Congratulations on an incredible and inspiring adventure so far Paul... and congratulations on the ability to get out of it when more important issues came back to the forefront.
 
Last edited:
Finishing this car is taking longer than expected. The painter took 6 months instead of 1 and the final result is not acceptable. During this time, @JetDexter has new business commitments so it has fallen and me (and Brett) to finish the project. Paul is still tangentially involved when need be. My EV build is driving and back with Tyler for final metal finishing so I have some time to work on this project, but doing two simultaneous E9 restorations and EV conversions is a handful.

The new owner of this car wants a driver, not a show car, so that has influenced some decisions, but we still want to make sure it is properly protected from corrosion, looks good, and drives great. This is a driver. So, please don't judge too harshly. To that end, here's an update on what we've been doing...

The original plan was to strip the trim and glass, remove the front battery box, and then send it out for paint of the engine compartment and exterior, leaving the trunk area black and postponing cleaning up and protecting the underside until after paint to minimize overspray, etc. The new owner decided to go back to the original Polaris silver color. As mentioned, paint took a long time and didn't turn out as we had hoped.

PaintImperfectionsOnHood.jpg


PaintImperfectionsOnFender.jpg


In order to take the car back, the painter wants the car running so that he can drive it in and out of his booth and around the shop so the new plan is to tear down the suspension and driveline, clean up the underside, put it all back together, and send it back to the painter to address the issues with the paint. Once back together there will be no access to address paint issues in the engine area so we're redoing all that ourselves.

The first order of business was to connect all the battery cooling lines -- Paul had never done this. We have a number of thermistors to measure battery temps. With normal driving and 40 amp charging, the batteries don't actually run that hot but the new owner may not watch temps as closely as Paul did and with the battery box out, now is the time to finish this.

BatteryCooling.jpg


We blew out all the suspension, brakes, etc. easily enough.

SuspensionBlownOut.jpg


We found one surprise when removing the rear coilover spring perch -- the original spring locating "tower" on one side was practically missing due to rust. This wasn't visible with the coilovers in place. I guess it worked ok but... not acceptable. The other side looks perfect -- it may have already been replaced. A new piece is on order from W&N but has been held up for 3 weeks at customs. If anyone has a 41141813039 local in the USA please let me know -- that's holding us up at this point.

RearSpringBefore.jpg


RustedSpringPerch.jpg


Tearing down the front subframe also led to an unexpected discovery -- someone had really bashed the front of the car into the ground at some point. The tow hooks were gone, the thrust arm washers were bent, and the subframe bushing area was also bent. With some heat and a large bar, we managed to straighten it out pretty close and made new tow hooks. As much of the suspension as possible was sent out for black powder coat, with fasteners and brackets out for gold zinc.

SubframeBent.jpg


NewTowHook.jpg


subframeDone.png


The Wilwood calipers had already been orange powder coated but looked plain to us so we stenciled some CSE logos on with black caliper paint, followed by clear caliper paint.

Calipers.jpg


Cleaning up the underside of a car is no fun but we did it. Wire wheels, a lot of sanding, rust conversion products on surface rust, etc. While under there, we fabricated a tunnel cover from 3/16" ABS to protect all the wiring and cooling lines in the old tans tunnel. It is attached via Dzus fasteners.

TunnelCover.jpg


TunnelCoverIn.jpg


Once all the fabrication was done (except that rear spring perch -- which we'l have to come back to later), we applied a Direct-to-Metal black epoxy primer, followed by black undercoating, and black top coat over non-undercoated brackets, etc.

FloorBefore.jpg


FloorCleaned.jpg


PrimedUnderbody.jpg

UndecoatFloor.jpg


UndercoatRightFront.jpg


The engine compartment needed better prep than the painter had given it so we took it all apart, sanded, and primed with a gray DTM epoxy primer/surfacer. We're sanding that down now and will soon shoot some Polaris silver single stage under the hood.

EngineBaySanded.jpg


EngineBayPrimed.jpg

HoodSanded.jpg


HoodPrimed.jpg


Hopefully, everything will be properly protected and look decent for years to come...
 
What happened with the paint? Is that debris in the clear or a base coat problem?
 
Finishing this car is taking longer than expected. The painter took 6 months instead of 1 and the final result is not acceptable. During this time, @JetDexter has new business commitments so it has fallen and me (and Brett) to finish the project. Paul is still tangentially involved when need be. My EV build is driving and back with Tyler for final metal finishing so I have some time to work on this project, but doing two simultaneous E9 restorations and EV conversions is a handful.

The new owner of this car wants a driver, not a show car, so that has influenced some decisions, but we still want to make sure it is properly protected from corrosion, looks good, and drives great. This is a driver. So, please don't judge too harshly. To that end, here's an update on what we've been doing...

The original plan was to strip the trim and glass, remove the front battery box, and then send it out for paint of the engine compartment and exterior, leaving the trunk area black and postponing cleaning up and protecting the underside until after paint to minimize overspray, etc. The new owner decided to go back to the original Polaris silver color. As mentioned, paint took a long time and didn't turn out as we had hoped.

View attachment 135771

View attachment 135772

In order to take the car back, the painter wants the car running so that he can drive it in and out of his booth and around the shop so the new plan is to tear down the suspension and driveline, clean up the underside, put it all back together, and send it back to the painter to address the issues with the paint. Once back together there will be no access to address paint issues in the engine area so we're redoing all that ourselves.

The first order of business was to connect all the battery cooling lines -- Paul had never done this. We have a number of thermistors to measure battery temps. With normal driving and 40 amp charging, the batteries don't actually run that hot but the new owner may not watch temps as closely as Paul did and with the battery box out, now is the time to finish this.

View attachment 135790

We blew out all the suspension, brakes, etc. easily enough.

View attachment 135773

We found one surprise when removing the rear coilover spring perch -- the original spring locating "tower" on one side was practically missing due to rust. This wasn't visible with the coilovers in place. I guess it worked ok but... not acceptable. The other side looks perfect -- it may have already been replaced. A new piece is on order from W&N but has been held up for 3 weeks at customs. If anyone has a 41141813039 local in the USA please let me know -- that's holding us up at this point.

View attachment 135774

View attachment 135775

Tearing down the front subframe also led to an unexpected discovery -- someone had really bashed the front of the car into the ground at some point. The tow hooks were gone, the thrust arm washers were bent, and the subframe bushing area was also bent. With some heat and a large bar, we managed to straighten it out pretty close and made new tow hooks. As much of the suspension as possible was sent out for black powder coat, with fasteners and brackets out for gold zinc.

View attachment 135776

View attachment 135777

View attachment 135778

The Wilwood calipers had already been orange powder coated but looked plain to us so we stenciled some CSE logos on with black caliper paint, followed by clear caliper paint.

View attachment 135779

Cleaning up the underside of a car is no fun but we did it. Wire wheels, a lot of sanding, rust conversion products on surface rust, etc. While under there, we fabricated a tunnel cover from 3/16" ABS to protect all the wiring and cooling lines in the old tans tunnel. It is attached via Dzus fasteners.

View attachment 135780

View attachment 135781

Once all the fabrication was done (except that rear spring perch -- which we'l have to come back to later), we applied a Direct-to-Metal black epoxy primer, followed by black undercoating, and black top coat over non-undercoated brackets, etc.

View attachment 135782

View attachment 135783

View attachment 135784
View attachment 135785

View attachment 135786

The engine compartment needed better prep than the painter had given it so we took it all apart, sanded, and primed with a gray DTM epoxy primer/surfacer. We're sanding that down now and will soon shoot some Polaris silver single stage under the hood.

View attachment 135787

View attachment 135788
View attachment 135789


View attachment 135791

Hopefully, everything will be properly protected and look decent for years to come...
Fantastic work, Jeff. Sorry Paul is busy elsewhere but I am really glad you are taking over.
 
What happened with the paint? Is that debris in the clear or a base coat problem?
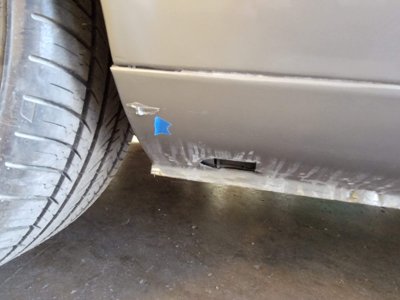
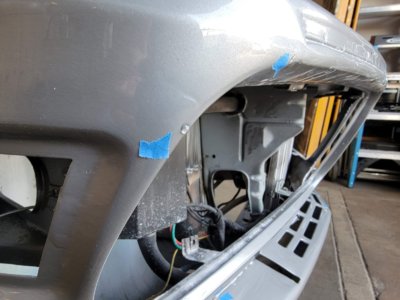
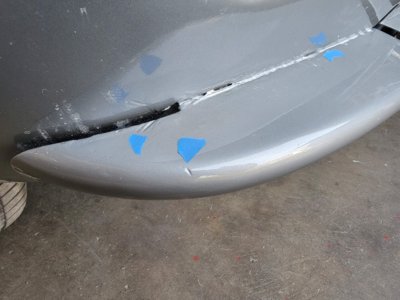
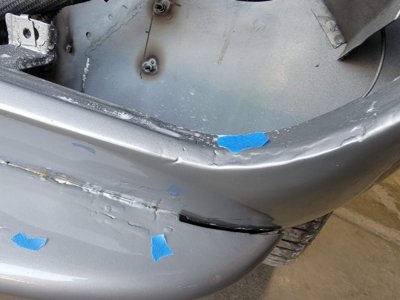
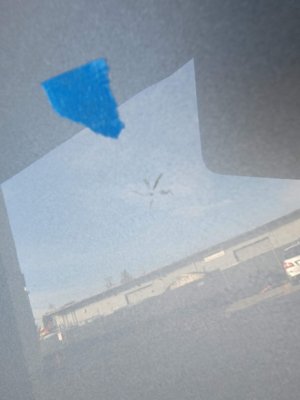
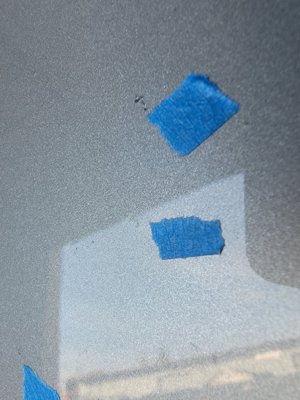
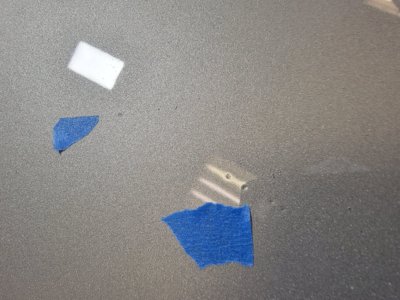
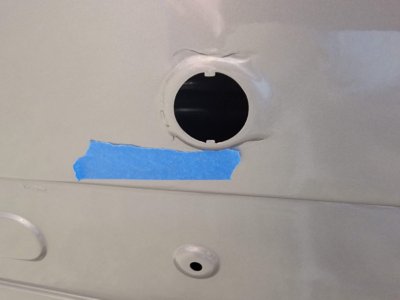
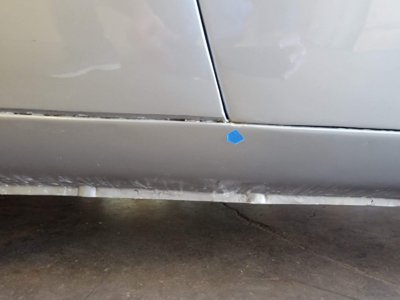
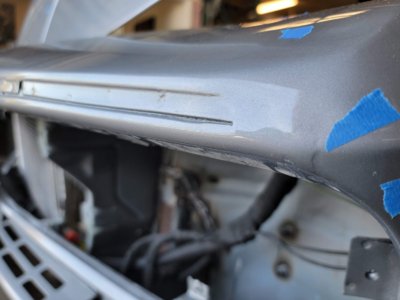
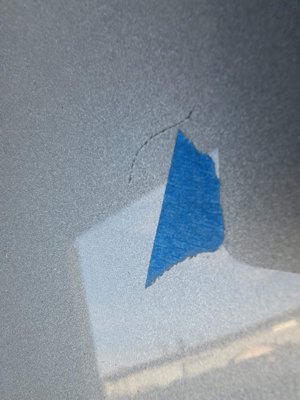
A combination of a lot of dust/dirt in the clear but also stuff (bug, hair, etc) in the base, and poor prep/bad filler work. Much of it is hard to capture with camera. Some examples below. Admittedly, it was to be a driver quality job, and overall, the car is straight but for $5,000 USD it needs to be a bit better than this. I could accept half a dozen small problems, not a couple hundred.
 

Attachments

  • 20220108_144443.jpg
    20220108_144443.jpg
    209.5 KB · Views: 133
  • 20220108_144459.jpg
    20220108_144459.jpg
    296.6 KB · Views: 135
  • 20220108_144503.jpg
    20220108_144503.jpg
    349.3 KB · Views: 140
  • 20220108_144514.jpg
    20220108_144514.jpg
    296.3 KB · Views: 152
  • 20220108_144727.jpg
    20220108_144727.jpg
    143.9 KB · Views: 137
  • 20220108_144734.jpg
    20220108_144734.jpg
    497.8 KB · Views: 134
  • 20220108_144754.jpg
    20220108_144754.jpg
    599 KB · Views: 151
  • 20220115_111825.jpg
    20220115_111825.jpg
    148.4 KB · Views: 138
  • 20220108_144446.jpg
    20220108_144446.jpg
    175.6 KB · Views: 144
  • 20220108_144520.jpg
    20220108_144520.jpg
    188.9 KB · Views: 127
  • 20220108_144739.jpg
    20220108_144739.jpg
    362.8 KB · Views: 130
A combination of a lot of dust/dirt in the clear but also stuff (bug, hair, etc) in the base, and poor prep/bad filler work. Much of it is hard to capture with camera. Some examples below. Admittedly, it was to be a driver quality job, and overall, the car is straight but for $5,000 USD it needs to be a bit better than this. I could accept half a dozen small problems, not a couple hundred.
And the $5000 pays for mostly prep work. Usually.
 
Back
Top