1974 BMW CSE

JetDexter

Well-Known Member
Site Donor
Messages
321
Reaction score
529
Location
Newport Beach, CA
We had a fun afternoon at the shop today. After a few days of slow test runs around the building, we started testing the real power of the Tesla. Thanks to Jeff and all his work programming up the interface to adjust power.

Tyler couldn't contain himself- it's priceless.


JetDexter

Well-Known Member
Site Donor
Messages
321
Reaction score
529
Location
Newport Beach, CA
Today we had a moment. Tyler cut out and repaired the VERY LAST specs of rust in the coupe!

It has been a year-long battle as most of you know. This coupe should have been scrapped but we were just stupid enough to keep going. But it sure is gratifying to have gone through the process!

c1d96af72211f101408b94dd598b13f5.jpg


492a25ae8fe74419d109af622e17b112.jpg


812ed13c7f5017193902f514e6efbb15.jpg


9bb4b5866cbed11bb01a8168353aca3b.jpg
 

rsporsche

Moderator
Site Donor $$
Messages
10,634
Reaction score
3,671
Location
Atlanta, GA
with that much power, maybe you need to use some wider rear tires. perhaps 245 / 45 -16 or 245 / 40 - 17s or 245 / 35 - 18s ... they have similar diameter to the appropriate tires ... of course there might be suspension work required to allow them to fit. seems to me that the rears have more room than the fronts
 

JetDexter

Well-Known Member
Site Donor
Messages
321
Reaction score
529
Location
Newport Beach, CA
with that much power, maybe you need to use some wider rear tires. perhaps 245 / 45 -16 or 245 / 40 - 17s or 245 / 35 - 18s ... they have similar diameter to the appropriate tires ... of course there might be suspension work required to allow them to fit. seems to me that the rears have more room than the fronts

Thanks Scott! Yes, I do have pretty wide rubber on there. I have 17x9s in the rear with 255/40s. We had a bit of rubbing at first, as the wheel arch flange is over an inch wide into the well. We trimmed that back to where it meets the inner fender, and now the wheel can fully compress (although I am not looking for this car to sit very low).

Now I am interested in the Garagistic adjustable rear subframe setup so that I can straighten back out those rears. Anyone have experience with those? They look nice. I would probably opt to buy the parts only and weld them ourselves (i.e. Brett or Tyler) as our subframe has been highly altered:)

Here's a couple photos of that fender work.

IMG_7964.JPGIMG_1271.jpg
 
Last edited:

JetDexter

Well-Known Member
Site Donor
Messages
321
Reaction score
529
Location
Newport Beach, CA
Today I was able to clean up my temporary control wiring (just wanted to drive the car at all costs) with a much cleaner setup. It’s still temporary as I plan to create a more OEM style wire harness with fuse block, multi connectors and such.

But for now this is a great solution while I am driving and refining the car.

5368f73aee7d750d6fa25441f53e18ba.jpg
7aaaee214e7d402ec1a6a4ad391b1381.jpg
 

JetDexter

Well-Known Member
Site Donor
Messages
321
Reaction score
529
Location
Newport Beach, CA
We've been making some great progress on the CSE.

Jeff has worked on the code for the Raspberry Pi dash display. We now have smooth and reliable feedback from the Tesla unit. I've leaned a lot about CAN bus wiring and that using an incorrect cable type really messes with our connection:).

I've also got the column ignition switch powering up the car, which makes it feel more like you are starting a car than say, a science project.

Here's a little video showing the car a bit from underneath then the temporary dash display (remember, I will be reorienting this display so that it fits through the old Tachometer hole on the stock dash. We'll get the analog Speedo and other gauges working properly, so only the Tach is being replaced.

While the burnout is fun, what is nice to watch is how the suspension is working out. I am very pleased with it at this early stage. Though I am upping my front springs just a touch. The dash display is a great milestone for Jeff and I as there were about 10 hurdles it took to get things stable and smooth. It's great progress!


Also, Tyler has been tirelessly bringing back our deck lid. It appears to have been used as a trampoline by its PO. Not only the dents but it was springy as rubber. He's got her all tightened up now and straight enough for only a skim of filler to finish. The hood is another story. Still on the fence if that is worth bringing back... I really thought I was done with metal, but I learn every day that there is no such thing as being done with metal on this car...

4D9CF4BE-B92D-45A5-9F84-9F8C426F24DC.JPG
 

eriknetherlands

Moderator
Site Donor
Messages
2,698
Reaction score
1,930
Location
Netherlands, Eindhoven area
Really enjoy the pioneering going on here.
I smiled when I heard the muffled giggles over the tyre squeal. Were all just kids...

Can you ask your metal guy what type of disk he has on his airtool? Is it used to remove the dents in the decklid? I'm curious to know how it works (& brand and type)
Erik.
 

JetDexter

Well-Known Member
Site Donor
Messages
321
Reaction score
529
Location
Newport Beach, CA
Really enjoy the pioneering going on here.
I smiled when I heard the muffled giggles over the tyre squeal. Were all just kids...

Can you ask your metal guy what type of disk he has on his airtool? Is it used to remove the dents in the decklid? I'm curious to know how it works (& brand and type)
Erik.

Yeah, that's a Shrinking Disc. It is crazy to watch Tyler use it. First heat with the disc and then quickly hit with water which shrinks the metal. It's crazy to watch how well it works. He used the torch on my hood, probably because it was so much worse, but the disc starts less fires LOL.
 
Last edited:

JayWltrs

Well-Known Member
Site Donor $
Messages
954
Reaction score
534
Location
Oklahoma City
Really enjoy the pioneering going on here.
I smiled when I heard the muffled giggles over the tyre squeal. Were all just kids...

Can you ask your metal guy what type of disk he has on his airtool? Is it used to remove the dents in the decklid? I'm curious to know how it works (& brand and type)
Erik.

Look up shrinking disc youtube videos. I would do unholy things with one, but it is fascinating how they use them.
 

JetDexter

Well-Known Member
Site Donor
Messages
321
Reaction score
529
Location
Newport Beach, CA
Last week we had Devon Hitchens come by the shop and put together this fantastic piece for the coupe.

My photoshop render is only from the rear angle so it’s nice to see her from the front!

227528627dc6b07b751ff003701a7d98.jpg
 

JetDexter

Well-Known Member
Site Donor
Messages
321
Reaction score
529
Location
Newport Beach, CA
A lot of good progress on the coupe the last coupe of weeks.

First, Tyler did some amazing lead work on the fenders. They look fantastic but it smelled even better.

6d0153ae4771ed63d0cab4f99ced8c80.jpg


4c2634864d789b4f8ac300887daec532.jpg


0a1999d9a1bd4fe38b6b908210d82c2b.jpg


Jeff made a lot of great progress on the Pi programming. Now the unit boots up and goes straight to the digital display screen without any action.

Same for the startup sequence- I’ve automated the full process so that now we can just get in the car, turn the key on and a few moments later you put it in gear and drive. We’ve ran the car several times and the car is starting to feel like a real car rather than a project :)

We’ve also got brake lights now! Using some LED lamps in the stock sockets, though I plan to do something a bit more custom in the end. Also you can see my upgraded chrome trim between the lights.

7cb3e9bc45ac13d88b141f52f1dc1ae6.jpg


Finally, we are priming the car green so that we can start road testing it and look presentable. We’ve got the windshield in and some trim. She’s starting to look proper!

df71a3469f95b60001974e5011fe2880.jpg


Today we drove her for the first time on the public roads a bit. Next week after we get turn signals and rear glass in we will begin some longer drives around town and on the highways.

So things are coming along nicely. Hard to remember where we started 18 months ago:)
 

JetDexter

Well-Known Member
Site Donor
Messages
321
Reaction score
529
Location
Newport Beach, CA
The coupe is once again a single color! It is fantastic to see her looking so good, considering 18 months of work removing rust, rebar, fiberglass and more rust.

Thanks to Tyler's extensive work heating and strengthening old sagging metal, we've got a very tight hood, roof and deck lid. Just one very thin coat of filler is all that is needed for paint.

We are now are installing mirrors, door handles, rear glass and turn signals so that I can drive it around Southern California with a legal appearance, or at least without waving a massive red flag. A couple of months of road testing and refining then we'll strip her back down and get her painted proper.

IMG_1748.JPG
IMG_1749.JPG
IMG_1750.JPG
 

JetDexter

Well-Known Member
Site Donor
Messages
321
Reaction score
529
Location
Newport Beach, CA
From the bmwcse.com blog:

Shifting Gears

Audi-Shifter.png


Now that the car runs on Tesla power, there is no need for a traditional gear shifter. Like most modern electric cars (and many gas cars), a simple set of push buttons or a dial would do the job. From the start, however, one of the things that we wanted to preserve about the car was its classic feel. Not just for the looks of seeing a gear shift, but the engaging driving experience it provides. We felt that a classic car required a classic gear selector.

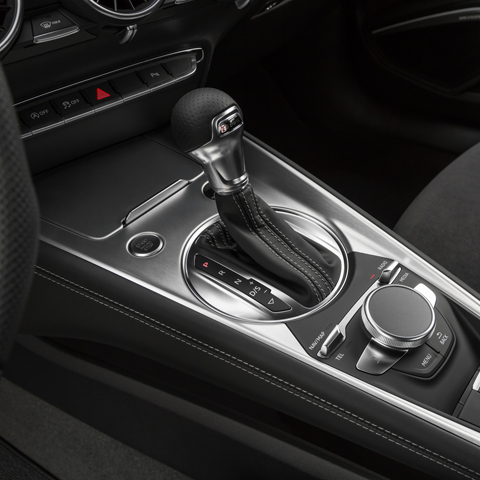
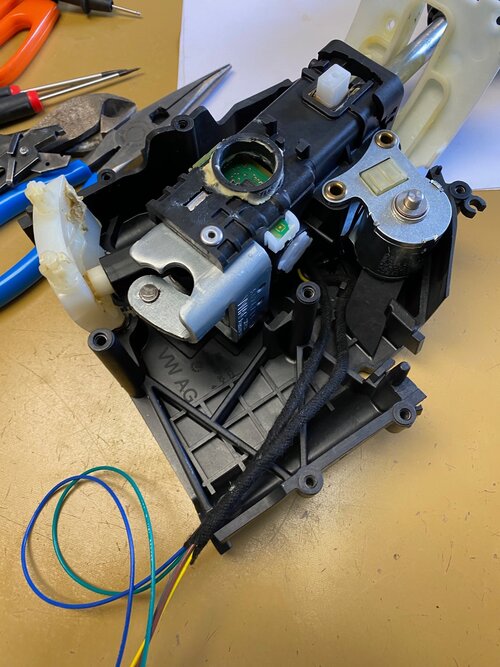
I explored many options for our shifter, starting with those from BMW. In the end I landed on using an Audi TT unit (pictured here). This unit has both an a on-board computer and a mechanical rod which extends to manually put the Audi transmission into its gears. Being a modern shifter, there is also an electric solenoid implemented which locks the shifter in Park for safety unless the brake is pressed, and ignition is on.

Functionality

The gear selector will function like any modern car. There is a button on the grip to release it from Park, so long as the brake is pressed. You will pull back for Reverse, then Neutral then Drive.

Our Tesla drive unit does not have a Park function, which holds the car still when in Park. You might remember a couple of posts back I detailed our use of Brembo/Tesla electric parking brakes. These brakes hold the car from rolling down the street. They are designed for this job, and remain locked even if power is lost or disconnected. For this reason, when our shifter is put into Park, the parking brakes will automatically set. When shifted out of park they will disengage. This is not merely for convenience. Since so few people set their parking brake, I needed to be sure that anyone else who drives my car will not watch it roll down the street after they get out.

Finally, our car has far more power than we can safely use for everyday driving. I plan to limit the power to perhaps 70% for normal Drive mode. From there, you will be able to push the shifter to the right (the Audi sport/manual shift mode). This will unlock the full power for sport driving, similar to Ludicrous mode on a Tesla. Slide it back into Drive position and the motor will again be reduced to normal, limited power. (There will also be a password-protected Valet mode which drastically limits the power to 15%).

The Dr. Frankenstein Method

The Audi shifter is both mechanical and computer in operation. It outputs a cable that extends under the car to the transmission which mechanically puts the transmission into the various gears. But there is also an on-board computer which senses the position of the shifter and tells the main computer what gear the car is in, as well as handling the sport mode commands.

For our modern Tesla setup, it makes the most sense to use that on-board computer. I plan to do just that in the final iteration. We will decode the Audi messages then build a simple hardware computer to convert those messages to those our Tesla controller understands. But to get this car out of the shop and onto the road I am going a much simpler route:

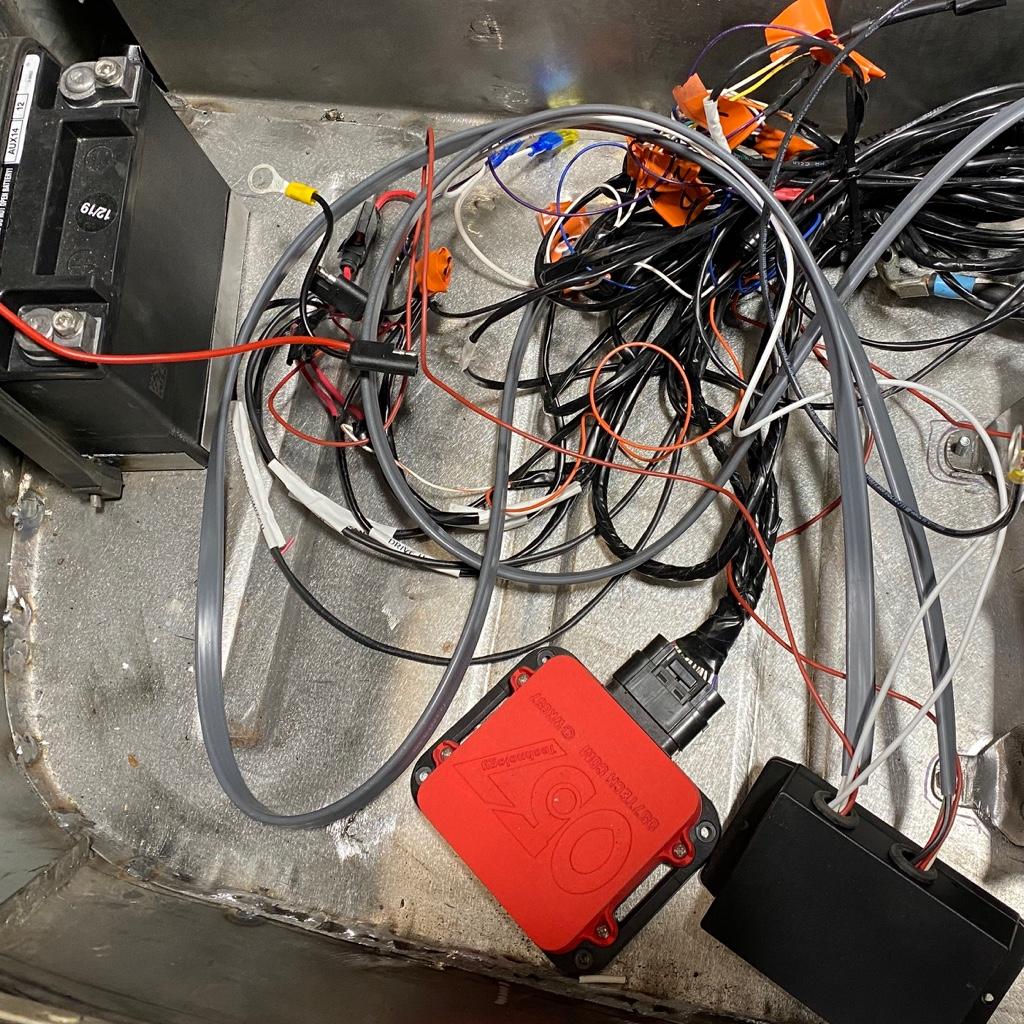
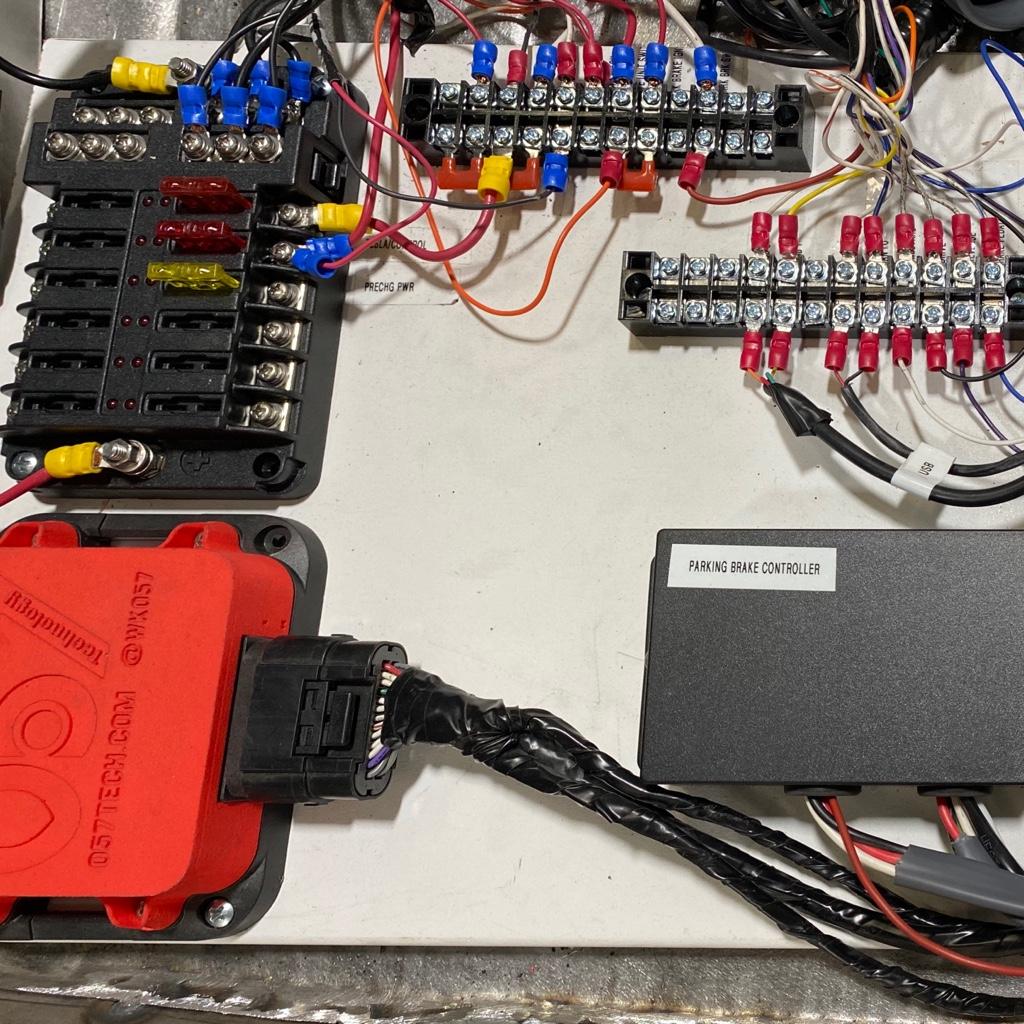
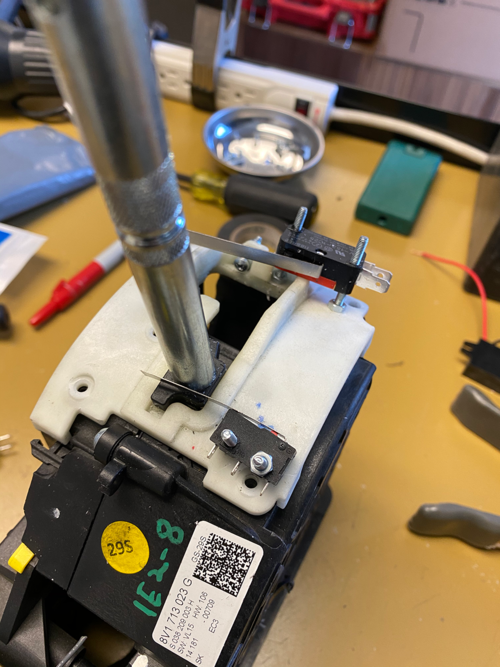
Our Tesla controller uses 12 volt triggers to enable each gear. Remember our spaceship looking control panel from previous posts? Push buttons send 12 volts to inputs on our controller to put the car in gear. I am going to add microswitches to the lever itself. Audi uses a microswitch inside the shifter to tell the computer that the release button has been pressed. So I don’t think I am crazy to add a few more of those little switches for the remaining functions.

IMG_1760.jpg

I soldered new leads to the solenoid and the release button microswitch. Automotive wire wrap was then used to keep things clean.

Switches.png

Here are our first two microswitches going into place. In this photo the unit is in Park position.

Shifter+Assembly.png

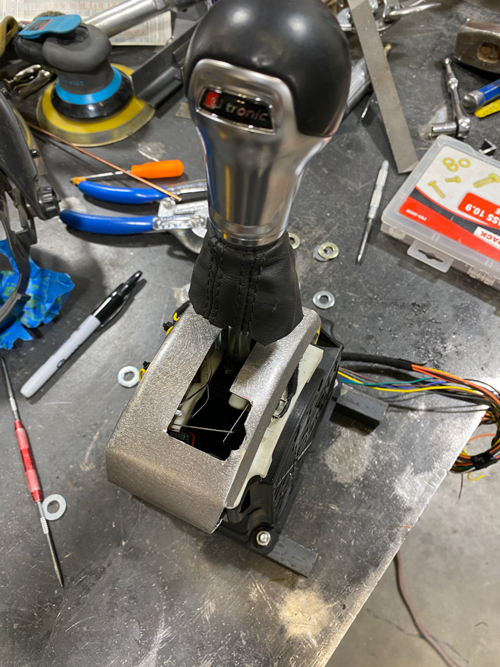
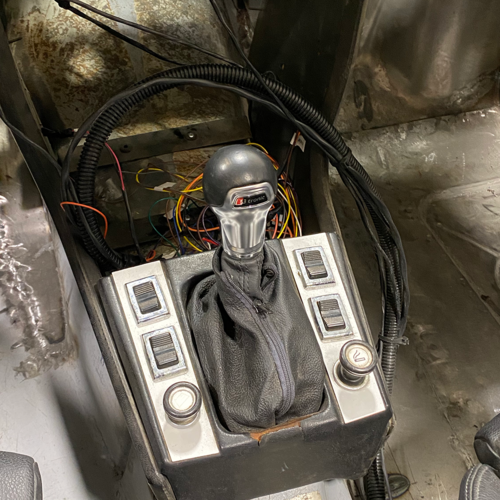
The shifter is all wired up and a custom cover is installed to protect the mechanisms.

Welding+it+in.png

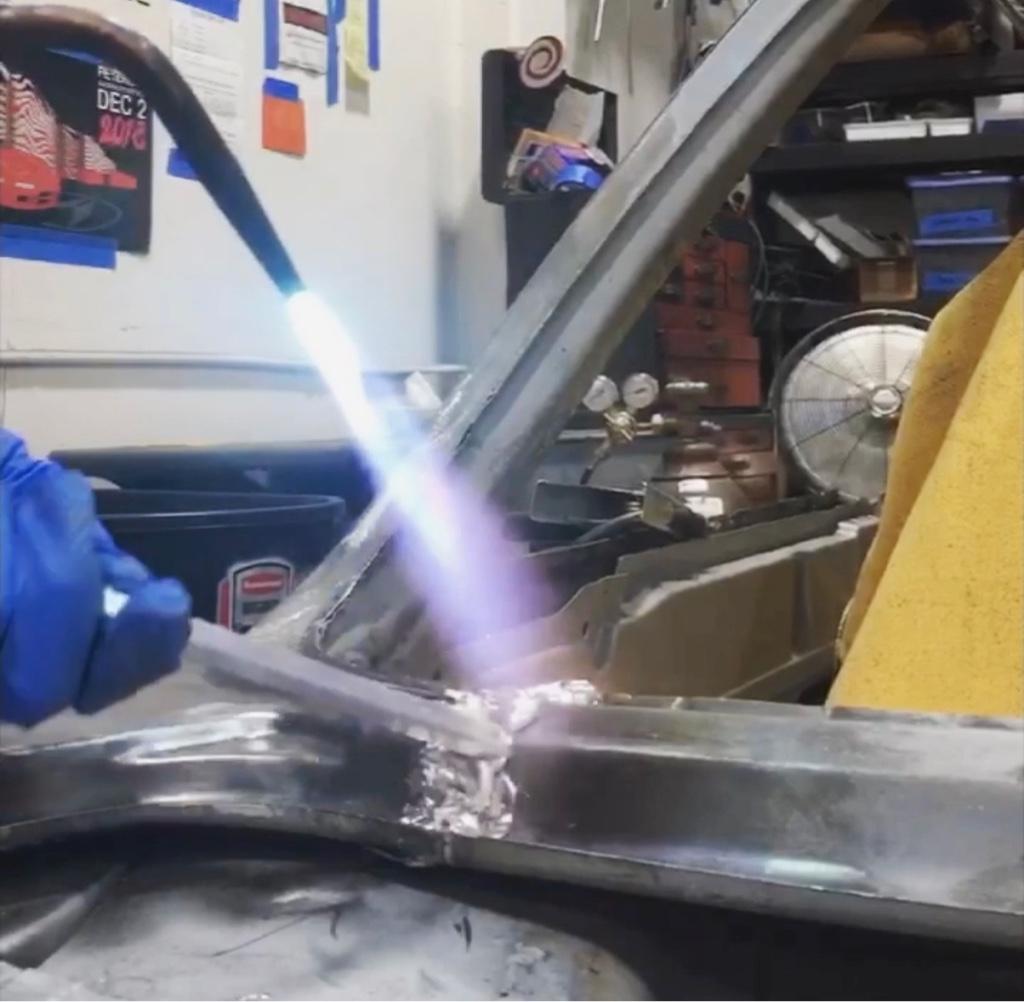
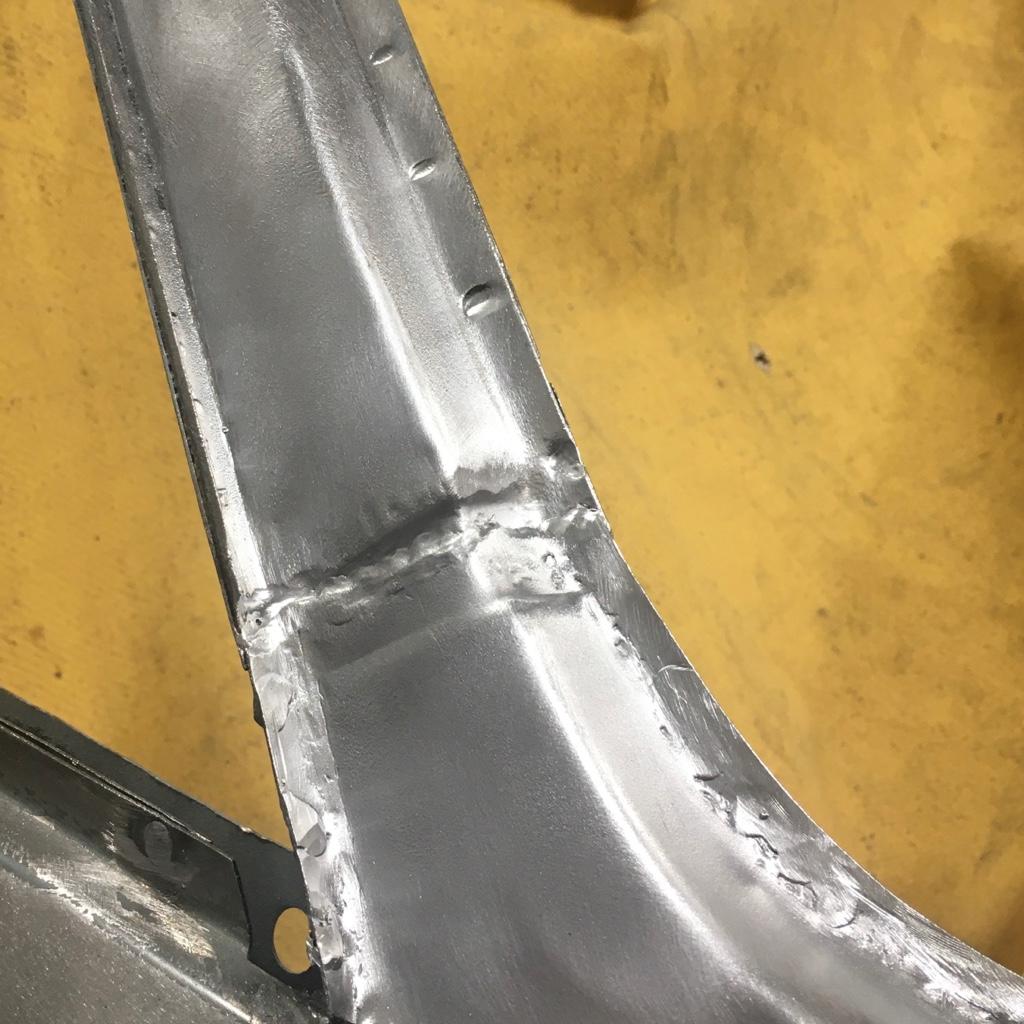
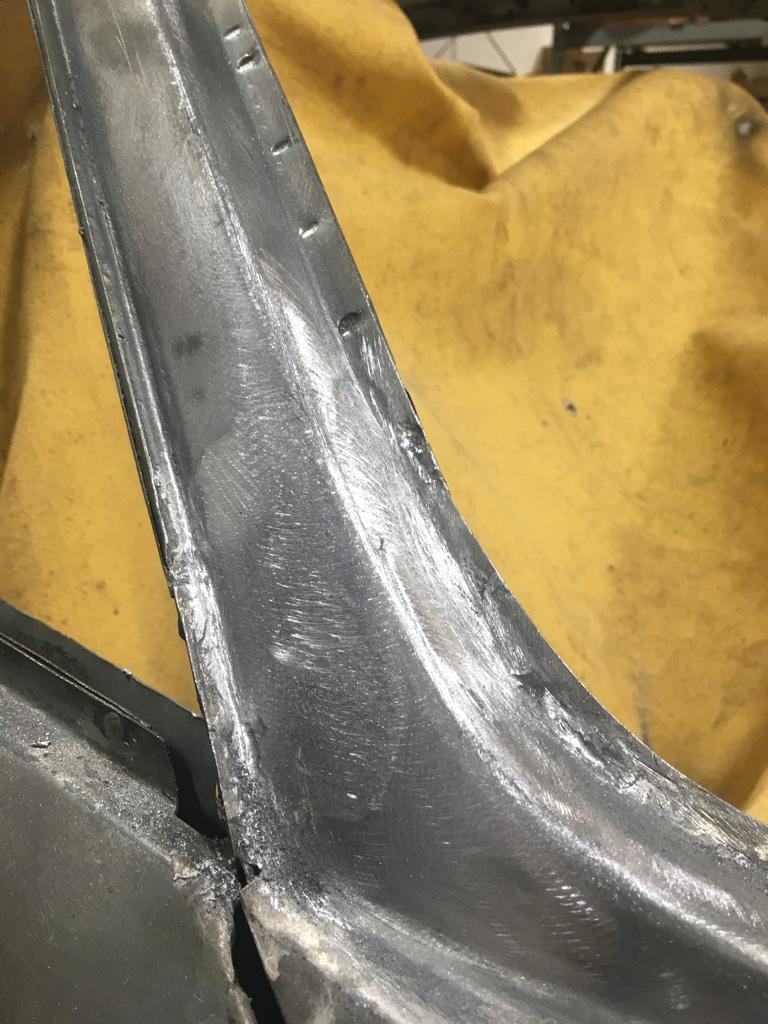
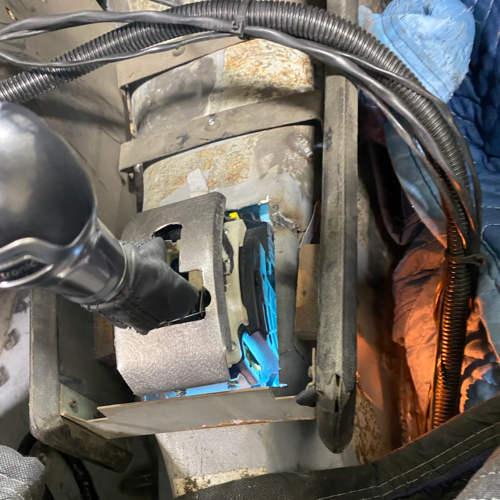
With the shifter held in place Tyler gets busy welding the mounting brackets below. The unit is easily removable for service.

Shifter+Installed.png

The shifter looks right at home in the console. We will fit a proper leather boot and even fabricate a wooden shift knob when we get to the interior finish of the car.

Old+Control+Panel.png

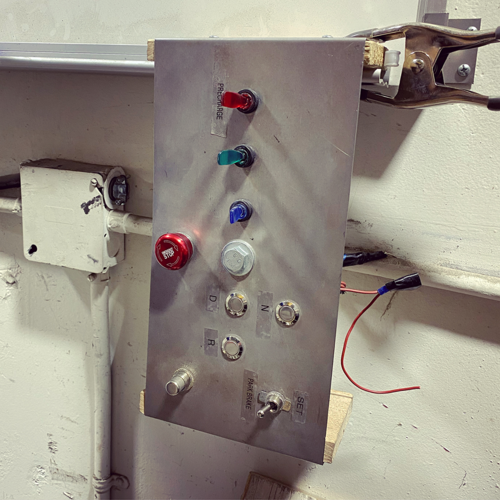
This marks the end of our temporary “space ship” control panel. We’ve now automated every switch and button required to operate the car without it, but we’ll certainly hang onto her as a shop decoration.

After all the wiring, welding and connecting, she looks fantastic and functions wonderfully. The finishing touches will be to properly fit the leather boot and to fabricate a traditional looking wood shift knob. The latter will require some doing, but should be worth the effort. I leave you today with a short little video of our first drive with the shifter installed:


Cheers,

Paul

Cheers,
Paul
 

JetDexter

Well-Known Member
Site Donor
Messages
321
Reaction score
529
Location
Newport Beach, CA
The last few days have been good:

We set the front and rear glass

We got the power seats fully functioning (I know, not a lot of love here for those)

We got the turn signals installed and I’m a couple hours away from having them function- including lane change 3 flash function.

We got the door handles and deck lid latches on.

We got the windwings on (mostly so that we could place the mirrors)

We got the trapezoid mirrors installed. A lot of debate about placement, but I went with BMWs early far-forward location for drivers, and back an inch or so on passenger so that they are both in full view.

We got the fuel door on - and of course the crap metal they used on the hinge was broken near one screw so I’ll be needing to replace that- there isn’t any good part on this car:)

And we HAD to put the side emblems on. They are the old faded original but look great at the moment.

These photos make it look like a regular car but when I see them I just remember weeks and weeks of work just on that rear quarter for example. It’s quite gratifying to look at like this.

And then we took her for a spin and got her zipping along the streets at 75MPH. Didn’t mean to, but she gets up there before you realize it if you aren’t careful.

fb0716e81b706d80b837cda31d92ccea.jpg


9710aa4f077cfcc66ebb225944673511.jpg
 
Top