1974 BMW CSE

JetDexter

Well-Known Member
Site Donor
Messages
321
Reaction score
529
Location
Newport Beach, CA
Last week was a terrific week of progress on our "Phase One" completion (AKA- buttoning up the car enough to bring it home and enjoy it for 6-12 months before stripping her back down for final paint and finish).

Sound Deadening- We sprayed topcoat to the inner doors and floors then applied DynaMat to the entire surfaces. I'd say it's around 40lbs worth, but completely worth the weight and effort. The feel of the car is so tight now, which is dramatic when driving. Our custom seat mounts look much more finished painted and poking through the material. We will wrap up this work next week.

Door Dynamat.jpg

Rear Dynamat.JPG

Front Dynamat.JPG


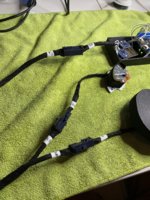
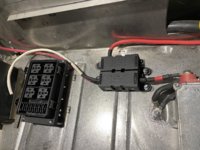
Digital Dash Display- A few weeks ago I posted the progress of physically mounting the color digital dash display. With a lot of perseverance with video scaling, and nice work from Jeff on Raspberry Pi programming, I was able to finally get the mounted display to show our live information from the Tesla unit. There is some fine-tuning to be done, but it's just about there. The photo makes it look like it is brighter than the other gauges, but in real life, it blends in far better than I had even hoped. Very excited for how this came out. Currently I am working on converting the Speedo, Temp and Fuel gauges to Stepper motor control so that we can have the classic gauges telling the modern information.

Digital Display.jpg


Dash Work - I wouldn't be able to bring the car within 10 miles of home with the dash looking like this:
Old Dash.jpg


I came across a guy on eBay who was amazingly local who had purchased a set of Leather wraps for an E9 dash- but then had sold his car before installing them (buying the parts is always the easy part:) Remember that I am using E93 leather seats, so I took a bunch of photos of my seats and met the guy to see if the leather would match.

It must have been my lucky day, because it was perfect. When I brought them back to the car I can't tell them apart. The funny thing is my upholstery guy can't find as close of match in all his sample books:) And the stitching is the same as well. I picked it up for a couple hundred bucks.
Leather.jpg


Of course my Upholsterer wasn't quite that cheap, but he is my neighbor where my shop is and he was very kind to me. They had to first do a lot of repair to the dash. The instrument section was split open to twice it's thickness where it meets the wood. One of the mounting screws was broken off, and cracks everywhere. They did an amazing job at the repairs, then a wonderful job at the wrapping.

Dash Repair.JPG


Dash Screw.JPG


Finished Dash.jpg


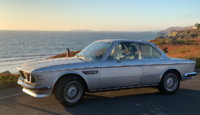
To celebrate the efforts we took the car out for our longest drive yet. Much further away than we could push her home if she broke down, that's for sure:) We drove to Norms and got lunch- the first day that restaurants were open in California! Then we took her for a 25 minute drive along the So Cal freeways. The car felt terrific at 80MPH and on the high-speed ramps. Can't wait to do more of that. It's probably the quickest E9 that's ever been on the road, but who's keeping score:). It's certainly the stealthiest, since it is perfectly silent when getting up to speed in a few seconds. It is completely well-behaved too.

I know that a lot of enthusiasts feel what without the engine noise or running through gears that there is no real joy in driving. But, as we all know, old cars are very fun to drive "for a while". At the end of a weekend rally, you are ready to get back into your modern car. I think what we have here is something that provides a lot of enjoyment, turns heads with it's form, and is still easy for this old guy to drive day after day. (I'll keep convincing myself:)

Norms.jpg

Freeway.jpg


All in all, it's been a very exciting week, and I might be just a few weeks away from bringing the car home and driving it to work most days!
 

eriknetherlands

Moderator
Site Donor
Messages
2,697
Reaction score
1,929
Location
Netherlands, Eindhoven area
What an amazing achievement.
I do like the "old" feel, and did drive my car for five years, nearly every day, but i get the thrill you describe from enjoying the silent hum as it glides along.

You know, once you get to the point where all that is left is prep&painting, then realise that that's just standard. Anyone can do that; themselves or pay someone. I mean to say, you've come so far. Again amazing. Who cares that its just in primer?

And it gives you more time to contemplate on the color...
 

JetDexter

Well-Known Member
Site Donor
Messages
321
Reaction score
529
Location
Newport Beach, CA
Trying to get more (nearly) free stuff done on the car:).

Last week I started working on the analog gauges. While the digital display in the old Tach position is nice, I still want to see the traditional Speedo, Temp and Tank gauges function (along with the clock of course).

The speedo took some patience for this hack engineer. A lot of measuring, 3d printing, then remeasuring, then printing, etc. But I've got it working and it's fantastic. I took the speedo apart, removed the mechanism.

IMG_2420.jpg


Using a common Stepper motor (this model is used by several manufacturers) I needed to extend the shaft to reach our needle (since it passes through the Odometer). Also, our shaft is larger diameter. I cut off our old shaft, then printed a small extender section which very snugly creates a nice single unit.

New Shaft.jpg


Then I took some circuit board and cut out a shape that would fit. I installed a small motor driver board, then wired up the motor to it, and our leads which will exit the cluster, and wrapped those nicely.
wiring back.JPG
wiring front.JPG


My 10th iteration of this mount worked perfectly. None of the holes are really aligned to anything, so it was tough to find a reference, but PLA material is cheap (and Jeff tells me recyclable) so I just kept printing and adjusting until I got this nice mount. There is a top cap which then bumps the top inside of the can.

Housing.jpg


Next up was the Odo. I do not have a transmission to feed me miles, so I have to do it electronically. Once removing two layers of worm drive, you are left with this 22 tooth gear. (22 spoke for this unit, the older unit I landed on using is a 19 tooth gear). I printed up a shaft that surrounds this gear on one end, and the output of a stronger, geared-down stepper motor on the other.

Odo Gear.JPG


Here's a nice shot of an old and new (at least that's my assumption) of debossed printed unit and flat printed newer unit. Both with very low miles I might add. I am going with the classic unit.
IMG_2544.jpg


I had to cut away the side of the can for the motor. It is a tight fit to the next can, but it works well. The motor very slowly, and very smoothly turns the odo. Notice the driver board fo this motor inside this cap.
Odo Motor.jpg


After everything was assembled, it is all enclosed in this cap. This is a first iteration, so it should be cleaner once complete.
cap installed.jpg


After all that was done, I am now forging my way into the Temp/Tank gauges. Pretty good progress there, but only one pic so far. I'll get those dummy lights working as well. I don't even know what they all originally did, but I might change that up anyway. For sure, a high temp, a low fuel (battery), but I don't know the others. I'll leave the original printing alone, and just insert LEDs in the tunnels.

temp.JPG


Oh- one more thing. I did buy a couple cans of vinyl dye spray, and paint my aging blue rear seats and door cards black for my temporary solution. The rear seats also had terrible sun damage so I used large sections of patching tape to seal them off. It's not perfect, but it will get me by until I can reupholster the whole interior.

It's fantastic to have an interior that is all the same color! The rear headrests now match the seats as well.

Seats.JPG


That's it for now.

Cheers!

Paul
 

JetDexter

Well-Known Member
Site Donor
Messages
321
Reaction score
529
Location
Newport Beach, CA
Last week we made some good progress:

We got the power steering and power brakes functioning. If you've followed this thread, you are aware that (for better or worse) the steering and brake setups were completely re-engineered. Mostly to make way for the humungous Tesla battery box in the engine compartment. We installed a VW GTI power steering rack, a Bosch hydroboost brake booster (since we have no vacuum) and a Wilwood master cylinder and big brake setup.

Since we have been driving the car the last 6 months, we have ran these systems without power. Steering felt fine on the road, but turning those big tires in a parking lot was just as you would expect. Brakes were very weak since the setup simply requires boost to properly function. Lucky for us, the regenerative braking of the Tesla setup means that you step on the brakes very rarely. If you have ever driven a Tesla you would agree that there are many drives where you simply don't put your foot on the brake at all other than for a full stop. The drive unit provides remarkable braking. At speed it is the equivalent of sporty downshifting, and coming to a stop it does all the work up until the very last few feet to a complete stop. Letting your foot off the accellerator is what triggers this (as opposed to a lot of smaller EVs where it is triggered by the brake pedal). This feels strange, and even "Autopia-like", this one-pedal driving. But once you get used to it it is addicting and very responsive. This is also how we have been able to drive the car without issue for so long.

Luckily we have sorted out so many details with the conversion that it was finally time to tackle this one. To power both steering and brakes I had selected a BMW/Mini 12 volt power steering pump. It fit nicely between the PS rack and the bottom of the firewall. I gave it the 100amp service it wants (30 amps constant, but it will pull 80A or so if a soccer mom were to hold the steering at limit for extended periods of time).

PS-Pump-Installed.png


The pump feeds the brake booster, which then feeds the power steering rack, which feeds the reservoir which feeds the pump. This all looked really good on paper a year ago, but I have been cautiously optimistic that it would all function and feel nice. I had done a lot of research, based on parts of this design working with other parts of other designs, but there was no real comparison as a whole.

Installing the pump was easy- we've done a lot of that. Fabricating brackets from various nearby mounting points, which mate to the Mini pump. Running the electrical was easy, but when it came to the high pressure lines I was literally lost. Tyler (who you know as the metal finishing master from this thread) called a mechanic buddy who told him of a guy he had heard of who used to work at Mesa Hose. Tyler called them and they said "That's Mike Swan, here's his number". I'd never heard of Mike, but he and his dog Stanley live in Nebraska and come out a few times a year to work on very nice hot rods for a few weeks at at time. He and Stanley were busy with a project but couldn't resist the story of this Tesla BMW, so he came by the next day to check it out. He instantly knew all the devices, connection sizes, etc. He measured for what he would need and said that he could come back after the weekend to fabricate and install the hoses at our place.

Pump Plumbed.JPG


Mike fabricated the custom braided lines and fired it up. We bled the system (which requires several repeats of letting the bubbles die off with long delays). In the end we now have fantastic brakes. The stock brakes were already amazing for their day, but I am quite proud of this setup which feels wonderful and stops the car immediately. I feel like they are a great match for the type of Tesla conversion we've got going here.

The steering feels good, but I need more drives to see if it might be a bit soft. If so, Mike will do what VW does, which is insert a thin sleeve into a hose to reduce the pressure before the rack. It is suprising that there is not an adjustable valve (there may well be but Mike hasn't come across one that handles this high of pressure). Inserting sleeves is what manufacturers do for reliable pressure reduction. Once again- this is not my world, but I find it fascinating.

While all of this was going on we were able to get our gas-charged struts in place to hold the hood up. I think this gained us about 40 pounds from the front of the car as the revered stock system is quite weighty. I'd read some threads here which had used some various designs. Some more obtrusive than others. I think that mine are quite out of the way. Of course the only thing I even need to do under here is check my 3 fluids.

Hood Support.JPG


I'll be backed up now the next couple of weeks so I won't be able to get much done, but it's been quite a run this last month.

Cheers,

Paul
 

JetDexter

Well-Known Member
Site Donor
Messages
321
Reaction score
529
Location
Newport Beach, CA
Paul, which shocks did you choose for the hood?
Sorry Bo I was out and missed this! Here are the units I used. Based on where I put them they are the perfect strength at 40lbs each. There is a 30lb version which would hold it just fine once its up. The 40lb is more than enough and it pushes pretty hard and fast if you let it finish without slowing it down, but I like the amount of strength when fully open so that a pretty good wind isn't gong to blow it closed.

IMG_2896.JPG
IMG_2897.JPG
 

JetDexter

Well-Known Member
Site Donor
Messages
321
Reaction score
529
Location
Newport Beach, CA
I took the family on a Griswald-style road trip for a couple of weeks so nothing done on the car. (Well we swapped the station wagon for a rented 40' diesel pusher RV but other than that it was exactly the same).

But this week we've managed to make a bit of progress.

First, the 12v power steering pump is fed from a BMW/Mini reservoir which we had in a temporary location in the HVAC intake. I needed to test the system before cutting into the car for a permanent location. So this week we moved it to a very odd location above the hood latch mechanism. It is the only place we could put it where the hose can feed at a pretty steep angle downward, which is required for this system. It looks clean and is nicely serviceable.

CAD72A0F-0BC6-4EC0-9C18-C260EA8ACB7F.JPG


I also installed all 4 door panels since they'd been dyed black. The wood is still terrible, but that is put off for 6-12 months. I picked up a cheap set of door speakers to fill the holes. All-in-all it looks buttoned up which is all I can ask for for now. I can't wait to have some custom leather panels done next year.

IMG_2894.jpg


Most most fun I had was with the front bumper. You guys may remember that I am using the rubber less old bumper in the rear. I wanted to try to match that up front, so I am playing with this concept. If I like it we will weld and smooth it then re chrome it. So far I think it looks good. Most people seem to prefer no bumper up there, but I like the chrome too much . BTW, if you recall, I was looking for a new center section because mine was in pretty bad bent and twisted shape. I found all three of these pieces in fantastic straight condition (including the chrome) for $399 on eBay. I seem to get lucky there. There is a dimple right in the very front, but for the price I can live with that unit the re-chrome.

D4A96CA3-9FBF-4B81-BFDE-966EF48A47CD.JPG


Still working towards buttoning the car up enough to present it to my wife in a month or so. Need to get the dash fully put back together and some carpet in. Just about there!
 

Bmachine

Well-Known Member
Site Donor $
Site Donor $$
Messages
3,525
Reaction score
1,778
Location
Northern California coast
Most most fun I had was with the front bumper. You guys may remember that I am using the rubber less old bumper in the rear. I wanted to try to match that up front, so I am playing with this concept. If I like it we will weld and smooth it then re chrome it. So far I think it looks good. Most people seem to prefer no bumper up there, but I like the chrome too much .
I agree completely. It’s all a strictly personal thing as usual and there are no rights or wrong. But I certainly prefer the using the bumper but without overriders. I tested it without the rubber but, with a metallic paint on the body, I think the rubber adds a nice break in the overall amount of “shininess”. With your flat paint (temporary as it may be), however, the larger expanse of visible chrome works better.
 

Attachments

  • 7FCA107C-7C76-432E-9329-EE99B7503A7A.jpeg
    7FCA107C-7C76-432E-9329-EE99B7503A7A.jpeg
    276.5 KB · Views: 162

Drew Gregg

Well-Known Member
Site Donor
Messages
1,565
Reaction score
1,201
Location
Ft. Lauderdale
I have watched the engine-out color change of my Coupe with many parts repaired and replaced by a restoration shop. I have also driven a 90S Tesla for 6 months. Congratulations on making an incredible combination of the 2 models. If only there was a way of adding the sound of triple DCOE webers to the acceleration of a CSE.
 

JetDexter

Well-Known Member
Site Donor
Messages
321
Reaction score
529
Location
Newport Beach, CA
The last couple of weeks have been slower than I'd like, but we do have some progress:

Brett got the carpet in which makes the car feel totally complete when you sit inside. Padding went down:

Padding In.JPG


Then black backless carpet:
Carpet Going in.JPG


Then it suddenly became a very finished car:
Carpet Done.JPG


Yesterday I got the very dusty seats bolted back in:
Seats in.jpg


We got more great progress on the digital display in the Tach position. The new high resolution round display is now starting up with our little animation splash shown here, before it settles into the data display. It looks cooler in animation, but I'm too lazy to post the video to YouTube just to share it here. I will once the cluster is installed next week. Jeff did an amazing job coding this thing up. Now I'm going to have to make him a blue coupe splash animation with skinny tires for his display:)

Splash Screen.png


And lastly, I got a stepper motor installed into the fuel gauge housing. We are now reading Tesla Battery charge % on the gauge (well not in this photo as we just turned off the ignition, but you get the idea). The last one to do is Temp gauge.
Fuel Gauge.jpg


I dropped off my pair of clocks at NH Speedometer. My newer quartz unit had a broken Minute hand. Bo generously sent me an older unit with a good hand. Turns out I can't swap hands, so I gave them the pile of parts. After complaining for 20 minutes that Singer has used up all the parts for these clocks, they decided that my best option was to repair the early non-quartz clock. They will also repaint my MPH needle to white as it is currently an ivory color where the other needles in this car are white.

Once I get that clock back I can reassemble the entire cluster and put it in for hopefully the last time. Actually, I haven't resolved illumination yet, so it will come apart once more for that. There is no space for the old lamp style illumination, so I am thinking of very thin LED strips stuck to the wall of the cans. But I am putting that off for now.

Cheers,

Paul
 

JetDexter

Well-Known Member
Site Donor
Messages
321
Reaction score
529
Location
Newport Beach, CA
More progress on the coupe this week. Mostly working on getting the instrument cluster assembled for the final time.

Got the odometer driver board wired up and installed into its housing complete with logo:)

B9E22AEC-5F33-4220-915F-BEF08C1457C3.jpeg

FD16850E-2CAC-4324-A026-1D2EEC6BA40B.jpeg


Got the fuel (battery charge/range) and temp (most critical temp reading) gauges all wired up and installed into the housing. Here’s a fun little loop:

903FBD41-079E-4837-9BFE-EC563AACC830.gif


Up until this point you’ve seen nothing but messy wiring for all my testing. But I’m finally to the point of creating clean wire harnesses. Disconnects on each device end:

1064B72B-D455-428F-9404-BE51762D02A1.jpeg


Monday I should receive my rebuilt clock (Bo, your minute hand would work with my later clock, so they suggested rebuilding your unit. My quartz unit was dead anyway so one of them would have had to be rebuilt) and a repainted MPH needle from North Hollywood Speedo. Then I can get the cluster fully assembled and functional!

Finally Tyler got my front fuse/relay box installed under the hood. There is room in the footwell but I just wanted a place I could easily service and add functionality to. I will have one in the trunk as well, but this one will serve water pump, cooling fans, headlights, horns, dash computers and such. All “up front” things.

A5422425-9923-48AC-A6DE-CAAAF9B421F2.jpeg

053F461B-520A-4C6B-AF14-A675A69A9F35.jpeg


Got my license plate lamps installed. There was a time I thought I would never have a shot as clean as this:)

BEE5E688-C296-47FC-9F7B-E1D099215E94.jpeg


Got a bit more bright work installed, making the coupe a bit more inviting to step into:

13DFAE26-A4E4-4082-8961-2AB328ADE413.jpeg


I finally received this beauty in the mail. I can’t wait to get it installed:

38CCFBD2-50E0-4DA4-A523-8728DDE9EF67.jpeg


Things are coming along!

Paul
 

Attachments

  • 239E7BB7-1933-48F2-8BB5-DA955168AD4E.jpeg
    239E7BB7-1933-48F2-8BB5-DA955168AD4E.jpeg
    668.2 KB · Views: 142

JetDexter

Well-Known Member
Site Donor
Messages
321
Reaction score
529
Location
Newport Beach, CA
Today I got the instrument cluster fully assembled. I've been sharing bits and pieces of this for a long time now, but it's so great to see it all come together. Two years ago when I started up the project I dreamed up this digital display in the (albeit sadly not needed) tach position, then digitally controlled gauges for the speedo, temp and fuel gauges. Only with the help of talented friends like @jefflit bringing my mockup to life on the display and another friend helping with the analog gauge control could it have ever happened.

What's better is that it's all working in real life in the car. I'm headed out of town today for business but next week I'll be installing this into my new leather dash and taking her for a spin.

I look forward to new wood in the future, but for now I got it polished up nice enough. I was suprised how well the chrome came back- I thought it was corroded completely through. North Hollywood Speedo rebuilt @Bmachine's donated clock. Crazy thing is that they installed the face UPSIDE DOWN. I was so upset when I went to put it in. And it was the last thing holding me up from completing this. I wasn't about to open it up to fix it, or send it back to them to fix, so I shaved off enough of the mounting tab to allow the mounts to function that way. (On second thought I'm sure one of the gurus here will tell me that early clocks were upside down and the clusters had different stud positions :)

I also tried a little trick to bring back the black in the surrounds. Mine were not only faded but discolored and splotchy. I didn't want to remove them to properly paint them (until I redo my wood) so I sprayed black satin spray paint on my rubber-gloved finger and wiped it into the surround. This did a nice job of bringing back just enough brightness in the black and getting into the crevices.

Here's a little video of the full startup animation:


Anyway, I'm a little proud of the results as you can tell. Not bad for a total hack like me.


IMG_3131.jpg


IMG_3133.jpg
 

JetDexter

Well-Known Member
Site Donor
Messages
321
Reaction score
529
Location
Newport Beach, CA
I am perpetually two weeks away from bringing this car home. Still, more progress has been made this week!

I got so frustrated constantly adjusting the interesting but overly finicky hood latches. So I decided to mod them into a basic modern latch- using E60 latches.


IMG_3237.JPG

First, Tyler whipped up a couple of adjustable mounting plates.

IMG_3238.JPG
IMG_3239.JPG

Then we could mount the new latches to the car's original mounts.

IMG_3216.JPG

Then we had to extend the catches to reach into the deeper latch. (Not shown, but we had to extend them further towards the cabin as well).

Finally, we added a pair of springs, then:


This, in combination of our gas struts makes the E9 hood completely non-original but extremely enjoyable to use.

In other news, We got a simple 12v battery disconnect installed into the trunk. My battery is a little motorcycle battery which only needs to activate a relay turning on the massive Tesla batteries. Since my clock and at least one small computer will be running on the battery when parked, I wanted an easy disconnect both for safety reasons when working on the car but also to disconnect if I am going to not drive it for a couple of weeks. This trunk panel will be carpeted.
B70CE9D0-6A3B-4B40-B341-6307007B4137.JPG


Lastly, I am reworking all of my temporary wiring with nice permanent wiring. Three fuse/relay boxes: One in the trunk near the battery which feeds the many Tesla items back there. One in the cabin footwell which feeds items there, then one up front which feeds radiator pump/fans, headlights, horn. One would have done it, but this distributed system seemed to make sense to me, and it seems simpler to work on/add to in the future.

EEA16D2F-F1DE-4EEF-A5D7-02910251E306.JPG


This week I got the front two completely done and clean. The trunk is the most complex and that's next week.

Then I can get back to putting the dash back together, carpet the trunk and bring the car home. That's if I don't find any more "must have" projects like these hood latches:)

Cheers!

Paul
 

JetDexter

Well-Known Member
Site Donor
Messages
321
Reaction score
529
Location
Newport Beach, CA
This was a great week of progress and the car is back to Operational status! The last several weeks I'd been working on these schematics. The first 3 sheets are the 12v systems and the last is the 320v Tesla system. This represents everything in the car today, but not represented are power windows, stereo, electric sunroof and HVAC all of which will be implemented after I drive the car for a while.

CSE Schematics.PNG


First I finished up that front fuse/relay box which turned out very nice. The lines run along our battery box. Feeds our headlights, horns, coolant pump, radiator fans. Turn signals pass through here as well so it's all in the same wire loom.

Front Complete 1.jpg


Front Complete 2.jpg
Front Complete 3.jpg


Then I moved to the cabin footwell fuse/relay box. No photos of that one since it's not installed yet. I have to decide a location, but need to instal my hood release lever first. The wiring is all done in there though. This box has the turn signal relay, a VW "convenience" relay (for 3 flash lane change function) and fuses for the dash and console items.

THEN I moved to the trunk which was a huge project. Here is the "Before" photo. This was the temporary wiring as I was installing and testing each of the various systems. Now that they are all working and refined, I am ripping all the wiring out to start over.

Trunk Before.jpg


To the right is a Tesla DC/DC converter. It takes the 320 volts of Tesla batteries and turns it into 12v to power all our auto systems (think of it as my alternator). I am feeding a pair of 100 amp mega fuses. One of them runs directly to the BMW/Mini electric power steering pump (this is the same fuse as they use, and there is a small 12v trigger to turn the unit on with ignition). The other 100A fuse feeds our three distributed fuse/relay boxes.
Trunk 1.jpg


My motorcycle battery passes through a cutoff switch before entering the system. This switch will be accessible above the carpeted trunk floor. Since my clock and Raspberry Pi computer will always be running, I will disconnect if I am not driving the car for 10 days or so of if I am working on the car. Otherwise, all the battery does is run through the ignition switch which then activates the DC/DC transformer which charges the battery back up.
Trunk 3.jpg


Then I wired up my parking brake controller (in case you missed it- the Tesla has no "Park" function, and hand brakes don't typically lock the wheels, so I am using the same Brembo electric parking brakes that Tesla (and many other cars) use. When I put the shifter in park, the parking brakes activate automatically.

Then my 057 Tesla control box got wired up. Everything was loomed nicely and it is all tested and stable.

Notice that Brett is now making a little wire path tunnel on the upper level preparing to carpet that section.

Trunk Complete 5.JPG


Here's our false floor, which is getting carpet this weekend. A vertical panel hiding the upper batteries is also going in.
Trunk Floor.jpg


Finally I moved to the console. I had been frustrated with the stock mounts for the console as I've had it in and out these last 6 months. Like the dash of these cars, they didn't make it fun to take in and out (which to be fair, shouldn't need to happen a lot). But I figured I might need to be in here a few more times (for one thing, I want to wrap it in leather next year). But I also needed a platform to install my computers. So I did this custom bracket method, which allows for very easy assembly and removal. It just won't win any points with BMW Classic.

First, a couple of angle brackets which can easily be screwed in, unlike the ones that went downward.
Console 1.jpg


Then I cut a piece of wood and painted black. I figured that BMW would appreciate the plywood for originality sake.
Console 2.jpg


Then I began to wire up the computers and the shifter. Molex connectors allow for disconnecting and removing the shifter and all computers. There's the Rasberry Pi which runs the digital display, then a small Arduino computer for Speedo, temp and fuel, then a smaller computer for Odometer.
Console 4.jpg


Next I peeled off the Audi emblem from the shifter and designed a CSE emblem for its place. For $26 an epoxy "domed" sticker printed on foil is already on its way. The cheapest part of the whole car. I can't wait to pop that on there. I do I fear it will take a few revisions of that to get the exact fit just right.
Shift Knob.JPG


Wiring is done, though not fully dressed. Got the HVAC face in (thought it's just a dummy for now). I don't know how I will approach that in the end. My first plan was to use a 1"tall x 8" wide touchscreen for HVAC, seat heaters and password for Valet mode- but I've gone all soft now to the classic, so I may leave the original controls in.
Console 5.jpg


Which leads me to this: My original mockup (on bmwcse.com) showed an Apple CarPlay unit, but I don't think I want to take it that far. I picked up this Blaupunkt unit and I'll finish a piece of wood to install it into. That will give me a small tray between the shifter and the stereo face. It's not a Frankfurt, but I'm going with the premise that someone swapped it out to listen to their Saturday Night Fever cassette later on in the '70s. I'll eventually add an Aux in to it so I can connect with bluetooth. This unit is in terrific working order.
Blaupunkt.jpg


Next week we should have trunk carpet, new windshield, dash and instrument cluster, and lower dash sections all in. And I'll hotwire a basic sunroof switch so that I can open and close it for my drives. I'm finally LESS than 2 weeks from bringing her home!

So that's it for this week's progress. It's been 5-6 weeks since I've driven her but next week I'll stretch her legs out. Meanwhile she's still nice just to look at. And there's @jefflit 's car which is currently getting trunk floors and weeks away from Tesla batteries wiring up and spinning those wheels with watts!

Cheers,

Paul

Ready Coupe.JPG
 

Attachments

  • Trunk 2.jpg
    Trunk 2.jpg
    458.9 KB · Views: 118
Top