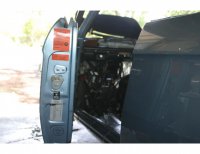
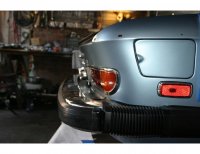
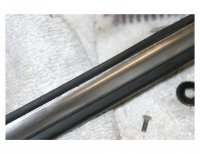
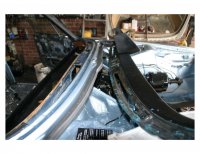
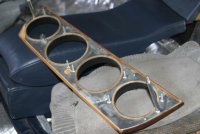
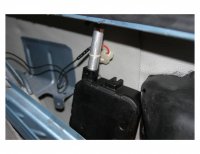
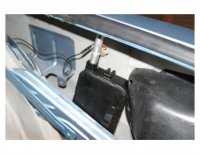
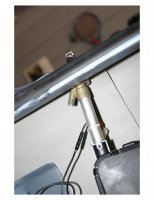
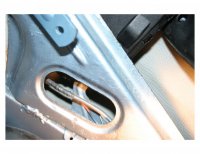
4310316 begins

aearch

Well-Known Member
Site Donor $
Messages
4,114
Reaction score
589
Location
pleasant hill , ca
Roundel

The roundel is actually to big you have to grind it down by hand
for it to fit
i knew id start sometin with that one
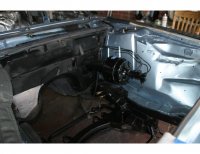
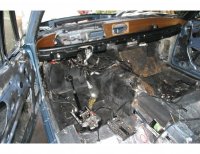
but you got to have the motor or its okie
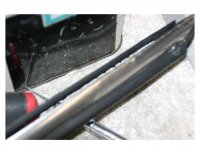
 

HB Chris

Well-Known Member
Site Donor $$
Messages
19,418
Reaction score
8,759
Location
Huntington Beach, CA
I've never seen the orange parts decal on a door and the E sticker is euro only. The plate brackets were white cad/zinc or yellow, still available I think. Looks like your booster is turned 180 degrees as well unless the 74 is unique, the booster hose should be next to the fender. I love the license plate frame!
 

aearch

Well-Known Member
Site Donor $
Messages
4,114
Reaction score
589
Location
pleasant hill , ca
yea i just want em

i put the stickers cause i like em
hazrd protection opening the door
haha
got the plate way back when zipper was still there
went to the dealer and saw it on a car and bought em from the sales gut
i love em too
classici like em chrome
they match
waiting on a new master cyl to hook it all up
 

aearch

Well-Known Member
Site Donor $
Messages
4,114
Reaction score
589
Location
pleasant hill , ca
more

comment next post
 

Attachments

  • IMG_9253.jpg
    IMG_9253.jpg
    88.8 KB · Views: 335
  • IMG_9251.jpg
    IMG_9251.jpg
    83.6 KB · Views: 313
  • IMG_9255.jpg
    IMG_9255.jpg
    87.6 KB · Views: 308
  • IMG_9257.jpg
    IMG_9257.jpg
    88.4 KB · Views: 302
  • IMG_9258.jpg
    IMG_9258.jpg
    77.8 KB · Views: 320
  • IMG_9254.jpg
    IMG_9254.jpg
    85.8 KB · Views: 306
  • IMG_9259.jpg
    IMG_9259.jpg
    87 KB · Views: 295
  • IMG_9260.jpg
    IMG_9260.jpg
    81.6 KB · Views: 308
Last edited:

aearch

Well-Known Member
Site Donor $
Messages
4,114
Reaction score
589
Location
pleasant hill , ca
4-46

so got the Front widows back in -big job
ordered a left front window from wally but -too light of a color put so put orig back in
rebuilt the headlight buckets -the adjuster mounts were loose so drilled and rivited back in -going to start on the wiring today to get the dash set up
ordered new door seals
installed the new brake master and lines
just waiting for the wiring loom to be redone so i can install then i can drop the engine in
sent all the belt trim out to be redone so i can install the back windows
the 5 series motors wok really well maybe 6 t0 7 SECOND RISE TIME MUCHO BETTER.
temp inset the font end trim
need to do a bit of adjustment to line it all up
 

Attachments

  • IMG_9261.jpg
    IMG_9261.jpg
    84.9 KB · Views: 313
  • IMG_9262.jpg
    IMG_9262.jpg
    95.2 KB · Views: 331
  • IMG_9263.jpg
    IMG_9263.jpg
    90.5 KB · Views: 324
  • IMG_9265.jpg
    IMG_9265.jpg
    87.4 KB · Views: 474
Last edited:

aearch

Well-Known Member
Site Donor $
Messages
4,114
Reaction score
589
Location
pleasant hill , ca
Bumper

Tried to tuck them seems they only went a bit to 3" from the body
better than nothin
love the finish the plating guY did.
 

Attachments

  • REAR.jpg
    REAR.jpg
    83.5 KB · Views: 310
  • R1.jpg
    R1.jpg
    83.5 KB · Views: 316

aearch

Well-Known Member
Site Donor $
Messages
4,114
Reaction score
589
Location
pleasant hill , ca
Amazing stuff

I AM TOTALLY AMAZED BY THE quality
of the metals they used to make this car it is the best stuff ever made
ive refurbished "every single piece" of the car
slightly russted parts come back to brand new with a wire drill
and the rubber and plastic are one of a kind
went to put the rocker trim on and it was pitted from the road
"better check yours no kidding it will fall apart under your nose"
mine was in pretty good shape with minor road knicks
took a small sharp chisel and reset the edge and polished.
slow but sure it takes forever to get this trim in glad im doing it now
so when the motors in i can just go
restoring all the welting back to new geting windows aligned dash is taking a bit as the left clip is off a 1/4" so need to fool with it
on ands on
GETTING THE ZIPPER SEWN IN THE HEADLINER HTHEN I CAN ROCK AND ROLL FOR THE REST OF THE TRIM
 

Attachments

  • T.jpg
    T.jpg
    82 KB · Views: 319
  • T1.jpg
    T1.jpg
    81.6 KB · Views: 318
  • 4.jpg
    4.jpg
    90.7 KB · Views: 317
  • 6.jpg
    6.jpg
    91.9 KB · Views: 325
  • 5.jpg
    5.jpg
    90.5 KB · Views: 323
  • 3.jpg
    3.jpg
    91 KB · Views: 335
  • 8.jpg
    8.jpg
    88.2 KB · Views: 320
  • a1.jpg
    a1.jpg
    89.8 KB · Views: 322
  • a2.jpg
    a2.jpg
    89.1 KB · Views: 300
  • 7.jpg
    7.jpg
    89 KB · Views: 326
Last edited:

aearch

Well-Known Member
Site Donor $
Messages
4,114
Reaction score
589
Location
pleasant hill , ca
info

general underdash

never seen a pic before
 

Attachments

  • ss.jpg
    ss.jpg
    90.8 KB · Views: 326
  • xx.jpg
    xx.jpg
    91.6 KB · Views: 318
  • aa.jpg
    aa.jpg
    91.2 KB · Views: 324

aearch

Well-Known Member
Site Donor $
Messages
4,114
Reaction score
589
Location
pleasant hill , ca
dash in

so i finally got the dash in
had to adjust the left clip a 1/4"
to go back then set the clips with jb weld to keep them from rattling or squeeks
also used butterfly clips for the lower molding as the others come off some time
 

Attachments

  • IMG_9311.jpg
    IMG_9311.jpg
    88.6 KB · Views: 318
  • IMG_9319.jpg
    IMG_9319.jpg
    81.7 KB · Views: 312

aearch

Well-Known Member
Site Donor $
Messages
4,114
Reaction score
589
Location
pleasant hill , ca
Just saying- Important dash note!

what a job the biggist task ive ever taken on in a car
so when to install the door seal and whoops the new is a
joke
it would seam the germans could make a simple die to match the texture of the welt ---yikes.
anyway so i have to pull the frigginn rubber off the stupid welt and reapply to the old im going to complain to wn so ythey can fix that error,
im going to get just the rubber and send back the weld rubber assembly.
set the foam from german pakageing on the top of the tank there foam is the best made.
doubled the elephant skin using the old as a base with foam backing on each piece -- save flying objects in truck to side walls.
also had to remove the top od the dash bummer cause the "back screws holding the top arch " were too tight and the bottom wouldnt touch the deck
i no one has mentioned that critical fact. to install the dash.
so just cleaned the rear end and painted \-works well for the driver.
 

Attachments

  • 2.jpg
    2.jpg
    89.8 KB · Views: 341
  • 4.jpg
    4.jpg
    89.3 KB · Views: 326
  • 7.jpg
    7.jpg
    86.4 KB · Views: 335
  • 6.jpg
    6.jpg
    95.5 KB · Views: 311
  • 3.jpg
    3.jpg
    85.6 KB · Views: 325
  • 10.jpg
    10.jpg
    90.6 KB · Views: 319
  • 9.jpg
    9.jpg
    90.8 KB · Views: 319
  • 8.jpg
    8.jpg
    84.4 KB · Views: 317
  • 11.jpg
    11.jpg
    93.4 KB · Views: 303
  • 5.jpg
    5.jpg
    94.4 KB · Views: 316
Last edited:

aearch

Well-Known Member
Site Donor $
Messages
4,114
Reaction score
589
Location
pleasant hill , ca
trunk

almost have the trunk finished
set the oem antenna with the oem mount bracket
set the foam to lap the gas tank lip and come up the sides
to preserve forever also set the edge of the gas tank seam
with weatherstrip adhesive so not creeping rust
 

Attachments

  • a2.jpg
    a2.jpg
    80.7 KB · Views: 285
  • a4.jpg
    a4.jpg
    83 KB · Views: 269
  • at.jpg
    at.jpg
    82.1 KB · Views: 261
  • g1.jpg
    g1.jpg
    88.6 KB · Views: 258
  • a3.jpg
    a3.jpg
    83.7 KB · Views: 249
  • a5.jpg
    a5.jpg
    89.4 KB · Views: 245

aearch

Well-Known Member
Site Donor $
Messages
4,114
Reaction score
589
Location
pleasant hill , ca
Trunk

So finaly mounte the cd
had the bracket since 78
its so weeldone the deck lit has a special indentation for the bracket mount
neat. Starting to trim the rear [panel
 

Attachments

  • TR1.jpg
    TR1.jpg
    89.9 KB · Views: 268
  • CD1.jpg
    CD1.jpg
    76.1 KB · Views: 268
  • CD3.jpg
    CD3.jpg
    82.9 KB · Views: 280
  • CD4.jpg
    CD4.jpg
    79.2 KB · Views: 265

aearch

Well-Known Member
Site Donor $
Messages
4,114
Reaction score
589
Location
pleasant hill , ca
Tues

Found pure graphic paper 1/32" thick for sunroof
gasket
redid wheelweel for final
body guy forgot the hood seal sht mtl made one up
rivets
 

Attachments

  • 1TR.jpg
    1TR.jpg
    79.4 KB · Views: 283
  • HS.jpg
    HS.jpg
    87.9 KB · Views: 307
  • SF.jpg
    SF.jpg
    81.7 KB · Views: 296

aearch

Well-Known Member
Site Donor $
Messages
4,114
Reaction score
589
Location
pleasant hill , ca
memor day

going forward and backward to make everything fit perfect
llike a said everyone how puts this ttgether needs my instruction
you would save about amonth of time in procedure.
what a wonderful puzzle!!!!!!!!!!!1


oh yea whats this part the round wer it goes seem\s like the heater or
ac unit
as its not a body structure part.
 

Attachments

  • 1.jpg
    1.jpg
    88.6 KB · Views: 267
  • 3.jpg
    3.jpg
    89.3 KB · Views: 273
  • 4.jpg
    4.jpg
    89.3 KB · Views: 251
  • 5.jpg
    5.jpg
    91.1 KB · Views: 262
  • 2.jpg
    2.jpg
    90.2 KB · Views: 259

aearch

Well-Known Member
Site Donor $
Messages
4,114
Reaction score
589
Location
pleasant hill , ca
new parts are different

so i had to redo the right door wood it cracked abit
so chiseled and reironed today all done
the silly tip of the flat dash cracked off when installing so sent off to
just dashes for a thousand bucks
oh well.
will get the headliner back tomorrow from the zipper shop
that will be fun.

so the new chrome runners have a different profile - much deeper
so i had to shim up the clips so they would catch
and the new strip has cutouts for the clips but three dont line up
so had to use the number 11 exacto to trim out 1/4" to align

if you buy new door weatherstrip from wn
you may want to keep your old seam clamp strip as it doesnt have the raised profile the old does
its just a printed pattern of the old
so i had to cut it off and glue the old back to the new rubber.
 

Attachments

  • IMG_9374.jpg
    IMG_9374.jpg
    81.8 KB · Views: 265
  • IMG_9373.jpg
    IMG_9373.jpg
    83 KB · Views: 248
  • IMG_9372.jpg
    IMG_9372.jpg
    76.9 KB · Views: 255
  • IMG_9371.jpg
    IMG_9371.jpg
    85.5 KB · Views: 255
Last edited:

aearch

Well-Known Member
Site Donor $
Messages
4,114
Reaction score
589
Location
pleasant hill , ca
Ready

Sitiin and waitin till next monday
 

Attachments

  • 1.jpg
    1.jpg
    84.3 KB · Views: 286
  • 2.jpg
    2.jpg
    86.2 KB · Views: 268
  • 4.jpg
    4.jpg
    92 KB · Views: 277
Last edited:

rsporsche

Moderator
Site Donor $$
Messages
10,682
Reaction score
3,711
Location
Atlanta, GA
that's a beautiful beast Alan ... looking forward to hearing about how strong it runs in a coupe
 

aearch

Well-Known Member
Site Donor $
Messages
4,114
Reaction score
589
Location
pleasant hill , ca
Yae

No kidding
the exhaust needs to be 2" twice so holy toledo
then i have to tow it to san jose for them to tune the kdata unit
but i have the doors all done
awwww
and most of the interior so -it will be great to once the motors in- i can just drive it.
 
Top