70 - 2800CS - 2270111 restoration - ode to the past

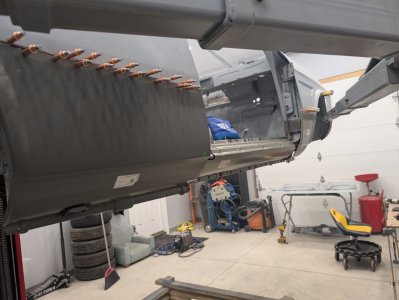
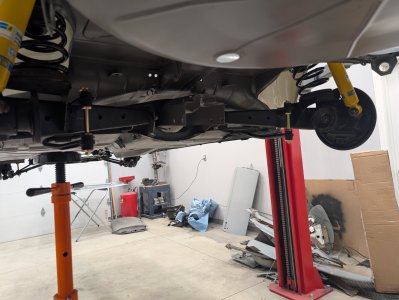
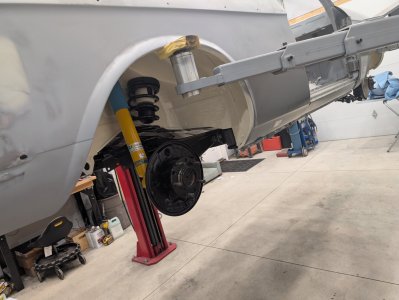
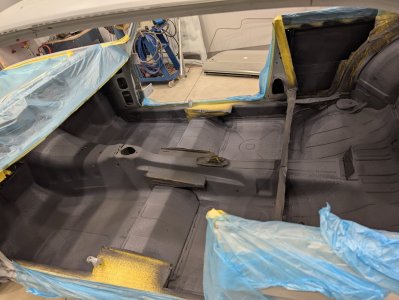
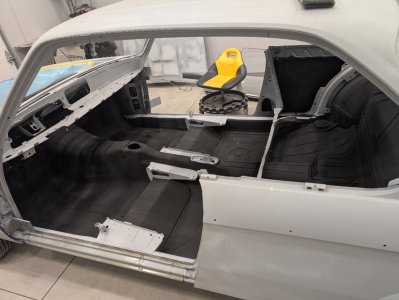
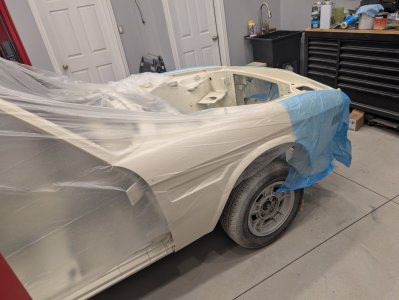
Still a ton of work obviously.

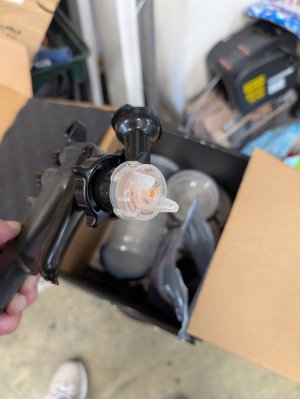
Will share that I got a really cool new spray gun. My old Sata died on the MGC paint job.

It's a 3M PSP. Disposable nozzles and cups... Very cool. They kill you on the consumables but it's so cool not to have to clean the gun.
 

Attachments

  • PXL_20250629_235423502.jpg
    PXL_20250629_235423502.jpg
    137.9 KB · Views: 153
Oh shoot... Sorry this is why I should have done this more often... Forgot. I installed the new fender bottoms before I took off too.

Glued in but not finished quite yet.

I love this structural adhesive. Those are panels that would warp pretty good with a lot of welding.
 

Attachments

  • PXL_20250630_193631231.jpg
    PXL_20250630_193631231.jpg
    189.8 KB · Views: 98
Sheesh… now I am recalling a bunch of things.

For color I went to my local Axalta (DuPont) dealer. As in the past I am using Nason which is technically a single stage paint but it has tends to have more mix codes than newer paints. Indeed they had the code for chamonix readily available in Nason.

But my guy has a bit of a trick. Instead of the urethane binder he subs a basecoat binder so I can shoot it as a regular basecoat clearcoat.

Now my guys knows and he slightly despises me for it… kidding.. that I actually prefer Acme Finish One Panel Spot clearcoat. Acme is Sherwin Williams “budget” brand. I like it because I’m a bit slow when I paint.
 
Big... No HUGE thanks to @TomHom !

Last body part needed arrived today.

We had to get a little creative with the packaging or it would have cost more than the expense of the part!

Thomas... Five minutes with a hammer and dolly and it's in decent shape. I'll work on that little part later.
 

Attachments

  • PXL_20250717_204242917.jpg
    PXL_20250717_204242917.jpg
    277.4 KB · Views: 81
Finished the rear trailing arms. Shocks and sway bar.

Now if need be we can throw some wheels on it and roll it. Which we will when it's ready to go in the paint booth which goes on the other side of the garage.
 

Attachments

  • PXL_20250717_201323649.jpg
    PXL_20250717_201323649.jpg
    242.3 KB · Views: 75
  • PXL_20250717_192231908.jpg
    PXL_20250717_192231908.jpg
    224 KB · Views: 69
  • PXL_20250717_192247178.jpg
    PXL_20250717_192247178.jpg
    179.5 KB · Views: 77
Finished the rear package shelf... Such as it was.

Unfortunately it was not a good piece. Happens. Required a lot of cutting, remaking of radiuses and general cussing and fighting. Tidied up some things inside and rolled it outside for some primer.

I am doing lizard skin on the interior. Sound proofing and ceramic heat shield on the firewall, tunnel and heater shelf. The lizard skin instructions says it cannot go over bare metal.

The sound proofing has to go on first apparently. It requires a 24 to 36 hours cure. Then the ceramic coat and then the same cure. Should be interesting. Never done this before
 

Attachments

  • PXL_20250722_205142081.jpg
    PXL_20250722_205142081.jpg
    516.5 KB · Views: 63
  • PXL_20250722_210610800.jpg
    PXL_20250722_210610800.jpg
    236.1 KB · Views: 77
Well that stuff is really interesting.

Man... You just keep spraying and spraying and spraying. At some point I just kind of went... That has to be enough. About a gallon used.
 

Attachments

  • PXL_20250723_182801223.MP.jpg
    PXL_20250723_182801223.MP.jpg
    326.5 KB · Views: 54
  • PXL_20250723_182754234.jpg
    PXL_20250723_182754234.jpg
    313.5 KB · Views: 65
So I sprayed the ceramic coat today.

Highly uneventful.

So the tally was about a gallon and a quarter of sound control for the firewall floor boards rear seat, package shelf and roof.

About 3/4 of a gallon of ceramic coating for the firewall floorboards tunnel and heater shelf.

Now we will see if it actually works.
 

Attachments

  • PXL_20250724_211628449.jpg
    PXL_20250724_211628449.jpg
    211.4 KB · Views: 45
  • PXL_20250724_211613461.jpg
    PXL_20250724_211613461.jpg
    211 KB · Views: 58
Forgot this...

Took all the scrap metal from the car in for recycling on Wednesday.

As usual...the lesson. When you think there is X amount of rust... There is Y. BTDT so many times. Oh the things I get myself into
 

Attachments

  • PXL_20250723_143218881.jpg
    PXL_20250723_143218881.jpg
    379.9 KB · Views: 63
Well the body is completely back in primer.

Pretty much the typical. Places I thought I may have to go back in are fine and places I thought we're good... Go back in. The normal.
 

Attachments

  • PXL_20250729_221829368.jpg
    PXL_20250729_221829368.jpg
    243.1 KB · Views: 38
Well the body is completely back in primer.

Pretty much the typical. Places I thought I may have to go back in are fine and places I thought we're good... Go back in. The normal.
What a great milestone. Looking good.
 
Somebody a bit back was asking about the body number on our cars.

Indeed it is underneath the body color tag.

Here is mine.
 

Attachments

  • PXL_20250729_204354526.MP.jpg
    PXL_20250729_204354526.MP.jpg
    295.1 KB · Views: 39
We are making progress.

Body is in paint... The hood. Well sheeshus. I have seen a lot of screwed up panels in my life. I've had a lot of MGs. But this sucker takes the cake. Not a straight damn part on it.

Obviously I've cut in the back etc. what a mistake.

PXL_20250805_235558909.jpg
 
Sorry i use a laughing smile, but I feel with you.
Mine has also everywhere dents, ok, not screwed up, but other whorse sh.t.....

Good luck with straight panels.

Breiti
 
Yah… everything else is fairly straightforward. I went to final block the hood and was so cheesed at my work that I just stripped it all the way back again. Darn thing is like a potato chip. What the heck did these people do :oops:
 
Back
Top