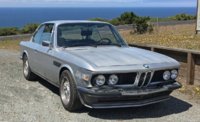
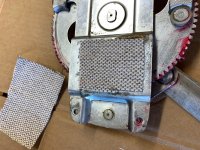
Bringing a '74 back up to her intended glory.

Good grief how time flies. A few updates.

The day after that last update, I took the long drive from Rey Rivera's shop, through L.A. and, the following day on up to our new house an hour and a half north of San Francisco. Not too surprisingly, there were a few "special moments", like a hood that became loose, the air dam that became loose and a small electrical issue which caused a serious jump in the heart rate. (https://www.e9coupe.com/forum/threa...mess-before-going-anywhere.32179/#post-263694).

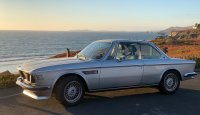
On August 16, after having fixed lots of little things (at least temporarily), I left at 4:00 in the morning to make it to Monterey by 7am for the annual Legends of the Autobahn. Although I had attended in 2016 without my car, it was a bucket list item to bring my coupe there, in all its "works in progress" beauty. The only category I was thinking I could stand a chance in was the "shiniest spare tire rim" one but, sadly, they did not offer it this year.
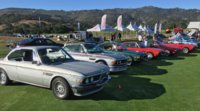
IMG_5565.jpg
 
Last edited:
One teething problem the car had was drivability. There was just something not right with the way the fuel was being delivered and the way the motor was reacting to it. Among other things, the throttle was developing a nasty habit of coming to idle at 2000 rpm instead of 900 when I would let my foot off the gas in stop and go traffic. As you might imagine, this was MEGA irritating and took away a lot of the driving fun. So I made an appointment with the b35 motor master himself, Mr Don Lawrence.

So I left at 6:30 this morning and sat in Bay Area traffic for two hours fighting this intermittent idle issue before arriving in Alameda around 9:15. Fortunately the Doctor was in, grabbed stethoscope and scalpel and dove right in. Several hours later, we had:
- a fully adjusted TPS sensor
- a correctly set throttle linkage with gas pedal set up in the proper position (mine was way too far up)
- a new Motronic computer with a Dinan chip.

The difference was simply remarkable. Not only did the idle issue get solved but the throttle response is now far more controllable and there is a serious increase in "liveliness", especially above 2000rpm. After crossing the various Bay Area bridges on my way home, I got off the freeway as soon as I could to sample the local country roads and was finally able to enjoy a motor which felt liberated!

A huge thank you goes to @sfdon who shared his knowledge, imparted a ton of coupe wisdom on me and freed a lot of horses that were imprisoned inside that otherwise wonderful motor!

Here is a quick and dirty video... and I mean REALLY quick and REALLY dirty, complete with phone camera acting up, dirty windshield etc. I clearly need to practice this technique a lot more.

 
Last edited:
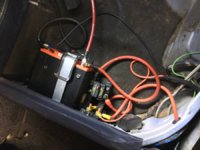
My electrical mishap on my last trip up north reminded me that I really wanted to add a main fuse right after the battery. So I bought a 150 amp one which I finally installed just before the main cut off switch under the rear seat.

I also added wiring for the e92 seat back lumber and side bolters pump adjustment.

I need to tidy it all up a bit by cutting the wires to proper length. But I have to wait until I get a proper crimping tool before I can do that.


6D93EACF-6C35-4659-BE40-9FECC1DE32C3.jpeg
 
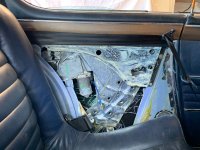
I had suffered at the hands of the snail pace windows long enough. Time to fix that. Let's start with the rear ones.

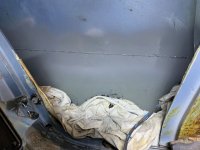
Remove the door card

IMG_0188.jpg

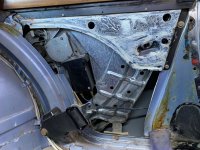
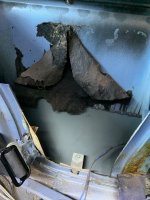
Remove whatever is left from the original soundproofing

IMG_0192.jpg

Rust proof the seam for the new outer panel that had been replaced a few months back

IMG_0194.jpg

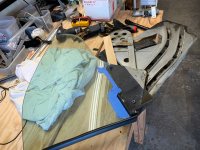
Take the whole mechanism out and remove the window

IMG_0195.jpg

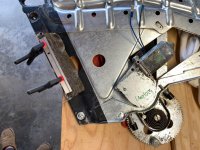
Clean everything, install e28 motor, reglue felt

IMG_0205.jpg

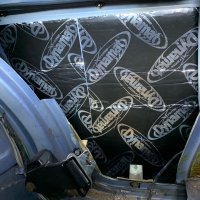
Install brand new soundproofing

IMG_0226.jpg
 
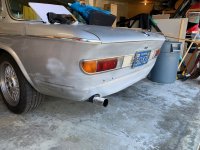
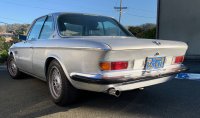
In the last few weeks I also finally got some good (although not perfect) rear bumpers. I wrote a little blurb about it here:

Here is a before and after:

IMG_0120.jpg IMG_0144 (1).jpg

And a gratuitous beauty shot to go with it:

IMG_0146.jpg
 
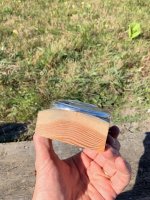
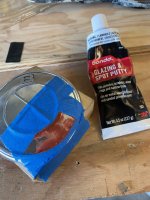
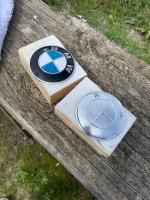
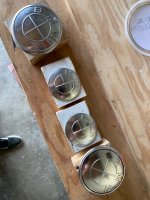
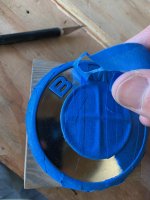
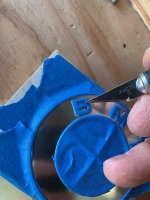
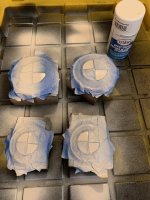
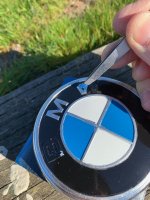
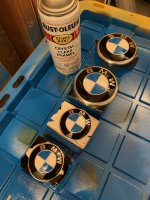
Other priorities have taken over recently but I did have time to do a few things. I finally was able to gather a full set of 4 raised letters emblems. All were pretty faded and one had been damaged during removal by a previous owner. So I embarked on a restoration project. The process has been documented by several others so just some pics for entertainment value.

A couple of notes:
- A very useful thing I did was to build a wood holder for each emblem. For the trunk one I sanded it to match the curvature of the 833 emblem. This allows you to manipulate them easily without worries about bending the posts.
- I had to hammer and fill a damaged area in the trunk emblem with putty.
- I first removed and cleaned all of them with acetone
- One mistake I made was to use painter's tape as my masking tape. I should have used artist transparent film which is much better suited for detailed work. This was particularly evident when doing the c-pillar ones which ended up not as good as I would have wanted.
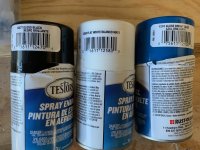
- I used Testors Enamel paints for the color. Four coats each. Then, after talking to Testors tech support, they suggested Rustoleum Crystal Clear enamel for the clear coat. I put 16 coats of that.
 

Attachments

  • IMG_1293.jpg
    IMG_1293.jpg
    410.1 KB · Views: 315
  • IMG_1295.jpg
    IMG_1295.jpg
    338.7 KB · Views: 324
  • IMG_1372.jpg
    IMG_1372.jpg
    468 KB · Views: 319
  • IMG_1373.jpg
    IMG_1373.jpg
    405.3 KB · Views: 304
  • IMG_1378.jpg
    IMG_1378.jpg
    268.9 KB · Views: 320
  • IMG_1379.jpg
    IMG_1379.jpg
    288 KB · Views: 329
  • IMG_1400.jpg
    IMG_1400.jpg
    456.8 KB · Views: 333
  • IMG_1464.jpg
    IMG_1464.jpg
    377.4 KB · Views: 311
  • IMG_1469.jpg
    IMG_1469.jpg
    328.7 KB · Views: 320
  • IMG_1479.jpg
    IMG_1479.jpg
    244.9 KB · Views: 327
  • IMG_1505.jpg
    IMG_1505.jpg
    404.6 KB · Views: 341
  • IMG_1510-dsqz.jpg
    IMG_1510-dsqz.jpg
    215.5 KB · Views: 317
  • IMG_1546 (1).jpg
    IMG_1546 (1).jpg
    352.8 KB · Views: 316
  • IMG_1547 (1).jpg
    IMG_1547 (1).jpg
    237.7 KB · Views: 330
  • IMG_1548 (1).jpg
    IMG_1548 (1).jpg
    277.8 KB · Views: 328
Thank you very much DQ.

Yes indeed Steve. The trunk and hood ones are not so bad but the much smaller c-pillars took a lot of detailed work. And I am not terribly happy with the results tbh. As I mentioned in the notes, this is where artist masking film would have been a much better idea. But since we switched to digital graphics 30 years ago, I had completely forgotten about that film which I used all the time. Someday when the 217 other projects on my list are done...
 
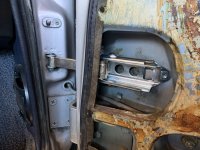
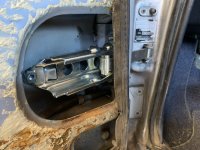
Next, I decided to do some work on the front doors. Cleaning up the window assembly and replacing the infamous broken doorstops.

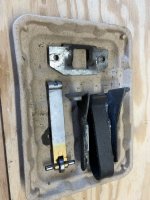
The doorstops were fairly easy plug and play using the Mercedes units recommended by many on the board.

One thing I wasn’t sure of is which way to orient them. I have seen them installed both ways with the sheet metal facing outward or inward as in my case. It seems to work either way but the angle of the captive nuts seem to match the body better this way.

For those who have done it, that stopper plate at the top of the last pic does not need to be used anymore, correct?
 

Attachments

  • 6873D305-577D-4F2F-97D3-4F2489603189.jpeg
    6873D305-577D-4F2F-97D3-4F2489603189.jpeg
    249.9 KB · Views: 329
  • 89AA9227-E8E3-4A9C-8757-992AC08CE2E1.jpeg
    89AA9227-E8E3-4A9C-8757-992AC08CE2E1.jpeg
    223.9 KB · Views: 311
  • ECC922E9-A577-4E6E-B0AE-48FC03B315F3.jpeg
    ECC922E9-A577-4E6E-B0AE-48FC03B315F3.jpeg
    275.4 KB · Views: 302
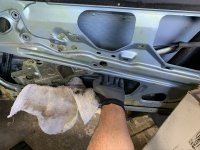
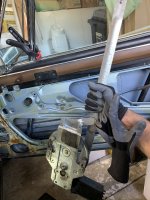
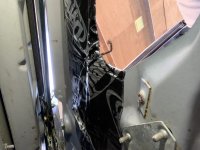
Once the doorstops were installed I managed to remove the window regulator. I detailed the painful process in this thread:


8627A9ED-5467-4F05-AF56-EE9F4EB82392.jpeg 44AD3CC6-6363-45A0-B44A-8AC87BF6CBFC.jpeg

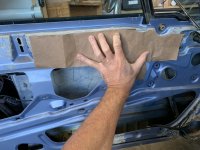
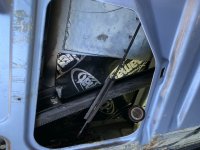
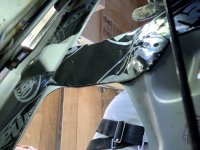
With those out, It was a good opportunity to clean the inside of the doors and also take advantage to install Dynamat everywhere that was not already covered. I detailed that step in this thread:


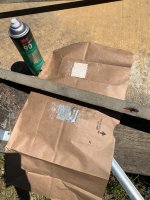
Pics: 1. Making a template for for the Dynamat 2. Dynamat starts where original soundproofing ends. 3 and 4: Dynamat on the inside of the door frame - a bit hard to see but this is looking up inside the door.

B6EB55F1-BEF3-45D8-B20B-980D2951DFCB.jpeg 986A2F5C-1D0B-41CD-9AF2-F52458F1A019.jpeg 1A9E19AB-AD23-4C43-9FF4-C54A038C0C64.jpeg 440E2AE1-87DB-4B5A-B5D0-6B8C24FF2474.jpeg

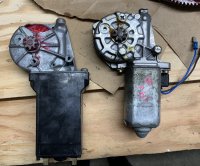
Then it was time to look at the motors. They were clearly very tired so, after several experiments related in the thread below I went ahead and replaced them with e28 window motors.


AD8B3A4C-DAD0-4533-A697-DF1A6B0572FB.jpeg
 
Last edited:

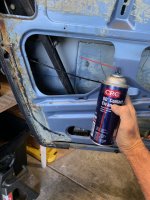
Next was a complete cleanup of the old rails which, as usual, were filled with old gunk from several previous attempts to improve the window speeds. It took a lot of scraping and cleaning in what is a pretty uncomfortable position with sometime very difficult areas to access. I like using CRC Contact Cleaner because it has naphtha in it. I decided to re-grease them using mobil One synthetic Grease after learning that the old lithium grease was no longer the favored option for lubricant. I then manually slid the windows up and down probably 100 times to get everything to work smoothly again.

IMG_1822.jpg IMG_1819.jpg

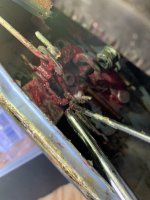
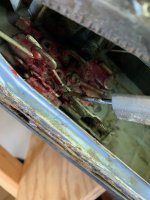
The I used the same clean and re-grease process for all of the locking mechanism. Once again a big mess of old lubricants of dubious origins. I also installed new grommets that keep the various linkages from rattling every time you close the door. This was detailed here:

https://e9coupe.com/forum/threads/a...-keep-door-lock-linkages-from-rattling.34640/

First I tried sliding the grommets on the rods and pushing them into the holes. Did not work. After Chris' suggestion I then bent the ends so I could fully remove the rods and insert the grommets separately. Results of attempt 1 and attempt 2:

IMG_2152.jpg IMG_2172.jpg

Glueing new protective fabric on the regulator to keep it from rattling against the inside door frame:

IMG_2147.jpg IMG_2149.jpg
 
Last edited:
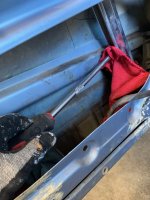
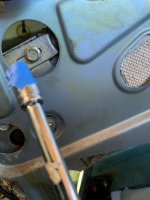
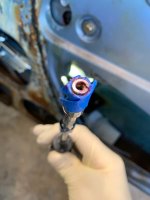
Before reassembly it is a good idea to test for unwanted noises. I knocked everywhere on the door dozens of times and could still hear some thing rattle. After lots of contortions, back pains and bleeding knees I finally discovered that the nut on the forward most bolt that holds the belt trim had been removed a long time ago (probably for a repaint) and had never been replaced. That one is the most difficult one to reach. At first I thought it could only be done with the regulator unbolted and moved out of the way because it blocks the access hole for that nut. But I then discovered that there’s actually just enough of an opening left to slide an extension on a 7 mm socket to install the nut. I used a piece of tape to sink the nut in the socket so it would not fall off and a little bit of grease on top of it to get the locking washer to stick to the whole assembly. After securing that and trying the knock knock method again, I was pleased that all of the previous rattles seem to have been tamed.

IMG_2161.jpg IMG_2165.jpg

At that point it was time to reinstall everything. It went a fair bit easier this time after all I had learned a lot from the disassembly. The e28 motors also do not have bolts that protrude as far out which helps a lot.
Once it got all hooked up it was such a joy to push the button and see that windows that used to take 17 seconds to go up now do the same job in 4 or 5.

One curious thing I noticed is that the e28 motors seem to be wired inversely from e9 ones. When you push up, it goes down and vice versa. So I had to swap the black and blue wires in order for the switch to operate the same way. No big deal really, but I always hate closing things up with a black wire going to a blue one and vice versa.

Unfortunately, I didn’t have any replacement for the moisture shield or even the appropriate glue for that yet. So, for now, I just put the door card back on and will not take the car out if there is any threatening cloud.

It is immensely satisfying to not only have solved the issue of the anemic window lifters, but also to have completely eliminated all rattles and increased the soundproofing of the door. On top of that, having the door lock work properly and the little locking knob do what it is supposed to do, all that up to a much more enjoyable experience.
 
Last edited:
Back
Top