Nice, thanks for sharing this. Great photos. May attempt on another vehicle I was wondering about. I like the Automotive Touch Up product. Used it when I had my hood torsion bar welded up and needed to repaint.
You are using an out of date browser. It may not display this or other websites correctly.
You should upgrade or use an alternative browser.
You should upgrade or use an alternative browser.
Bringing a '74 back up to her intended glory.
- Thread starter Bmachine
- Start date
-
- Tags
- restoration list
Thank you Chris.Excellent work Bo
Thank you.Nice, thanks for sharing this. Great photos. May attempt on another vehicle I was wondering about. I like the Automotive Touch Up product. Used it when I had my hood torsion bar welded up and needed to repaint.
The Auto Touchup paint is good but but it is a closed ecosystem that is fairly inflexible. It requires strict temperature range (70-90F) and there is no rust inhibitors in the primer. When asked what rust protection would work with their system, they told me they have not tested any. Seam sealers don't work with their primers either. They are acrylic lacquer paints. And if you run out of paint, you can't just drive to the auto parts store to get more. It takes a couple of weeks for them to mix it up and ship it. For a full engine bay and nose cone area like this you should order 5 cans of each. Primer, color and clear.
They did (somewhat reluctantly it seemed) tell me that Duplicolor makes an acrylic lacquer primer that is compatible with theirs. So at least in an emergency, you can find extra primer if your local shop carries that one. I think the Duplicolor code in BPR0031 IIRC.
Last edited:
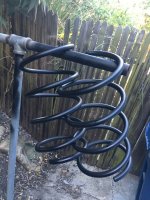
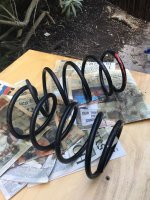
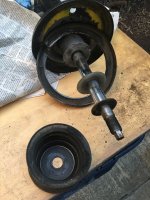
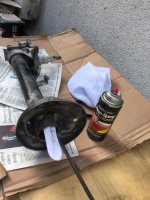
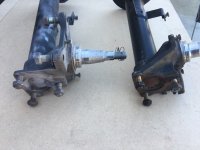
Little time available this weekend because of the SoCal vintage BMW meet. But I started cleaning up the front struts and springs. I cleaned and repainted the springs that now have one coil cut off.
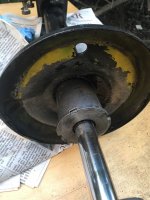
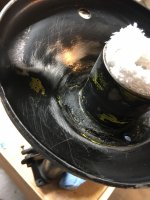
I notice some yellow paint on the upper strut "cup". Seems like a strange place to to drop some paint. Anyone else see this before? Is there some meaning to this???
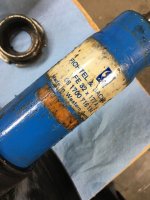
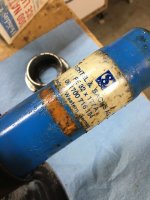
I removed the existing struts. Some old Sachs. Leaking of course. Possibly originals? I thought Boge were the original.
I notice some yellow paint on the upper strut "cup". Seems like a strange place to to drop some paint. Anyone else see this before? Is there some meaning to this???
I removed the existing struts. Some old Sachs. Leaking of course. Possibly originals? I thought Boge were the original.
Attachments
Last edited:
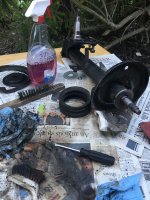
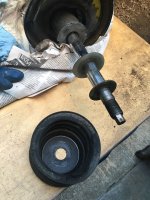
I noticed that, on top of the yellow paint there were traces of a substance that almost looked like cold weld, JB weld type at the bottom of the cup, right around the main shaft. I wonder what that was doing there. There are otherwise no traces of repair or anything like that. Any ideas?
Attachments
I had a rare weekend with both days off. Time to try and move the project along!
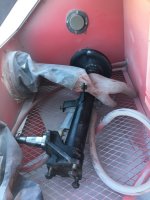
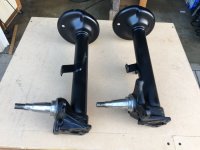
Continuing the front end work with the struts. First in the bead blasting chamber. My moveable system works quite well although a full size strut is about the biggest that can go in there. I remove all the questionable areas leaving the good paint reasonably unscathed. Painted with sating black epoxy paint.
Continuing the front end work with the struts. First in the bead blasting chamber. My moveable system works quite well although a full size strut is about the biggest that can go in there. I remove all the questionable areas leaving the good paint reasonably unscathed. Painted with sating black epoxy paint.
Attachments
-
 E4DA8709-CB87-4FBC-AE28-42A04D64BEB9.jpeg227.6 KB · Views: 539
 -
 D4F1DCFC-979E-4F0C-BFE7-BFD293E60C13.jpeg298.8 KB · Views: 572
 -
 2C6FF2FF-5BE7-4DCC-8A36-5022AEC9E8CF.jpeg187 KB · Views: 645
 -
 A0A9F80B-BB74-4279-B2BD-DC01E3614C43.jpeg202.4 KB · Views: 661
 -
 60FFA879-A7BF-4CE3-8091-6BC970973ECF.jpeg187 KB · Views: 553
 -
 17850B75-73F8-4ADB-958B-C97463D6842C.jpeg177 KB · Views: 617
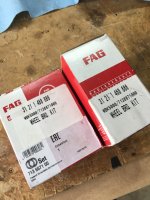
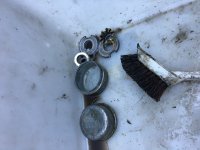
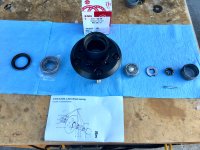
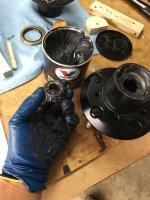
Next are the wheel bearings. I had refinished the hubs a while ago so it was time to put the new bearings in. The reusable parts (cups, nuts and special washer) are first degreased and cleaned up.
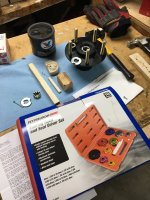
After pounding the races in by using the old ones to help punch them down, I suddenly remembered that I had actually bought a bearing seating tool kit a year ago... Duh! At least I remembered before I started the second one...
After pounding the races in by using the old ones to help punch them down, I suddenly remembered that I had actually bought a bearing seating tool kit a year ago... Duh! At least I remembered before I started the second one...
Attachments
-
 86485B95-80E5-48B0-B6FC-9446D84072B7.jpeg1.5 MB · Views: 536
 -
 B9F08F41-F557-4C45-9590-4602286D9EAB.jpeg1.8 MB · Views: 548
 -
 A9254164-8C59-445E-990D-048F713D86B1.jpeg3.4 MB · Views: 557
 -
 492A1CD0-7097-4083-8177-F537AE9AB140.jpeg2.6 MB · Views: 682
 -
 DD66A5BA-6037-4696-B742-3C97CD558ECE.jpeg1.7 MB · Views: 669
 -
 A37AB0FD-140F-492B-95BE-CD2106F37937.jpeg1.6 MB · Views: 691
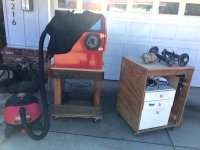
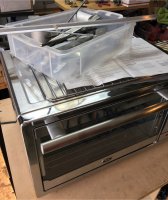
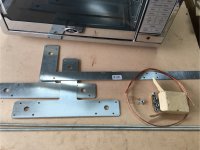
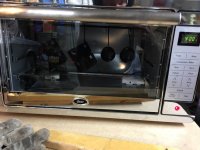
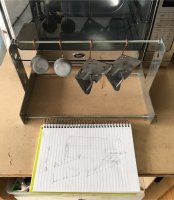
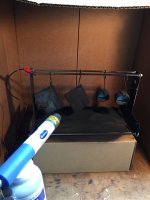
Next it was time to finally put together my powder coating system. I had been doing a lot of research on it and parts gathering over the last few month.
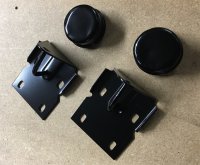
I got a large mini oven which several people had recommended. Just as I was about to start, I realized I needed some sort of rack to get these parts in there without touching them. A quick bit of brain scratching and I came up with the idea of using flat brackets and 1/4-20 threaded rods. This would make for an easily adjustable rack that could be extended to work in vertical mode with the oven on its side for tall parts. Some 12 gauge copper wire allowed me to make hooks of various sizes and shapes.
I was fairly happy with the results.
Attachments
-
 57453FA6-2826-4816-BC5A-3AB457A82FCE.jpeg234.7 KB · Views: 561
 -
 FC568041-4F82-443B-912E-D2B9495A2308.jpeg205.7 KB · Views: 552
 -
 14740732-EC7D-4DB8-846E-DE21B89FCB9A.jpeg240.5 KB · Views: 577
 -
 C3CF2FE7-8111-474E-A9D2-B8BDD5204C5B.jpeg171.3 KB · Views: 567
 -
 8B9EC753-03F1-45CE-A57C-D19D2FB0906E.jpeg219.8 KB · Views: 562
 -
 D899B34C-A9A1-4360-94E1-D258F2DCD409.jpeg149.3 KB · Views: 574
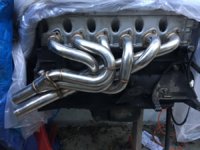
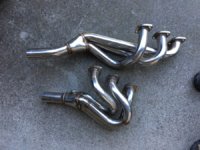
Got a set of pretty sweet looking headers last weekend. They are a little bigger than I would have likes (1-5/8 OD) so I am still debating on whether to use them or not.
Attachments
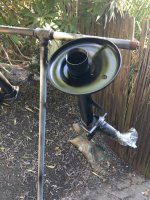
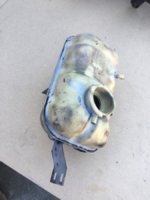
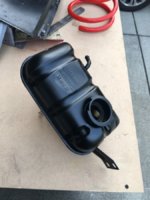
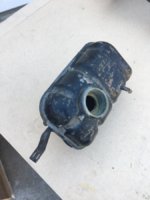
I also got some work done on the overflow tank. First I sandblasted it, then I had the bracket re-welded and then painted it.
Attachments
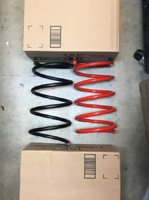
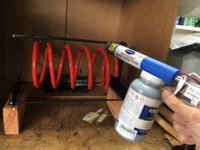
Finally I was lucky to find a set of B&G front springs based on Chris' suggestion.
Here they are compared to stock with one coil cut off. So these should provide some decent lowering. The photo is a little misleading of course because it shows them without any load.
I'm not a big fan of red so I quickly powder coated them black.
Here they are compared to stock with one coil cut off. So these should provide some decent lowering. The photo is a little misleading of course because it shows them without any load.
I'm not a big fan of red so I quickly powder coated them black.
Attachments
Got a set of pretty sweet looking headers last weekend. They are a little bigger than I would have likes (1-5/8 OD) so I am still debating on whether to use them or not.
Are those Scheidemann's? How do they fit?
I'm not sure who made them tbh. They fit expect for the leftmost pipe which needs to be pulled just a hair to the left.Are those Scheidemann's? How do they fit?
Much less free time as I would have thought during the Xmas break as we spent a lot of time with the kids. But I got the front struts put back together at least.
Installing new Bilsteins presented two challenges which required making custom tools.
First is how to tighten the shiny collar ring that secured the strut to the strut housing. The old one had some notches that were protruding outward so you could grab them with a pipe wrench. But the new ones do not protrude and it makes it much harder to grab. I did not want to use the pipe wrench as that would have ripped the collar to death. After lots of head scratching, I finally took a piece of 1/2" (or 1cm) high aluminium strip, wrapped it around the collar and then cut and bent two small tabs that fit inside the collar notches. Then I bought a cheap oil filter wrench at Harbor Freight (the one that grabs the filter in 3 different places and used that to grab the aluminium strip which in turn rotated the collar to screw it in.
Last edited:
Bilstein sells the tool for this, if you want to borrow mine let me know.
Much less free time as I would have thought during the Xmas break as we spent a lot of time with the kids. But I got the front struts put back together at least.
Installing new Bilsteins presented two challenges which required making custom tools.
First is how to tighten the shiny collar ring that secured the strut to the strut housing. The old one had some notches that were protruding outward so you could grab them with a pipe wrench. But the new ones do not protrude and it makes it much harder to grab. I did not want to use the pipe wrench as that would have ripped the collar to death. After lots of head scratching, I finally took a piece of 1/2" (or 1cm) high aluminium strip, wrapped it around the collar and then cut and bent two small strips to fit inside the collar notches. Then I bought a cheap oil filter wrench at Harbor Freight (the one that grabs the filter in 3 different places and used that to grab the aluminium strip and screw the whole thing in.
Thank you Steve. I figured that they would. But I only had an afternoon to do this so I had to come up with something available at the time.Bilstein sells the tool for this, if you want to borrow mine let me know.
Second was the big 27mm nut at the top of the struts.
I first used an impact gun to tighten but all too soon it started spinning without tightening any more. This is the real PITA one which has an 8mm hex inside which you are supposed to hold while tightening the 27. So I did a search and found this excellent thread:
https://www.e9coupe.com/forum/threa...nd-not-so-small-bits-around.14519/#post-97918
Lots of great tips in there including a photo posted by Stevehose of a customized socket. So I went to HF and got a 27mm impact socket and cut the upper part on two sides with a cutting wheel so I could get a 24mm open wrench around it and a 8mm hex through the hole in the center.
Last edited:
Finally, time to put it all back together:
Note that, after more head scratching I decided to pop the 3 top bolts on the strut bearings so I can install the camber plates from Carl. I don't know for sure if I will need them with my rolled fenders but since my front tires are 215 wide, it might be better to be safe than sorry.


Note that, after more head scratching I decided to pop the 3 top bolts on the strut bearings so I can install the camber plates from Carl. I don't know for sure if I will need them with my rolled fenders but since my front tires are 215 wide, it might be better to be safe than sorry.
Last edited:
spring compressors....stressful to have all that potential energy held back by those things! Worst part of the job for me.
A few hours available this past weekend. First comes the sanding and refinish of the front sway bar. I would have loved to powder coat it but that piece requires a big ass oven. So it had to be epoxy painted.


Last edited: