Deconstruction Thread: How to part-out an E9

The time has come to start cutting.
4098F9A9-A77C-42E8-81F0-C27F919EEF48.jpeg


I removed the tail panel and began the exploratory surgery on the rear fenders. The floor is toast but I kept the tow hook.

Drilling the spot welds on the tail panel:
E6D6A6F8-1CE7-49FA-AB7A-493E46633D57.jpeg


The trunk floor was shot so I didn’t spend anymore time separating the floor from the tail panel. I just cut right through the floor:
0760C820-F936-4F01-B55F-2E8B7454501D.jpeg


Fiberglass was covering the trunk floor:
915E6EF5-8EFE-4CC3-9806-4B885936AB51.jpeg


Getting started on the fender spot welds:
596D9C43-0263-4DA0-95B9-3B86ADDA068B.jpeg


A8215AC8-C659-4B99-AB44-FF20D1213588.jpeg


These guys are tricky:
BA788702-14FD-4A0F-9CE6-F4F567C80482.jpeg


There is a full weld where the “b-pillar” meets the window base. There is enough room to get it with a cutoff wheel:
1FA87BAB-46A1-483E-939E-5525142A4CC0.jpeg


Hunting around for the fender seams. A flap disk
doesn’t help because the lead blends in perfectly with the steel:


I’m not using any previous write ups. I did look at some photos of fenderless e9’s. I was led astray by a recent thread where the fender was cut wrong. The seam is much higher than my hunting expedition above. I haven’t wrapped my brain around the two visible seams seen below:

E59A27B9-132E-4F69-B471-B91E65E8DCC9.jpeg


The seam is just to the left of spot in this video:

BB469A9C-9AAA-4687-86E8-411DF563C0DB.jpeg
 
Last edited:
Thank you @Sven for confirming which of the seams above is for the fender. I need to remove more lead to reveal the weld on the upper seam. Also, we confirmed that there are no spot welds on the little firewall that sits on top of the wheel arch. I looked for them with the flap disk but found nine.

He also reminded me how long ago it was that he stopped by to grab some parts. I think he restored his whole car in the time it has taken me to tear one apart. :D

Sven’s reference pics:
386A665C-7B10-4A12-992D-A8F1BF66F705.jpeg
B95280E2-1E59-44E6-ACDA-62EE9BBC7CE9.jpeg


2DF2D26D-1A2C-49F1-93A7-666EE0743E81.jpeg
 
I think that’s someone at the Karmann had just got promoted to spot welding. I’m counting and my fenders has way more spot welds than Sven’s car. Particularly the fender arches. It was next to impossible to see the spots on the arch. As a result, I bent the metal until a a spot weld was evident. The wheel arches look like swiss cheese unfortunately.

When all is said and done, I really hope that I don’t need remove the fenders on my target car. I know this is a parts car, but I can’t help but review my work. All things being equal, Sven is a plastic surgeon and I am Dr. Frankenstein.

Lessons learned:

1. Don’t use a flap disk to remove the paint. It is too aggressive and smears the metal, hiding seams and spot welds. An orbital scotch brite pad works well.

2. Use wax on your spot weld cutter (thanks @sfdon)

3. Don’t cut too deep on the c-pillar. Not really a lesson, I knew I was cutting too deep. Perhaps helpful for the next guy.

4. Buy better spot weld cutters

5. Keep more composite dremmel disks on hand. There are small areas like the drip rail and the fender arch that benefit from a small cutting disk.

A944B775-BA24-4180-A031-1BC91809B1AD.jpeg
BC1C8307-7519-4322-B781-65BB4039BAD2.jpeg
9F7B82EC-7496-429E-8B02-388AC428D218.jpeg
791CBBBE-D561-4F26-8196-1ECF7677AB9E.jpeg
D7FB2C85-B3EA-4FD2-9D54-5BE73B579A99.jpeg

3F38C7D6-D462-46B9-846D-E5634774B6F9.jpeg

DD71DE75-4433-4D10-97F7-BD0DE67FB4B7.jpeg
 
Last edited:
I need to find a BMW buddy next time. Today I pulled the roof, chopped the e9 in half, and loaded it onto a rather small trailer (5x9). It was all quite heavy, but rolling my project car around in the garage was harder. :D

In addition to the parts below, I have the rear fender, front fender arches. The rear tow hook. The rear tire hold down. The parking brake handle sheetmetal.

I decided that the tail panel wasn’t worth keeping. I cut out the fog area to be used as a template. I’m cleaning it up and mailing it to Texas this week.
6C9B89F4-1EBD-4142-83B2-BB5B1C2DC10E.jpeg


The roof needs to find a home ASAP. If no takers I will keep the pillars,
4BECA3F3-C4F5-454E-ADB2-4F5EF906FDC8.jpeg


These things are so beefy that I pity the person or ship that restores the entire unit. I cut it out for measurement purposes only. We are going to see what options exist for replacement tops.

Also in this pic you can see that I cut out the factory d-jet fuel pump mount. One of many parts of the body that are specific to the CSI/CSL.
BA1BDF34-7E21-445F-8B32-DC2819B1C40D.jpeg


I’m keeping the parcel shelf and the lower windshield frame. I also kept the front lower windshield frame.
70D2D3FE-FE7F-4A36-8CCF-BBAE6E8ACFEA.jpeg


The car was too big and too heavy for me to move into the trailer. I figure it still weighed about 600lbs (edit: Actual was 480lbs).I cut it in half in a spot that made sense weight wise. I realized that I forgot to cut out the windshield frame after cutting the car in half. It is easier to use a reciprocating saw when the car is sturdy. Oh well.
16B9E4E6-1C29-443F-82A1-FB9FF5277238.jpeg


A view if the rocker we don’t always see. Not supposed to be open on the bottom.
DCD5832B-B47A-455F-9AD0-3768E984D2AD.jpeg


Powered sheetmetal shears zip through the fender like butter. The goal was to save the arch, but Inkept some fender also.
DC82F8D1-BB50-4C4C-B118-FBFE917F5ECC.jpeg


A little rust on the floor:
D85025A5-2659-497A-AADB-ECB304FDF99B.jpeg


Ready to be crushed:
69C026FC-1C62-4381-B87F-3A43089A34E6.jpeg


A fitting end:
F83DEBEB-5DA5-4ED0-9C80-4F79E4B473A1.jpeg


The hardest part, wheeling my in-op project car back into place, doing a 180 around the post. It has always started fine but two months ago it just wouldn’t fire. I’ll tinker later. I don’t like that it doesn’t start, it is inconvenient even though I rarely drive it. Yes the wheels are ugly. They will be gone soon.
DD9CDE58-8B9F-4A0A-8B71-4635B7E625CD.jpeg


Roof : $500
07116A9E-92C8-4D4F-A73F-C2EA5A9E725D.jpeg


52A79079-8149-4B50-B40A-BE589531C031.jpeg


480F9818-9BEF-4825-8782-7F4937B5C1AD.jpeg


0027268F-C840-47C0-A9F7-EFADA1DBE78D.jpeg


Total Sales: $6,385
Play Money: $2,985
 
Last edited:
Warning: Wall of Text

This thread has run its course. My thought was that I would land at $7K in sales. I will edit below when I sell the roof (or sunroof) and fenders but otherwise it is effectively dead.

Initial Price: $3,000
LSD Addition: $400
Total Sales: $6,385
Play Money: $2,985

Now I will merge the finances with my project thread. The “Play Money” is to be deducted from
the project car spend. I’ll inventory the major
parts that I kept. The technical term is a crap ton of parts. Since we have been counting beans, I would say that I conservatively kept a “loose parts” value of about $6K. That helps to understand what a salvage CSI is currently worth.

I counted beans because when I first joined there was a lot of sentiment about cars in poor shape only being worth about $1,000-$2,000. I would argue otherwise and although it took me 2 years to establish my point, the sales data helps to baseline the value of a junker. A lot of precedence has been set on this site, but transparency of spend is not one of them. Kudos to other folks like @scottevest for sharing the very important financial aspect of a restoration. IMO, knowing what parts sell for and what it costs to fix these cars is critical for new and prospective owners.

This car was extra rotten and the VIN was hacked off (but not the import tag). I hope that no other CSI’s suffer this fate. This endeavor was never about making money. It really was about getting hard to find bits for my car. The greatest value for me was learning about the vehicle, and how it comes apart. I’ll obviously need to take apart another before I put one together. Hopefully by then I will have retained and documented enough to get it all assembled again.

Thanks to everyone who bought a part or two (or 20)!
 
Last edited:
the center of the wheels look red, are those the wheels that were on the car when you got it and were they red?
 
the center of the wheels look red, are those the wheels that were on the car when you got it and were they red?

The centers are Chiarettorot. I bought them that way. They are temporary wheels that have good tires on them. I'm either going to trade them for 16" BBS RS or 7x14 FPS fauxpinas.
 
I went through complete story today.

Pictures done are very valuable for anyone who is starting his journey with E9 restoration.

It is also history record when such a cars we worth not much.
I would love to have body condition like the car being cut in pieces.
It was different time and different continent but it hurts a little anyhow.

Anyway it was a very interesting to read. I will probably be back to it from time to time.
Some pics are missing from some reason. Maybe it is only problem with my PC configuration. No idea.

Thanks for your patience and effort.
 
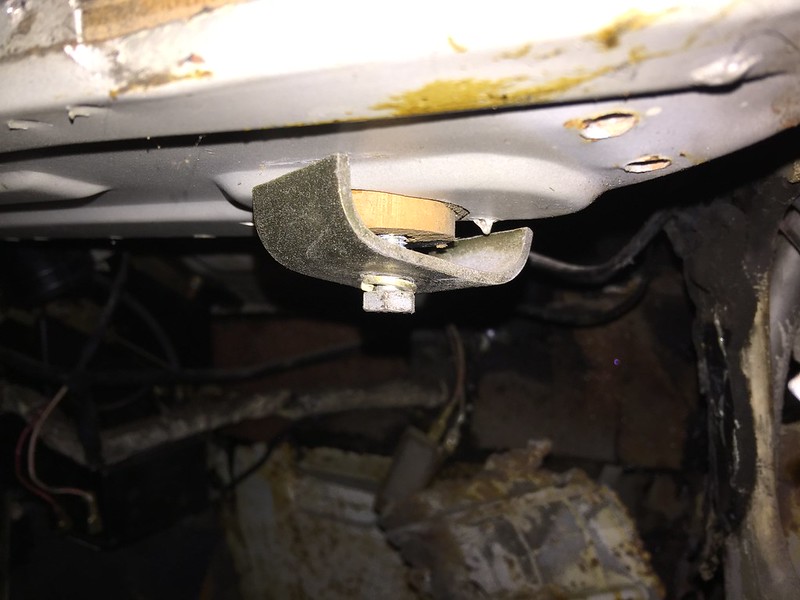
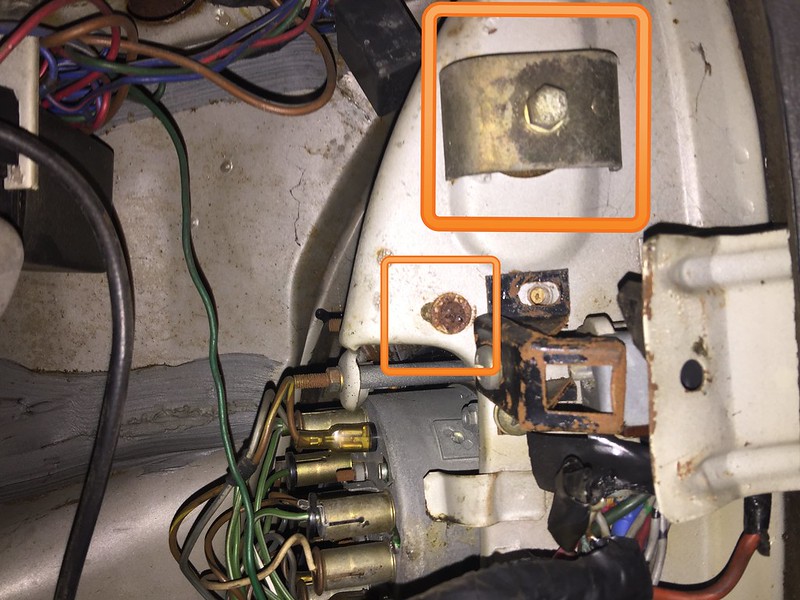
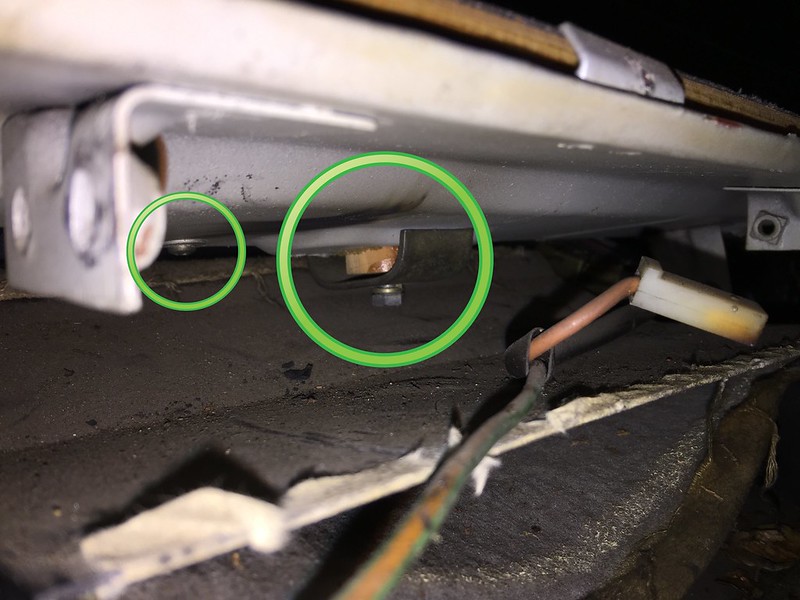
There are three of these bolts and two screws to remove from the underside of the dash.

Passenger Side:
31816202151_3d791c5b4b_c.jpg


Driver's Side:
31123669383_9fde9fbc1b_c.jpg


Center. The bolt is easy enough with a box wrench and the screw is achievable with pliers or an L-shaped Phillips but the screw is annoyingly tedious. I'm going to remove the heater components first (edit: done - not in order though see above).
31559913550_d87369a6c2_c.jpg


After you have the dash bolts off, and the two screws securing the dash, it's almost ready to come out.

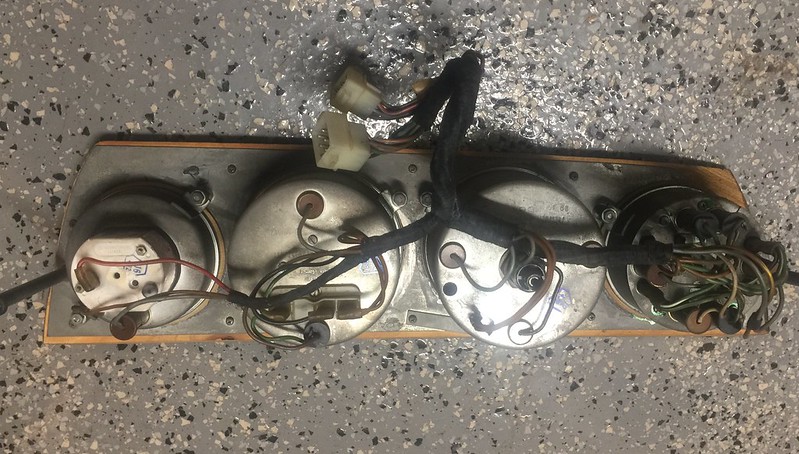
Next I removed the instrument cluster. There are two 8mm nuts holding it to the body. You have to go after them from under the dash. The wiring for the four gauges all condense into two pig tails. There are two plugs that are clipped to the body that disconnect the gauge pig tails from the main wiring harness. To remove the cluster, you need to unclip the pig tails, unscrew the speedo cable, and remove the trip meter reset. Everything else can stay connected. I removed the speedo cable from the top after pulling the cluster out a bit.

The black hole on the shiny speedometer back is where the trip meter reset cable enters. The speedometer cable is the big threaded plug in the center.
33474592914_e9acb1a272_c.jpg


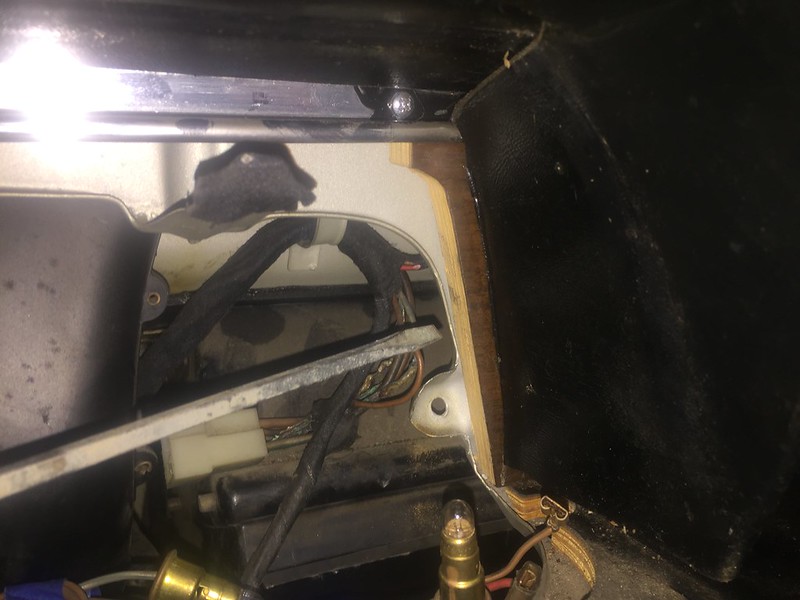
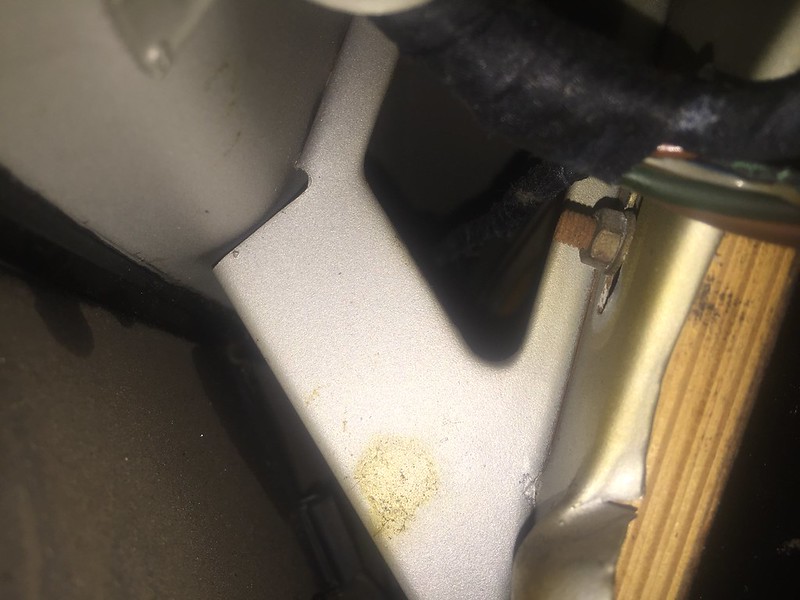
Now the dash is ready to come out, but wait - I forgot one more 8mm nut. I removed the cowl nut on the left side of the cluster, but not the right. It is a tight squeeze getting this bolt out with the heater box in place. A ratcheting 8mm box wrench does the trick.

Right back here to the right of the cowl
34275516446_f69b30226b_c.jpg


You will find this:
34316120055_47a3946ef6_c.jpg


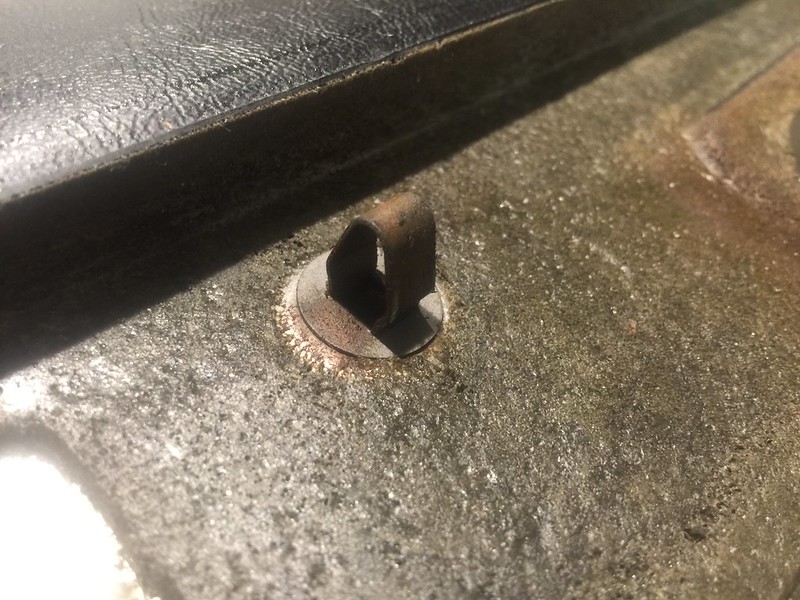
Next you can pull the top of the dash with the cowl in place. It is held on with clips. It's a little scary tugging on the thing. Once the clips pop out I still found it quite difficult to squeeze the dash past the a pillars. I probably should have pulled more towards the interior and less 'up'.

These are the infamous dash clips that everyone wants. If they pop off of the dashboard upon removal, you can use pliers to insert them back into the dash.
34185242131_238f055ddc_c.jpg


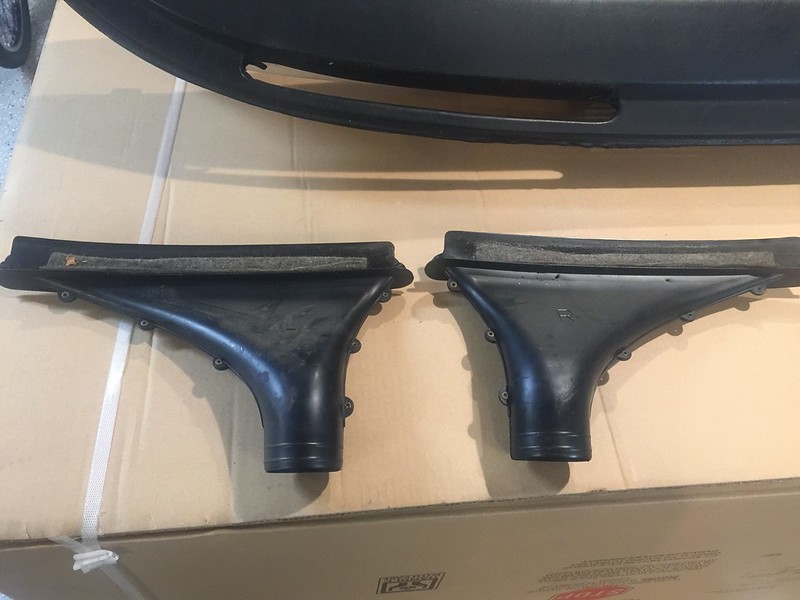
As you are lifting the dash out you can disconnect the defroster vents. I know that folks have removed these with the dash in place but this seems to be very tricky without cracking the vents. These things are made of glass!
33474593474_7cca4ceb55_c.jpg


And here she is, this is why I bought the parts car!
34316118615_0c3e499a60_c.jpg
Better suuuuuuuuuper late than never, THANK YOU for this most excellent pictorial description. Going though this now and it is soooo useful to have this.
Thank you Mark!
 
Thanks! I’m going to “go pro” the disassembly of my project car and narrate the fastener length/pitch/diameter. I should have the entire car engrained in my memory but video will help with reassembly. Still 18 months and one hobby garage out though!
I should have specified that, in this case, I was following your dash removal process. A special mention for that super sneaky screw hidden above the headlight switch. Did not catch that on your post until half an hour after banging my head against the wall trying to figure out why it was not coming out.
 
getting the dash out is one thing, getting it back in is a whole different game
pulling the clips down with wire didn't work for us, as suggested by someone here, made a hook with threaded rod
 
Just gone through this, thank you for all your hard work. I can relate to the jobs taking a back seat to everything else that needs to be done at home never mind work !

Its threads like this and all the others on the site that help us do the little bits and gain confidence to try to do more. Just have to start on some of the restoration threads now that I've been putting off :)
 
Back
Top