Fixing that little rust spot...

Belgiumbarry

Well-Known Member
Messages
1,618
Reaction score
1,116
Location
Belgium
sorry guys , this is "local" news.... sad news !

Erik , i just see that the Walonie government ( so the south part of Belgium , French speaking ) put a hold on oldtimer registration per 1/1/2022..... only those with a O license plate can continue.... but of course it will be more difficult to sell that car as the buyer can't get anymore a "cheap" annual tax..... !

PS in Belgium a car has to be 30 years old to be licensed as oldtimer. That profits a fix annual tax.... younger cars pay according cc/HP/CO etc...
So the new rules will only make our hobby a lot more expensive.... and officials richer.
 

Bmachine

Well-Known Member
Site Donor $
Site Donor $$
Messages
3,525
Reaction score
1,779
Location
Northern California coast
When you say “a lot more expensive“ what do you mean exactly? Like how much would one pay in January versus in December for the same car?
 

eriknetherlands

Moderator
Site Donor
Messages
2,699
Reaction score
1,930
Location
Netherlands, Eindhoven area
Just for @Belgiumbarry ...
20211118_233705.jpg
 

eriknetherlands

Moderator
Site Donor
Messages
2,699
Reaction score
1,930
Location
Netherlands, Eindhoven area
Sand the pieces flush on a flat piece of granite or similar to remove any warpage
It's going to need more then that I fear; of the 8 carbs i have, i think 6 of them all have warpage on the same part, in the same corner, in the same direction.

I will have to measure them, but the warpage looks like between 1 and 1,5 mm on every one. No way i can sand that "out".
 

eriknetherlands

Moderator
Site Donor
Messages
2,699
Reaction score
1,930
Location
Netherlands, Eindhoven area
Not really in chronological order, but some images from the 2021 work that I had not documented yet here:

- On top of spotwelding , I glued the rear panels with 2K Structural Epoxy for a water tight seal+ additional strength. :
20210618_230326.jpg
20210618_230301.jpg

- spot welding the rear spare tire wheel and fuel tank panel.

20210621_223647.jpg


- made extension arms for my spotwelder to be able to weld the rear valance / apron and rear fenders to the floor sections:
20210620_140949.jpg
20210623_175100.jpg
20210621_224615.jpg
20210621_224707.jpg
20210621_224814.jpg


finishing the welding with some strip welds like the original and treated all fresh welds with a nice paint layer.

20210621_224636.jpg
20210621_224858.jpg

all painted up, making sure all spaces between panels are filled:
20210628_214604.jpg
20210628_222604.jpg

and sealed it all up, matching original seal location, width and texture:
20210812_235145.jpg

I sealed the edge to the fender in 3 passes after welding:
First I filled it with 2K Epoxy paint: (never was in there so deep originally)
20210628_222704.jpg


and a sealing layer just as original.
20210822_140229.jpg
 
Last edited:

eriknetherlands

Moderator
Site Donor
Messages
2,699
Reaction score
1,930
Location
Netherlands, Eindhoven area
Prepared the fuel tank panel ahead of welding it in: added wiring harness tabs (self fabricated) and the bumper mounts. Note the 3 mm holes i drilled prior to removing the bumper brackets for exact repositioning.
20210309_231419.jpg
20210309_231443.jpg
20210309_231509.jpg


20210309_233109.jpg
20201107_162651.jpg


reduced the hole for my antena; it was always leaking as the hole was ~3 mm wider as the plastic foot of the antena could effectively cover. I welded in an replacement plate, making sure it was set flush. I used a copper sheet at the back to aid in welding.


20210807_221806.jpg
20210807_221815.jpg
20210807_221836.jpg
20210807_222400.jpg
20210807_224916.jpg
 
Last edited:

eriknetherlands

Moderator
Site Donor
Messages
2,699
Reaction score
1,930
Location
Netherlands, Eindhoven area
Needed to fix a lot of corners of the spare tire wheel well before I could get it zinc coated and being able to weld it back in:

20190910_225708.jpg
20190912_220816.jpg
20190908_122702.jpg
20190701_234718.jpg
20190701_234955.jpg

some patches to be made
20191004_153858.jpg
20191004_172754.jpg

20191004_202756.jpg


new edge:

20191102_163747.jpg
20191226_140130.jpg


new corner:
20191113_220447.jpg
20191113_224946.jpg
20191129_224519.jpg

and 2 bits on the wheel well also:

20191208_113948.jpg
20191208_220659.jpg


After fixing the steel part, it was time to install the fresh parts.
New brackets mounted on the underside of the spare tire panel for the NOS muffler that I found:
20201103_214337.jpg
20201103_213936.jpg
20201103_213522.jpg
20201103_213453.jpg


and some brackets on the top side: a few tabs for the wiring harness, the rear bumper mount, the pin for the spare wheel and the funny bracket that can only be meant to prevent the jack from damaging the wiring harness. Last item was the towing hooks that also required my newly made spot welder's extension arms.
20201107_164338.jpg
20201107_190752.jpg
20201109_230005.jpg
20201109_224429.jpg


not chronological, but all got zinc plated for that extra rust protection - I don't want to worry driving it when it's finished.
20200530_131847.jpg
20200530_132037.jpg


I also added a reinforcement for the Differential mounting: the body tends to develop cracks around the bolt holes where the Diff mounts. As I did not take the diff mount part off the body, best I could do is adding stiffness close to it, hoping that it would help. I simply doubled up on the plate, adding a 1,5 mm zinced steel plate. Afterwards I filled the space in between capillary with paint as such double layers are a real rust trap if not cared for well, especially being right behind the wheels.
20201102_234921.jpg
20201103_002000.jpg
 

Attachments

  • 20191226_133733.jpg
    20191226_133733.jpg
    288.5 KB · Views: 111
  • 20201103_173642.jpg
    20201103_173642.jpg
    235.5 KB · Views: 96
  • 20201103_213453.jpg
    20201103_213453.jpg
    266.8 KB · Views: 97
  • 20190701_234610.jpg
    20190701_234610.jpg
    311.8 KB · Views: 89
Last edited:

eriknetherlands

Moderator
Site Donor
Messages
2,699
Reaction score
1,930
Location
Netherlands, Eindhoven area
Thanks @Bmachine. Always good to hear people appreciate it.

Not sure if I shared this one, but I hand made some tabs for the wiring harness in 2017. As i needed a lot more, I turned new dies for my bead roller on the lathe at a friend. This way I could make 25 of them in an evening, plus make use of the class in tech highschool on lathe basics that I took in 1998....


20200122_202916.jpg
20200122_202847.jpg
20200122_202943.jpg
20201103_215509.jpg
 

Attachments

  • 20200122_202943.jpg
    20200122_202943.jpg
    282.3 KB · Views: 99

Candia4441

Well-Known Member
Site Donor $
Site Donor $$
Messages
911
Reaction score
310
Location
California
Installed, and going on....

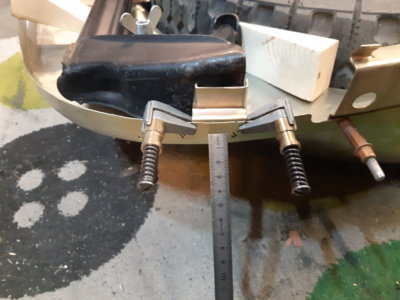
so here some pics showing the installed handbrake cable (W&N) with the bracket (BMW dealer part).

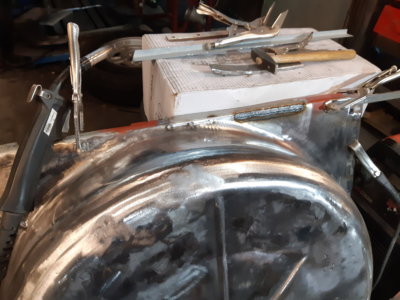
New heat shield; painted in BBQ type paint. New brake shoes & pivots with springs.
Hello, I had the same problem with my cars I have 2 E9 I was changing the hand break cable and I try to use the good cable from one to other car but didn't work since there was deferent one from the other I figure out maybe they upgrade the parts one car is 71 and the other is 73 that's why but now I see other people having same problem
 
Top