You can drill two 1/8" holes a couple inches apart in the lower hinges before removing and leave the hinges attached to the hood. When you go to reinstall, insert four 1/8" drill bits into the holes to align then tighten it up. Defintely at least a 3 person job.I was originally going to leave them and then perhaps paint the hood by taking it off the car, sounds as if that is not a fun task to realign
You are using an out of date browser. It may not display this or other websites correctly.
You should upgrade or use an alternative browser.
You should upgrade or use an alternative browser.
What did you do to your E9 today?
- Thread starter adawil2002
- Start date
That’s a nice trick. I’ll keep it up my sleeve in case I decide to take it off.You can drill two 1/8" holes a couple inches apart in the lower hinges before removing and leave the hinges attached to the hood. When you go to reinstall, insert four 1/8" drill bits into the holes to align then tighten it up. Defintely at least a 3 person job.
AlainDelone9
Member
Fixed the trunk light 
You can drill two 1/8" holes a couple inches apart in the lower hinges before removing and leave the hinges attached to the hood. When you go to reinstall, insert four 1/8" drill bits into the holes to align then tighten it up. Defintely at least a 3 person job.
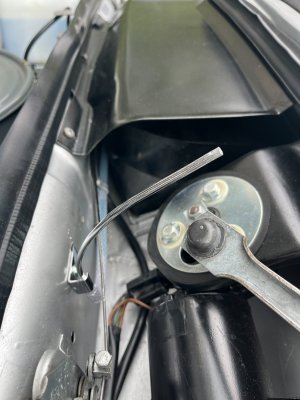
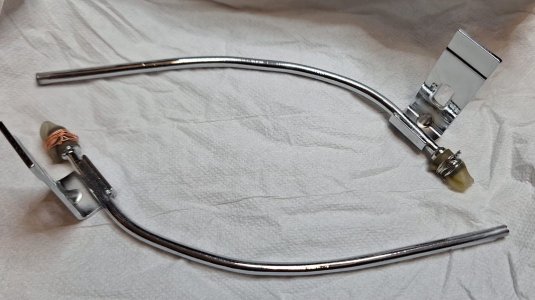
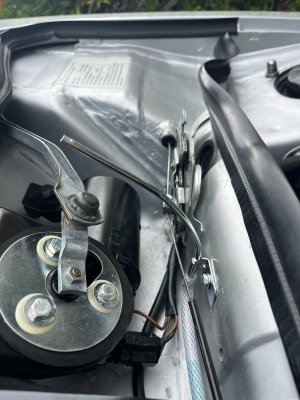
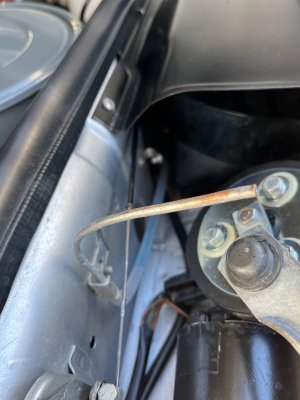
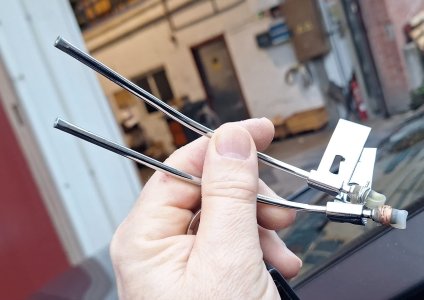
Installed chromed washer nozzels. Big thanks @deQuincey for chroming them for me. This was one of the things in the engine bay that bothered me. Big improvment you can see before and after pictures
Attachments
I like that idea, I've picked up a bunch of Clecos at estate sales but haven't needed them yet.View attachment 2157871/8 inch Clecos will also work and hold the hinges and hood together View attachment 215788
Is there clearance for them against the upper part of the hinge/hood?
Ah, I see that they make a smaller version, the PMIN series if clearance is a problem.

Cleco Fasteners PMIN Series
Miniature Clecos - Temporary Fasteners For Precise Holding Of Materials PMIN SERIES - Miniature Series - Stubby
 www.panamericantool.com
My ignition key cylinder broke apart the other week.There are lots of good threads on the forum about how to remove it but I can confirm it is VERY hard to remove the 4 shear bolts that secure the steering column shaft which needs to be lowered in order to extract the steering lock middle cylinder. It took me 2 frustrating days using a dremel and than whacking them extremely hard with a hammer and screwdriver to break them loose enough to remove with a small long nose vise grip locking plier.
Bought a new key cylinder which by chance just become available again at W&N. I am sending it off to Blaine at Santa Monica Lock as recommended by others to be repinned to my original key,


Bought a new key cylinder which by chance just become available again at W&N. I am sending it off to Blaine at Santa Monica Lock as recommended by others to be repinned to my original key,
My ignition key cylinder broke apart the other week.There are lots of good threads on the forum about how to remove it but I can confirm it is VERY hard to remove the 4 shear bolts that secure the steering column shaft which needs to be lowered in order to extract the steering lock middle cylinder. It took me 2 frustrating days using a dremel and than whacking them extremely hard with a hammer and screwdriver to break them loose enough to remove with a small long nose vise grip locking plier.
Bought a new key cylinder which by chance just become available again at W&N. I am sending it off to Blaine at Santa Monica Lock as recommended by others to be repinned to my original key,View attachment 216026View attachment 216027View attachment 216028View attachment 216029
I went through removing the whole ignition key shaft thing a couple of years ago. What a PITA! It's one of the jobs you almost have to figure out yourself, otherwise, you are going to pay someone a small fortune in shop hours learning how to do it themselves.
Rek
Well-Known Member
My shaft was fine but the microscopis size of the grub screw which holds the shaft in place meant I had to use a rare earth magnet to track it down when I failed to catch it.I went through removing the whole ignition key shaft thing a couple of years ago. What a PITA! It's one of the jobs you almost have to figure out yourself, otherwise, you are going to pay someone a small fortune in shop hours learning how to do it themselves.
I finally got mine running after three years of getting various work done to it. Everything seems ok other than a bent crank pulley. Got one off a 633 being sent. Fingers crossed I’ll be cruising next week.
Did you replace the ignition switch?I finally got mine running after three years after getting various body, electrical work done to it. Everything seems ok other than a bent crank pulley. Got one off a 633 being sent. Fingers crossed I’ll be cruising next week.
Yes I did, I used an E24 ignition switch, I removed a little material at the base and massaged it until the grub screw went back in. Works great, for now at least…Did you replace the ignition switch?
//My5UV
Member
I finally deciphered all of the speaker and radio wiring. The fader control and single front speaker along with a couple different changes of color in the harnesses over the years didn’t help but I was able to remove nearly all of it and I’ve almost got my new retrosound unit done.
Hopefully I won’t have to immediately pull it back apart to get the ac working. With luck the leak is just at a hose fitting and not in the evaporator
Hopefully I won’t have to immediately pull it back apart to get the ac working. With luck the leak is just at a hose fitting and not in the evaporator
Ya know, real men make their own pins and re-key their locks while eating a Cowboy steak for lunch...Bought a new key cylinder which by chance just become available again at W&N. I am sending it off to Blaine at Santa Monica Lock as recommended by others to be repinned to my original key,View attachment 216026View attachment 216027View attachment 216028View attachment 216029
Spent 3 hours removing five of six bell housing bolts...Progress!!!
Pittraider18
Well-Known Member
Fighting the good fight!Spent 3 hours removing five of six bell housing bolts...Progress!!!
Taking them out is the easy part!
Oh joy..Can't wait for that other end of this story!!Taking them out is the easy part!
Sounds like you're already getting it in the other endOh joy..Can't wait for that other end of this story!!
")
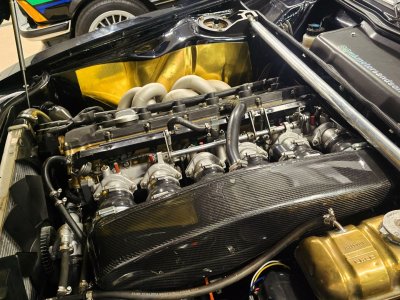
Replaced the leaking remote brake reservoir grommets on the top of the master, bled the brakes and took her out for the first time since getting the new ecu and airbox fitted.
Camera doesn't pick up the guttural induction noise, sounds divine.
Camera doesn't pick up the guttural induction noise, sounds divine.