It was a gift from an old colleague of mine who used it in the 70's and replaced it in the 80's. I restored it ten years ago and made the seat from a template I found on thesamba.com. The lamp is one I had lying around and fit the holes in the posts.Looks like you have a restored early Hazet Assistent. They are scarce this side of the Pond. I've found a newer one here in Texas but it doesn't have the seat or lamp.
You are using an out of date browser. It may not display this or other websites correctly.
You should upgrade or use an alternative browser.
You should upgrade or use an alternative browser.
What did you do to your E9 today?
- Thread starter adawil2002
- Start date
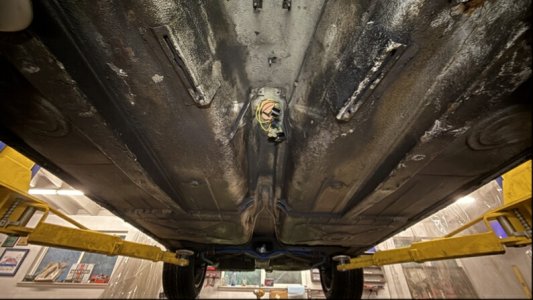
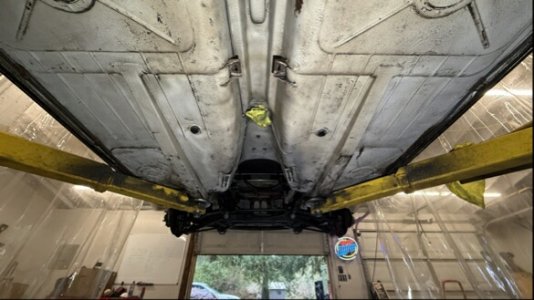
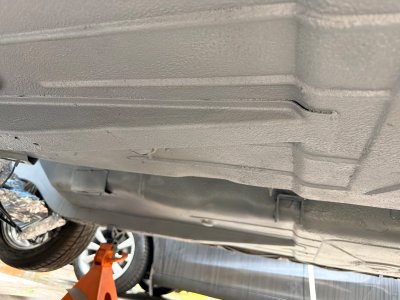
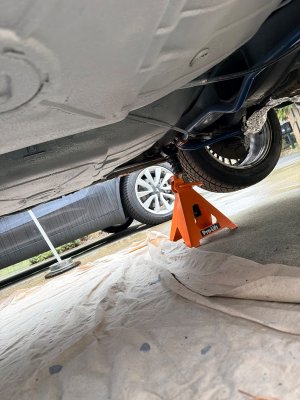
Painted the underside. Used Seymour dark gray (which is surprisingly a silver color rather than dark gray) on the transmission tunnel and then Wurth Porsche Stoneguard Gray on the bottom of the floor panels. I know that the original color is more of a khaki but that was hard to find in a stone guard and this color is actually fairly close to my Polaris Silver so I’ll say that I’m breaking with the bible here. Quite a change from how I got the car - pics from original to post-dry-ice-blasting to post- painting
Attachments
Undersides were khaki primer and grey Wurth style undercoat so your solution is perfect.
You doing your own zinc coating?I removed front calipers and rotors in preparation for rebuilding the calipers and putting in new rotors and pads. I think the PO had more recently replaced the pads but the calipers were really gummed up and the rubber just completely tore away as I removed the pistons. Will sandblast, zinc plate and then powder coat while I wait for seal kits to arrive this week.
Also cerakoted my exhaust manifolds after sandblasting them this morning since they were looking fairly rusted over. Since the engine is on the stand I’ve have been cleaning up parts of it, essentially everything short of taking it apart. Front/rear main seals, valve cover refresh and new gasket, etc. The manifolds are looking good and are now extra-protected.
I've done a bit, just using one of the kits from Eastwood. Given that I'm powder coating over it, that serves as a primary protective layer so the zinc is more of the belt and suspenders approach. The kit is fairly cheap and works for things like this, brackets, etc. You can do bolts and washers, etc, but for a $0.30 bolt that's all rusted or encrusted, seems a lot of work to polish, degrease, wrap with wire to zinc plate, then polish further etc. Most of the bolts that are standard size I have just replaced from Belmetric and have only done the above to the ones that are odd sizes or otherwise hard to find.You doing your own zinc coating?
Does anyone the RAL number of the khaki colour?Undersides were khaki primer and grey Wurth style undercoat so your solution is perfect.
Painted the underside. Used Seymour dark gray (which is surprisingly a silver color rather than dark gray) on the transmission tunnel and then Wurth Porsche Stoneguard Gray on the bottom of the floor panels. I know that the original color is more of a khaki but that was hard to find in a stone guard and this color is actually fairly close to my Polaris Silver so I’ll say that I’m breaking with the bible here. Quite a change from how I got the car - pics from original to post-dry-ice-blasting to post- painting
Wow! Really nice work!
mkent
Well-Known Member
mkent
Well-Known Member
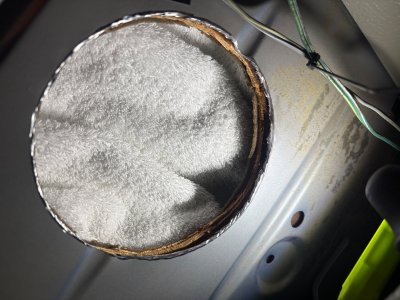
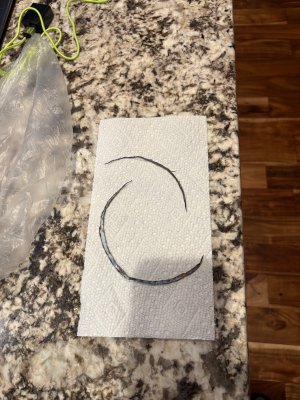
I am replacing the derelict speakers on my package shelf and discovered a horrible job previously done in creating the hole. Plus the new speakers are a bit broader at the base, so hole needed enlarging anyway. After grinding the edges smooth I will apply primer and some touch-up fjord paint to keep corrosion at bay.
Attachments
mkent
Well-Known Member
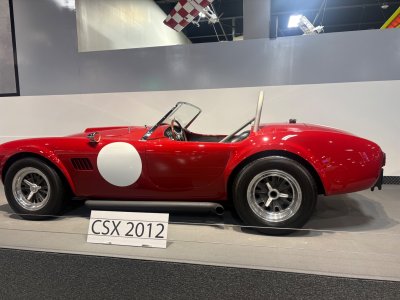
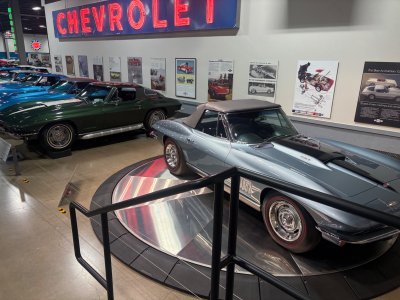
No, the Cobra and Vette have nothing to do with the project. They snuck in from my photos
Front tow hook installed. Here is the back story. I have owned BMW's since I was 16 and have owned other vehicles with front air dams most of my life. The problem I have had over the years is when the vehicle needs a tow. The air dams are always so low with no clearance (or very little I should say) that when in need of a tow it is very stressful for me due to the clearance and where the tow truck driver decides to place the metal hooks, straps or whatever they use to winch on to a flatbed if car inop. Did they bring a bunch of 2x6's or some sort of transitional ramp to the flatbed, etc.
Obviously the factory hooks are worthless, pulling from sway bar or other areas can damage those parts. I've always wanted a dedicated front tow hook or strap to attach the winch end to. Since the air dam holes are not hooked up to ducts for brake cooling, the holes were there, we used them for something else.
Well, I left the car with my mechanic to "do his thing" and make me one. Here is the end result. He loves welding and his welds are amazing. I know this won't be everyone's cup of tea but maybe it gives you different ideas on how to accomplish this. The guidelines were, nothing welded on permanently (slight deviation here), something that could easily be taken off, if need be, and something strong enough to pull the whole car up a ramp or if on a track to hook up and pull real easy off track or into paddock. This fits all of that criteria. It came to me when I was doing a parade lap day at the local track, it was hot (like usual on a track), I've had some vapor lock issues in the past (going to be rectified soon) and wanted a way for the tow truck driver to grab it quick and get it out of the way if something happened.
The challenge was the front factory valance (not the air dam). There wasn't a straight shot to the subframe without having to cut into that, which I also wanted to avoid for obvious reasons. Well, this is what he came up with. 1/4 steel, same as subframe, two small holes were drilled to attach forward of the shock towers so shouldn't hurt the structural integrity. The only thing welded are the two nuts on the back side the bolts go into for easier on/off. It only takes five minutes to uninstall. Visually, unless on a rack you can't see it unless you kneel down and look under. Small gripe is I wanted a red strap but they were out, so I opted for Blue which doesn't look bad IMHO. Yes it is a little JDM or racecar look, but I was going for "function" not "form."
Front Euro bumper made it from the NL's and is at the Chromer's. This shouldn't interfere with that install. Anyhow, I downloaded a video and three pics to this Shutterfly link below. Check it out, constructive or even Non-Constructive criticism is welcome. I'm guessing this is a one of one. Over engineered? Maybe, but better than the alternative. E30's have a nice slot in the bumper/air dam that easily screws in. That is the end piece I bought with the nylon. As far as added weight goes, on the big picture, not a concern. My weight is more of a concern than that piece. Looking at it that way, maybe I should have installed on passenger side...LOL.
Shutterfly
Shutterfly Photos. Finally, the perfect solution for all your photos. Effortlessly gather, quickly find, and magically create.
linkit.shutterfly.com
Last edited:
Shane, Where he bolted it to the frame is where your bumper irons need to be mounted with the unique to 74 bent irons.
Oh of course...well, so much for that. We will figure something out. Thanks for the heads up. I didn't realize they were bent. Maybe I will get lucky but I doubt it. Always my luck. I figured that was much higher up and would fit in the slot straight. Shoot...ok, well, maybe back to the drawing board, maybe not, will keep you posted.Shane, Where he bolted it to the frame is where your bumper irons need to be mounted with the unique to 74 bent irons.
Don’t you have the irons?
So a slight change of plans. I did all of the above to my rear brake calipers, overall turned out...ok...and then when talking to Don he nicely told me "you're doing a lot of the work on this car yourself, spend that effort doing the things that it's hard for someone else to do when the car is in your garage, but for rebuilds, have an expert do the job since they will do it better". So, yes, for about $300 for all 4 calipers to be completely torn down, beautifully zinc coated and cadmium plated, then rebuilt, that's probably a better idea. So off they go to CaliperHQ to return in 4 weeks. I did finish the engine bay painting and polishing however, installed the liners on the underside of the hood and started putting the hinges back on. Those Cleco pins are phenomenal - great tip by someone here to drill two 1/8" reference holes on each half of the hinge before removal to realign afterwards. Tonight is trying to get that torsion bar assembled and installed...You doing your own zinc coating?
Don has given me the same advice.. Don't spend valuable time doing the parts you don't like doing, and can pay someone else to do much better.. Wise man...So a slight change of plans. I did all of the above to my rear brake calipers, overall turned out...ok...and then when talking to Don he nicely told me "you're doing a lot of the work on this car yourself, spend that effort doing the things that it's hard for someone else to do when the car is in your garage, but for rebuilds, have an expert do the job since they will do it better". So, yes, for about $300 for all 4 calipers to be completely torn down, beautifully zinc coated and cadmium plated, then rebuilt, that's probably a better idea. So off they go to CaliperHQ to return in 4 weeks. I did finish the engine bay painting and polishing however, installed the liners on the underside of the hood and started putting the hinges back on. Those Cleco pins are phenomenal - great tip by someone here to drill two 1/8" reference holes on each half of the hinge before removal to realign afterwards. Tonight is trying to get that torsion bar assembled and installed...
That said, I did "enjoy" the 3 weeks or so I spent being a grease monkey again. Just realizing that there are indeed things that pros do a better job of...
Last edited:
I think he's right. I'm planning to keep the car for a long time, but if/when I go to sell it, I'm not going to have a long list of work done by a mechanic or shop, since a lot of this I'm doing on my own - the teardown, the rebuild, the wiring, the adding items etc. That at least is stuff that is "visible" to any future buyer or owner. When it comes to the items that are a bit more "black-box", it might be nice to be able to say that the brake booster was rebuilt by PowerBrake, and the Manifold Pressure Sensory by Fuel Injection Corp, and the calipers by CaliperHQ. I will have reinstalled all of those parts but the work to make them perfect will have been done by an expert. Where to draw the line on that is always fluid and likely based on your own comfort level and experience.Don has given me the same advice.. Don't spend valuable time doing the parts you don't like doing, and can pay someone else top do much better.. Wise man...
That said, I did "enjoy" the 3 weeks or so I spent being a grease monkey again. Just realizing that there are indeed things that pros do a better job of...
Agree. As an electrical engineer with 30+ years in the advanced automotive technology industry, I am fine with some of the more esoteric things, like totally rebuilding my wire harness, and even taking a pass at restoring the wood dash (that experience is based on 15 years restoring an antique boat), but to be able to say the car has an engine from Don Lawrence, and to have good paint and a very classy interior is, IMO, a value add.I think he's right. I'm planning to keep the car for a long time, but if/when I go to sell it, I'm not going to have a long list of work done by a mechanic or shop, since a lot of this I'm doing on my own - the teardown, the rebuild, the wiring, the adding items etc. That at least is stuff that is "visible" to any future buyer or owner. When it comes to the items that are a bit more "black-box", it might be nice to be able to say that the brake booster was rebuilt by PowerBrake, and the Manifold Pressure Sensory by Fuel Injection Corp, and the calipers by CaliperHQ. I will have reinstalled all of those parts but the work to make them perfect will have been done by an expert. Where to draw the line on that is always fluid and likely based on your own comfort level and experience.
Currently having a great time communicating with Erik at Coupe King as they restore my Scheel seats. We have worked out how to slightly update them, and also to get them to play nice with the rear seats. Loving watching the progress. They are a real pleasure to work with.
Used a photo of @Ives car as a base for designing the revision of the rear seats so they are esthetically related to the new front seats. Using grey/white leather. the center sections will be perforated using a Porsche perforation pattern.
Then reconfiguring the Schools to be slightly more updated, with fewer lateral pleats (see chalk marks), and the same perforated centers. You can see the re-covered bottom bolsters in the pic below. Top and front will be solid like the bolsters.
Last edited:
Hey Chris, I do, however, I didn't open the box before I took the bumper to the Chromer. Was going to fit it all once the bumper was done and the box didn't look like it had pieces of metal with big bends. I looked at a couple pictures online and it looks like they may need some spacers along the frame anyways where those holes are. My hope is the irons will fit over the tow hook mod and I may be able to at least use one of the existing holes, just would need a longer bolt. If we need to make a bigger bend or do some more fabing, we will. So, thanks for pointing that out. Nothing ever goes smooth or flawless with me, par for the course. It's ok, not worried about it. My guy is pretty amazing at his fabrication work so we will figure it out. In the meantime I am very happy to have the tow hook.Don’t you have the irons?
i tend to think that the pattern used on the rear CSL seats makes a lot of sense for the inset of perforated leather.Agree. As an electrical engineer with 30+ years in the advanced automotive technology industry, I am fine with some of the more esoteric things, like totally rebuilding my wire harness, and even taking a pass at restoring the wood dash (that experience is based on 15 years restoring an antique boat), but to be able to say the car has an engine from Don Lawrence, and to have good paint and a very classy interior is, IMO, a value add.
Currently having a great time communicating with Erik at Coupe King as they restore my Scheel seats. We have worked out how to slightly update them, and also to get them to play nice with the rear seats. Loving watching the progress. They are a real pleasure to work with.
Used a photo of @Ives car as a base for designing the revision of the rear seats so they are esthetically related to the new front seats. Using grey/white leather. the center sections will be perforated using a Porsche perforation pattern.
View attachment 217055
Then reconfiguring the Schools to be slightly more updated, with fewer lateral pleats (see chalk marks), and the same perforated centers. You can see the re-covered bottom bolsters in the pic below. Top and front will be solid like the bolsters.
View attachment 217056