72 CSi rotisserie restoration

autokunst

Well-Known Member
Site Donor $$
Messages
3,606
Reaction score
2,619
Location
Milwaukee, WI
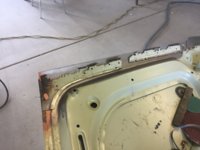
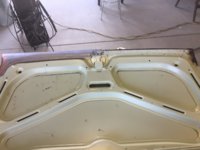
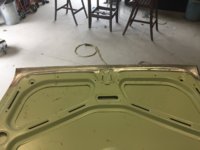
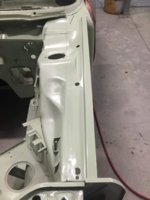
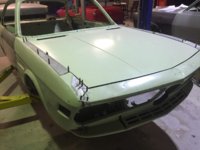
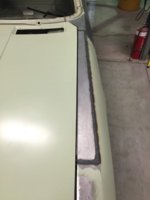
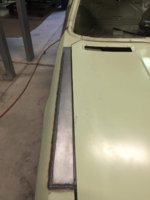
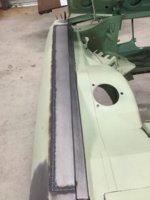
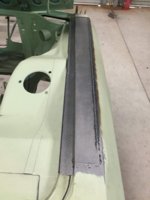
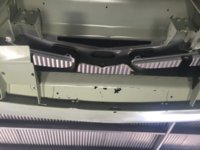
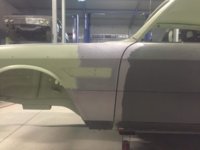
Week 24 .........trunk lid had some pin holes at rear end (where badges attach) cut away revealing rust on inside so new outer and inner pieces cut and welded in. LH front fender had some lead repairs (dodgy work) so cut out and new piece fabricated. Unpick inner panels front guards.......cut and repair....refit. Has been a lot of work in these front fenders. Pity you can't buy them new.:( 
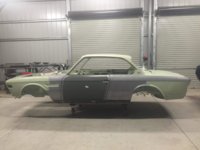
In 2 weeks time all welding /cutting /patching should be finished. then on to hammering ready to go to Spray shop. (2 months there probably) I looked into the tunnel today and saw a very dim light at the end :rolleyes: 
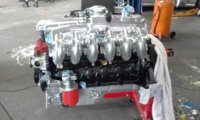
Engine is coming along ok....Cam in and timed....( all good Don) had to get extra parts ceramic coated. I don't think I will get this machine on the road until Feb next year...............oh well.
Hi Paul. The problem is, you make it look so easy. ;) I hope I can match your quality - knowing I will not come close to your pace. Looking great!!!
 

pat cooks

Well-Known Member
Messages
220
Reaction score
92
Location
essex
I think W & N need to make repair panels for the inner top edge of the front wings / fenders, lots of work to fabricate them and not even sure if I can fake those little raised ribs in the corner....
 

Wladek

Well-Known Member
Messages
1,305
Reaction score
792
Location
Gdansk, POLAND
Wladek..............thanks............used ARB High Performance bolts ($440 aus a set not cheap) That is the bracket for A/C compressor. Thanks all for comments
Sorry for the dumb question - what are the benefits, cylinder head can be removed only after unscrewing nuts? They are reusable because of additional top screws or same as OEM after unbolting/unscrewing only good for trash?
So, i assume every single bolt you have to torque two times;)
 

paul

Well-Known Member
Site Donor
Messages
321
Reaction score
305
Location
Australia, Queensland, Gold Coast
Back onto my teak dash..............used the wife's clothes steamer to wrap it around :cool: some more pics of the engine. We used ARB bolts so if ever decide to supercharge (not likely) don't have to change.
 

Attachments

  • Side Piece 1.JPG
    Side Piece 1.JPG
    110.2 KB · Views: 490
  • Side Piece 2.JPG
    Side Piece 2.JPG
    112.9 KB · Views: 497
  • Side Piece 1 (6).JPG
    Side Piece 1 (6).JPG
    84.8 KB · Views: 499
  • Teak Laminate end.JPG
    Teak Laminate end.JPG
    98.8 KB · Views: 492
  • Teak Laminate side.JPG
    Teak Laminate side.JPG
    97.6 KB · Views: 485
  • Wife's Clothes Steamer.JPG
    Wife's Clothes Steamer.JPG
    90.2 KB · Views: 481
  • 20181005_114333.jpg
    20181005_114333.jpg
    255.9 KB · Views: 496

paul

Well-Known Member
Site Donor
Messages
321
Reaction score
305
Location
Australia, Queensland, Gold Coast
Week 25 565 hrs. Trunk lid new piece cut and welded inner and outer. Front fenders tops finished and in place........ready for cut out rusted area in lower guard and fit W&N 1/4 panel.
Inner front guards finished. That will leave only welding up of front fenders and then on to hammering whole car and hopefully off to spray painters on 25th Oct.:):):) this car has had some rust..........not anymore :D
 

Attachments

  • IMG_9663.JPG
    IMG_9663.JPG
    202.3 KB · Views: 461
  • IMG_9664.JPG
    IMG_9664.JPG
    188.5 KB · Views: 460
  • IMG_9685.JPG
    IMG_9685.JPG
    192.8 KB · Views: 481
  • IMG_9719.JPG
    IMG_9719.JPG
    201.5 KB · Views: 453
  • IMG_9726.JPG
    IMG_9726.JPG
    199.3 KB · Views: 469
  • IMG_9779.JPG
    IMG_9779.JPG
    182.8 KB · Views: 468
  • IMG_9780.JPG
    IMG_9780.JPG
    209.5 KB · Views: 483
  • IMG_9785.JPG
    IMG_9785.JPG
    205.2 KB · Views: 478
  • IMG_9786.JPG
    IMG_9786.JPG
    203.9 KB · Views: 481

NilsH

Well-Known Member
Site Donor
Messages
124
Reaction score
48
Location
Germany BW
First of all, great work! Really impressing and thanks for all the pictures! Keep it up!

What kind of metal shaping tools do you use? I thing I saw a bead roller in some picture but what else?
Are you a panel beater by trade? Everything looks so easy when you do it. :)
 

paul

Well-Known Member
Site Donor
Messages
321
Reaction score
305
Location
Australia, Queensland, Gold Coast
Hi NilsH........We use water cutting or plasma cutting to shape our 3mm steel work. For our sheet metal work we use bead rollers, Cnc lathe to make dies, we get dies made depending on shape, press with different dies depending on shape, slip rollers, 2 different folders, shrinkers, stretchers, sand bag and English wheel. We have made some of our own tooling for hand forming different shapes. We use spot welder, mig welders, and tig welders and a few different tools for finishing.
No I am not a panel beater. This is fabrication work........the boys are very good at what they do..................... I hope this helps
 

paul

Well-Known Member
Site Donor
Messages
321
Reaction score
305
Location
Australia, Queensland, Gold Coast
Marc....I notice you did a CSL.......man that had some rust in it.......I admire your stamina and a job well done....I think you have been thru a bit more pain than me.
BTW....how did you go with your dash?
 

paul

Well-Known Member
Site Donor
Messages
321
Reaction score
305
Location
Australia, Queensland, Gold Coast
Well I am back after a month off .....no work being done on the BMW since. when fitting the renewed front fenders and gap fitting the bonnet....... noticed some misalignment. further inspection revealed damage done to car in the past and the RH engine rail pushed up about 6mm and the radiator supports out of wack 6 or 7 mm. So on Friday off to have the car pulled and back into alignment. Then fenders welded on, and off to the spraypainters in 2 weeks for hammering/blocking/spiraling and spraying!!!!:):):):D
 

Attachments

  • IMG_0092.JPG
    IMG_0092.JPG
    149.8 KB · Views: 423
  • IMG_0093.JPG
    IMG_0093.JPG
    162.3 KB · Views: 435
  • IMG_0094.JPG
    IMG_0094.JPG
    203.5 KB · Views: 412
  • IMG_0095.JPG
    IMG_0095.JPG
    197.8 KB · Views: 406
  • IMG_0096.JPG
    IMG_0096.JPG
    190.3 KB · Views: 422
  • IMG_0097.JPG
    IMG_0097.JPG
    217.7 KB · Views: 408
  • IMG_0098.JPG
    IMG_0098.JPG
    222.2 KB · Views: 411
  • IMG_0099.JPG
    IMG_0099.JPG
    250.5 KB · Views: 406
  • IMG_0114.JPG
    IMG_0114.JPG
    237.4 KB · Views: 417
  • IMG_0108.JPG
    IMG_0108.JPG
    198.5 KB · Views: 416
  • IMG_0109.JPG
    IMG_0109.JPG
    215.9 KB · Views: 403
  • IMG_0107.JPG
    IMG_0107.JPG
    225.6 KB · Views: 398
  • IMG_0103.JPG
    IMG_0103.JPG
    220.5 KB · Views: 398
Last edited:

Wes

Moderator
Site Donor $
Messages
1,628
Reaction score
1,472
Location
Tasmania, Australia
Looking good Paul.
Red letter day when you manage to get the paint on.
Managed to get the topcoat on mine today.
Will post some pictures in my build thread in next day or so.
 

paul

Well-Known Member
Site Donor
Messages
321
Reaction score
305
Location
Australia, Queensland, Gold Coast
Thanks Wes....BTW did you buy that car from Nick Coetzee??? That rust in front fender....I would be taking the front fender off and see what's in behind. Also the sills did you go back to the inner sill.....you would be amazed as to what is living in there.
 
Top