74 3.0 CS Mild Restoration

Yeah the lighting is off. First time I got some pics from the painter it looked green. He shot me a pic of the paint label and it's the right paint. Need to see it after a buff/dry and in natural light.

I'm pretty fired up to get it back in the garage. Been forever!
 

Attachments

  • IMG_9664.jpg
    IMG_9664.jpg
    27.6 KB · Views: 226
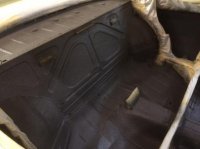
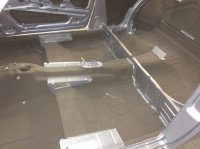
Some pics of lizard skin lining.

Sorry for the fuzzyness.

Trying something different by covering the sound deadening locations in the engine bay with the stuff. Might be a total failure but willing to give it a shot.
 

Attachments

  • IMG_6990.JPG.jpg
    IMG_6990.JPG.jpg
    22.1 KB · Views: 292
  • IMG_6991.JPG.jpg
    IMG_6991.JPG.jpg
    24.2 KB · Views: 286
  • IMG_6992.JPG.jpg
    IMG_6992.JPG.jpg
    23.9 KB · Views: 282
  • IMG_2712.jpg
    IMG_2712.jpg
    29.7 KB · Views: 297
I hope the lizard skin does not cause problems, looks like a bear to remove. You may want to trim it around some of the mounting holes for the interior panels as I have had fitment problems with some pieces when the build-up was too thick. This happened around the center console and the door cards. Looks great though!
 
Yeah the tape is still on in those previous photos. Check out the attached ... just copied Svens look.
 

Attachments

  • IMG_7010.jpg
    IMG_7010.jpg
    90.5 KB · Views: 293
  • IMG_7011.jpg
    IMG_7011.jpg
    91.9 KB · Views: 284
  • IMG_7012.jpg
    IMG_7012.jpg
    92.7 KB · Views: 284
i think this looks great, and doesn't seem to be as bulky as the dynamat. very tailored install - well done!
 
Thanks guys ...

Andrew, it's called LizardSkin http://www.lizardskin.com/

Has a ceramic material for heat shield and then a sound deadening layer. So while it looks like bed liner it is much more functional.

It took only one gallon of each material to do the engine bay areas and the interior. ~$300 for material.
 
Some pics in natural lighting ...

Car back home on Tuesday morn.
 

Attachments

  • IMG_9444.jpg
    IMG_9444.jpg
    29 KB · Views: 281
  • IMG_70472.jpg
    IMG_70472.jpg
    92.5 KB · Views: 286
Wiring, drivetrain all back in the car. Was concerned about it kicking over since I rewired a good amount in the injector harness. After getting the right fuse into the fuel pump (15A not 10A ... damn it) it kicked right over first turn of the key. Was a good day!
 

Attachments

  • IMG_1196.jpg
    IMG_1196.jpg
    84.4 KB · Views: 265
  • IMG_1197.jpg
    IMG_1197.jpg
    86 KB · Views: 272
Congratulations! That must be an awesome feeling. Car looks great.

BTW, on your icloud stream it looks like you kept the aluminium spacer at the top of the struts?
 
Last edited:
That's what that is! Ok, that makes sense now. On the pictures where only the far strut mount was visible, it looked like the DOT alu spacers. Now that I look at a photos of the near ones, you can clearly see the camber plate. Very nice!
 
One small detail.... Looking at your photostream, I noticed on August 5, 2014, you took some pics of your headlight assembly restoration. It looks like you repainted the frame and the headlight "bucket" black and silver respectively. Did you take those apart or did you mask those adjustment screws that are so difficult to remove?

Thank you.
 
Funny ... I started "mild" and then went down the rabbit hole pretty quick. Was just really a tear down to get rid of a bad respray. But with it down the the shell I got to do some other things. :)

In the headlight components, I broke them all down to each component. Getting the silver light retainers off the screws takes a hammer and a flat head screw driver. Getting them back on is just a snap.
 
Back
Top