What did I do today................I dug out a family member stuck in a snow bank and then got a flat tire driving home......so my E9 got zero attention.
You are using an out of date browser. It may not display this or other websites correctly.
You should upgrade or use an alternative browser.
You should upgrade or use an alternative browser.
What did you do to your E9 today?
- Thread starter adawil2002
- Start date
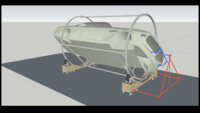
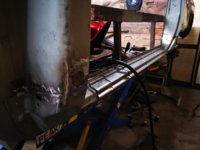
If you moved the hoops out nearer to the front and back of the car you could put a x brace to a central axle / pivot and mount a barrel tipping gearbox there , that would give you full control over the angle of rotation and prevent “ run back “ maybe ?I tried to design a rotissery for the E9. One that's a bit different from the classic ones, but maybe also useful?View attachment 110578
View attachment 110579
View attachment 110580
Attachments
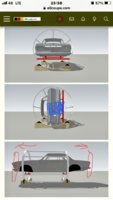
I'm still improving the design, but your remark is certainly taken into account!
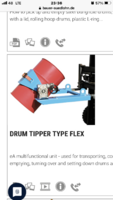
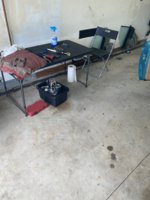
This was my inspiration, but too big for my garage:
I like your compact setup! Where do you attach those? to the framerails?
This was my inspiration, but too big for my garage:
I like your compact setup! Where do you attach those? to the framerails?
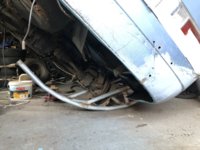
@Johan_CS2800 ; consider that much rust normally hides in the ends of the sill; you likely need to get an arm and an angle grinder in between your hoop and the body.
At the front you seems to have OK access to the lower A pillar, but not so in the back. Moving the rear hoop at least to the begin of the trunk compartment will give you good access to the sill ends. Having them fully front and back of the unibody is ideal (but i for instance do not have the space).
I spend quite some time squatted in the 60 cm of space between the sill and the wall of my garage... Being able to turn the body, and be able to stand upright is quite a benefit!
@eriknetherlands thx for the tip!
My garage is wide enough but not deep enough for the normal rotisseries.
If I move the back hoop further to the trunk, where are the best mounting point over there?
My garage is wide enough but not deep enough for the normal rotisseries.
If I move the back hoop further to the trunk, where are the best mounting point over there?
version 2.1:

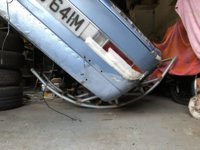
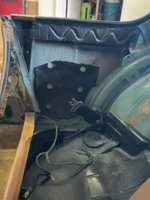
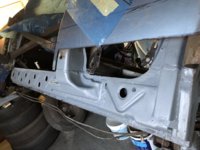
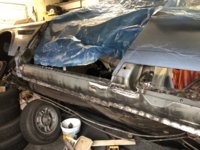
Well in the rear is not so much that you can use; what you have looks workable.
There is the diff mount in the center, and the subframe mounting points just inward of the rear end of the sills (as i see in your pic). As these 3 points need to maintain their relative position, it would be good to tie them together. Perhaps additional an attachment (bolt-on/bolt-off) making a double triangle to the diff mount from the last rear hoop?
In EU models the bumper mounts are quite weak (US versions are stronger). They won't support much weight, but would be easy to use as reference in case you want /need to replace the rear valance and /or spare wheel well / fuel tank frame floor.
no good deed goes unpunished...What did I do today................I dug out a family member stuck in a snow bank and then got a flat tire driving home......so my E9 got zero attention.
That video does look really good alright !!I'm still improving the design, but your remark is certainly taken into account!
This was my inspiration, but too big for my garage:
I like your compact setup! Where do you attach those? to the framerails?
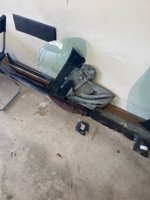
My setup attaches to the hubs ,you have to jack up 1 side , take off the 2 wheels and attach the roller hoops then let her down , and then fully jack up the other side to work on.
so you do have to work on one side of the car and finish all the welding then put her back on all 4 wheels then swap the setup to the other side of the car .
It is a 1 man operation , it just takes a bit of time to swap from 1 side to the other .
Before I watched the video , I was going to suggest using the bumper mounts on your set up to attach the barrel roller and or brake mechanism , but now after watching the video, I think I might be over thinking things
")
Attachments
Last edited:
Well I decided to brighten up the E9........so I LED all the lights..........awesome difference and they run so much cooler. Had to fit an inline resistor for the indicator lights see in pics. I am running aircraft landing lights on high beam and against the LED low beam....... even they look yellow. In the tail light pic left bulb is incandescent bulb......( just to show difference)


In the tail light pic left bulb is incandescent bulb......( just to show difference)HonaloochieBoogie
Well-Known Member
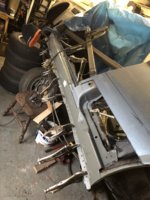
Is it okay to post about what someone else did to my coupe? At least I’m writing the checks. Assuming that’s acceptable, here’s progress on making the underside as pretty as the topside. This pic highlights the gorgeous Pirellis, the coupe king exhaust, the refurbished subframes, suspension and brakes. Can’t wait to get her back.


HonaloochieBoogie
Well-Known Member
Nice! Unfortunately, the convertible isn’t mine. By the way, How do you keep 2 white cars so clean?
Wow I realized I haven't posted here for quite a while. I've been working on my car quite a bit, but mostly just enjoying it.
However, the last few weeks the console looked like this - with computer and control wiring going everywhere as I added features and would screw existing things up along the way. But this weekend I was able to finally wrap it all up so the wiring is very pretty, and put the console back together. Even connecting the Blaupunkt for the first time.
Then my son and I took her for a nice drive listening to some great classic music.
O C DNice! Unfortunately, the convertible isn’t mine. By the way, How do you keep 2 white cars so clean?
I had an experienced BMW classic mechanic that worked at a known BMW restoration company replace the rubber blocks in my rear side windows. I didn't want to break anything and I learned how they are assembled. He said the driver side regulator didn't return the window to the same place every time the window is articulated. Does anyone have a solution to that problem? The original motors work fine and the spring & tracks are clean & lubricated.
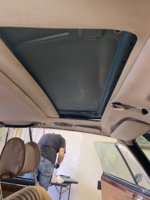
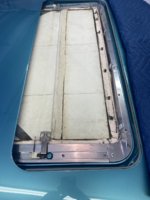
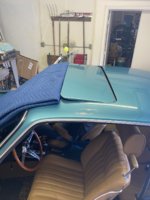
He also adjusted the sunroof so it now opens completely. The shop I paid to paint the car left it in sad shape with a missing bushing and plastic and masking tape laying on top of the sunroof headliner. I had found the rubber bushing laying on the floor of the car months ago and kept it, knowing it belonged somewhere on the car. Sometimes it's better to be lucky than good.
For those of you replacing your headliner,make sure the new material is the same thickness as the original if you have a sunroof. My replaced headliner makes opening the sunroof harder than usual due to the tight clearances.
Attachments
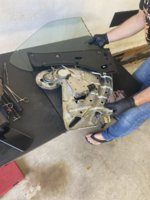
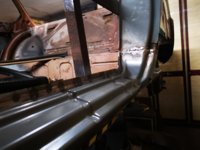
I welded on my outer sill today.Fitted the euro torch conversion kit onto my 30+ year old snap on/Lincoln mig and got the a and B pillar repair sections welded in. Still a bit more cleaning to do
I think I did 71 spot / plug welds and various stitch and seam welds all done with my tig welder and now ground back down flat .
It took me about 2 hours grinding back alone , my back and arms are now aching , but the Car is coming along nicely
Time for a beer I think
Attachments

Looking good Barry! I've not used my tig anywhere near as much as I should have done, also goes to show that there is no such thing as too many mole grips!
I think I have shares in the mole grip company at this stageLooking good Barry! I've not used my tig anywhere near as much as I should have done, also goes to show that there is no such thing as too many mole grips!
