Deconstruction Thread: How to part-out an E9

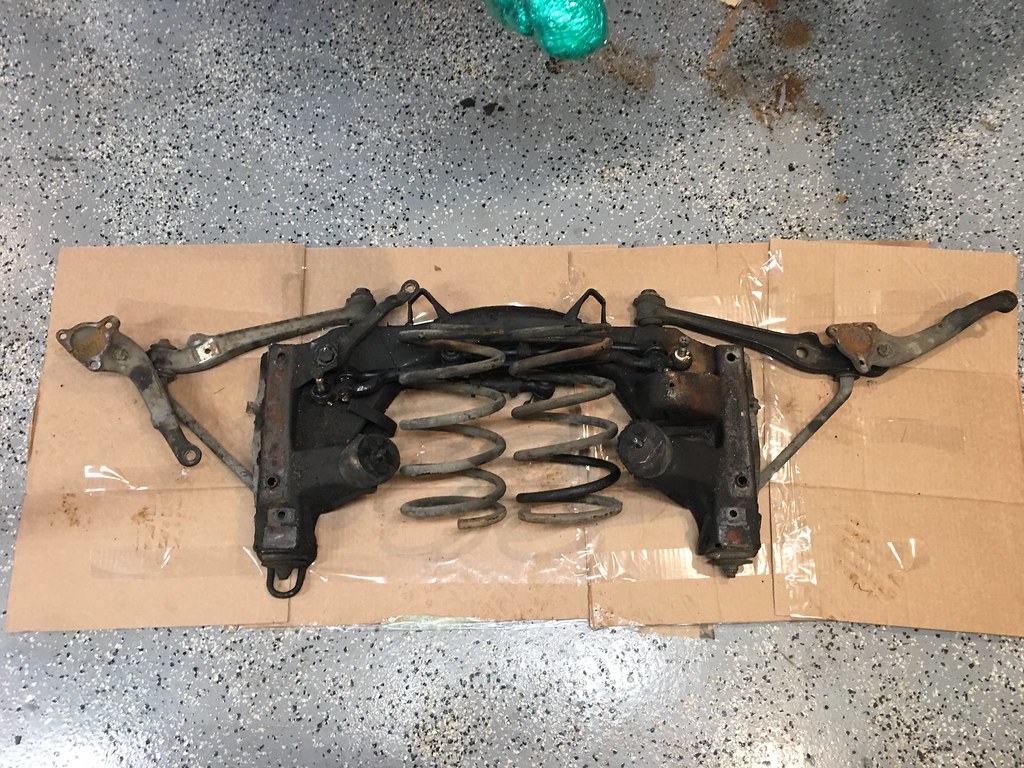
I was going to keep the front subframe and have it powder coated, but it’s a space hog. My wife said “why don’t you sell it?”. So that is that...

I must say that working on suspension without air tools is a bit of a chore. I’ll have to save this one for the weekend when the kiddos aren’t asleep. I just need to remove the steering box. The 17mm bolts come off easy enough, as did the ball joint castle nut on the pitman arm . I’ll need to free the tierod ball joint. I have a ball joint press but I’ll probably need to pickup a fork unless anyone has any tips. I’ve never done much ball joint work. The sway bar mounts are crusty and stuck. Since I’ll have the air tools out I will probably break up the suspension and steering parts to reduce the box size.

Although I have had issues with greyhound this one is going to Socal. I’ve had zero issues with Greyhound on the coast and you can’t beat the price.

eb6ca82d0bec5157fa0673308197f35f.jpg


Accounting Edit:
Heater Intake Fan Cover: $25
C-Pillar Roundels: $150


Total Sales: $4,643
Play Money: $1,243
 
Last edited:
Hi Mark,
I am always looking for an excuse to add a new tool to my arsenal. Not sure if you are looking for consensus, but I'd recommend you get the fork. Not only do I think you'll enjoy how it will make quick work of joint work, you will forever be able to say "I have a pickle fork". My two cents...
Stephen
 
IIRC, if they are still attached to the struts, the lc arm ball joints are a pain to remove with the "gentle" tools bc the bottom of the strut keep you from sliding the tool deep enough in there.
So the pitch fork is often the only way to convince the damn thing that resistance is futile.
 
Thank you both. I'll see if HF has one. It's not a complicated tool and I'll probably use it 8 times in my life. :D
 
Just spent a happy hour reading this from start to finish. Puts the hints in perspective!

Awesome thread, you must be nearly done by now?
 
Just spent a happy hour reading this from start to finish. Puts the hints in perspective!

Awesome thread, you must be nearly done by now?

Wow cool! That is great to hear! I hope at least a few people keep up with it.

My project car is in the neighbor’s carport so I need to get moving. This weekend I need to remove the rear bumper and clear out the trunk panels. If possible. My weekdays have been hectic but I need to get the rear subframe and suspension out next week.

The following weekend and weekdays will be cutting up the body. I want to do the rear fenders properly so I may do the spot weld removal during the week also.

On top of that I need to take that pickle fork to the front suspension and get that front subframe en route to california!
 
I parted out a car with a friend about 3 years ago. Not to your level of disassembly. But we got a lot of parts scavenged off the car and the parts went all over the world! It is a fun project if you have the space in which to work. Fortunately the guy who actually owned the car had a barn with space.
 
Well my impact gun crapped out on me. I didn’t have enough torque to bust the control arm bolts loose. I may just ship the subframe at full width. I need to buy a new gun but I won’t need it again for some time.

More this week!

The subframe has a nice recess that let’s you get to the nut, which faces the front of the car:
27044558209_756be45a69_b.jpg


This $20 HF tool works great for popping off the tierod ends. Be careful that your face is out of the way, it sends the end flying. I smacked my shin on the first one.
27044558719_d596f812c6_b.jpg
 
I need to get the subframe shipped so I picked up a HF impact gun in a pinch. Nothing beats your basic IR impact gun but I still haven’t taken the plunge on one.

This thing didn’t budge the control arm bolts despite the advertised torque. I’m going to take it back this week.

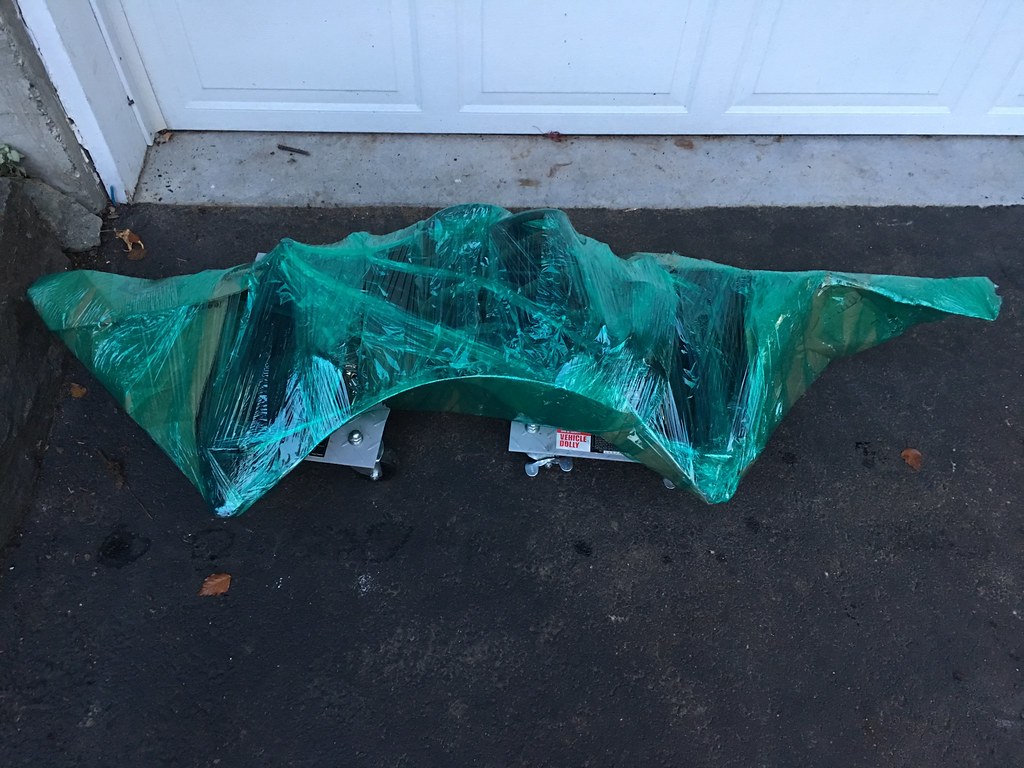
So the subframe will go out as-is and any competent shop can crack those bolts free in a second. There are a few drivers that are headed to California next week. No boxing required. If I could get this thing in a box I can get it tom socal for $35 Fedex. Oh well...

Sending the buyer some free bits for his patience. :)

0C458D5B-2AB0-4B2B-A09D-FE8EB93B31FF.jpeg
 
This $20 HF tool works great for popping off the tierod ends. Be careful that your face is out of the way, it sends the end flying. I smacked my shin on the first one.
View attachment 34113[/QUOTE]

Great tool idea ... providing there is enough room to insert it where you need to. I've also bent one of these on a stubborn tie rod end that had no desire to come undone. The metal is not the highest quality.
 
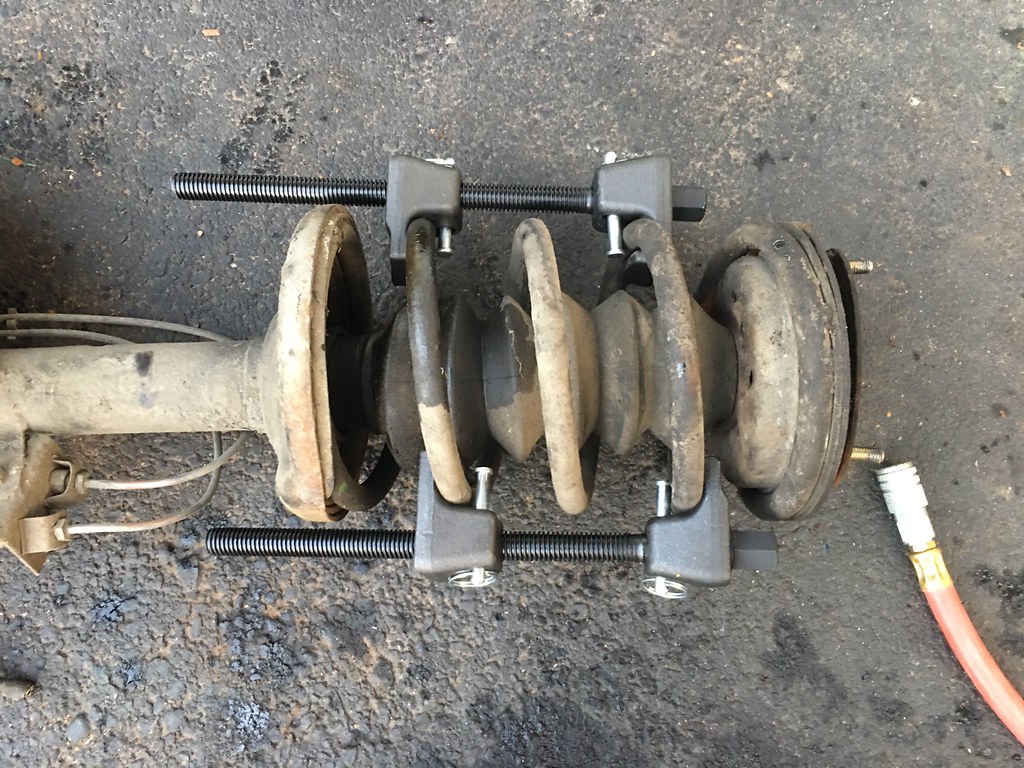
The buyer for my subframe needed some temporary springs so off mine went. Easy work with an impact wrench. I decided to keep my HF wrench. :D

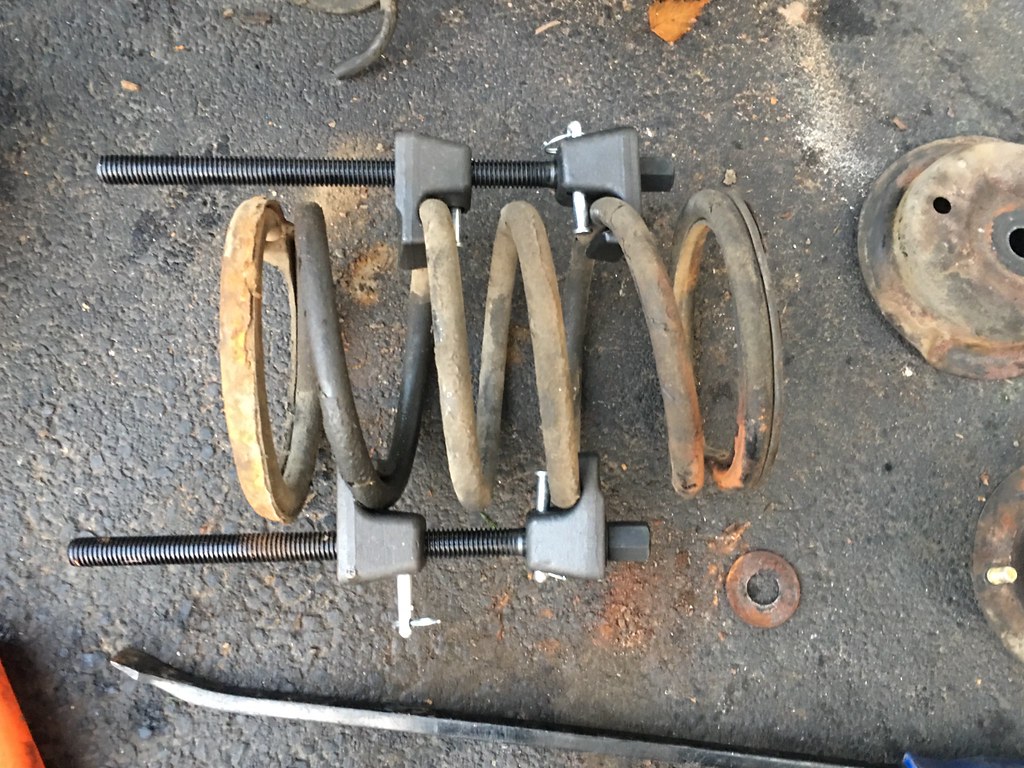
Clip on the compressors and screw them tight with your impact wrench.
38059692055_0d96f0d727_b.jpg


Remove the strut bearing and spring retainer. I had to gently pry with a bar to pop them off. Remove the springs and unwind the compressors.
38059691035_9fd5ac0e5a_b.jpg


Greyhound was $160 to Santa Anna. I called a driver I used for the block. He is picking it up tonight and it will be at the buyer’s door inn Tuesday for $180.

38059692065_8f4703694f_b.jpg


27168816949_8796675c4e_b.jpg


Edit: I just had an “oh duh” moment looking at these pics. I ran outside, cut the end open and folded in the driver’s side arm. Package is a tad smaller now. :)
 
Last edited:
The steering column support / pedal box / booster mount is held in place by about 4 bolts and 6 screws. There are four 13mm bolts under the dash that thread into captured nuts in the under-dash sheetmetal. About six 10mm sheetmetal screws hold the pedal box to the firewall. Lastlly, I had done this earlier but there is a support bracket that secures the end of the brake booster mounting point to the driver's side inner fender. You access the bolts for this mount from inside the tire well.

The bolts on the outer edge of the upper portion of this bracket are for the actual steering column "cover". As mentioned earlier it's not really a cover but a solid unit. The four bolts on the inside secure the pedal box thingy to the underside of the dash. Note, the pedals were removed about 8 pages back and sold for a manual conversion. As mentioned earlier you do not need to remove the pedal box to for a manual swap. The pedal assembly may be removed from the pedal box via a long 17mm bolt.
b2685fca6a61d9d2688870d6e1138cce.jpg


Pedal Box Booster Thingy, $75 plus shipping. It's actaully significantly lighter and shorter than I realized. Shipping shouldn't be too bad at all.

Edit: Sold the strut housings for $200
Edit: Sold the power steering pump for $65

Total Sales: $4,983
Play Money: $1,583
 
Last edited:
just gone trought this thread ... amazing , very well docu ! Keep it coming Markos !

Thanks Barry! I’m working on the car, prepping to pull the rear subframe. It is unbolted now, but the shocks are still bolted in.

One thing I found is that is very difficult to get the car on jack stands when you can’t use the subframe pickup points. One could say just use the jacking point, but mine are rusty. I ended up using them but the passenger side settled a good 2” before resting. At this point I ca pickup the front of the car with one hand. The complete rear ends is as heavy as the front shell (with the nose removed).
 
i can imagine Markos, there's still alot of car behind the rear jack points . I also was already looking at that as i need to remove the rear frame to repair rust around the big bolts ... also giving enough space to work and some stability so we may apply some forces on it .... and as you have seen , i don't really thrust the jackpoints for that .
Think i make supports that take the bolts from the tie plates and big enough to support the inside vertical plates. There we have strong bottom plate i think ... at least , there's no rust on mine on that areas.
Just to edit... those 2 M8 bolts each side only to have some horizontal stability ... not to take any force ofcourse.
 
Last edited:
Slow and steady. Having my neighbor content with my car parked in her carport does nothing for my chop shop motivation. Nearly all of the remaining parts on the car are for me, so the missing pressure to ship doesn't help either. I slowly parted this car differently than recommended. The sensical recommendation was to pull everything apart, then sell it. I sold everything one part at a time while the parts were on the car. Sell a part, go remove it, repeat. It is a slow process but it has been enjoyable.

Tonight I * tried to focus on several things. I tried to pull the back half of the wiring out. It is removed from the engine bay, the doors, the tunnel, and the rear window area. Next I had to clear all of my parts bins, boxes, and loose parts from the trunk. I decided it would be best to pull the elephant skins to gain access to the wiring that runs behind them. That means dropping the shocks as the washer covers the elephant skin fender liners. Dropping the shocks means the unfastened rear subframe drops (although it is supported by my floor jack). As it turned out I couldn't drop the shocks, as I was unable to break the nuts free. The shock shaft likes to rotate and I don't have an open ended wrench thin enough to hold the bottom nut. I also don't have any type of special tool to hold the shock shaft steady. I suppose I could have tried vice grips. Instead I will wait until the day so I can hit the nut with an air ratchet. It probably won't budge but it's worth a try.

I ended up tossing some stuff including the rear speakers. I love how the rear deck got cut up for a set of 6" radioshack speakers.
eaed5d541838cf5d49cfc7b687ff8416.jpg


Some additional keepers as I migrate towards the rear of the car:
8d2c301b5e5e856c000519863619036b.jpg


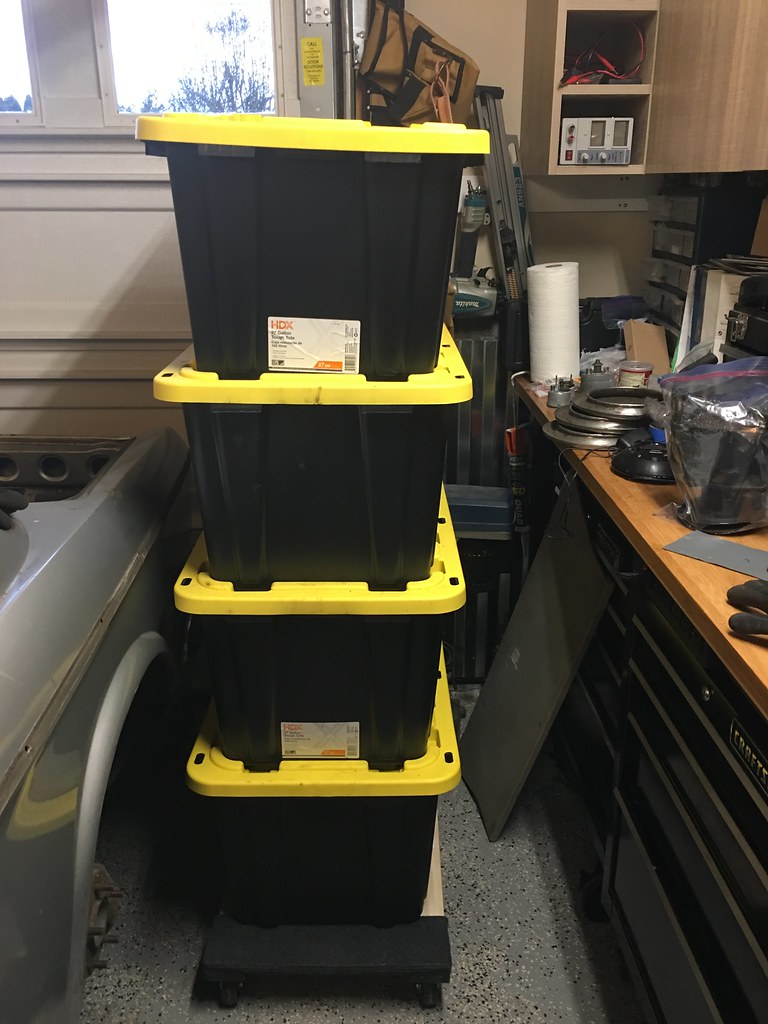
The keeper parts are getting unruly!
25616333167_f0bf414c09_b.jpg
 
Last edited:
i have seen that the "paper/cloth" of my speakers vibration cones was completely gone to "powder'.... if i toucht it , it felt apart !
 
Back in the day the Radio Shack catalogue was better for me than my neighbor's father's stolen Playboy
 
This thread is a good read, thank you for documenting all this. It's helpful for fastener info, placement, etc.
 
Back
Top