Deconstruction Thread: How to part-out an E9

Markos

Well-Known Member
Site Donor
Messages
13,369
Reaction score
7,503
Location
Seattle, WA
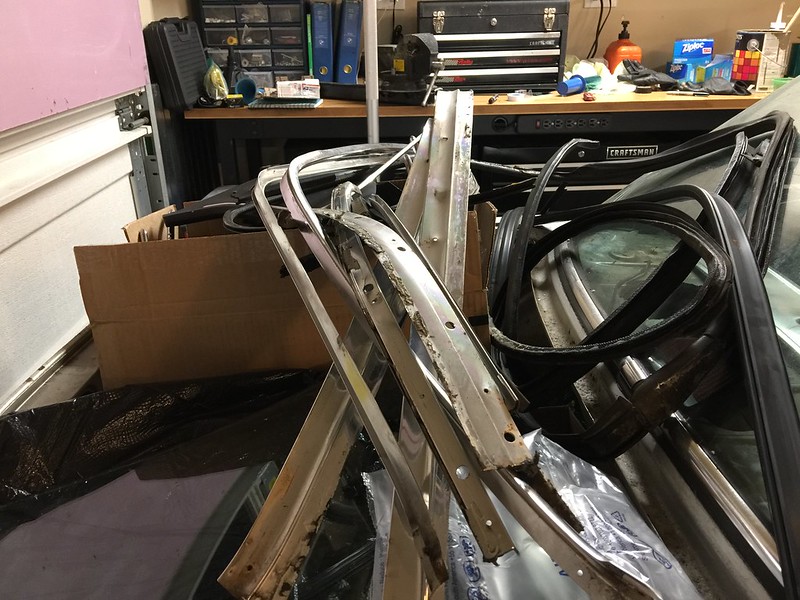
Back on to the harness...

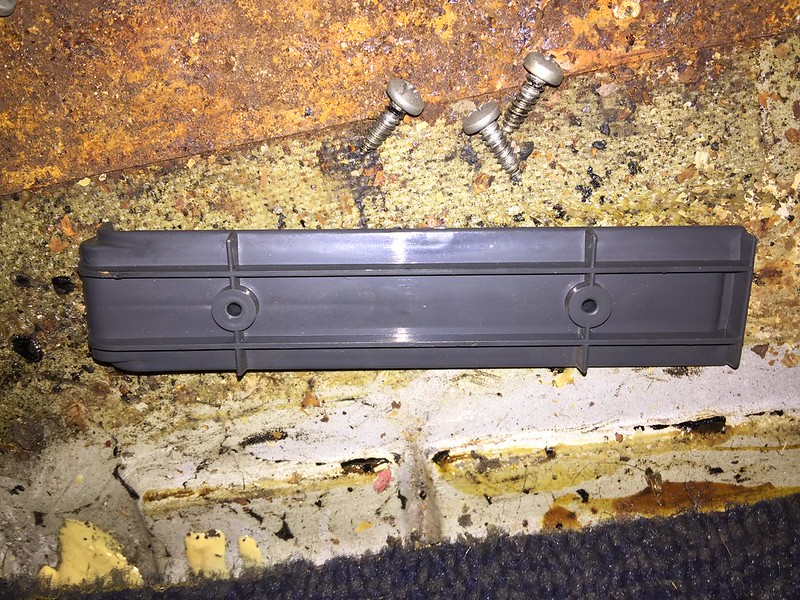
Removing the screw near that back of the brain allows a plastic panel to pop open. This gains you access to the main ~21 pin blade connector for the brain.
29600863985_8eedcbcd57_c.jpg


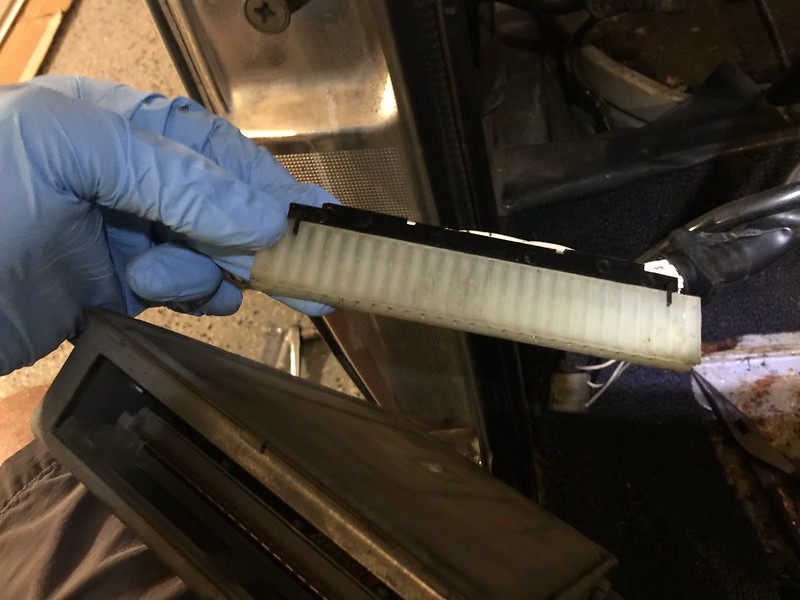
The connector - the black part slides out. The extra millimeter or two will be helpful when pulling the connector through the frame:
29310697960_393b8a1bb4_c.jpg


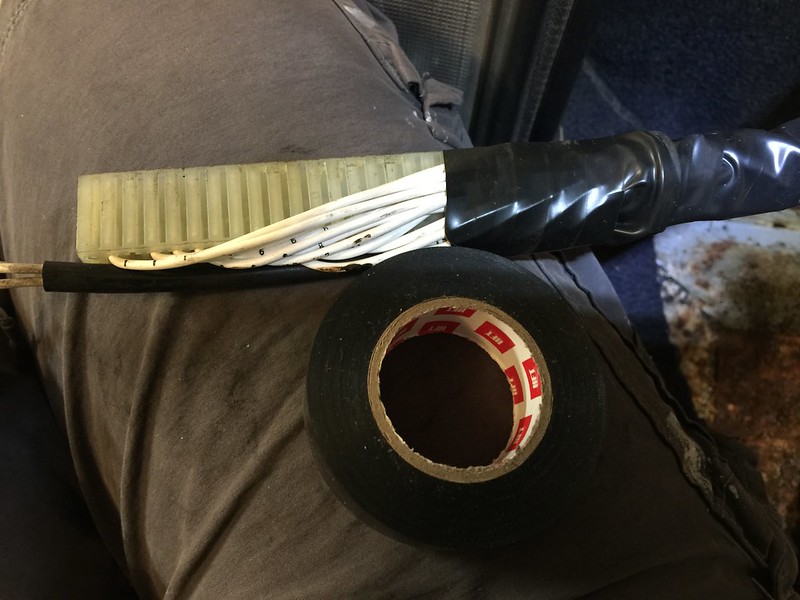
Wrap the entire connector in electrical tape. line up the fuel pump relay plug on the end of the blade connector and wrap that up also (not seen in pic):
29520288391_a8c7ff215a_c.jpg


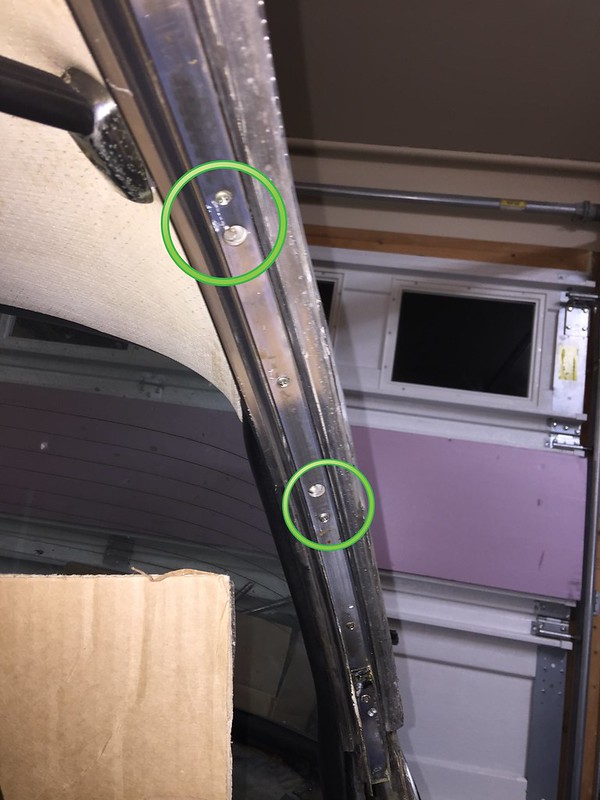
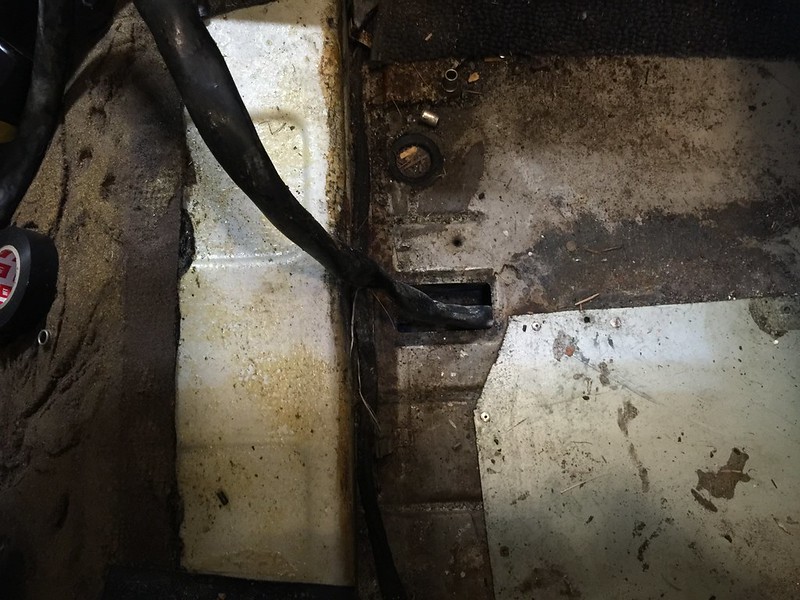
After you pass the harness through the rear seat, and the reinforcement that's under the front seats, you will begin to fish the harness through the frame hole. It takes several trips, pushing a bit from the passenger floor, then pulling a bit from the engine compartment. The blade connector will pass through without issue on both ends.
28975504644_8d03c062a8_c.jpg


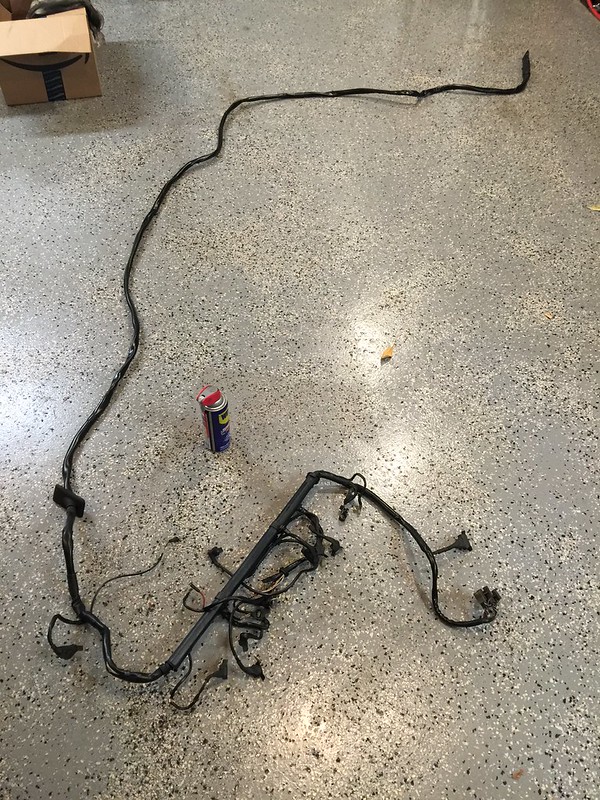
You end up with this. I've mentioned it before, but WD-40 makes a great wiring harness cleaner. Look at that shine! :cool:
29600859295_b4591867b8_c.jpg


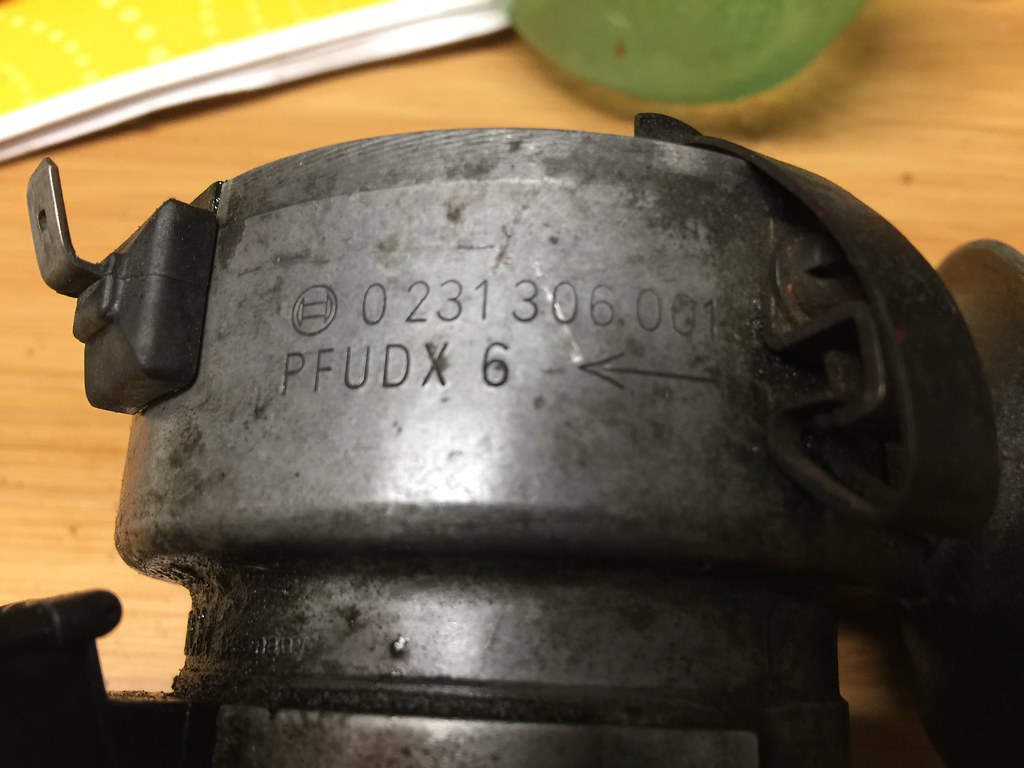
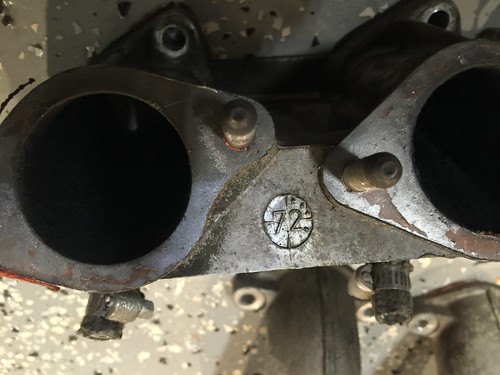
The CSI intake manifold is date stamped:
29490972442_3211e50fc5_d.jpg


Last edited:

Markos

Well-Known Member
Site Donor
Messages
13,369
Reaction score
7,503
Location
Seattle, WA
The life of parting cars. Quoting for relevance:

You make a very valid point Markos on just buying what you need. I bought two E24's earlier this year and then the E24 turbo. Parting out the cars to get the money back has been a pain in the arse. While you don't need all the parts, you kinda feel obliged to remove them LOL and also hope to offset the build cost of the target car... in my case my E9. The reality is that I would rather not add up the time invested for this process because so far I have blown the whole spring and summer (besides my day job) parting out the two E24s and the crashed E9. In retrospect I should have rather just bought the stuff.
 

Markos

Well-Known Member
Site Donor
Messages
13,369
Reaction score
7,503
Location
Seattle, WA
Backing out $78 to ship ~30lbs of D-Jet parts. The manifold, injection, wiring, and brain in this box.

29344092130_76b9f9e418_o.jpg


Total Sales: $2,026
Remaining: $1,374

I'm going to go after a few small parts. A friend wants the much desired gas door boot. I'm holding the shift console for a chap in the UK. After that I need all of the glass off so I can cut off the roof. Plan to get some work done this week.

Edit: Sold the shift console for $36. It was in rough shape.

Edit: Sold the gas filler boot for $50. I probably could have sold on Ebay for $100 but this went to a local member.
 
Last edited:

Markos

Well-Known Member
Site Donor
Messages
13,369
Reaction score
7,503
Location
Seattle, WA
I'm kind of in the calm before the parts-pulling storm. I've pulled a few small parts and fiddled here and there, but I'm nothing large.

Rescuing a foil-less driver's side wiper for a member in need. He took the plunge on a good Ebay two-wiper deal that I spotted, but they were both passenger wipers. He's going to experiment with making his own.

I pulled the wiper from my project car temporarily. I made two templates, with the red template serving as an accurate copy of the original. The galvanized version is to illustrate the curvature of the foil. As you can see, it's just slightly chubby on the narrow end. I will also spot check the curvature before boxing it up tomorrow. The lighting in the pic is misleading and the angle of the two wipers are slightly different in the pic. Howver, I do need to make the curve on the metal template just slightly more aggressive.

I sold the wiper for $20 shipped but the buyer pitched in $10 for me to make him a template.
29202515353_ae197b19b9_b.jpg


Total Sales: $2,056
Remaining: $1,344
 

Markos

Well-Known Member
Site Donor
Messages
13,369
Reaction score
7,503
Location
Seattle, WA
D-Jet Update:

A quick update from the D-Jet buyer. This is helpful for anyone considering used d-jet parts in the future. The buyer threw a number at me, based on both of us looking at the market and adding up the à la carte pricing on parts. He threw out a number and I bumped it down by several hundred dollars since my parts weren't tested. These are his results:

A quick update. Thanks again for giving me a break on the overall D-Jet cost. The MAP was bad (to be fixed now). The ECU was okay but needed some TLC. Five out of the six injectors were good, one stuck but OK now. Most of the work was done by Fuel Injection Corp, good group. Overall real happy with my spares situation.
 

Markos

Well-Known Member
Site Donor
Messages
13,369
Reaction score
7,503
Location
Seattle, WA
Nice job making the foil! I bet there are a few without that part on their wiper who would buy one from you.

Unfortunately that was just an illustrative foil to show the buyer the curvature. It's about half the gauge and made from galvanized steel. It's the same process as making the stainless one, although it would be slightly more difficult to cut with snips. It would be pretty easy to have a shop make them with laser cut stainless though. You just work the metal over a pipe to get the bend. I used a deep socket. :)
 

Markos

Well-Known Member
Site Donor
Messages
13,369
Reaction score
7,503
Location
Seattle, WA
In preparation for cutting the roof off, tonight I removed all of the roof trim. To do so I had to get the rear windows down. I also took this as an opportunity to remove the rear wood trim, which also requires the removal of one small screw accessible from the open window.

Before getting started, I found this behind the rear window regulator. It must have slipped down past the window seal. I'm not sure when this sign was written, but it's been a very very long time since this car was in "good condition". Also, I've found a ridiculous amount of random stuff in this car.
29982247324_28970d048f_c.jpg


First step - lower the rear windows. I of course tried to power the motors with my DC power supply. I haven't researched how much draw the window motors pull, but this is the second time I've confirmed that my 3amp converter isn't up to the task. I recently spent $20 on the manual window tool. I've had this idea in my head that I could use some of my son's legos to make the job go quicker.

Here is the original manual window tool lined up with a lego gear:
30314095910_e495be4cfa_c.jpg


My creation:
29980065083_eba89b9dd3_c.jpg


It works as seen in this video! If you watch in the background (though the gaps in the sheetmetal) you can see how quickly the window is going down. Full disclosure - I broke two gears playing with this idea, mainly from going to fast. These are Legos from the early 80's and they are pretty brittle. When I do this again I'm going to double up the gears and fill the voids on the gears with more lego connectors pieces.


So all the trim is off, and I can already tell that I'm running out of space.
30314097030_499602811c_c.jpg


The trim all uses the same small phillips head screws, probably about 30 or so in total. Start by removing the drip rail trim. It's easy to remvoe carelessly, but tricky to remove without bending. It is very thing and you have a lot of leverage on the trim while removing. Next remove the door seals, as well as the upper window felt. They both just pull off. The felts were pretty brittle on my car, an I'll be curious to know if they can be replaced. I'm definitely happy to be doing this on a practice car first.
30614105845_52e1af17d0_c.jpg


Lastly, the C-Pillar roundels. Start with the emblem. You an pry them off with a tiny screwdriver. Better yet, stick your finger inside the window opening after your trim is off and you can push right on the back of the studs.

I spent a couple of minutes testing to see if I could wet sand the emblems with 1500 grit paper, and had good results. The rear emblem is the Before look and the front emblem is the After. Don't laugh but I used WD-40 as the liquid while sanding. When it comes time to seriously restore the emblems, I'll go up to 3,000 grit.
29982247484_c1eb3c0c3a_c.jpg
 
Last edited:

Markos

Well-Known Member
Site Donor
Messages
13,369
Reaction score
7,503
Location
Seattle, WA
There isn't much to be said about removing the distributor. It is held in place via a cast clamp. One 10mm box wrench on the nut, one 10mm short socket on the bolt. Once loose, pull.

The distributor and fuel pump mark the last bits of the D-jet system. With the distributor total d-jet related sales are $1,000. I have too many spare parts in th trunk to go after the fuel pump right now...


30564067682_ae953270cb_b.jpg


30047402983_0df6060160_b.jpg


30380735880_2216b285af_b.jpg


Total Sales: $2,156
Remaining: $1,244
 
Last edited:

Markos

Well-Known Member
Site Donor
Messages
13,369
Reaction score
7,503
Location
Seattle, WA
Not surprising, very little activity on the parts car. Life continues to get in the way of actual wrench-time.

Sold a little part from page 35/6 in the e9 parts catalog for $25 shipped. This throttle linkage arm has a 10mm nut and a 9mm bolt. It's a tight squeeze but manageable. Fortunately you just have to loosen the arm, as the nut would never clear the firewall. The arm sits on a splined shaft.

31454999385_ba5ab79095_c.jpg


31339212351_eaa12b2d0e_c.jpg


I casually tried to pop the front and rear glass from the outside using my HF suction cups. I figured it was a long shot, and confirmed that the seals are in much better condition than my project car. I may even be able to re-use them, at least until a real restoration begins. What this really means is that I need to clean all of the crap that I stuffed in the car while family visited over thanksgiving. This looks like your typical "ran when last parked" craigslist ad...:D

30646850153_937bded37d_c.jpg


Total Sales: $2,176
Remaining: $1,224
 
Last edited:

Markos

Well-Known Member
Site Donor
Messages
13,369
Reaction score
7,503
Location
Seattle, WA
If you need to ship a dash face and tray, it fits a 9"x9" telescoping box from Fedex. The box is about $6 or so, and is pretty heavy duty. My dash came in at 12lbs.


These are actually from my project car but I'm throwing the specs of the dash biscuits in this thread:

31588403575_5e958747be_o.jpg


30778479313_4b51df0ac7_o.jpg


30778479743_5ca0dd28cd_o.jpg


31550808536_87ee1c8e96_o.jpg


30746901844_eb96cd4e03_o.jpg


30778479473_b59b6a97b1_o.jpg


30746901424_b4c718357f_o.jpg
 
Last edited:

Markos

Well-Known Member
Site Donor
Messages
13,369
Reaction score
7,503
Location
Seattle, WA
Getting ready to cut the roof, hopefully this weekend. This evening's endeavor involved removing the glass. Disclaimer: this isn't a writeup on how to remove the glass or trim correctly, just what I chose to do. Chime in with any tips for the next guy or gal if desired...

I did a small amount of research, but not nearly as much as I do for most things. I've heard from several people that you want to keep the trim in place when installing. I assumed the same while removing but that clearly wasn't going to happen. I followed up via the forum today and read a good writeup that included removing the aluminum trim. I had already removed the trim up from rather haphazardly (even though I knew it was not the ideal way to do it). I was much more careful when removing the rear.

The major insight that I gleamed was that the seal is not to be re-used, and you cut it out. So I ran a fresh razor blade flush against the glass and cut off the outer lip with ease. I followed up by running the blade into the seal where the glass meets the rubber.

The aluminum trim is T-shaped with a barb on the bottom of the T. It fits between the visible seam in the seal below. Here I am removing the portion that secures the glass:
31638704326_914d2c3463_c.jpg


This is what the seal looks like after the trim is removed and you cut off the outer lip:
31302900110_899df82795_c.jpg


A video of the glass coming out:
 
Last edited:

Markos

Well-Known Member
Site Donor
Messages
13,369
Reaction score
7,503
Location
Seattle, WA
The rear window went quicker.

I tried to cut out the seal with the aluminum trim in place...
31638489786_21f2f85ae9_c.jpg


31559902341_8be557fdbf_c.jpg


Ultimately it wasn't enough, so I pulled the aluminum trim. This time, I used a plastic scraper underneath the barbed-T, which helped to keep the trim from bending. It worked very well. I will use this approach on the project car.

31302901220_1582d28f4a_c.jpg


Not to trigger a discussion on the proper glass storage... I not have two front windscreens and a rear stacked on top of each other in a horizontal box. To be honest, I don't have any intentions of storing them any other way. I read up on this a little and the consensus seems to be that it's a non issue. It makes sense for transporting glass vertically as it is stronger. Storage is limited, so it is what it is for now...

31529429432_3ecb52ed06_c.jpg


The hardest part of the whole job - getting this box of three windscreens on top of my 7' cabinet. It took me two tries and I tweaked my back doing it. :( Storage is becoming a concern!

31675347085_cf5961bc59_c.jpg
 
Last edited:

Markos

Well-Known Member
Site Donor
Messages
13,369
Reaction score
7,503
Location
Seattle, WA
I finally have access to my pride and joy - a pristine dashboard. It is very difficult to to find a complete - crack free, water damage free dashboard! The dash and interior bits were a primary driver for the purchase, knowing that I could keep these parts and get my money back. At any moment in time, multiple members are interested in dashboard parts

Note the small hole in the windshield frame by the penny:
31638490096_38024dbe11_c.jpg


Overall the windshield frame is in really good shape compared to the rest of the car. As seen earlier, There is a whole under the glovebox large enough to crawl through. The upper frame on the roofline looks fantastic!

Another small rust spot. I will be keeping the lower frame for my project. For those folks with clean drivers or survivor cars - this isn't visible from the outside!
31559902621_21ae70702f_c.jpg


I wonder what the frame on the project car will look like?
15630397647_744f2ecfc6_c.jpg
 
Last edited:

Markos

Well-Known Member
Site Donor
Messages
13,369
Reaction score
7,503
Location
Seattle, WA
The next step in the process is to build the box for the roof. Both the roof an the AC are sold at this point so the car is theoretically paid off and I'm just slightly in the black. This post will get edited later with additional details and dollar figures once parts start shipping. Time to buy new blades for my saw!


Edit: Change of plans! The buyer interested in the roof had a change of heart in the eleventh hour. I'll still end up hacking into the roof I'm sure but I probably won't sell it while. I'll need to keep working away at the CSI to break even, but the thread will be more indicative of a typical part out. I'm annoyed with myself for taking so long, but i'd rather annoy myself than my family. I can't change the amount of time I have to work on this stuff.
 
Last edited:

Markos

Well-Known Member
Site Donor
Messages
13,369
Reaction score
7,503
Location
Seattle, WA
Four hidden screws before pulling dash.
Call tomorrow!

Thanks for ringing me Don, the explanation of the relationship between the evap box and the heater box on these cars, and the tips and tricks for removing the dash. You are the best!

I suppose I should pull the dash first before my reciprocating saw sends metal everywhere.
 
Last edited:

Peter Coomaraswamy

Well-Known Member
Site Donor $$
Messages
3,787
Reaction score
896
Location
Austin, TX
Received dash wood and frame from Markos today, all was as stated and in excellent condition- Markos has a good grasp of stating the condition of the parts in case anyone wants to help him finance his project! :)
 

Ohmess

I wanna DRIVE!
Site Donor $
Messages
4,887
Reaction score
2,706
Location
Aiken, SC
Hey Markos -- this is a great thread. If the binacle you plan to pull from your existing car is good, I am interested.
 
Top